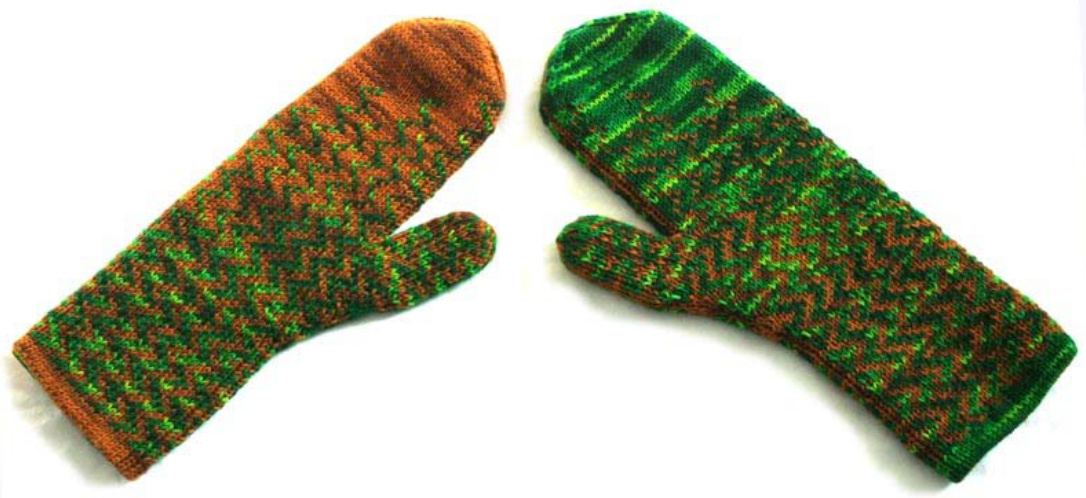
I think of autumn as the transition from green to brown. Once in a bright and fresh green on the tree, the leaves will start falling to the earth and cover the ground under a thick layer of brown. This pair of mittens is just in between and depending on the way you wear them, your fingers will be covered in green, brown or one in each. This pair of mittens is perfect to get a little taste of doubleknitting as this is a relatively small project. Thanks to the doubleknitting technique you will end up with a fully reversible pair of mittens that are warmer than most knitted mittens thanks to the double layer construction. Apart from that doubleknitting is the perfect answer to problems with floats (fair isle), as the yarn will only ever be carried a maximum of two stitches. This results in a more stretchy fabric! The mittens will hug your hands plus fit a wide range of hand sizes without being too tight or loose.
Materials:
Gauge:
30 stitches and 40 rows on ${10}\,\mathsf{c m}$ $/\,4^{\prime\prime}$ in stockinette stitch. IMPORTANT: You need to make a doubleknitted swatch as this technique alters the gauge!
Size:
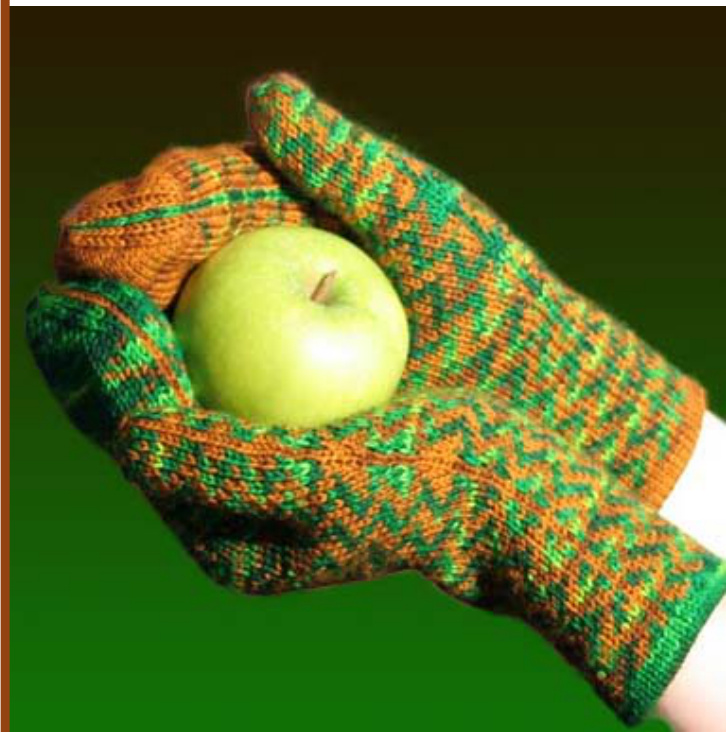
Women's Medium 18-19 cm /7 -7%"hand circumference (look at the picture above where to measure)
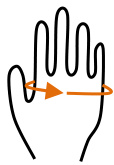
$18-19\ c m\slash7-7\%^{\prime\prime}$ hand length (measured from beginning of thumb gusset) If you have larger hands $(19-20\,\mathsf{c m}\,/\,7\,\%-8^{\prime\prime}$ circumference), use slightly larger needles to get a gauge of about 28 stitches and 38 rows on $10\,{\mathsf{c m}}\,/\,4"$
About Doubleknitting:
In doubleknitting, two layers of fabric are created on one needle (think of it as two layers of stockinette with wrong sides facing each other), resulting in twice as many stitches on the needle as you would normally need to knit a piece of plain stockinette. Every part of this project, from cast-on to bind-off, will feature detailed instructions on how this technique works. Read through the whole pattern before starting to knit! This will give you an idea of what lies ahead.
Part 1: The Cast-On
Using the provisional crochet cast-on and the $2,5\;\mathsf{m m}$ needle, cast on 52 sts in color A. Join in the round and work in stockinette (starting with a knit round) for 5 rounds.
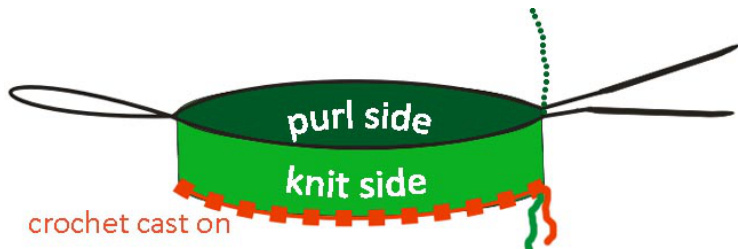
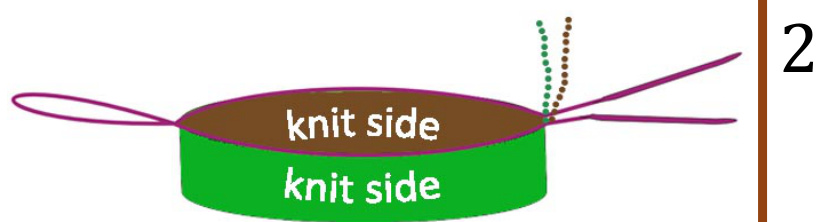
(line $=$ cast-on yarn tails / dotted line $=$ working yarn) Turn the tube inside out so that the purl side is facing you with the working yarn (color A) hanging down.
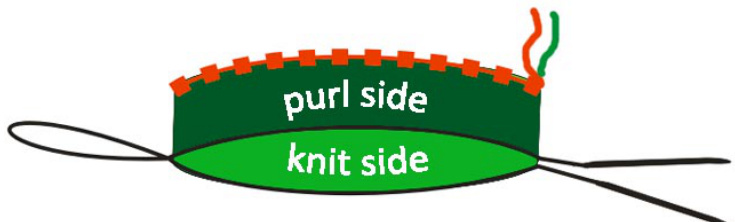
Put the 52 loops from the provisional cast on back on the second circular (marked blue in the following graphic).
Starting at the beginning of the round (tail of color A from the cast-on) begin working reverse stockinette in color B for 6 rounds. Make sure that you purl in the same direction as you have done on the previous rounds when using color A.

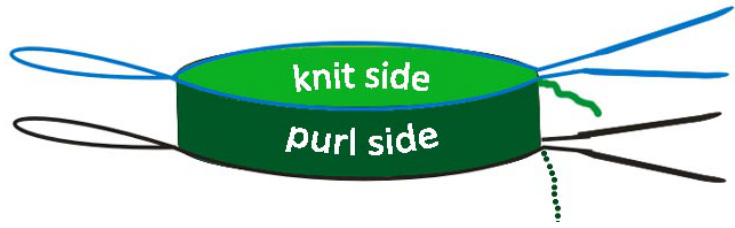
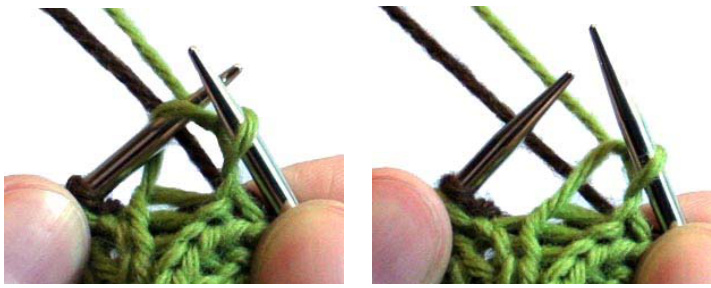
Thread the tails of both A and B on a tapestry needle and pull them on the purl bump side (if they aren't already there). Weave in the ends. Mark the beginning of the round using a split ring marker. Fold the piece of knitting so that the needles are side by side and the purl bump sides are facing each other (folding line is marked in the graphic above). Using a 2 mm needle, transfer all stitches from both needles onto one needle, alternating one stitch from A and one stitch from B. Start with a stitch from the needle which is next to you (slip as if to purl), then take a stitch from the other needle. Continue until all stitches have been transfered (see the following picture. 2mm needle shown in purple)
Separate them into two times 52 stitches (corresponding to the palm and the back of the hand side of the finished mittens) to be ready for working in the round using magic loop.
Part 2: Doubleknitting 101
In plain doubleknitting (without colorwork) you will go on like this (starting with a stitch in color A): knit this stitch using color A with both strands of yarn in back.
The next stitch (color B) needs to be purled using color B while holding both yarns in front.
This will result in a fabric having one side in color A and the other side in color B.

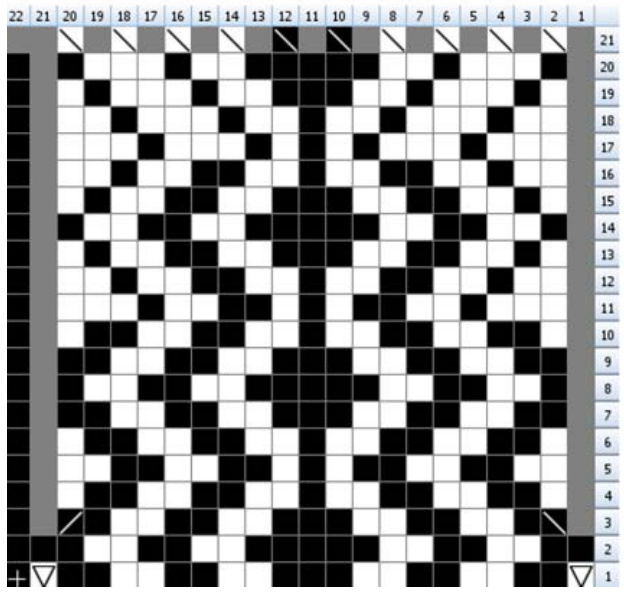
It is of great importance always to move BOTH yarns in front or back! The colorwork motif is achieved by reversing the colors (knit with B and purl with A). This pattern is based on a chart, where each square represents (in contrast to fair-isle) not only one stitch but TWO stitches (one from the front layer which needs to be knitted and one from the back layer which needs to be purled). The charts are read from right to left and from bottom to top. Return to the right hand side of the chart after finishing each round. To get you used to the system I will give you a small example chart and explain how every stitch needs to be worked (this isn't part of the mitten-pattern! Just read through it to get the hang of the technique):
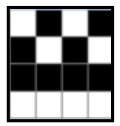
This would translate to: Round 1: $^{*}\mathsf{k}1$ in white holding both yarns in back, p1 in black holding both yarns in front\* repeat 3 more times Round 2: $^{*}\mathsf{k}1$ in black holding both yarns in back, p1 in white holding both yarns in front\* repeat 3 more times Round 3: $^{*}\mathsf{k}1$ in white holding both yarns in back, p1 in black holding both yarns in front, k1 in black holding both yarns in back, p1 in white holding both yarns in front\* repeat one more time. Round $4;^{\ast}\,\mathsf{k}1$ in black holding both yarns in back, p1 in white holding both yarns in front, k1 in white holding both yarns in back, p1 in black holding both yarns in front\* repeat one more time.
Part 3:Working the ouffand had
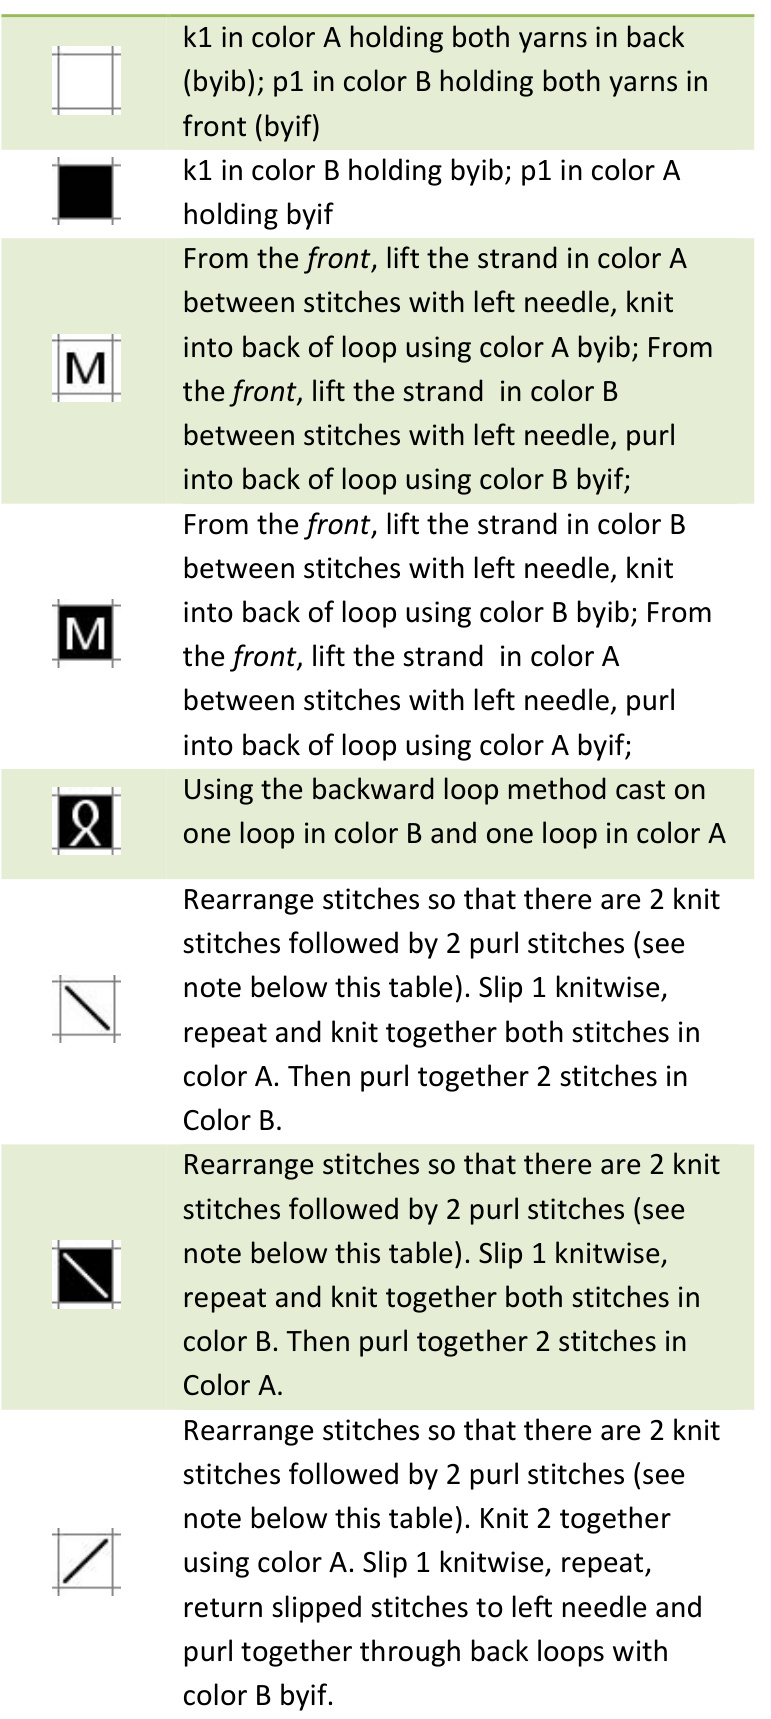
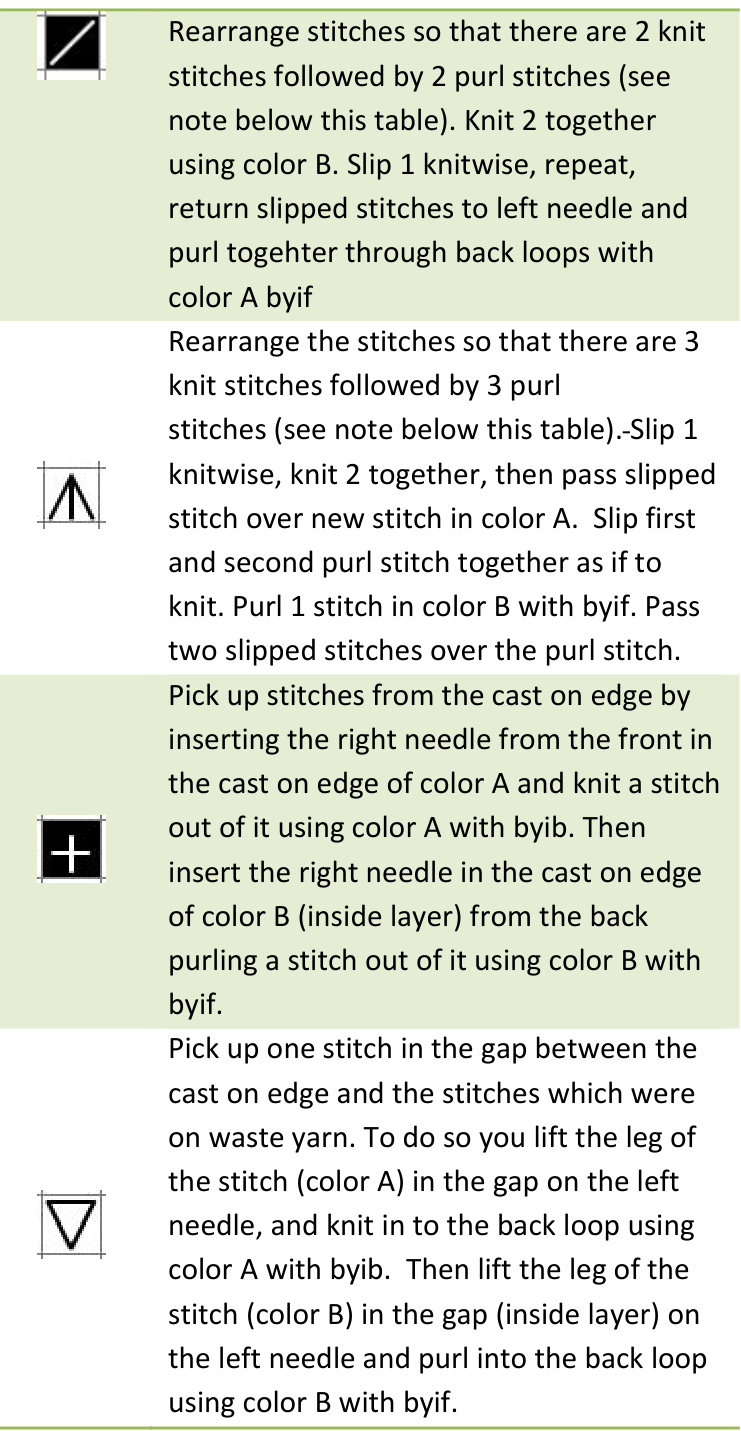
This pattern includes one chart for the body of the mitten (both for the left and the right one) and a separate chart both for the decrease section and the thumb. The following symbols are used in the charts: Symbol Description
How to rearrange stitches:
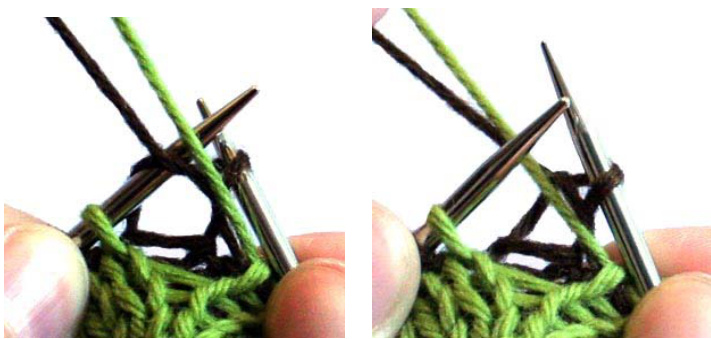
To work decreases in doubleknitting, you need to rearrange the stitches so that there are 2 knit stitches followed by 2 stitches two purl stitches: Insert the right needle in the two loops of both knit stitches by picking the loops with the needletip, holding the needle in front of the left needle. The loop of the purl stitch which is in between is left out.
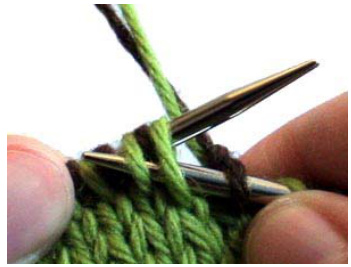
Then pull the left needle out of the last 3 stitches (the two in color A being already on the right needle). Insert the left needle in the loop of the purl stitch which is currently onno needle,
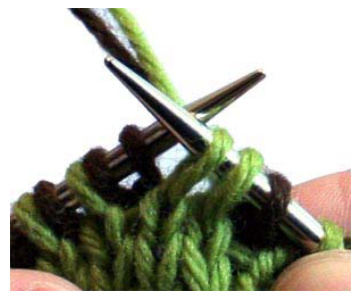
then slip the two knit stitches back on the left needle. As you may have noticed: this is quite similar to cabling without a cable needle. In case of the central double decrease you have to rearrange the stitches to 3 knit stitches followed by 3 purl stitches. To do this you go on like described before but you insert the right needle in 3 knit stitches, then slip 5 sts of the needle, insert the left needle the 2 purl stitches in between and then slip the remaining 3 knit stitches back on the left needle. If the yarn is to slippery to pull the needles out (or the knitter to frightend), another, slightly more complicated, but also more safe method can be used: Slip the first knit stitch as if to purl, slip 1 knit and 1 purl stitch together knitwise, insert left needle tip from the right into purl stitch and slip back to the left needle. Repeat with the knit stitch, then insert left needle from the left into the second knit stitch and slip back to the left needle. To rearrange 3 knit and 3 purl stitches, slip the first knit stitch as if to purl, then slip 1 knit and 1 purl stitch together knitwise, repeat with the next knit and purl stitch, insert left needle from the right into last purl stitch and slip back to left needle, repeat with the next knit stitch, then the purl stitch. Then slip those last 2 stitches back to the right needle by slipping them together knitwise, again insert left needle from the right into last purl stitch and slip back to the left needle, repeat with both knit stitches. For the last knit stitch, insert left needle from the left and slip it back to the left needle. There are now 3 purl sts and 3 knit stitches rearranged. Start working chart A, being careful not to twist your cast on while doing so. Place a marker to indicate the beginning of the round. After you have created the thumb gusset you have to transfer the stitches for the thumb onto waste yarn. This is indicated by a red line in the chart. When you reach this line go on as follows: place the next 38 stitches, alternating 19 in A and 19 in B on waste yarn, cast on one (l) and go on kitin the remaining 10 (lternating 52 in A and 52 in B) stitches according to the chart. Go on working the chart until the mitten is 3cm shorter than your hand (measured from the tip of your middle finger). Depending on the size of your hand you may have to stop working the chart before reaching the last row (shorter hand) or repeat the last row of the chart a few times more (longer hand). Work the decreases according to Chart 2. There will be a total of 16 sts (8 in each color) left. Place these stitches on two separate needles (one for each color). Break the yarn of color B (about 40cm long) and use a tapestry needle to thread it through the 8 stitches of color B two times. Pulltight. Break the yarn of color A (about 40cm long) and use a tapestry needle to thread it through the 8 stitches of color A two times. Pull tight. Weave in both ends between the layers so that they are invisible on both sides.
Part 4: The Thumb
Place the 38 stitches which were held on waste yarn back on the needle carefully, in the proper order, and work Chart 3. Keep in mind that in the first row you will have to pick up a total of 6 sts (3 in each color): 2 in the gaps between the between the cast on edges and the stitches now on your needle and one from the cast on edge. Having completed the last round of the chart go on as described in part 3 to finish up the remaining stitches.
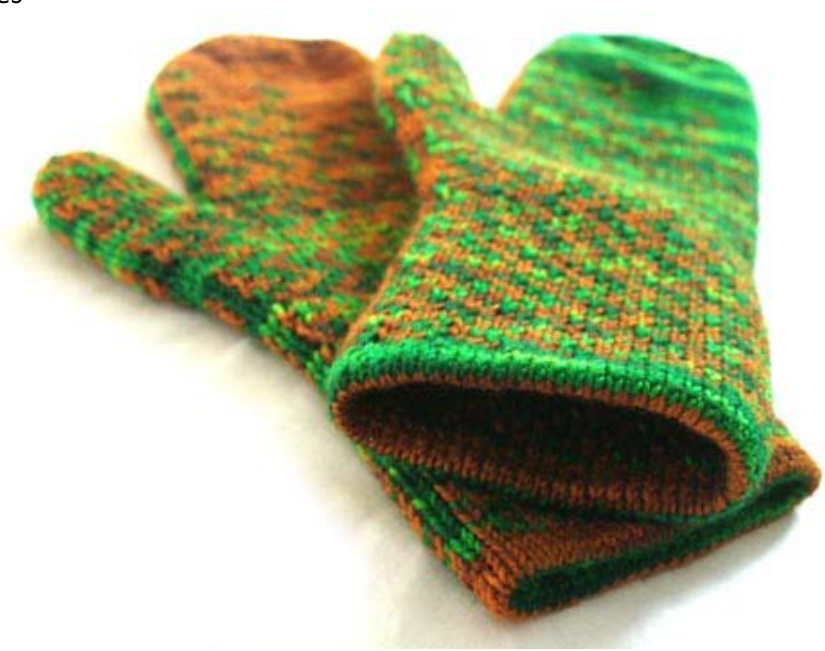
Chart 1: Hand
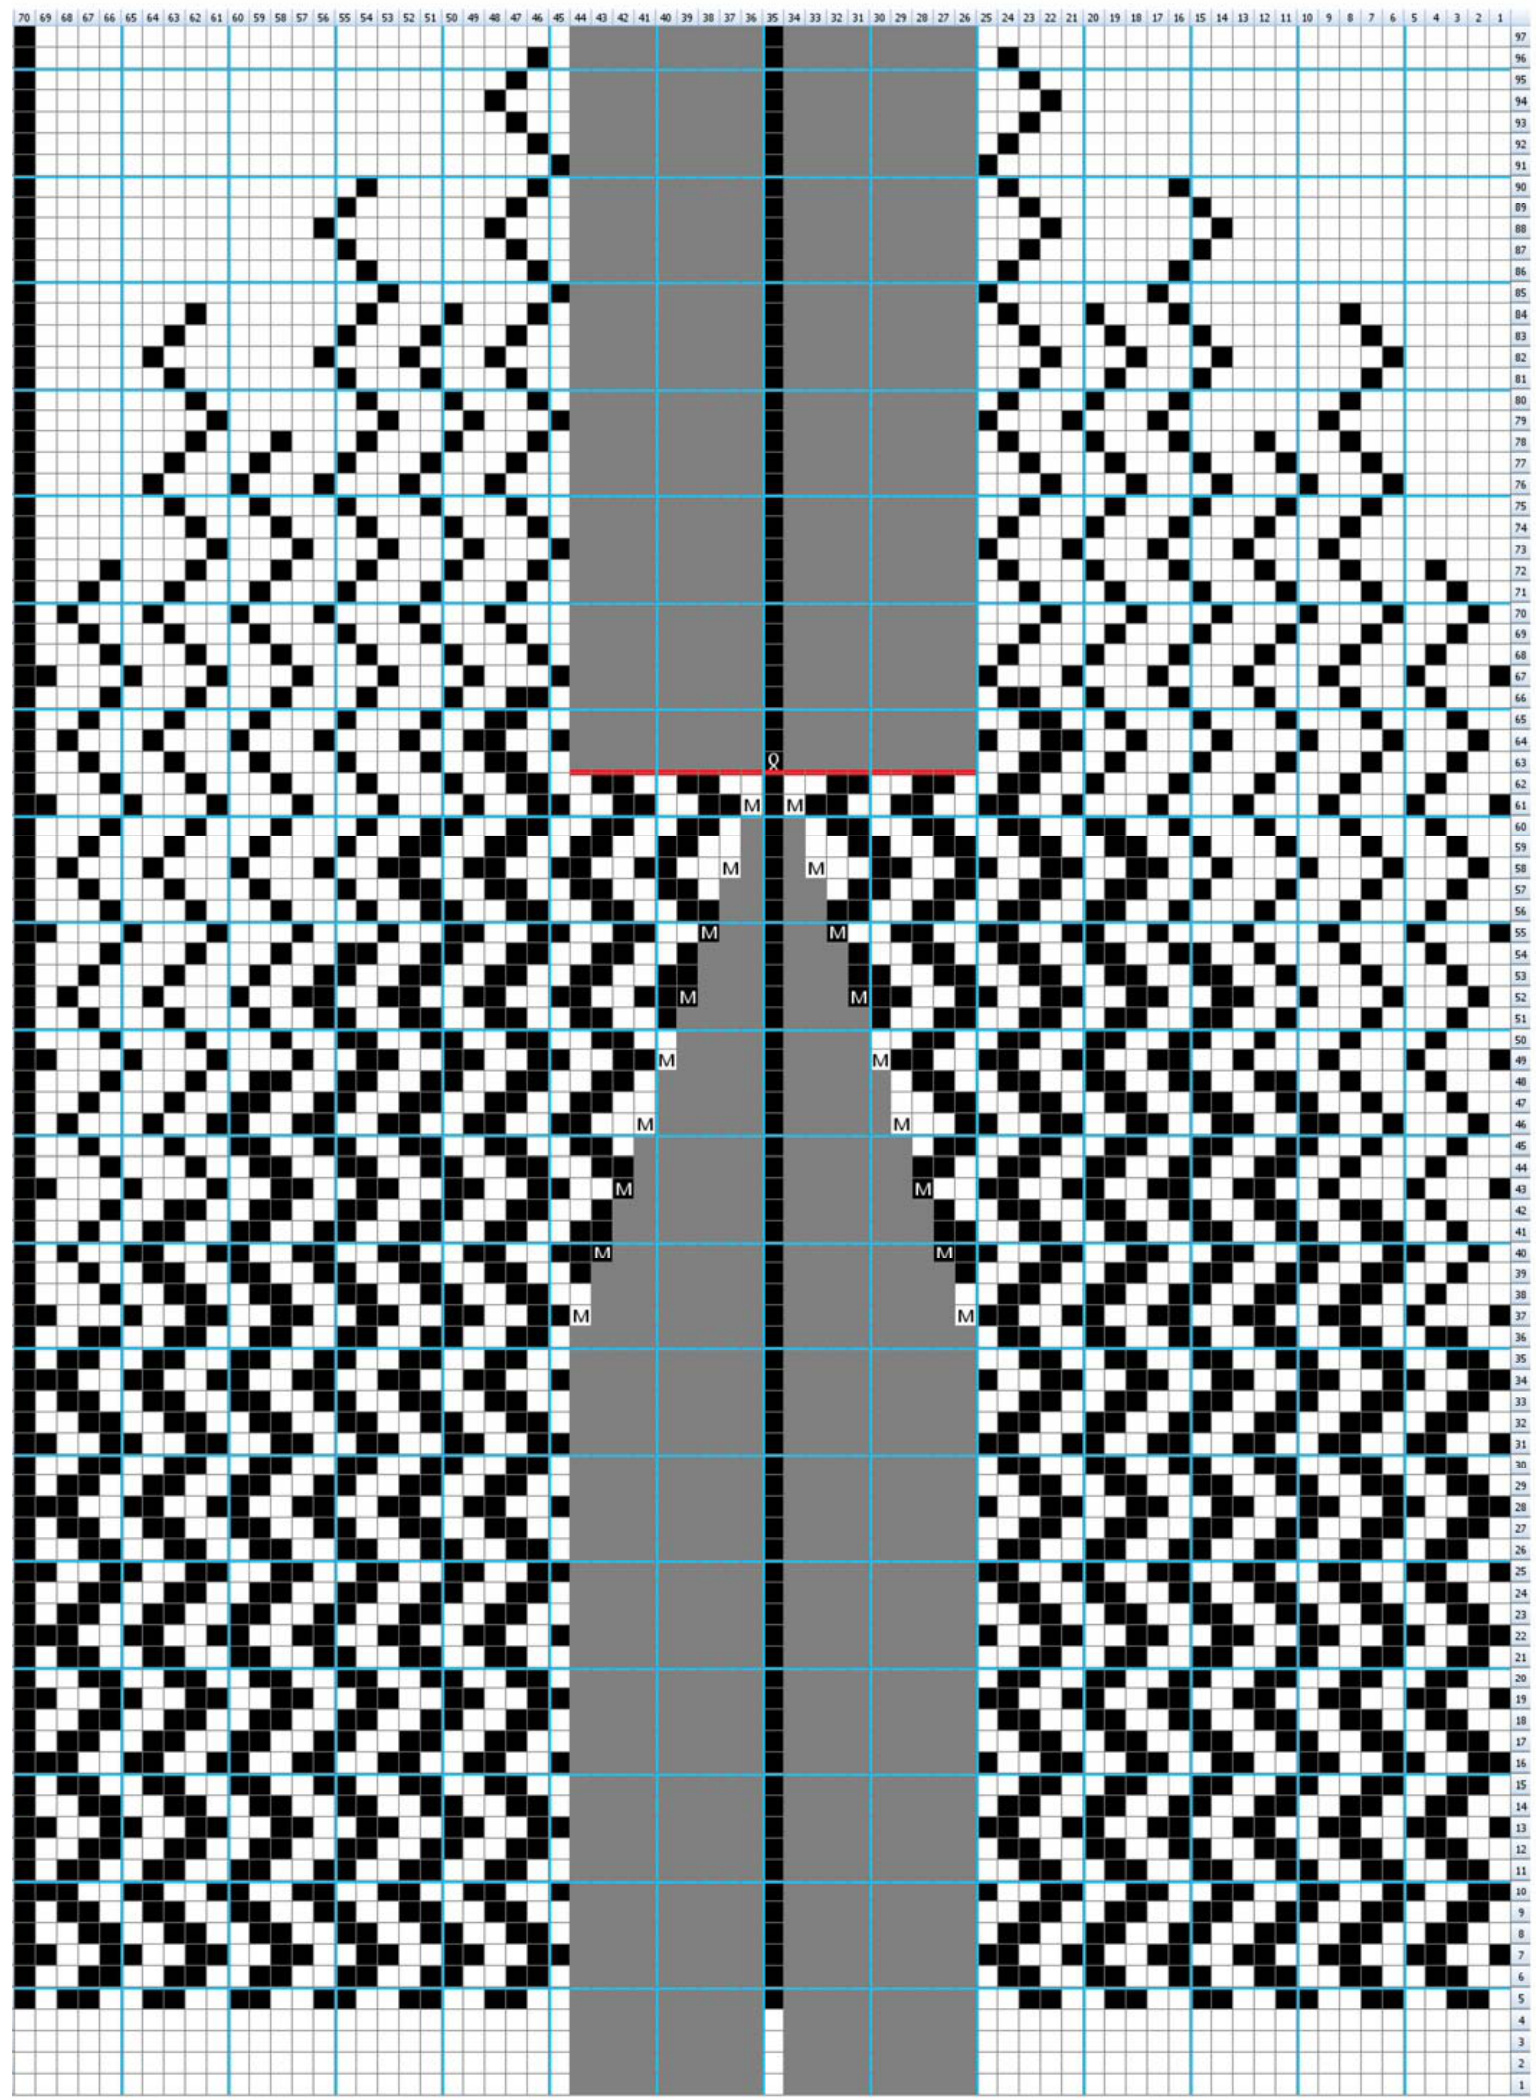
Chart 2: Decreases
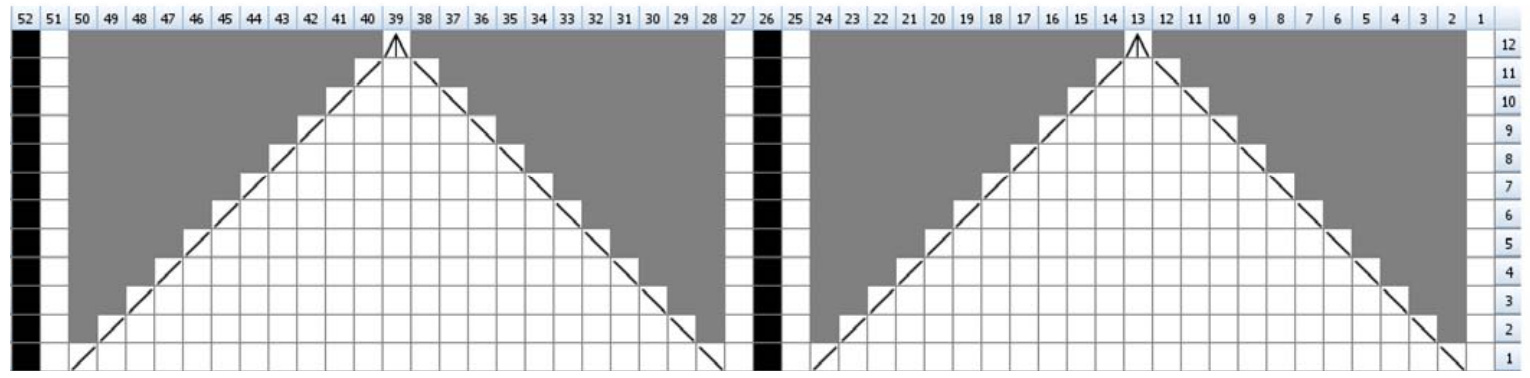
Chart 3: The Thumb