Gabriella
By: Ann Weaver - Weaverknits
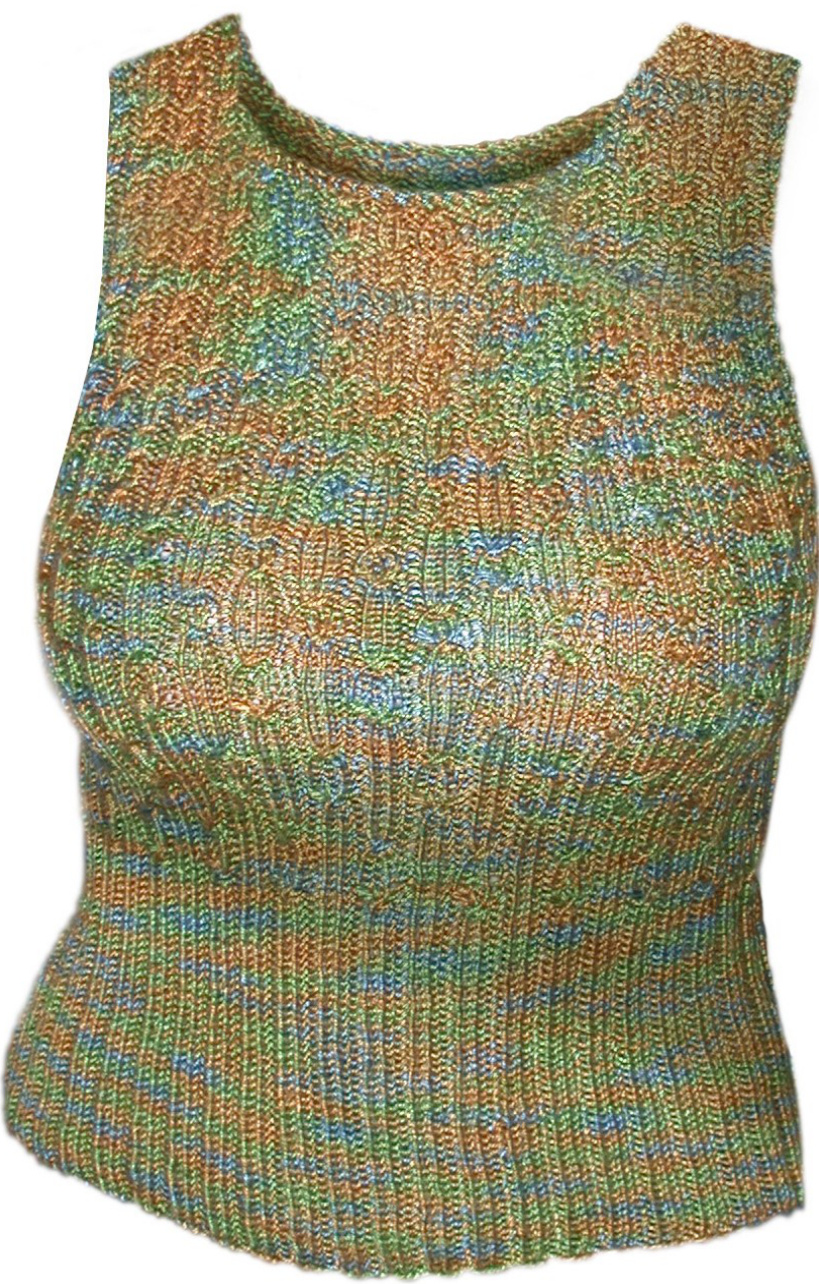
MEASUREMENTS: To fit size xs (s, m, 1, xl, 2x) [30-32 (34-36, 38-40, 42-44, 46-48, 50-52) inch bust; 22.75, 23, 23.75, 24.5, 25, 25.25) inches in length], shown in size s with the back done in racer-back style. Instructions for a more full-coverage back style, shaped like the front of the garment, is also included. The tank is made to fit with 3 to 5 inches of negative ease; the yarn is very stretchy at this gauge, and the negative ease opens up the twisted stitch pattern and emphasizes the texture. The top may seem very long, proportionally, but the widthwise stretch makes it shorter when worn. Finished measurements are 27 (31, 35, 39, 43, 47) inches across the bust. Pick your size according to how much ease you would like in your sweater. The top shown measures 31 inches across the bust.
MATERIALS:
Yarn: 3 (3, 3, 4, 4, 5) skeins [480 (560, 650, 750, 840, 940) yards; 215 (250, 300, 350, 380, 420) g) Pearl (220 yards/100 g per skein) by Lorna's Laces Needles:US 5 (3.75 mm) 16" & 24" circular needles Other: 2 stitch markers. Yarn needle for finishing. Gauge: 24 st and 28 rows/4 in (10 cm) in k2, p2 rib stitch on US 5 (3.75 mm) needles after blocking gently
DIRECTIONS:
Cast on (CO) 164 (188, 212, 236, 260, 284) st, placing a marker after stitch 82 (94, 106, 118, 130, 142). Join into a round, being careful not to twist. Place a second marker at the beginning of the round. These two makers denote the side “'seams" of the top. K1, [k2, p2], repeat sequence between [] to first marker. The last stitch before the marker should be a k stitch. Repeat this sequence between the first and second markers. Continue to work in this pattern until piece measures 3 (3.25, 3.5, 3.75, 4, 4.25) inches from the CO edge.
Waist Shaping:
On next round, decrease 1 st at beginning of round, 1 st before 1st marker, 1 st after 1st marker, and 1 st before 2nd marker (end of round) in pattern (k2, p2 rib). Work 5 rows in pattern without shaping. Repeat the last 6 rows 2 more times for a total of 12 st decreased and 18 rows. Work 5 more rows in pattern withoutshaping. At this point, begin to work Chart A, beginning at the lower right corner of the chart and reading the chart from right to left on every row (since you are knitting in the round). However, continue to work the k2 ridge closest to each stitch marker (those k2 ridges that border the "seams" of the top) with NO CABLES. These ridges will always be worked k2 to emphasize the seam line and, later,the armholes of the top. As you work Chart A, increase 1 st at beginning of round, 1 st before 1st marker, 1 st after 1st marker, and 1 st before 2nd marker (end of round) in k2, p2 rib pattern. Work 5 rows of Chart A with no shaping. Repeat the last 6 rows 2 more times for a total of 12 st increased and 18 rows. You have now returned to your original st count and completed the waist shaping. ntil you have worked one complete repeat of the 24 rows. Then work the first 12 rows of Chart A again. Begin working Chart B, reading it as you did Chart A. Work one complete repeat of the 16 rows.
Armhole shaping:
Begin a second repeat of Chart B. On the first round, bind off (BO) 3 (3, 3, 4, 4, 5) st at beginning of row. Work in Chart B to side seam marker, then TURN work, BO 3 (3, 3, 4, 4, 5) st, and work back to beginning of row. You are now working on the front of the top only; place the back stitches on a spare needle or a length of waste yarn while completing the front. NOTE: You will now be working both RS and WS rows in pattern; WS directions for the charts apply to this section and the corresponding back section. WS rows of the chart are worked from left to right and RS rows are worked from right to left. On next row, slip 1 (sl1), k1, ssk, work in pattern to last 3 st, k3 On next row (WS), sl1, p1, p2tog, work in pattern to last 3 st, p3 these two rows 6 (7, 8, 9, 10, 10) times for a total of 12 (14, 16, 18, 20, 20) decrease row
NOTES:
After you have worked the first 8 rows of Chart B while shaping the armhole, work 1 (1, 1, 1, 1 1) repeat of Chart C (3 rows) and 0 (0, 0, 1, 1, 1) repeat of Chart D (3 rows) while continuing armhole shaping. Begin working Chart E. After you have completed armhole shaping rows, begin each RS row of the top front by slipping the first st (sl1) and knitting the next 2 st. End each RS row by knitting the last 3 st. Begin each WS row with sl1, p2; end each WS row with p3. This will create a neat border for the armholes and make picking up the armhole stitches for the edging simple. After armhole shaping is complete, work with no shaping until you have completed 2 full repeats of Chart E (32 rowstotal).
Front Neck Shaping:
Continuing to work Chart E, work 18 (22, 25, 27, 30, 33) st in established pattern, BO middle 28 (30, 34, 38, 42, 46) st, work last 18 (22, 25, 27, 30, 33) st in established pattern. From this point on the right and left fronts are worked separately. Keep the st for the L front on the needle while working the R front.
NOTE:
ked the first 8 rows of Chart E while shaping the front sections, begin to work in Chart
Right Front:
Turn work, work in pattern to end. Next row (RS), sl1, k1, ssk, work in pattern to end Next row (WS), sl1, p2, work in pattern to end Next row (RS), sl1, k3, work in pattern to end Next row (WS), sl, p2, work in pattern to end Work these 4 rows a total of 3 (3, 3, 4, 4, 5) times. 14 (18, 21, 23, 26, 28) st remain. Continue to work in Chart F until R front measures 7.5 (7.5, 8, 8.5, 8.75, 8.75) inches from beginning of armhole shaping. End with a WS row.
Right Front Shoulder Shaping:
vorked in garter stitch using short rows and the shoulder seams are grafted together at t end. If you dislike grafting, bind off the shoulder seams after the last row of shoulder shaping and sew the seams. k6rows k 12 (12, 14, 16, 18, 18) st, wrap next st and turn work k1 row k 6 (6, 7, 8, 9, 9) st, wrap next st and turn work k 1 row k across all st, picking up and knitting the wrap along with the wrapped stitches Place st on a holder for grafting, or BO for sewing seams.
Left Front:
Reatach yarn to L front st with WS facing. Work as for R front, reversing shaping. Left Front Shoulder Shaping: Work as for Right Front Shoulder Shaping, beginning with 5 k rows rather than 6.
Back (FULL COVERAGE STYLE):
Transfer back st to live needle. Reattach yarn to back st with RS facing. Work exactly as front until neck shaping; rather than working neck shaping, \*continue to work back of top without shaping until it measures 7.5 (7.5, 8, 8.5, 8.75, 8.75) from beginning of armhole shaping. End with a WS row. On next row, k 14 (18, 21, 23, 26, 28) st, BO 36 (38, 42, 46, 50, 56) st, k to end. From this point on, the L and R back are worked separately. Keep R back st on the needle while working the L back. Left Back Shoulder Shaping: Work as for Left Front Shoulder Shaping Right Back Shoulder Shaping: Reattach yarn to R back st with RS facing. Work as for Right Front Shoulder Shaping. Back (RACERBACK STYLE): Transfer back st to live needle. Reattach yarn to back st with RS facing
Armhole shaping:
Begin a second repeat of Chart B. On the first round, BO 7 (7, 7, 7, 8, 8) st at beginning of row. Work in Chart B end of row, turn, BO 7 (7, 7, 7, 8, 8) st, and work back to beginning of row. On next row, sl1, ssk, sl1, ssk, pass slipped stitch over ssk (psso) (3 st decreased) On next row (WS), sl1, p2tog, sl1, p2tog, psso (3 st decreased) Repeat these 2 rows 6 (6, 7,8, 9, 9) times for a total of 12 (12, 14, 16, 18, 18) decrease rows. 32 (38, 50, 56, 60, 70) st remain.
NOTES:
After you have worked the first 8 rows of Chart B while shaping the back armholes, work 1 (1, 1, 1, 1, 1) repeat of Chart C (3 rows) and 0 (0, 0, 1, 1, 1) repeat of Chart D (3 rows) while continuing armhole shaping. Then begin working Chart E. On next row, sl1, k1, k1fbf (knit stitch in the front, the back, then the front again, increasing 2 st), pm, work in pattern to last 3 st, pm, k3 (2 st increased) On next row, sl1, p1, pfbf, work in pattern to last 3 st, p3 (2 st increased)
NOTES:
St on outside of markers (the beginning and end of the row) will be worked in k2, p2 rib pattern. Increase stitches in this pattern. St between the markers will be worked in Chart E until 2 full repeats plus one more repeat of the first 8 rows have been worked. At this point, begin to work in Chart F. Repeat the 2 rows above 7 (8, 8, 9, 10, 10) times for a total of 14 (16, 16, 18, 20, 20) increase rows. 60 (70, 82, 88, 100, 110) st on needle. On next row, sl1, k1, k1fb, work in pattern to last 3 st, k3 (1 st increased) On next row, sl1, p1, p1fb, work in pattern to last 3 st, p3 (1 st increased) Repeat the 2 rows above 2 (2, 1,2, 1, 1) time for a total of 4 (4, 2, 4, 2, 2) increase rows. 64 (74, 84, 92, 102, 112) st On needle. At this point, remove 2 markers and begin to work allst in Chart F. Work back as for Full Coverage Style from \* to end.
Finishing:
Graft or sew L front to L back and R front to R back at shoulders.
Neckband:
Using 16" US 5 (3.75 mm) circular needle, with RS facing and beginning at rear of R shoulder, pick up 6 (6, 6, 6, 6, 6) st along rear of R shoulder, 22 (24, 30, 34, 40, 42) st across back neck, 6 (6, 6, 6, 6, 6) along rear of L shoulder, 14 (14, 16, 18, 20, 20) along L front neck shaping, 16 (18, 22, 26, 30, 34) across front neck, and 14 (14, 16, 18, 20, 20) along R front neck shaping. k 1 round, p 1 round. BO using a very loose, stretchy BO; a sewn BO is perfect.
Armhole Edging:
Using 16" US 5 (3.75 mm) circular needle, with RS facing and beginning at center of underarm, pick up 32 (35, 38, 44, 48, 50) st along front of armhole and 32 (35, 38, 44, 48, 50) st along back of armhole for both Full Coverage and Racerback styles. k 1 round, p 1 round. BO as for neckband. Repeat for second armhole. Weave in ends. Steam block gently. Chart A (repeated 1.5 times (36 rows) for all sizes):
| X | X | X | X | 24 | ||||||
| X | X | X | X | 23 | ||||||
| X | X | X | X | 22 | ||||||
| xX | X | X | 21 | |||||||
| X/X | X | X | 20 | |||||||
| O/X | X\O | X | X | 19 | ||||||
| X | X | xX | 18 | |||||||
| X | X | X | X | 17 | ||||||
| X | X | XX | 16 | |||||||
| X | X | X | X | 15 | ||||||
| X\O|O/X | XX | 14 | ||||||||
| X/X | X | X | 13 | |||||||
| X | X | X | X | 12 | ||||||
| X | X | X | X | 11 | ||||||
| X | X | Xx | 10 | |||||||
| X X | xx | 9 8 | ||||||||
| X | X | X/X | ||||||||
| X | X | O/X | X\O | 7 | ||||||
| X | X | X | X | 6 | ||||||
| X | X | X | X | 5 | ||||||
| X | X | X | X | 4 | ||||||
| X | X | X | X | 3 | ||||||
| X | X | x\o|o/x | 2 | |||||||
| X X | X/X | 1 | ||||||||
Chart B (repeated 1.5 times (24 rows) for all sizes):
| X | X | X | X | |||||
| xx | X | X | ||||||
| X/X | X | X | ||||||
| O/X | X\O | X | X | |||||
| X | X | X | X | |||||
| X | X | X | X | |||||
| X\O | O/X | X | X | |||||
| X/X | X | X | ||||||
| X | X | X | X | |||||
| X | X | X | X | |||||
| X | X | X/X | ||||||
| X | X | O/X | X\O | |||||
| X | X | X | X | |||||
| X | X | X | X | |||||
| XX | X\O | O/X | ||||||
| X/X | X/X | |||||||
Chart D (repeated 1 time (3 rows) for sizes 1, xl, and 2x):
| X | X | X | X | ||||
| X | X | X | X | 3 2 | |||
| X/X | X | X | 1 |
Chart E (repeated 2.5 times (40 rows) for all sizes):
| X | X | X | X | |||||
| X | X | X | X | 16 15 | ||||
| X/X | X/X | 14 | ||||||
| O/X | X\O | X | X | 13 | ||||
| X | X | X | X | 12 | ||||
| X | X | X | X | 11 | ||||
| X\O | O/X | X | X | 10 | ||||
| X/X | X/X | 9 | ||||||
| X | X | X | X | 8 | ||||
| X | X | X | X | 7 6 | ||||
| X/X | X/X | |||||||
| X | X | O/X | X\O | 5 | ||||
| X | X | X | X | 4 | ||||
| X | X | X | X | 3 | ||||
| X | X | X\O | O/X | 2 | ||||
| X/X | X/X | 1 | ||||||
| X | X | X | X | |||
| X | X | X | X | |||
| X | X | X/X |
Chart F (repeat to required armhole depth for each size):
| X | X | X X | 3 | ||
| x X | X X | 2 | |||
| X/X | X/X |
Key:
X = k on RS, p on WS blank space = p on RS, k on WS X/X = RS: k into front of second st on L needle; k into front of first st on L needle; sl both st off needle Wrong Side (WS): p into front of second st on L needle; p into front of first st on L needle, sl both st off needle O/X = RS: k into front of second st on L needle; p into front of first st on L needle; sl both st off needle WS: k into front of second st on L needle; p into front of first st on L needle; sl both st off needle X\O = RS: p into back of second st on L needle; k into front of fist st on L needle; sl both st off needle WS: p into back of second st on L needle; k into front of first st on L needle; sl both st off needle


