Endless
A Cheeky Monkey design by Elanor Sakamoto
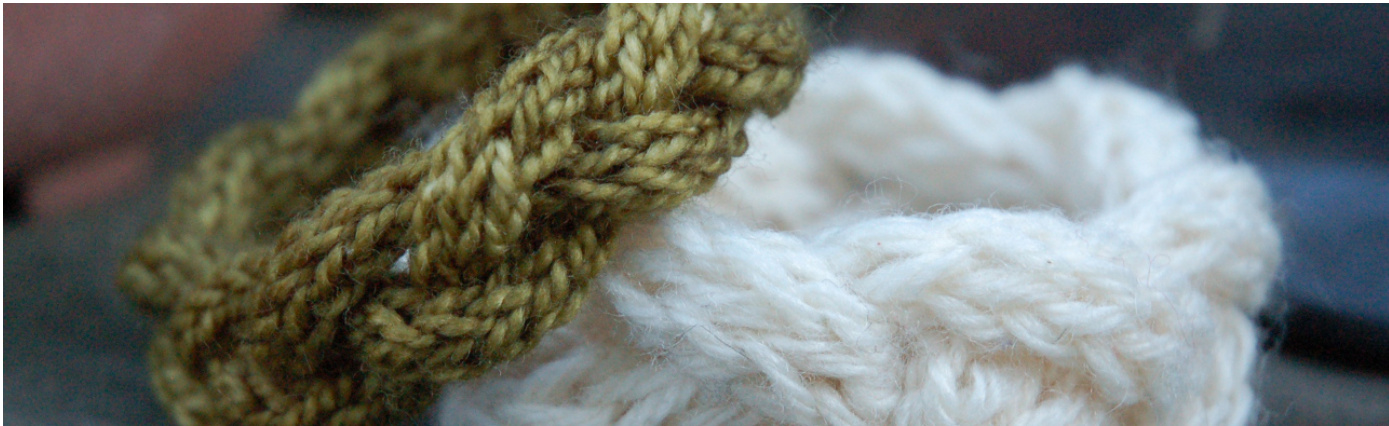
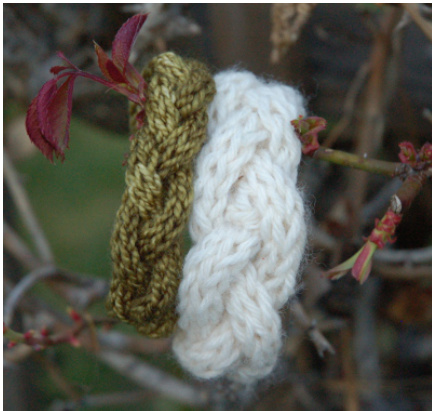
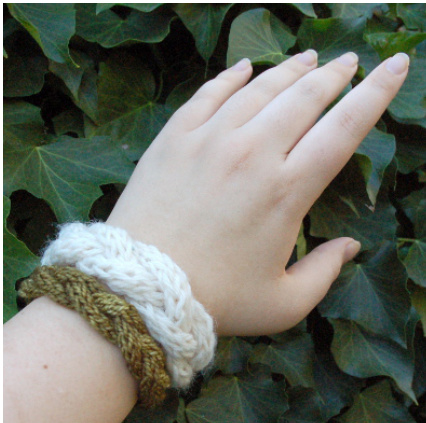
An endless braid wrapping your wrist in yarny goodness. It can be made from precious scraps to fit any wrist with any weight yarn, and it's so simple you'll soon be making endless variations! Finished measurements: (as shown) 1" x 8" or 3/4" x 8" Size: custom fit (8" wrist shown) Yarns used: approx. 25 yd worsted weight or 15 yd fingering weight Shown in Wool-Ease in Fisherman (197 yd/180m per 3 oz/85g ball, 80% acrylic, 20% wool); and Tosh Sock in Grove (395 yards per 4 oz skein, 100% Superwash Merino Wool Gauge: In worsted - 4 sts & 2.5 rows to 1"; in fingering - 5.5 sts & 5 rows to 1" Because of the way the bracelet is made, gauge is not super important. Go with a look you like. Notions: dpns 1 or 2 sizes larger than you would normally use for the yarn weight (I used sz 8 for the worsted and sz 2 for the fingering), tapestry needle Notes: To make this bracelet, you'll need to know your wrist measurement. As written, it produces a snugly fitting piece. It should be possible to make a bangle style bracelet by adding an inch or so to your initial wrist measurement. My yarn estimates are on the generous side. This project can easily be made with leftover yarn. I recommend a thumb loop/e-loop cast on for this project, but most cast ons will work just as well. If you have trouble understanding my braiding. instructions, try looking up videos for tying a “turk's head knot." It's pretty much the same thing! Abbreviations: CO - cast on k - knit st(s) - stitch(es)
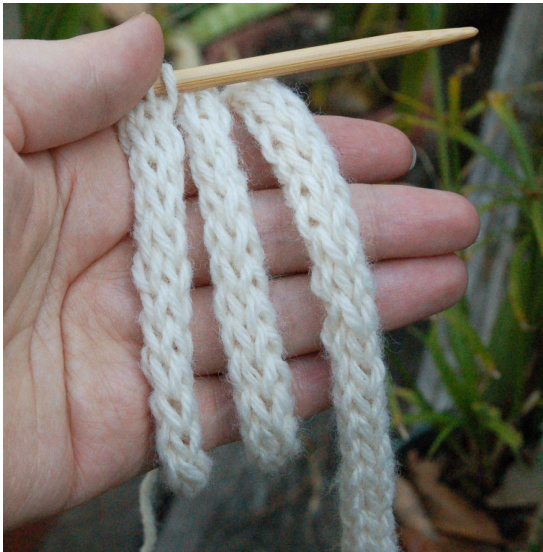
Directions: CO 4 sts; do not turn work Begin i-cord Slide 4 sts to the right hand side of the needle; k4 Repeat this row to create i-cord As you knit the i-cord, tug the yarn after the first stitch to snug up the back and prevent laddering. Continue in i-cord to 3 times your wrist measurement. (length knit for sample: 24") When measuring the length of your i-cord, give the cord a few aggressive tugs to settle the stitches, and measure the cord in its relaxed state. Once you've reached your target length, cut the yarn leaving about an 8" tail.
Now it's time to braid!
First, tuck the CO tail up inside the cord. Then, take the dpn end between your thumb and index finger with the cord hanging down in front of your fingers.
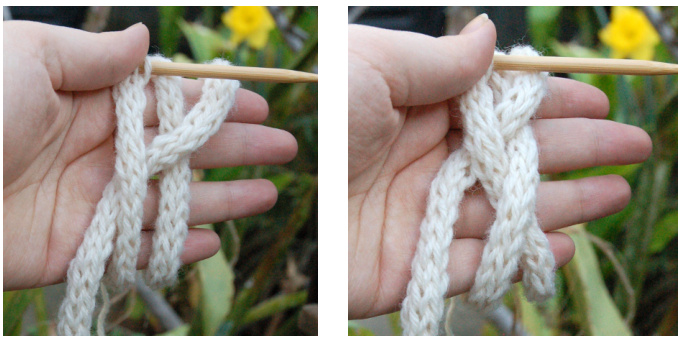
Wrap the cord behind your hand and up over your fingers twice. The free end of the cord should be closest to your fingertips.
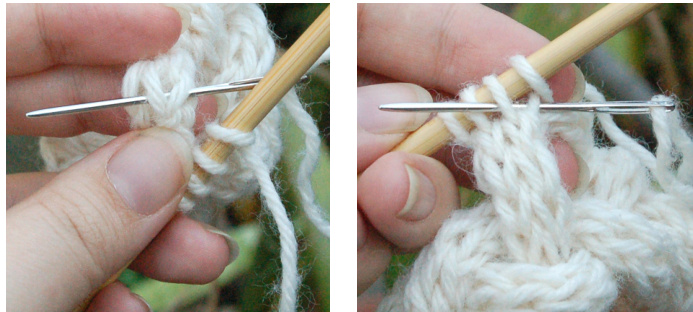
Take the free end of the cord and weave it over the loop next to it, then under the loop farthest from it. Then, take the loop that is closest to your fingertips and cross it toward the center, over the loop next to it.
Take the free end, and cross it back to the right, over the loop next to it and under the loop farthest from it. Take the loop closest to your palm and cross it toward the center, over the loop next to it.
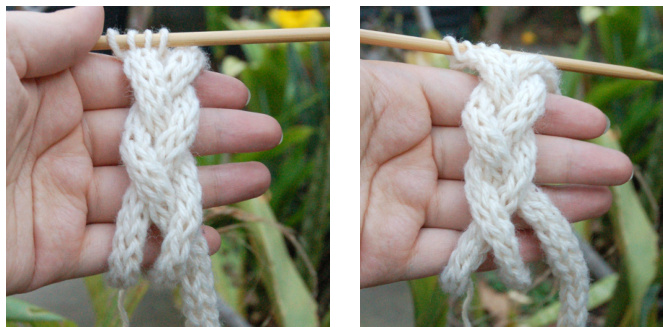
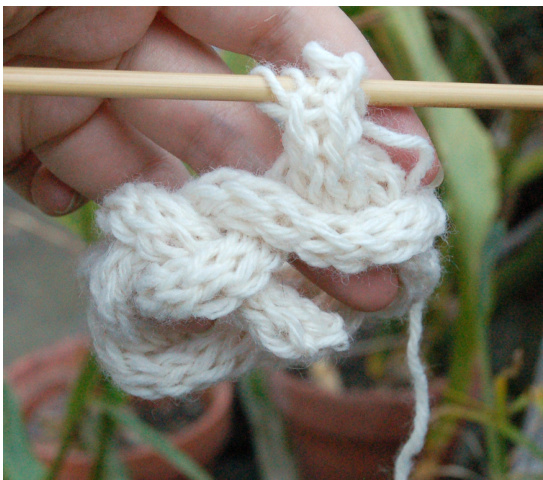
Repeat these 4 movements to make the braid. You may find yourself running out of cord. Don't worry! Just tug one of the loops around from left to right to create some slack and keep going. Once it looks like this, you're ready to graft!
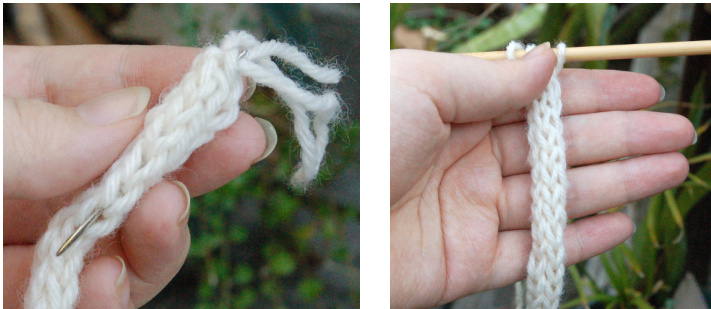
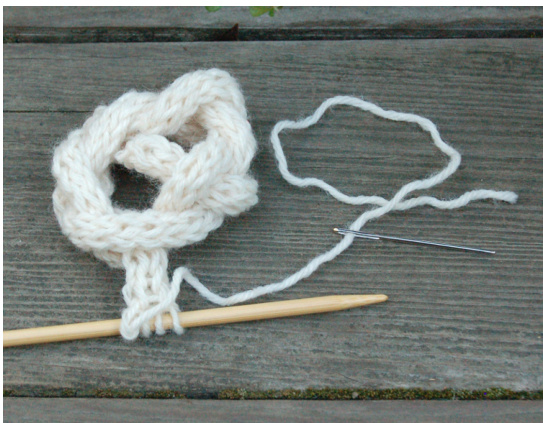
Half-graft
Thread a tapestry needle with the yarn tail from the live stitches, and pull the yarn around the back like you would if you were going to knit another row.
Insert the needle into the first stitch purlwise..
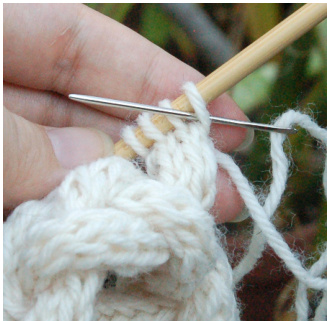
...then pass the needle behind the "V" of a knit stitch on the CO end of the cord. Slip the needle through the first stitch again knitwise, and through the second stitch purlwise, then slip the first stitch off the dpn while pulling the yarn snug.
Repeat the last 2 lines until the last stitch has been dropped off the dpn. Slip the tapestry needle purlwise through the first stitch you grafted and take the yarn up inside the cord to hide the end. Wiggle the loops around until you're satisfied with the look of it. Have fun wearing it!
Tri-color Variation:

I had fun making a tri-color version of this bracelet for my sister. I knit each of the 3 wrist-lengths in a different color. Dream in Color Everlasting Sock in Posy, and KnitPicks Stroll in Wonderland Heather and Dogwood Heather) When I switched colors, I knit 1 row with both colors, then I broke the old color and continued on with the new color. Before braiding, I tucked the loose ends into the cord so they wouldn't get in the way. Don't be afraid to play with color! The possibilities are endless!