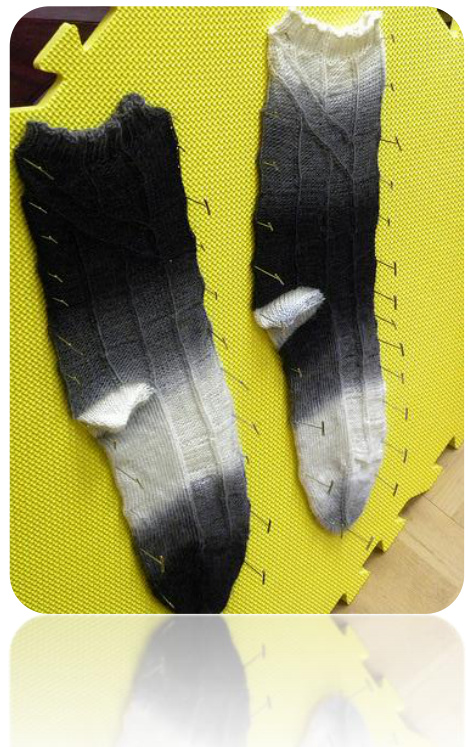
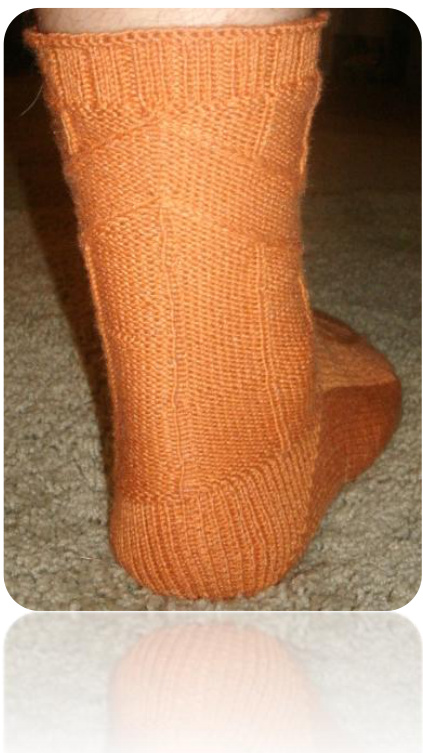
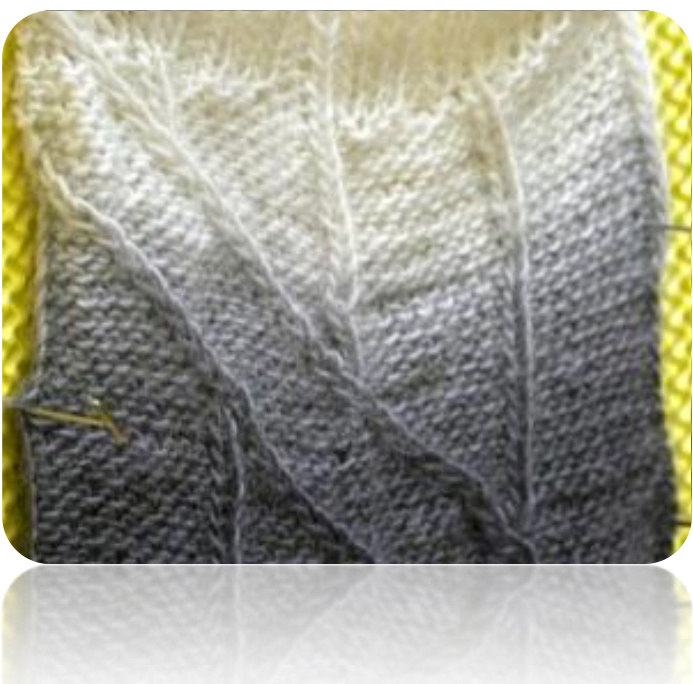
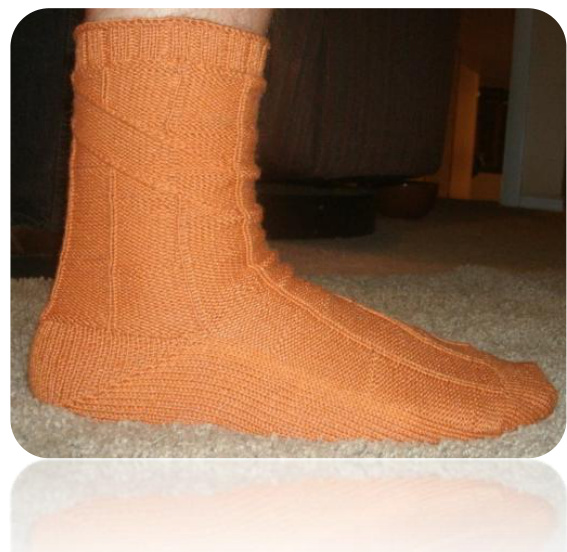
These were designed as a wedding present to my friend Scott. His wedding had the most involved theme I have come across: $^{\prime}1920^{\prime}{s}$ Parisian Art Deco." In designing his wedding socks, I wanted something that felt appropriate to that theme, and yet was still a nod to his personality. The motif here, with strong columns broken by subtle horizontal bars and the travelling stitches is actually meant to suggest the “metal hand" in text, to whit: \m/ The socks themselves are toe-up, and designed for a large foot. Black and white photos show afterthought heel; orange sock photos show short-row heel. Gauge: 9.5 st/10 rows per inch
Materials
420 yards of sock weight Size O needles, or whatever is needed for gauge
Notes
The original sock was done using some Schoppel-Wolle Zauberball. In order to keep the color repeat smooth across the instep, I chose to do an afterthought heel, which is why the afterthought heel is used. There is no reason to not use another heel structure if you prefer. The horizontal breaks in the columns are randomized, and given pattern for them except for where they meet the diagonal lines is merely a suggestion. If you do your socks 2 at a time, or if you don't mind that they not identical from one sock to the other, place them at will!
Abbreviations
LLl - Left Leaning Increase - lift up the stitch below the last stitch you completed and knit (or purl) into it. RLI - Right Leaning Increase - lift up the stitch below the next working stitch and knit (or purl) into it, and then work the next working stitch. Spp - slip one stitch to right needle, purl 1, pass slipped stitch over. It's a left-leaning decrease. P2tog - purl 2 together. It's a right-leaning decrease.
Chart symbols
| -ktbl 11 L 1- purl \~- 1x1 cable left, purl back stitch \~- 1x1 cable left, knit back stitch $\therefore-1\times1$ cable right, purl back stitch - 1x1 cable right, knit back stitch Directions
Toe
Using Turkish Cast-On or your toe-up cast-on of choice, cast on 20 stitches (10 for top of foot, 10 for sole).
Round 1: K 1 round Round 2: For top of foot: K1, RLl, K to last stitch, LLl, K1; Repeat on sole stitches. Repeat these two rounds until there are 80 stitches total, 40 for the top of the foot and 40 for the sole.
Foot
Sole stitches are all worked in stockinette stitch For top of foot, repeat Chart A until foot measures $z^{\prime\prime}$ short of desired length, in order to accommodate the heel.
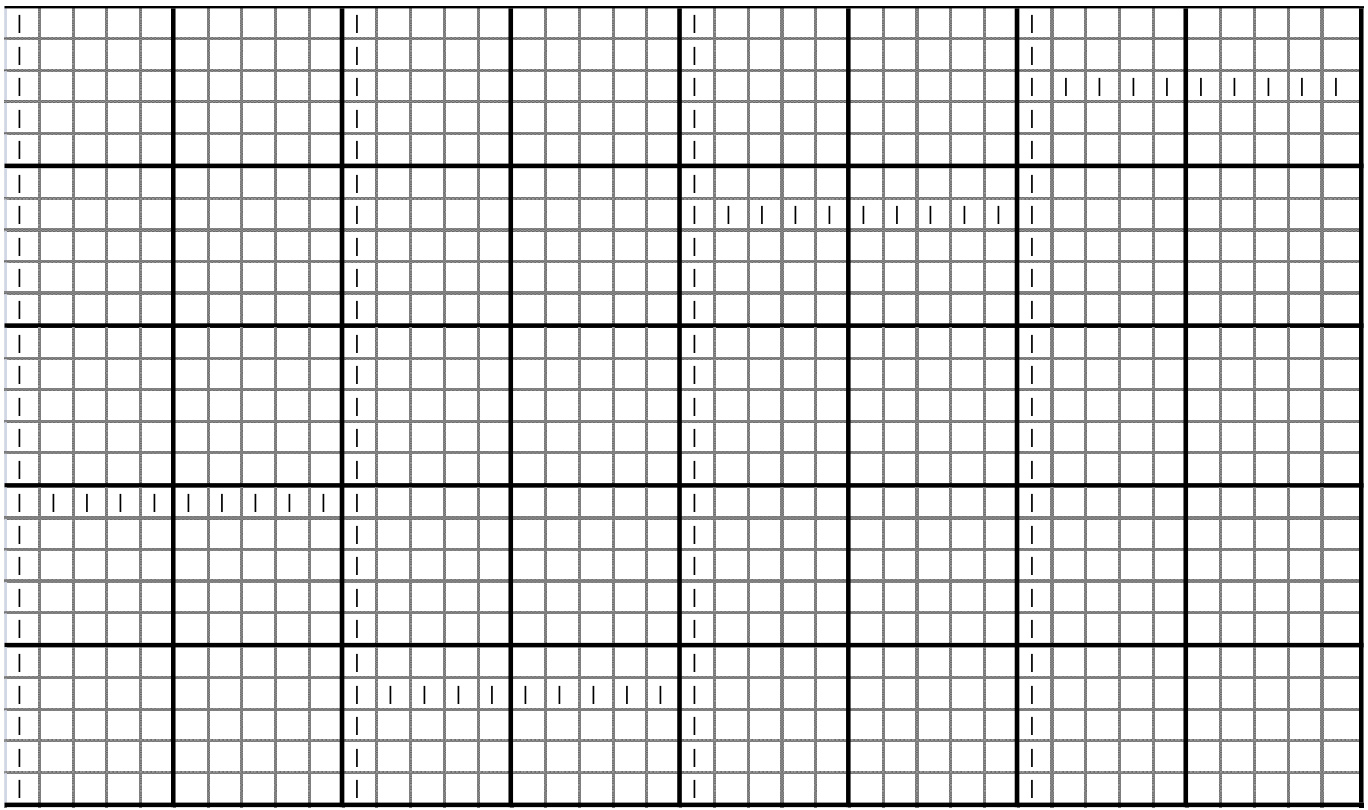
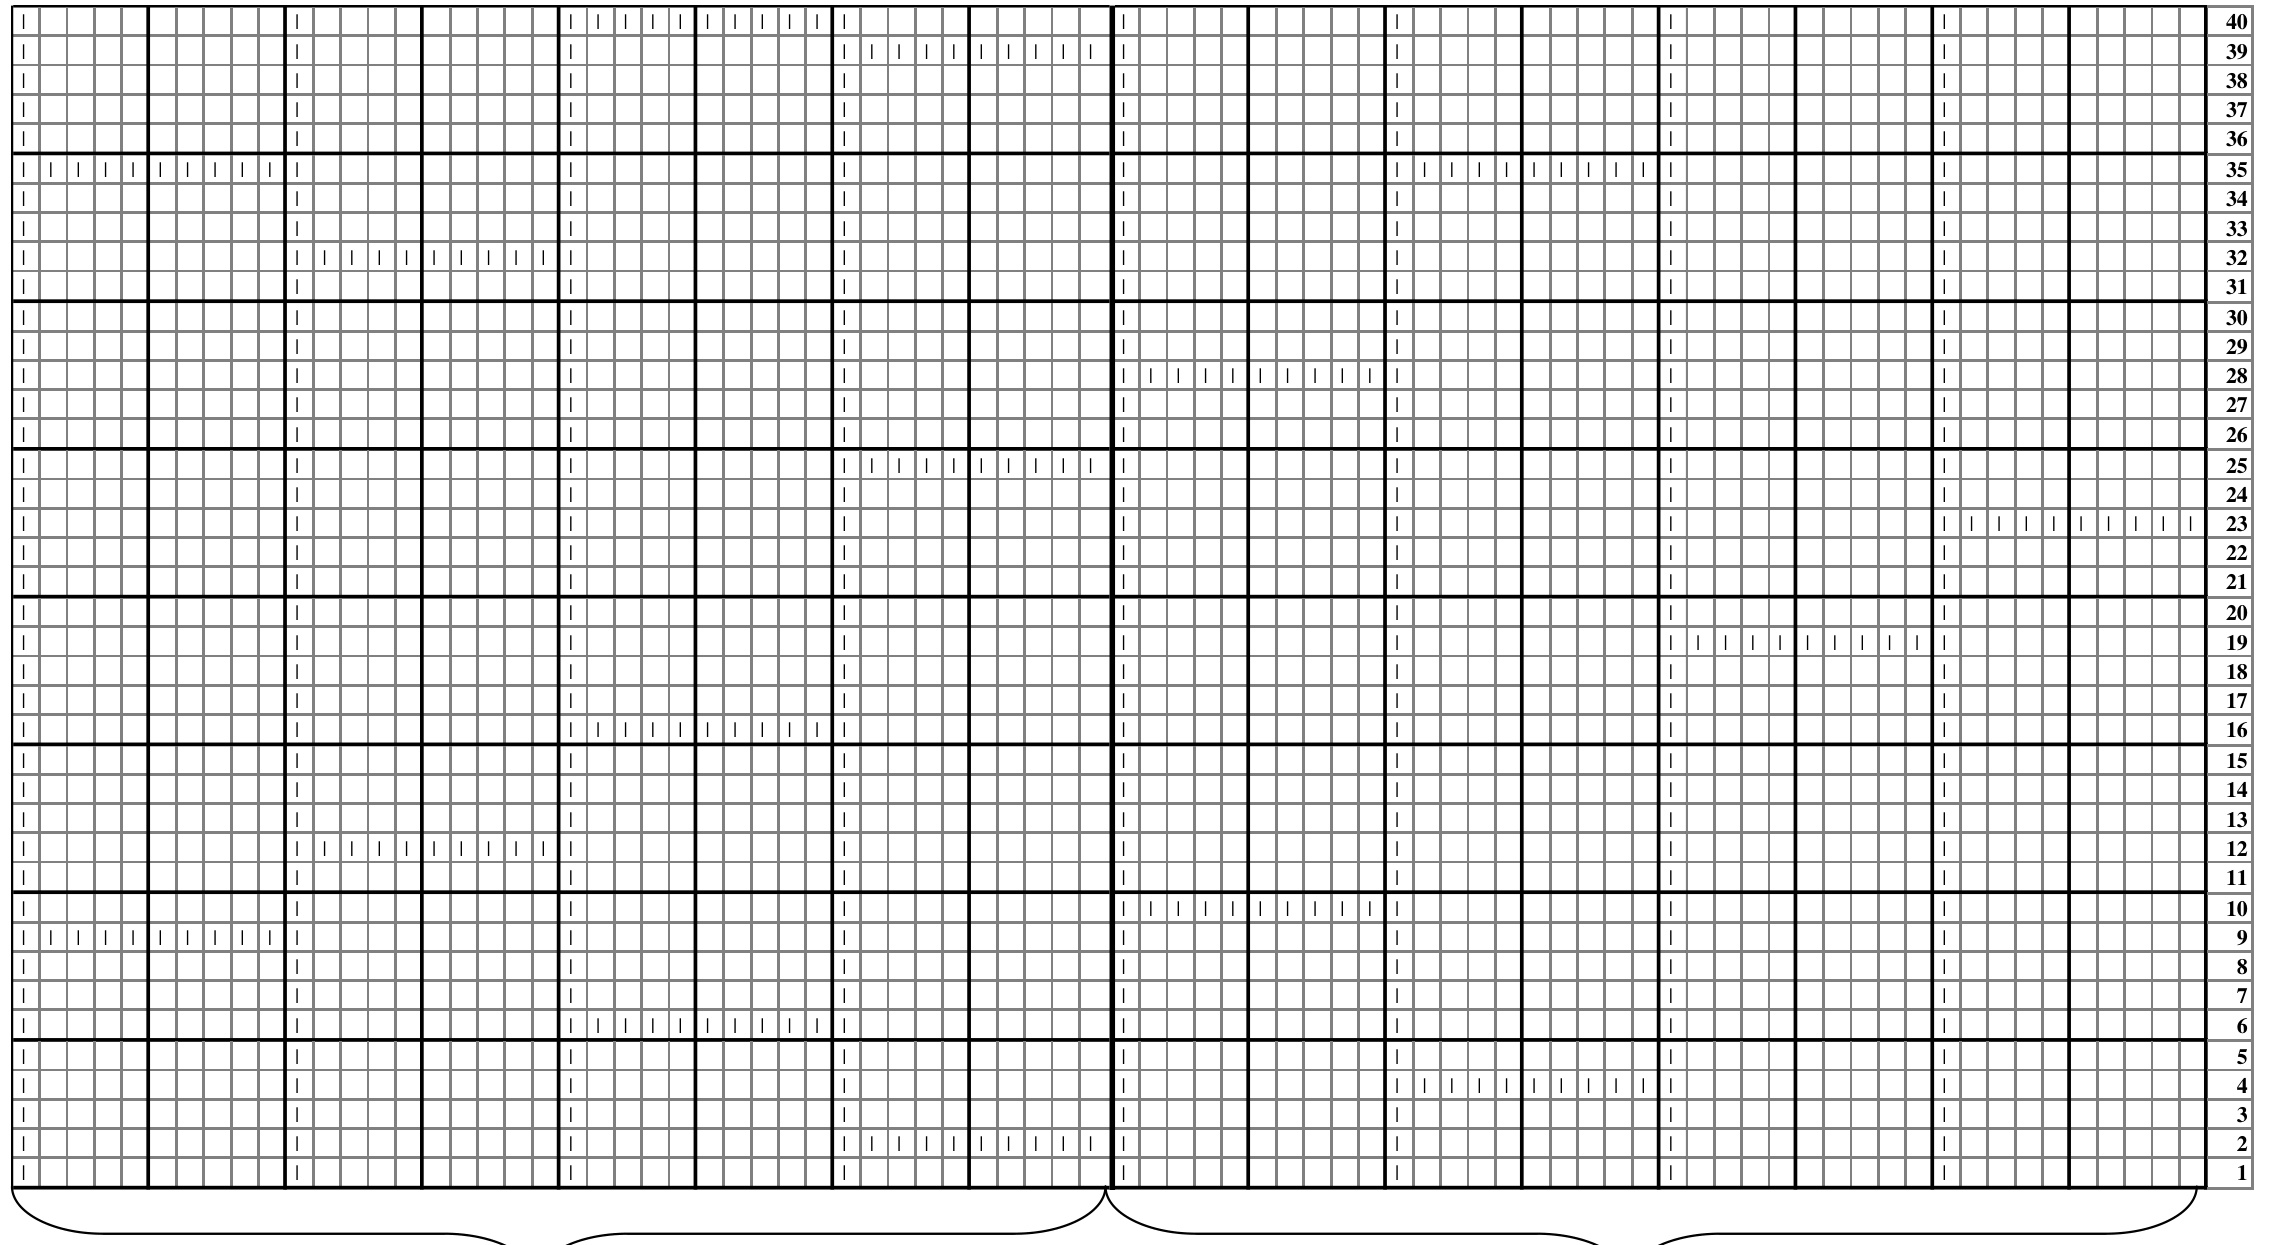
Chart A
Once ready for heel, K across instep in pattern, and with waste yarn, k across sole. Then, with working yarn, p9, k1, p9 k1, p9,k1, p9 k1. You are now ready to begin the leg of the sock.
Leg
For those who are placing horizontal lines randomly, the basic recipe for the front of the sock is this:
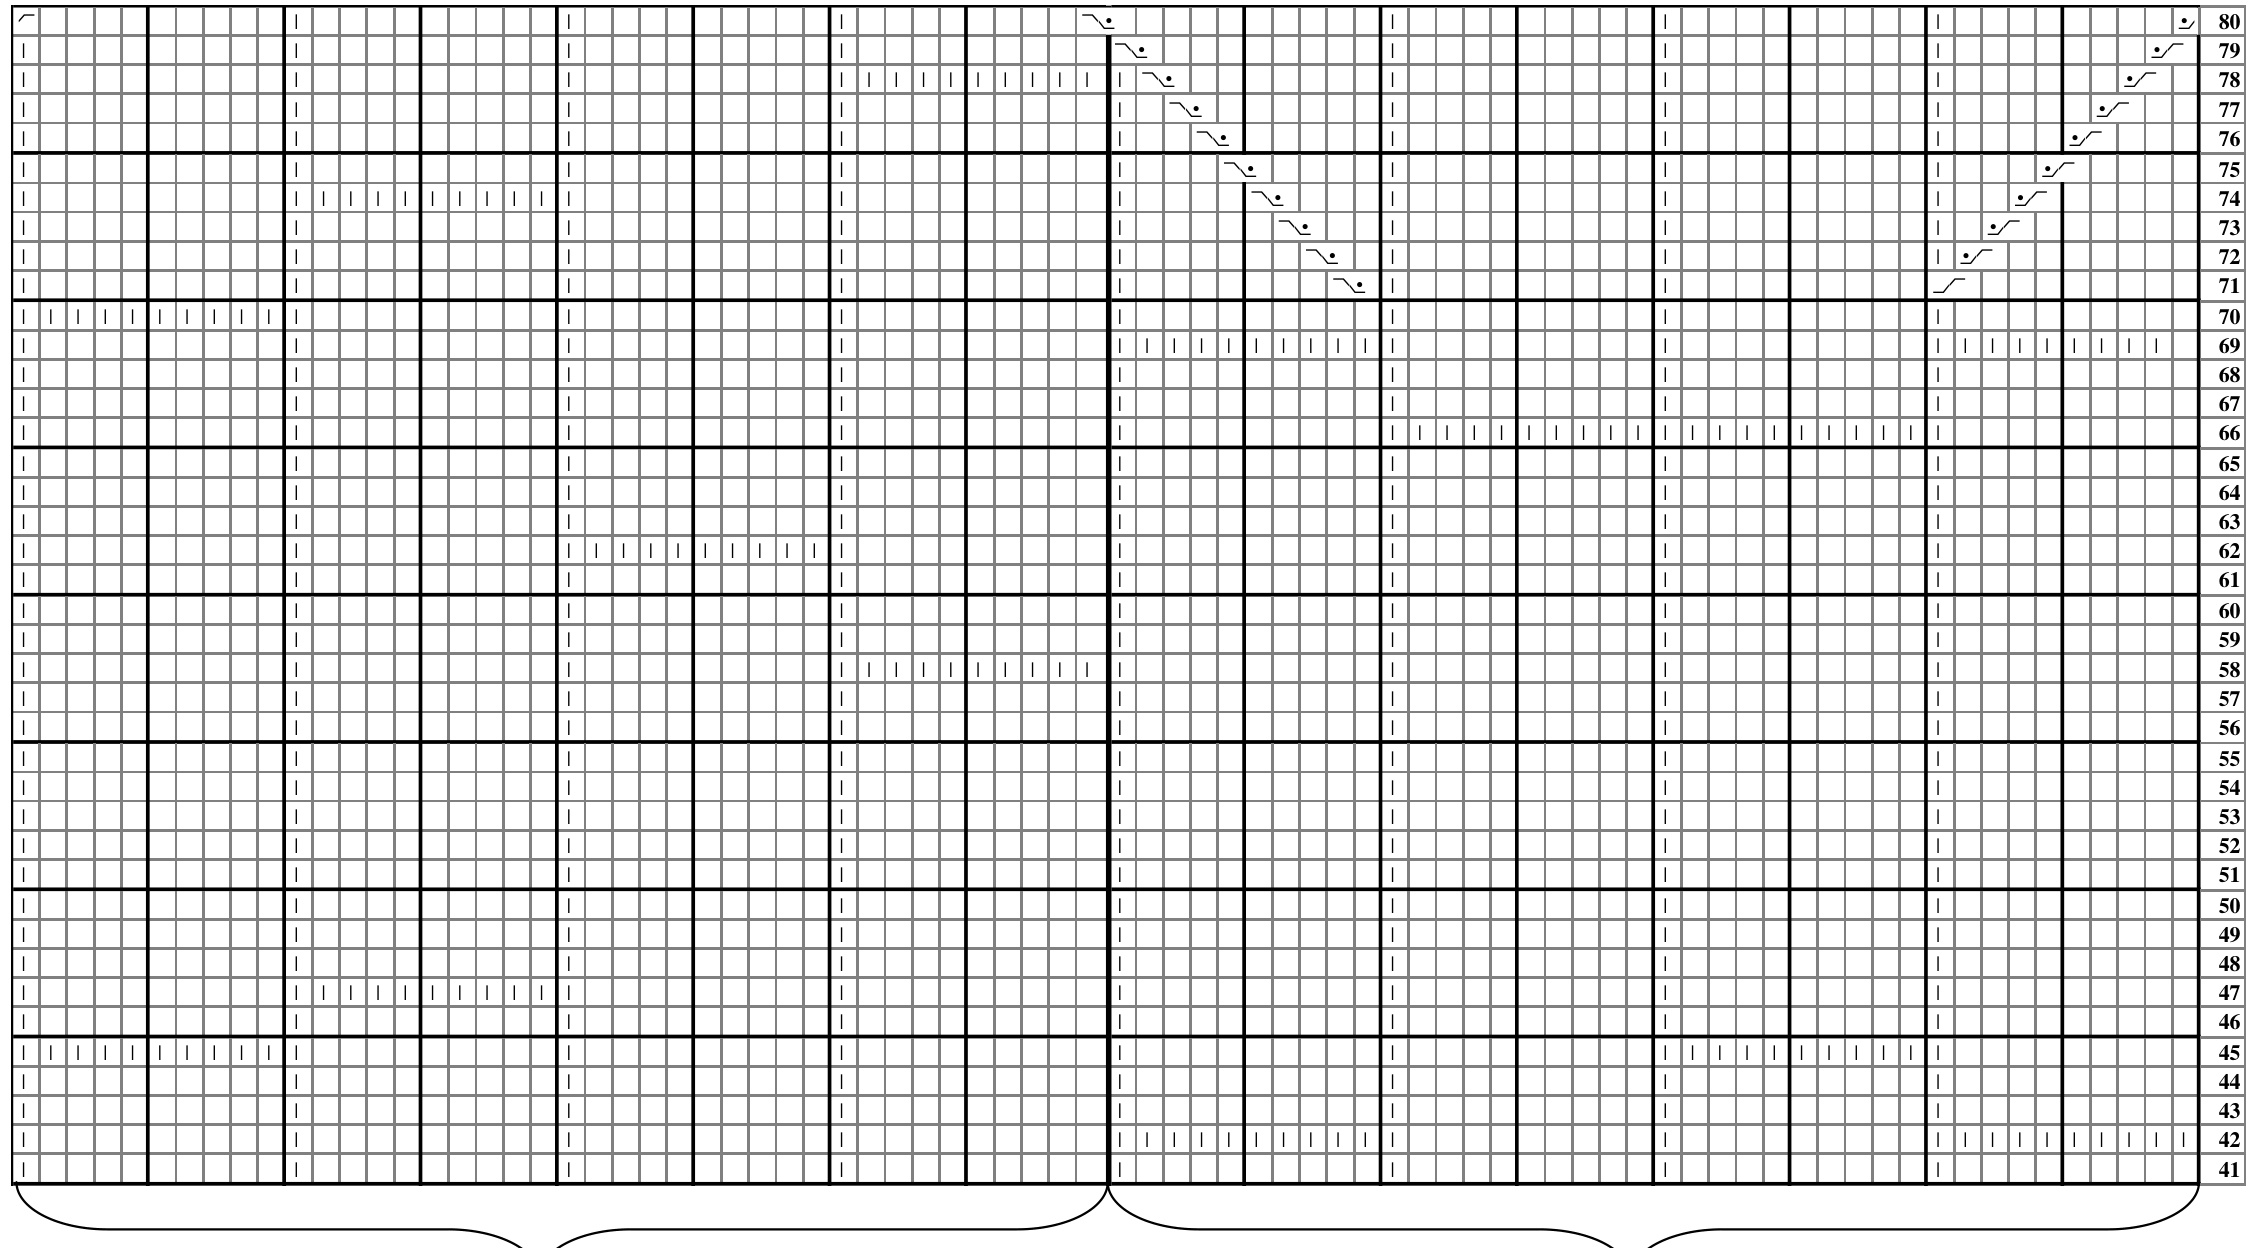
Knit about3inches above theheel,k acrossthe center two columns on the front of the leg. Knit around the leg in p9k1tbl pattern (with more horizontal bars in any column but the middle two on the front of the sock) for 4 rounds. Starting with the $5^{\mathrm{th}}$ round, begin the 1x1 cables each row, with the knit rows leading away from the two central columns and wrapping around to meet in the back. 15 rows above that, begin the second pair of 1x1 cables, and k across the two central columns. Continue the random horizontal breaks in the columns and the cables until the top cables meet. Begin cuff. For those who want the chart, see Leg Chart
Cuff
Set up round: (P4 P2tog p3 Ktbl) x8 Ribbing: (K1, p1, k3, p1, k2)x8 Repeat ribbing row 12 times, or desired length Bind off using stretchy bind-off of choice. My preferred is work 2 in pattern (slip back to left needle, k2tog, work 1 stitch in pattern) repeat.
Afterthought Heel
Remove waste yarn and place live stitches on needles. Stitches next to the leg stitches will be referred to as the "upper row"; those next to the sole stitches will be the "lower row." I joined yarn to start with the lower row, but as the pattern is mirrored, either works. Knit Round: K1 round Decrease Row: K1, spp, kto 3 stitches before end of row, k2tog, k1. Repeat with upper row. For shallower heel: Repeat just the decreases row until 24 stitches remain (12 on each side). Kitchener the remaining stitches together. For deeper heel: Alternate the decrease row with 1 row K around until 24 stitches remain (12 on each side). Kitchener as for shallower heel. Block and enjoy!
Acknowledgements
Much thanks to my valiant test knitters: Janelle Hallet, Tori Martin, and Runciblespork. Orange sock photos courtesy of Janelle Hallet.
Leg Chart (part 1)
Leg Chart (part 2)
Back of leg Leg Chart (part 3)
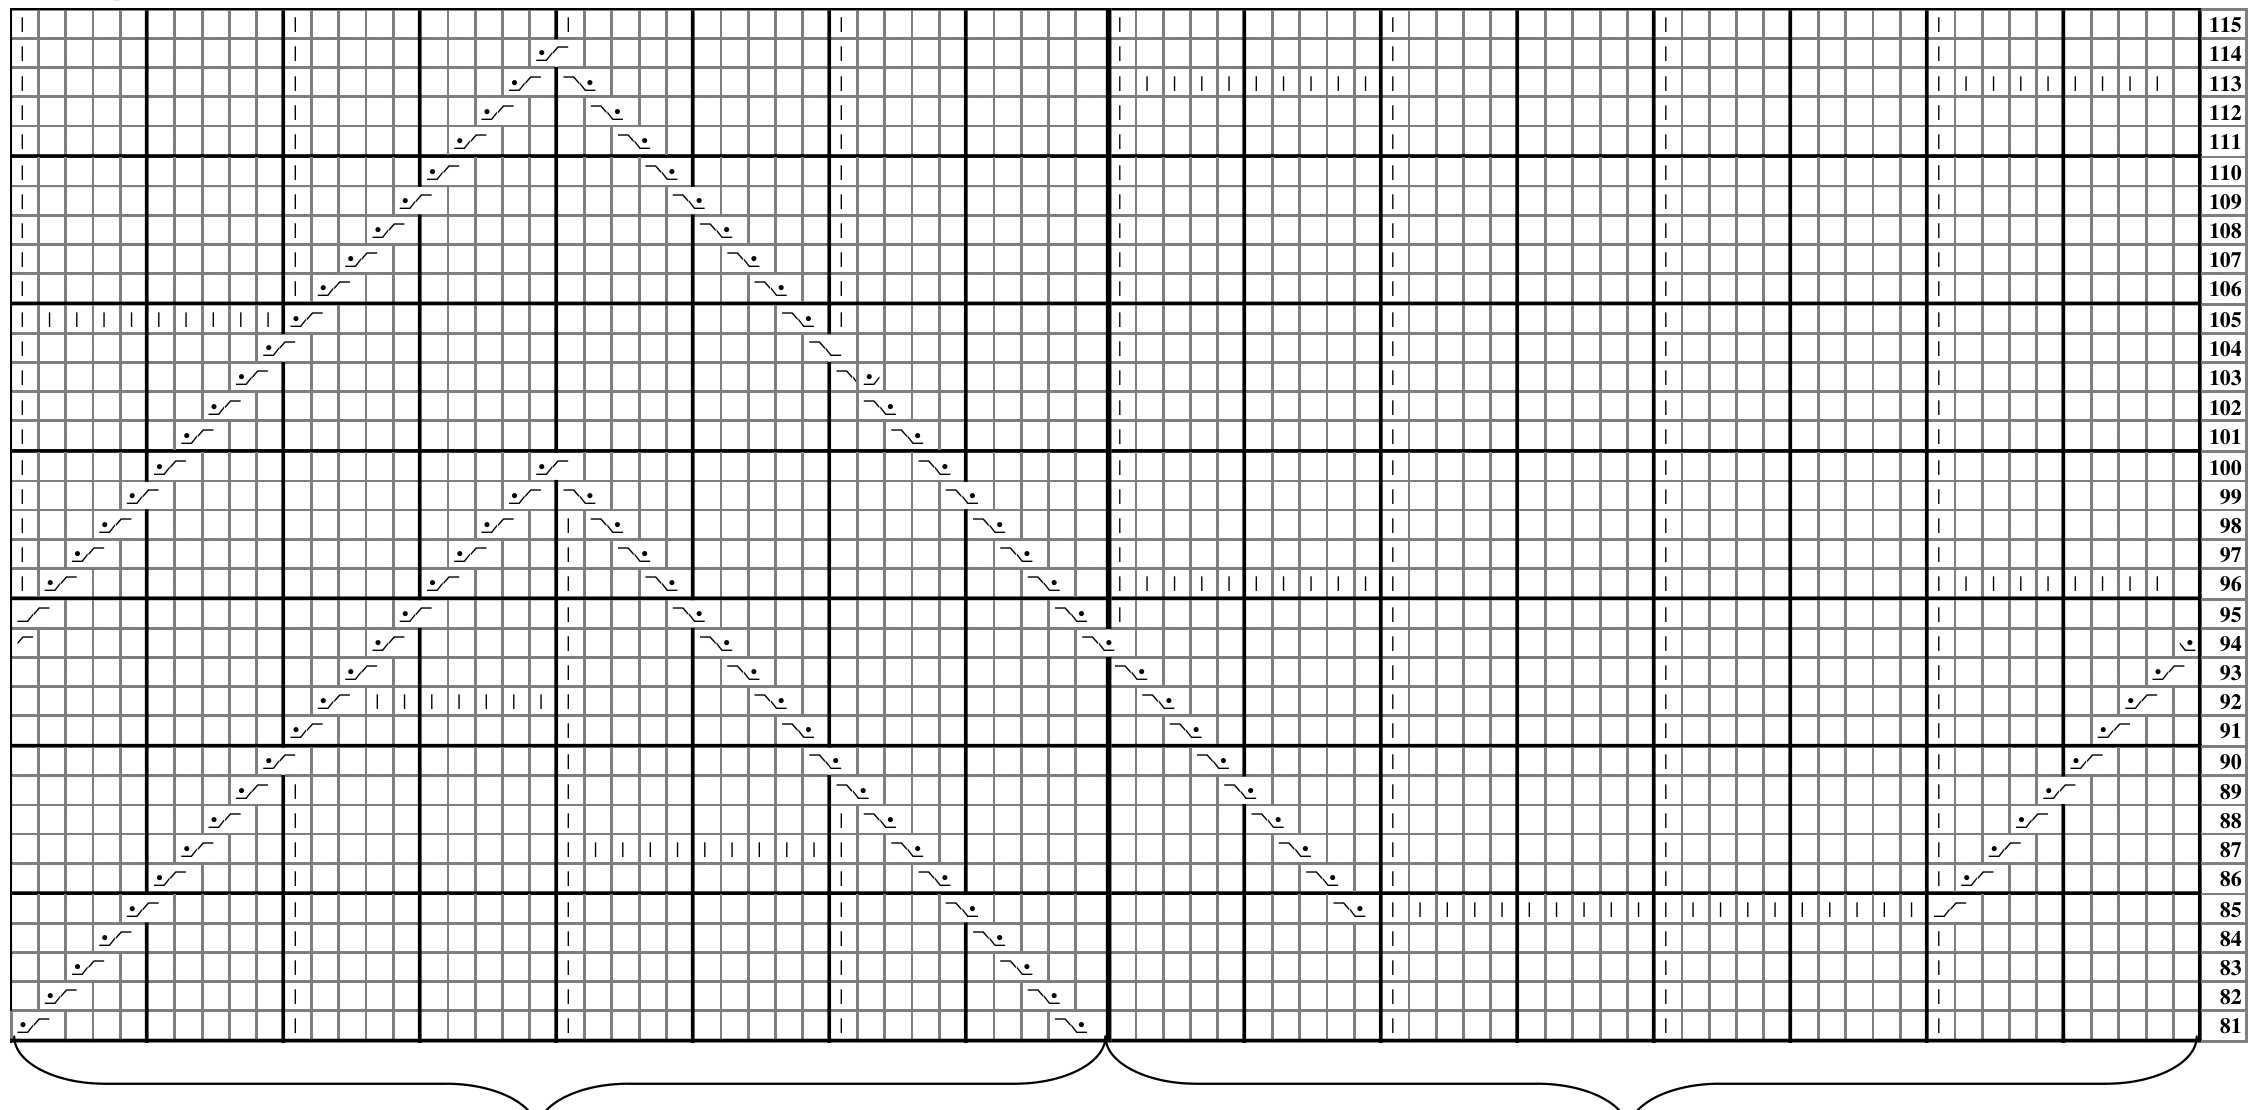
Back of leg


