PIGLET &PIGLET-BABY CROCHET PATTERN
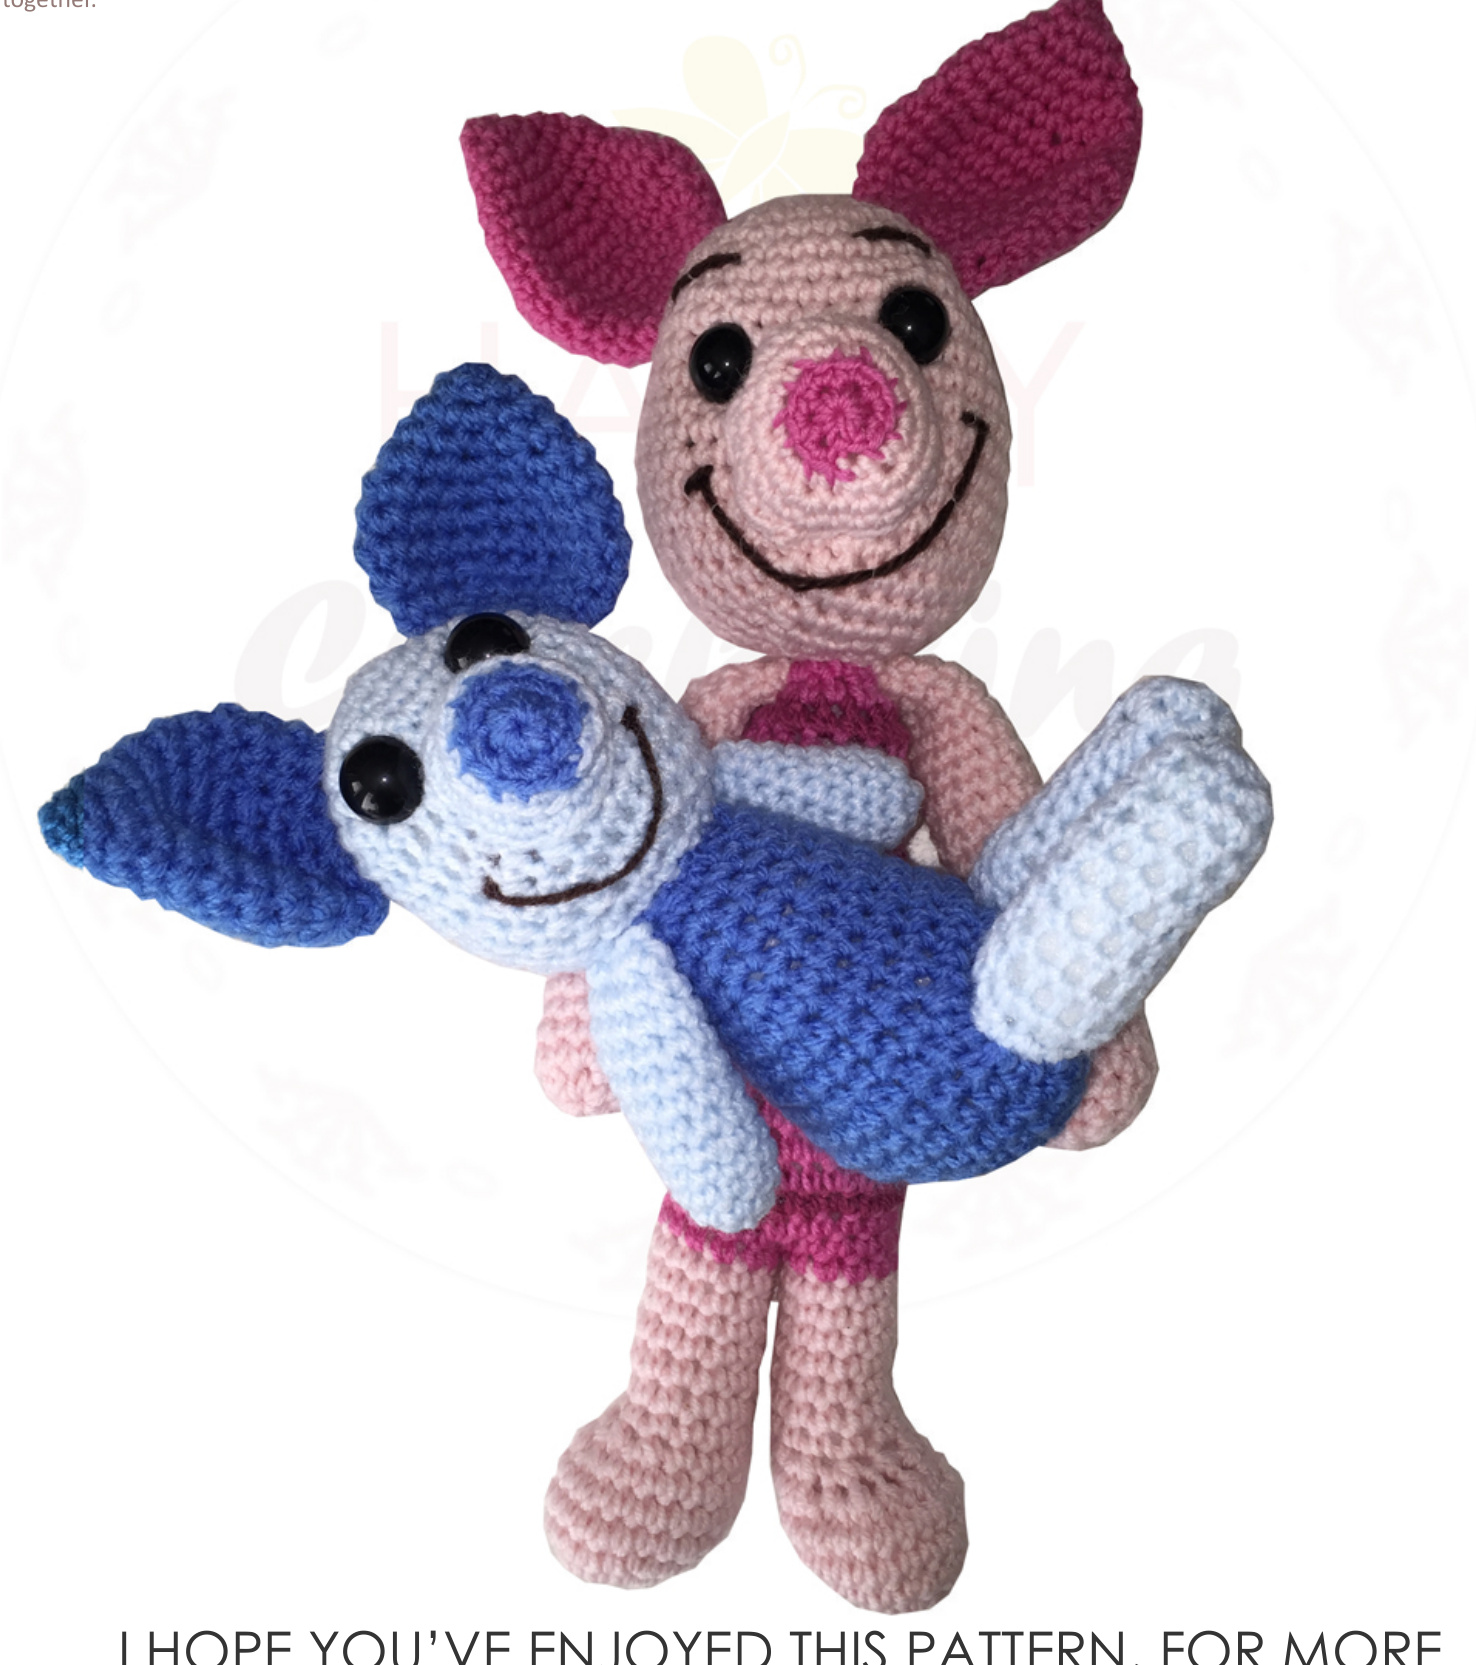
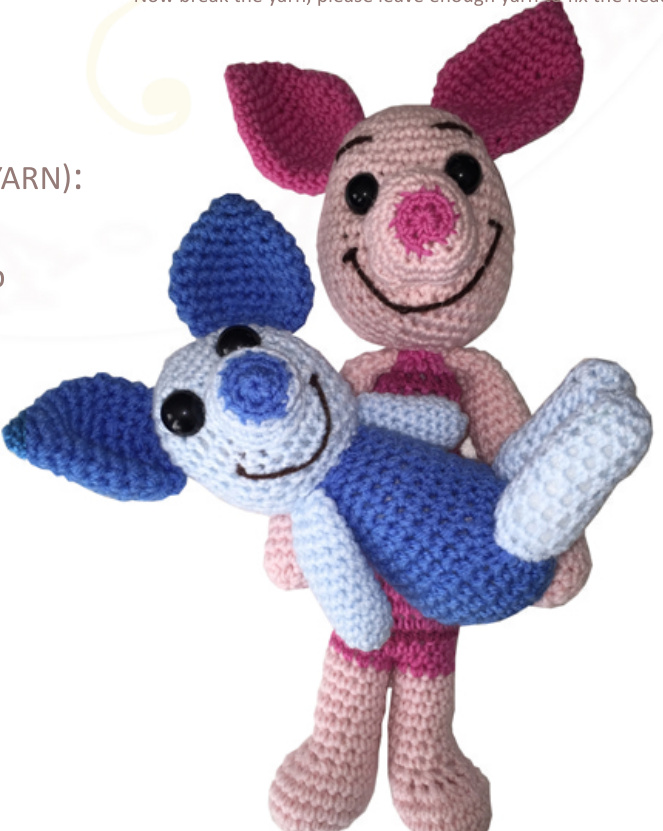
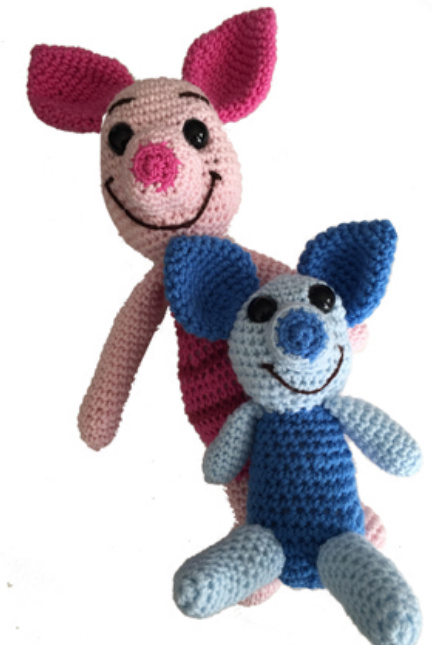
Congratulations! Now you can crochet your very own Free Piglet and Piglet Baby Toys
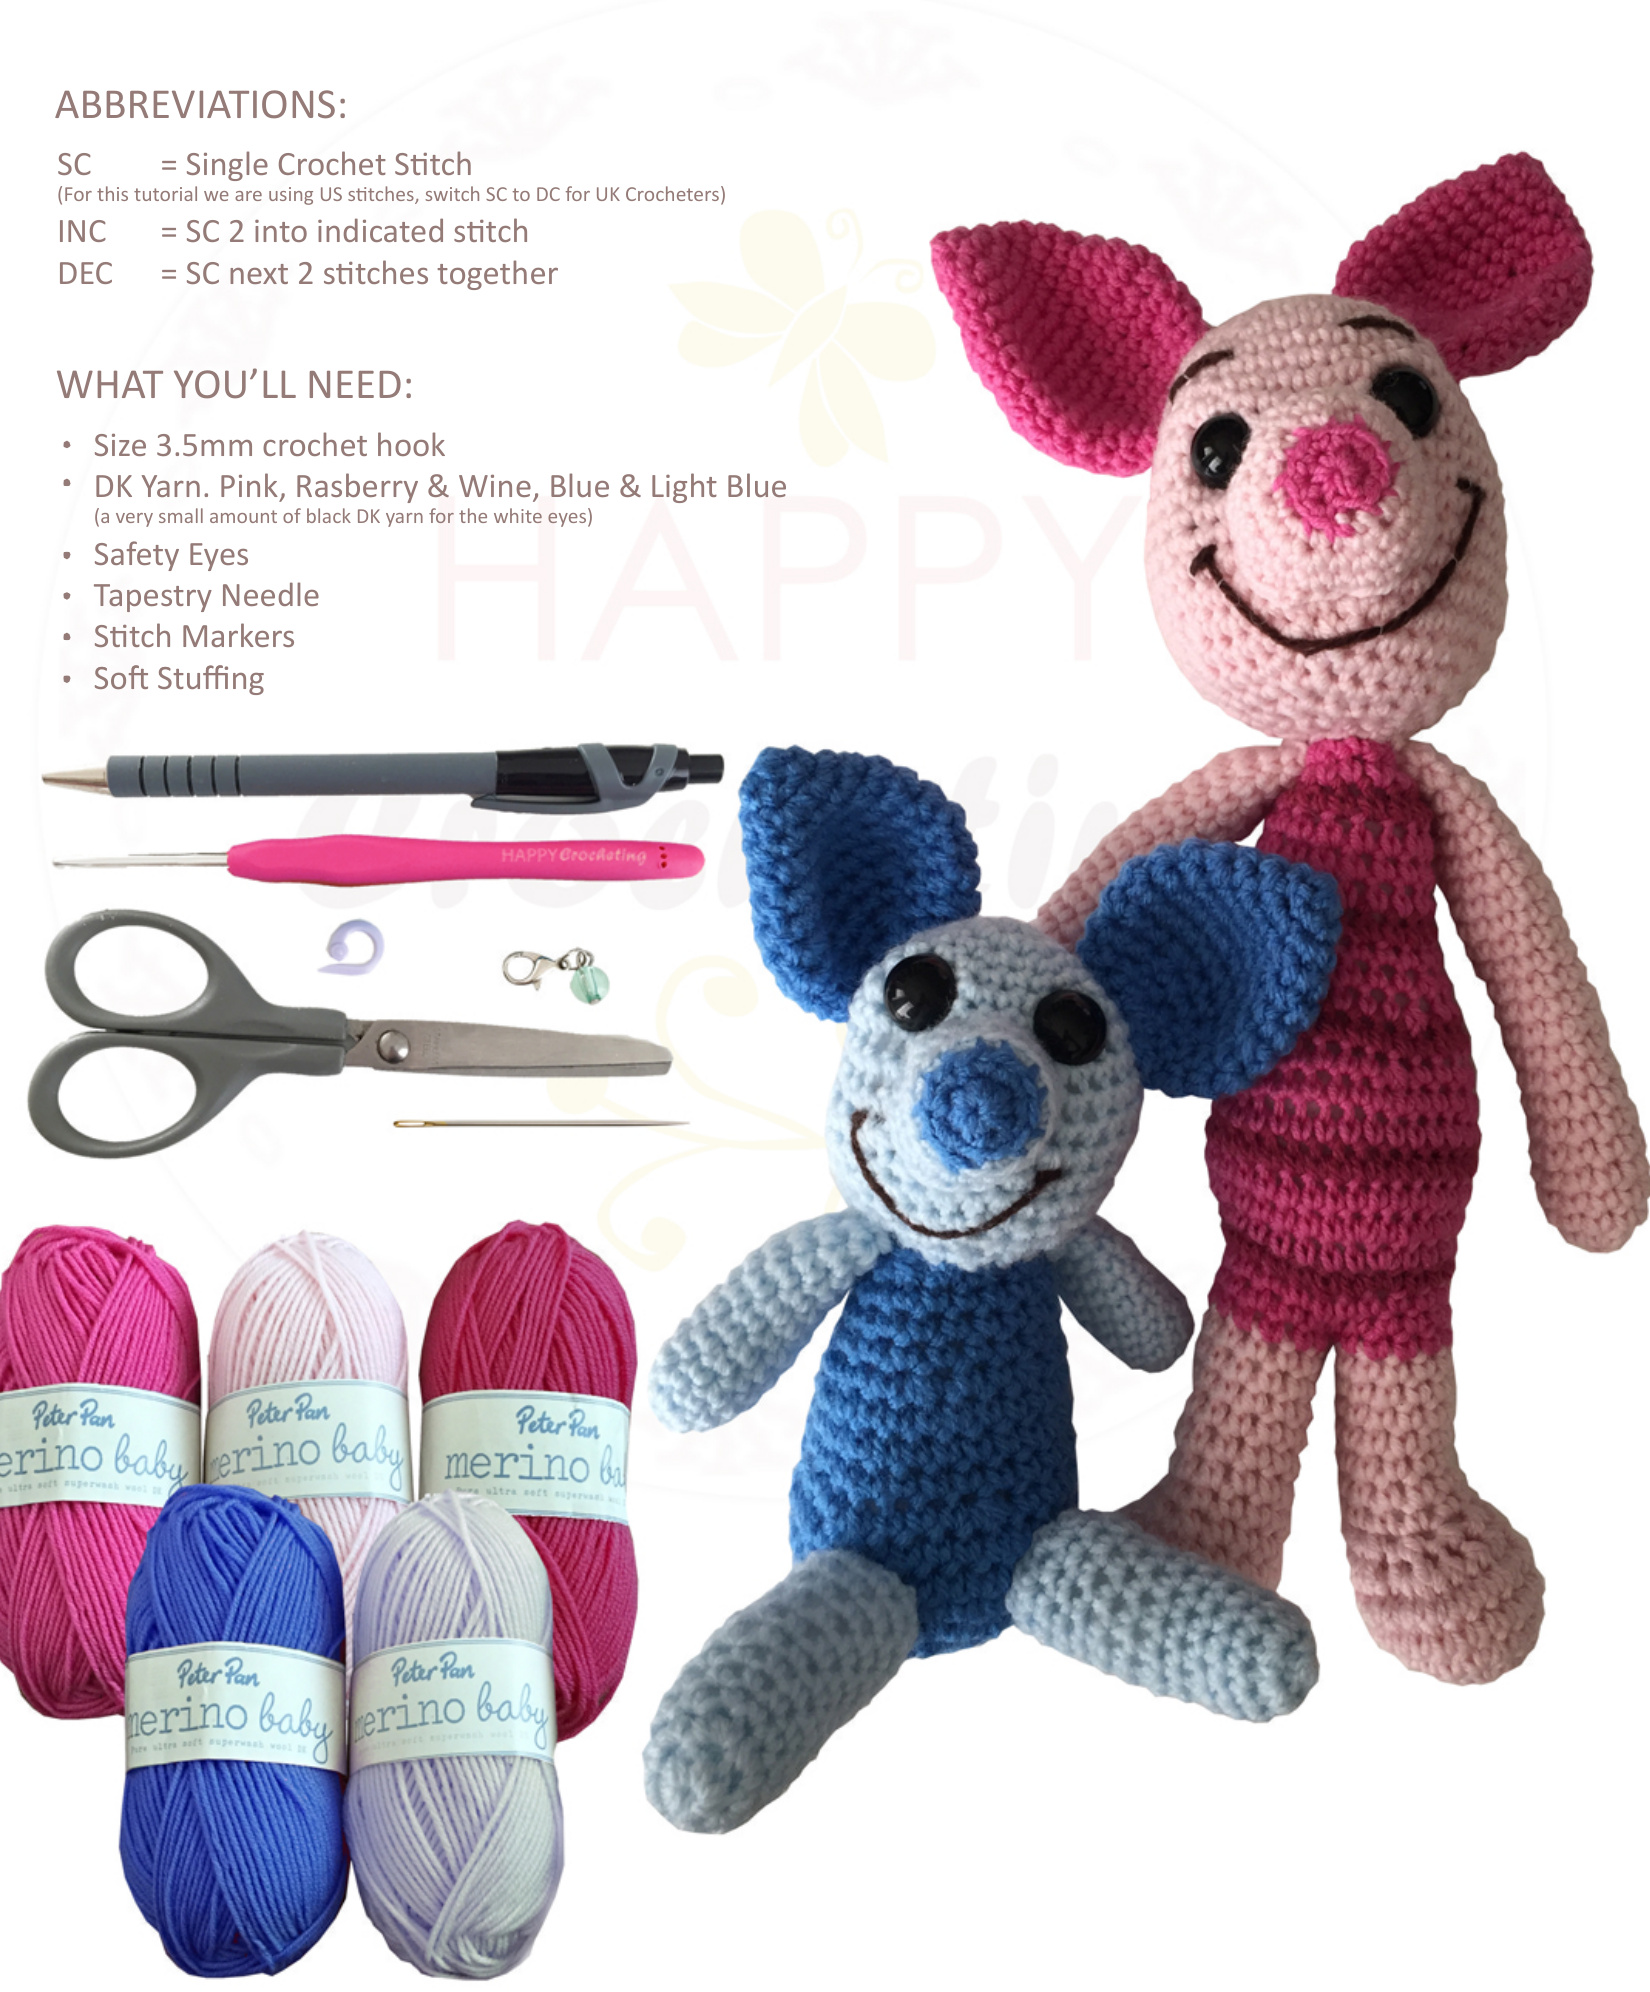
PIGLET&PIGLET-BABYCROCHET PATTERN
BIG PIGLETS HEAD (LIGHT PINK YARN):
Magic Loop R1 SC6 into loop and tighten the loop R2 [INC] 6x (12sts) R3 [SC, INC] 6x (18sts) R4 [SC2, INC] 6x (24sts) R5 [SC3, INC] 6x (30sts) R6-R7(2 rows) [SC] across (30sts) R8 [SC4, INC] 6x (36sts) R9-R10(2 rows) [SC] across (36sts) R11 [SC5, INC] 6x (42sts) R12-R13(2 rows) [SC] across (42sts) R14 [SC6, INC] 6x (48sts) R15-R16(2 rows) [SC] across (48sts) R17 [SC6, DEC] 6x (42sts) R18 [SC5, DEC] 6x (36sts) R19 [SC4, DEC] 6x (30sts) R20 [SC3, DEC] 6x (24sts) R21 [SC2, DEC] 6x (18sts) R22 [SC1, DEC] 6x (12sts)
BIG PIGLETS EARS X2 (RASBERRY YARN):
R1 SC6 into loop and tighten the loop R2 [SC] across (6sts) R3 [INC] 6x (12sts) R4 [SC] across (12sts) R5 [SC, INC] 6x (18sts) R6-R7(2 rows) [SC] across (18sts) R8 [SC2, INC] 6x (24sts) R9 [SC3, INC] 6x (30sts) R10 [SC3, DEC] 6x (24sts) R11 [SC, INC] 6x (24sts) R12 [SC2, DEC] 6x (18sts) R13-R14(2 rows) [SC] across (18sts) R15 [SC1, DEC] 6x (12sts) R16 [SC] across (12sts)
BIG PIGLET ARMS X2 (LIGHT PINK YARN):
Magic Loop R1 SC6 into loop and tighten the loop R2 [INC] 6x (12sts) R3-R25(22rows) [SC] across (12sts)
Now break the yarn, leave enough yarn to attach to body.
PIGLET &PIGLET-BABY CROCHET PATTERN
BIG PIGLETS FEET & LEGS X2 (LIGHT PINK, RASBERRY & WINE YARN):
Magic Loop black yarn R1 SC6 into loop and tighten the loop R2 [INC] 6x (12sts) R3 [SC, INC] 6x (18sts) R4 [SC2, INC] 6x (24sts) R5-R6 (2rows) [SC] across (24sts) R7 SC6 [DEC 6x] SC6 (18sts) R8 SC3 [DEC 6x] SC3 (12sts) R9-R12 (4rows) [SC] across (12sts) Switch yarn to grey R13-R16 (4rows) [SC] across (12sts)
BIG PIGLETS BODY (RASBERRY & WINE YARN):
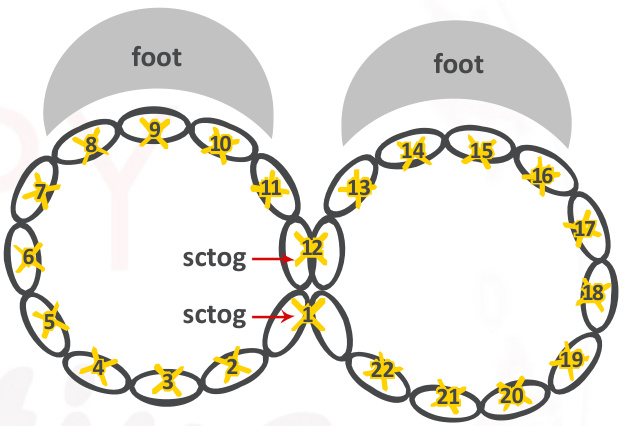
Now you have finished both the legs, add a little stuffing so they're sturdy. Place them side by side with the feet pointing forward (see diagram to right) and then sctog (single crochet together) the first leg to the 2nd leg. SC11 then sctog legs then sc around the legs(see example)=22 sts Also keep an proper eye on the stitches as its easytolosethemonthissection Tip: When crocheting the body keep stuffing firmly as you go as. Once its finished the neck is quite small and makes adding stuffing harder. The following rows are done in the Wine coloured yarn, to create the strips on Piglet R2,R6,R9,R14,R18
R1 [SC] across (22sts) R2 [SC10 INC] 2x (24sts) R3 [SC5, INC] 4x (28sts) R4 [SC6, INC] 4x (32sts) R5-R6 (2rows) [SC] across (32sts) R7 SC6 [DEC] SC16 [DEC] SC6 (30sts) R8 SC8 [DEC] SC10 [DEC] SC8 (28sts) R9 [SC12, DEC] 2x (26sts) R10 SC6 [DEC] SC10 [DEC] SC6 (24sts) R11 [SC4, DEC] 4x (20sts) R12 [SC8, DEC] 2x (18sts) R13-R20 (8rows) [SC] across (18sts)
BIG PIGLET NOSE (RASBERRY & LIGHT PINK YARN):
Magic Loop R1 SC6 into loop and tighten the loop R2 [INC] 6x (12sts) \*\*Switch to Light Pink yarn R3 [SC, INC] 6x (18sts) R4 [SC2, INC] 6x (24sts) R5-R6 (2rows) [SC] across (24sts)
Now break the yarn, leave enough yarn to attach to head.
PIGLET &PIGLET-BABY CROCHET PATTERN
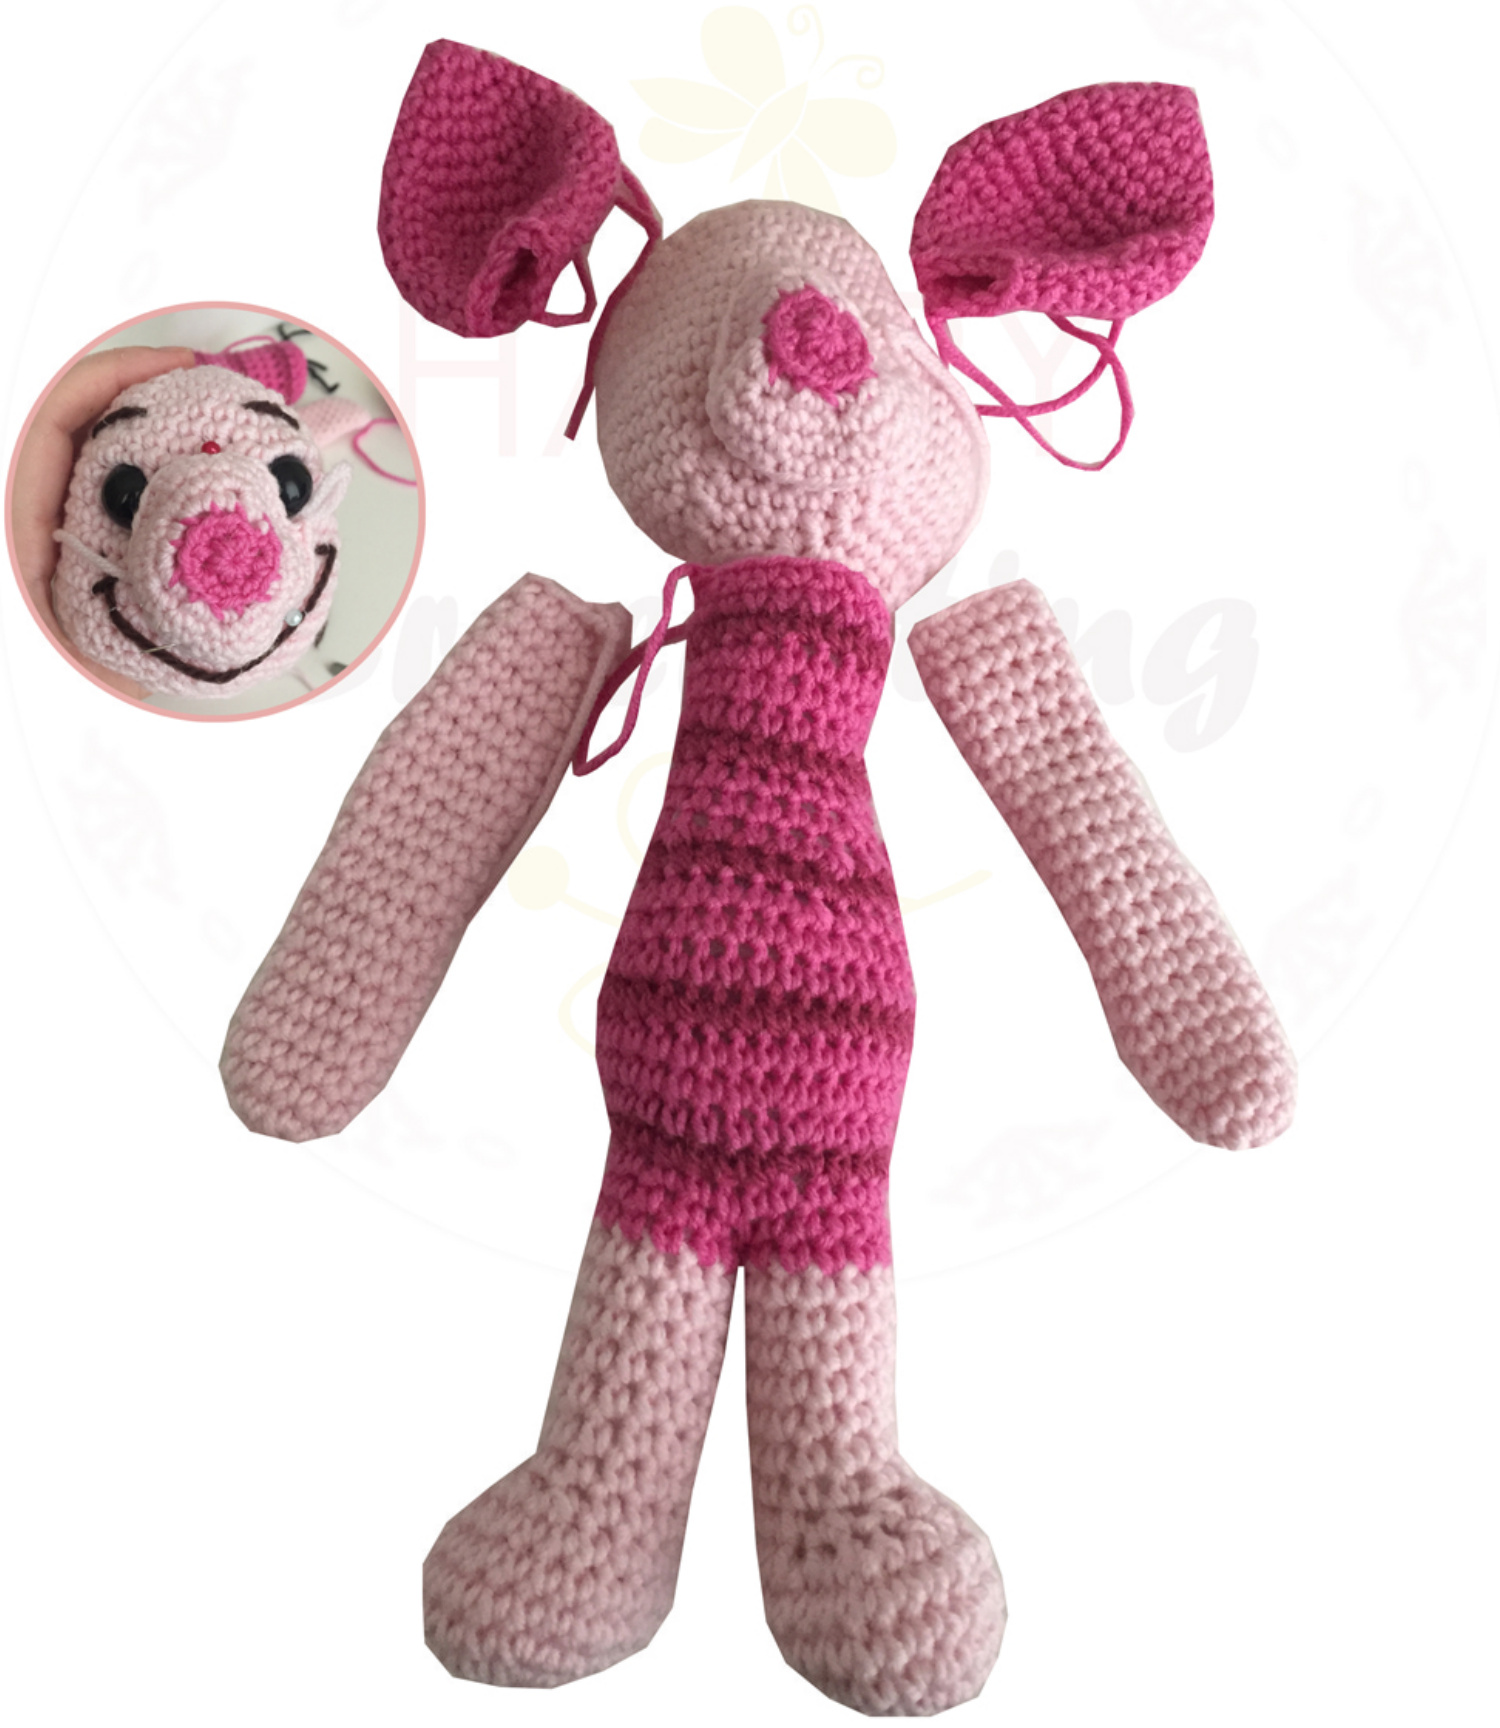
Below is what allthe pieces look like before stuffing and sewing together. I started on the head, once the safety eyes were securely attached I added a little embroidered mouth & eyebrows, and then began stuffing the head quite firmly. Then I added the ears. The rest of the body is quite easy to attach, once stuffed just use pins to secure each section into place and once you're happy attach them together.
PIGLET &PIGLET-BABY CROCHET PATTERN
LITTLE PIGLETS HEAD (LIGHT BLUE YARN):
Magic Loop
R1 SC6 into loop and tighten the loop R2 [INC] 6x (12sts) R3 [SC, INC] 6x (18sts) R4 [SC] across (18sts) R5 [SC2, INC] 6x (24sts) R6 [SC] across (24sts) R7 [SC3, INC] 6x (30sts) R8-R10(3 rows) [SC] acr0ss (30sts) R11 [SC4, INC] 6x (36sts) R12 [SC4, DEC] 6x (30sts) R13 [SC] across (30sts) R14 [SC3, DEC] 6x (24sts) R15 [SC] across (24sts) R16 [SC2, DEC] 6x (18sts) R17 [SC1, DEC] 6x (12sts) Now break the yarn, leave enough yarn to attach to the body. \* Tip: wait until you have attached the safety eyes before stuffing.
LITTLE PIGLETS EARS X2 (DARK BLUE YARN):
R1 SC6 into loop and tighten the loop R2 [SC] across (6sts) R3 [INC] 6x(12sts) R4 [SC] across (12sts) R5 [SC, INC] 6x (18sts) R6-R7(2 rows) [SC] across (18sts) R8 [SC2, INC] 6x (24sts) R9 [SC] across (24sts) R10 [SC2, DEC] 6x (18sts) R11-R12(2 rows) [SC] across (18sts) R13 [SC1, DEC] 6x (12sts) R14 [SC] across (12sts)
LITTLEPIGLETARMS&LEGSX4(LIGHT BLUE YARN):
LITTLE PIGLET NOSE (DARK BLUE & LIGHT BLUE YARN):
R1 SC6 into loop and tighten the loop R2 [INC] 6x (12sts) R3-R14(12rows) [SC] across (12sts) Magic Loop Magic Loop R1 SC6 into loop and tighten the loop R2 [INC] 6x (12sts) \*\*Switch to Light Blue yarn R3 [SC, INC] 6x (18sts) R4 [SC2, INC] 6x (24sts) R5-R6 (2rows) [SC] across (24sts)
Now break the yarn, leave enough yarn to attach to head. Now break the yarn, leave enough yarn to attach to head.
LITTLE PIGLETS BODY (DARK BLUE YARN):
Magic Loop
Now break the yarn. R1 SC6 into loop and tighten the loop R2 [INC] 6x (12sts) R3 [SC, INC] 6x (18sts) R4 [SC2, INC] 6x (24sts) R5 [SC3, INC] 6x (30sts) R6-R8(3rows) [SC] across (30sts) R9 [SC3, DEC] 6x (24sts) R10-R12(3rows) [SC] across (24sts) R13 [SC2, DEC] 6x (18sts) R14-R16(3rows) [SC] across (18sts) R17 [SC1, DEC] 6x (12sts)
PIGLET & PIGLET-BABY CROCHET PATTERN
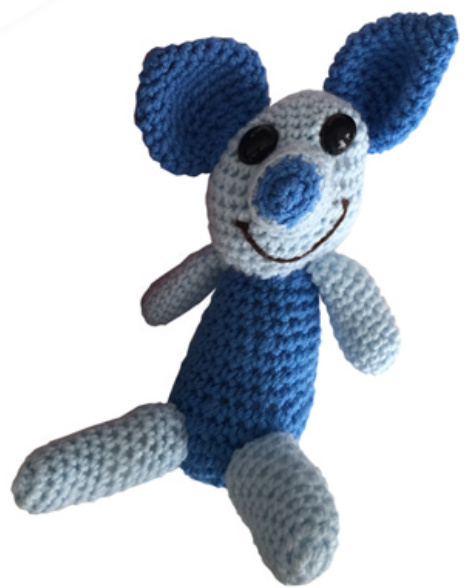
It's just like the big piglet, I started onthe head, once the safety eyes were securely attached I added a little embroidered mouth and then began stuffing the head quite firmly. Then I added the ears. The rest of the body is quite easy to attach, once stuffed just use pins to secure each section into place and once you're happy attach them together.