Klamath Pattern by Sarah Kukuchek
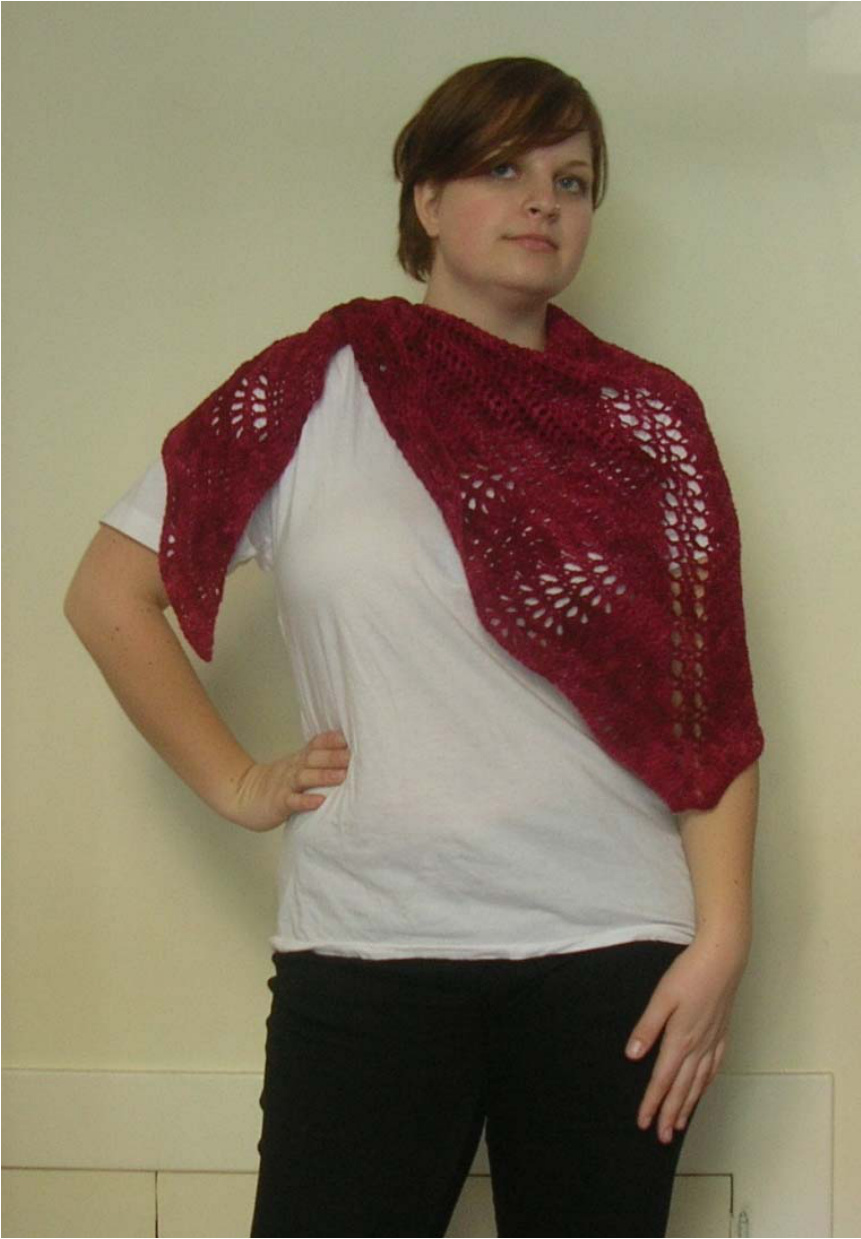
This easy crocheted shawl was inspired by the popular Multnomah Shawl by Kate Flagg. My brother, Liam, (lemurlemur on Ravelry) was looking for a shawl to make his friend and liked this one, but he is not much of a knitter. Inspired, I decided to design a shawl with some of the same features, but in crochet. It is named after a different county in Oregon, Klamath County. h Kukuchek 2010. Please do not redistribute or sell without my permissiol Page 1 of 14
Pattern Notes
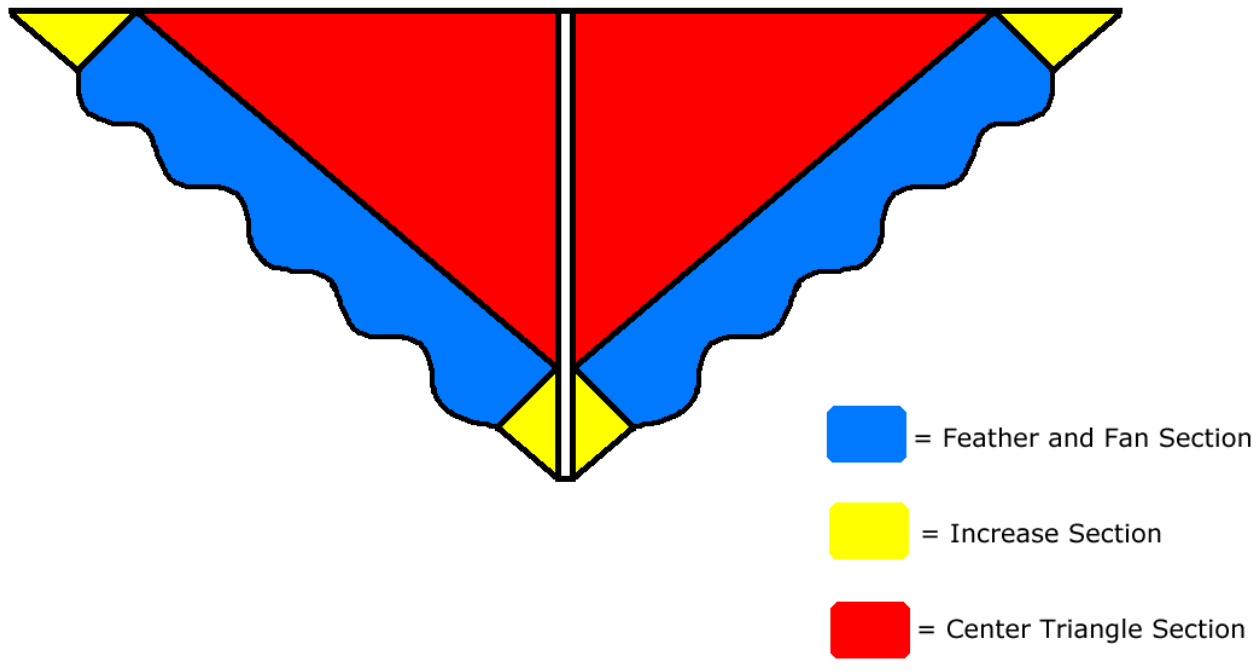
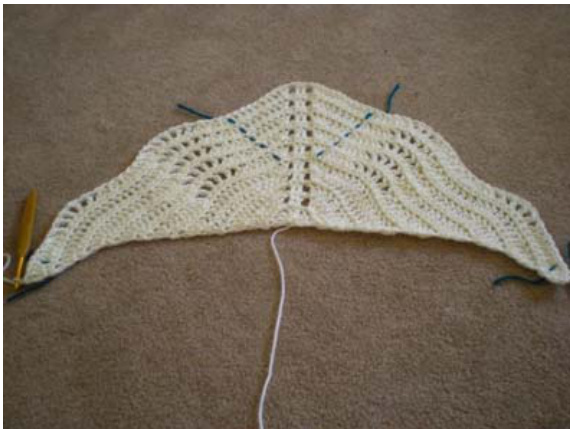
- Instead of giving a gauge and a few pattern sizes, I have listed the sizes as A through H, because this is such a versatile pattern that it can be made in many different weights and gauges of yarn depending on thedesired look. - Start making the shawl and work the double crochet section until it looks large enough, stopping at the closest size, then work the Feather and Fan section. The same size can yield different size shawls depending on what yarn and gauge it is made of. - The red version was made in sock weight yarn worked at a very loose gauge and I have also worked a number of these shawls in other gauges and sizes all with different effects. - Klamath features a similar construction to the Multnomah shawl, starting at the top and increasing to the lower edges, working in double crochet. When the lace section is worked, the lace repeats are centered on each half of the shawl and the stitches outside the repeats include the increases to maintain the shawl shape. - This shawl is slightly batwing-shaped, but this can either be exaggerated or downplayed in blocking. -There are directions for using markers in the lace section of the pattern. It is easiest to use lengths of waste yarn and lay them between the stitches at the specified points, and on the following rows, move the end of the marker to the opposite side of the work, so it is woven up through the work and can be easily removed later. - There are charts and a schematic to help clarify the instructions. [] at end of row indicate stitch counts after completing rows
Gauge
Exact gauge is not crucial for this pattern. What is important is that you work at a looser than normal gauge for the weight of yarn you are using, so the shawl will have drape. Most unevenness of stitches can be improved during blocking so don't be afraid to use a very large hook! h Kukuchek 2010. Please do not redistribute or sell without my permissiol Page 2 of 14
Pattern
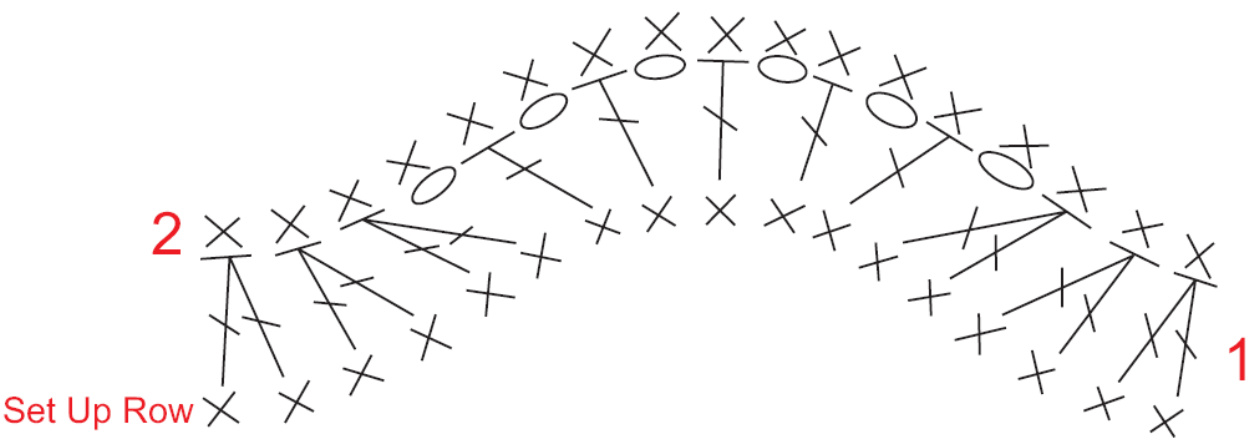
Feather and Fan Stitch Pattern: (multiple of 17 sts) Row 1: \*(Dc2tog) 3 times, [ch 1, dc in next st] 5 times, ch 1, (dc2tog) 3 times, \* repeat from \* to end. Row 2: Sc in every st to end. Instructions : Sizes: A (B, C, D, E,F,G, H) Center Triangle Working into a magic ring, Row 1: Ch 3, dc 2, ch 1, dc 2, ch 1, dc 3, tighten magic ring [8 dc]; Row 2: Ch 3 and turn (the ch 3 turning chain counts as a dc throughout), 2 dc in same dc as base of turning ch (2 sts incr.), dc in next dc, 3 dc in next dc, ch 1, dc in next 2 dc, ch 1, 3 dc in next dc, dc in next dc, 3 dc in top of turning chain [16 dc]; Row 3: Ch 3 and turn, 2 dc in same dc as base of turning ch (2 sts incr.), dc in each until 1 st remains before ch-1 space, 3 dc in next dc, ch 1, skip ch-1 sp, dc in next 2 dc, ch 1, skip ch-1 sp, 3 dc in next dc, dc in each dc until 1 st remains, 3 dc in top of turning ch [24 dc]; Rows 4 through 5 (10, 14, 18, 22, 27, 31, 35): Repeat Row 3 [19 (39, 55, 71, 87, 107, 123, 139] dc on each side, and 2 dc in center column]; Note: In this center section, you are increasing 2 sts at both outside edges and inside edges, 8 sts total over the whole row.
FeatherandFanBorder
Row 6 (11, 15, 19, 23, 28, 32, 36): Ch 1, 3 sc in first st, sc 0 (2, 1, 1, 0, 2, 1, 1) place marker between this and next st, sc across until 1 (2, 2, 1, 1, 2, 2, 1) st(s) remain before ch-1 space at center of shawl, pm, sc 1 (2, 2, 1, 1, 2, 2, 1), ch 1, skip ch-1 space from previous row, h Kukuchek 2010. Please do not redistribute or sell without my permissiol Page 3 of 14 sc in next 2 dcs, ch 1, skip ch-1 space, sc 1 (2, 2, 1, 1, 2, 2, 1), pm, sc across until 1 (3, 2, 2, 1, 3, 2, 2) st(s) remain before end of row, pm, sc 0 (2, 1,1,0, 2, 1,1), 3 sc in last st [21 (41, 57,73, 89, 109, 125, 141) sc on each side and 2 sc in center column]; Note: If your size says to sc 0 sts, this means to just skip to the next instruction. It is used to keep size directions clear. Row 7 (12, 16, 20, 24, 29, 33, 37): Ch 3 and turn, 2 dc in same sc as base of turning ch (2 sts incr.), dc in each sc to first marker, work Feather and Fan pattern (starting with row 1) across to the second marker, dc to last sc before center column, 3 dc in next sc, ch 1, dc in next 2 sts, ch 1, 3 dc in next sc, dc across to next marker, work Feather and Fan pattern across to next marker, dc to last sc, 3 dc in last sc [25, 45, 61, 77, 93, 113, 129, 145) sts on each side and 2 dc in center column]; Row 8 (13, 17, 21, 25, 30, 34, 38): Ch 1, 3 sc in first st, sc in each st across to marker, work row 2 of Feather and Fan pattern to next marker, sc in each dc st across to ch-1 sp, ch 1, skip ch-1 sp, sc in each of next 2 stitches, ch 1, skip ch-1 sp, sc in each st to next marker, work row 2 of Feather and Fan stitch pattern to next marker, sc until 1 st remains before end of row, 3 sc in next st [27 (47, 63, 79, 95, 115, 131, 147) sts on each side and 2 sc in center column]; Note: In the dc rows, you will increase at the same rate as the center triangle, 8 total sts per row. In the sc rows, you will increase 2 sts at each outside edge, and none on the inside edges, totaling 4 sts increased in the sc rows. Repeat last 2 rows to form feather and fan section of shawl. When the number of stitches outside the marker is more than 17, you can add another feather and fan repeat and replace marker outside feather and fan section. Work as many rows in this section as desired, ending on a scrow. Fasten off. Weave in ends and block.
Abbreviations
ch= chain sc= single crochet dc= double crochet dc2tog= double crochet 2 together st(s)= stitch(es) incr= increase pm= place marker (see pattern notes)
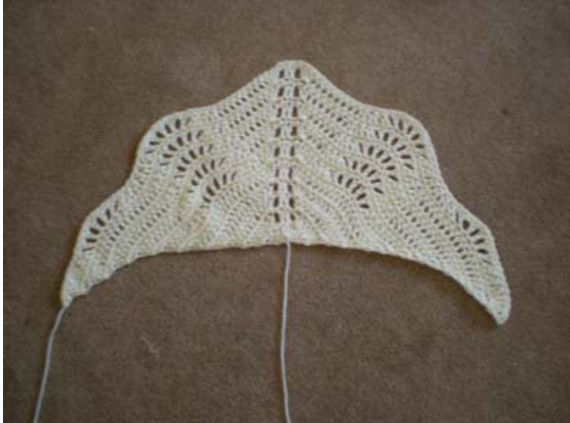
Schematic
Charts
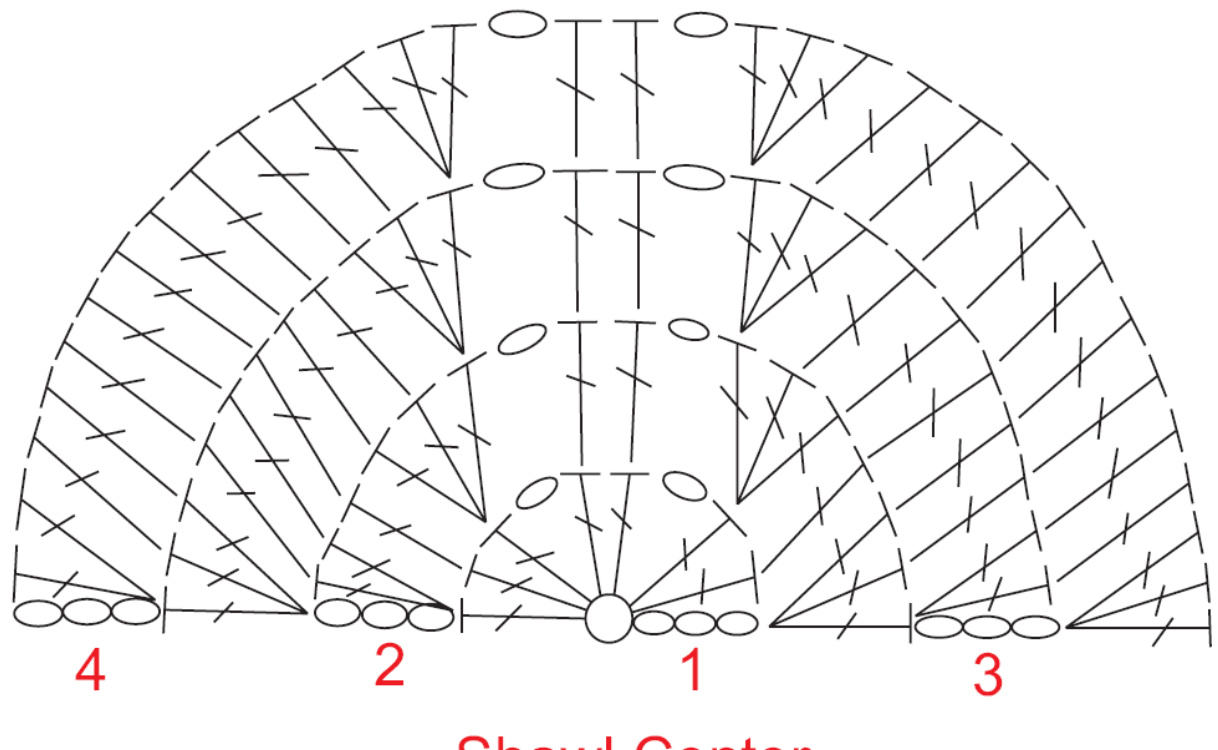
Feather and Fan Stitch Pattern Repeat Multiple of 17 sts @ Sarah Kukuchek 2010. Please do not redistribute or sell without my permission. Page6of 14
Photo Tutorial
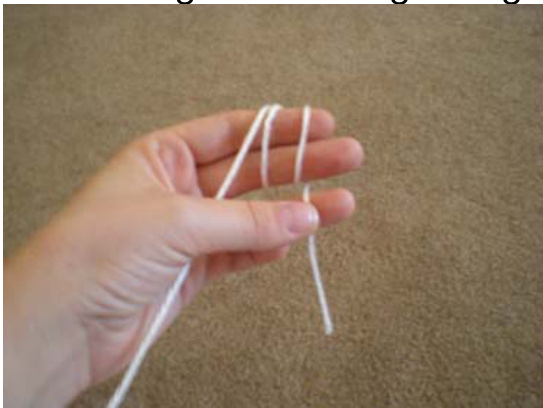
Tutorial shows me making a shawl in size A. 1. Starting with a magic ring:
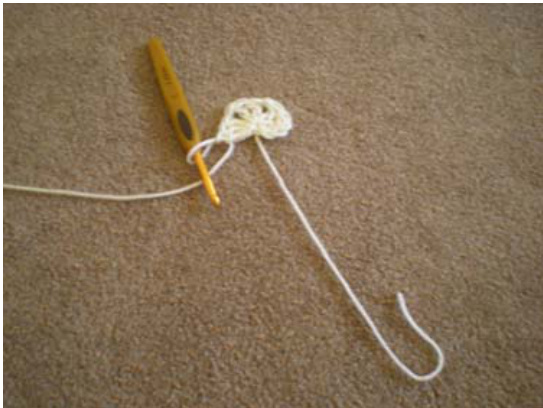
3. After tightening ring:
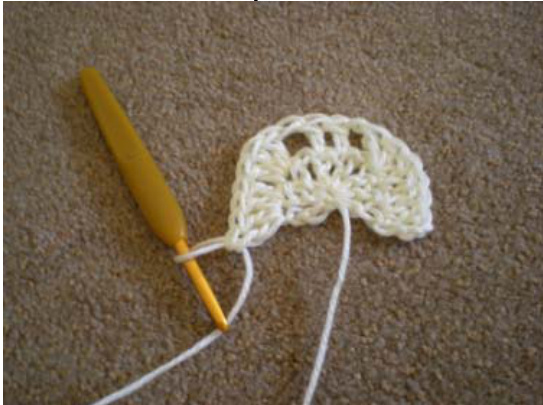
5. Row 2 completed:
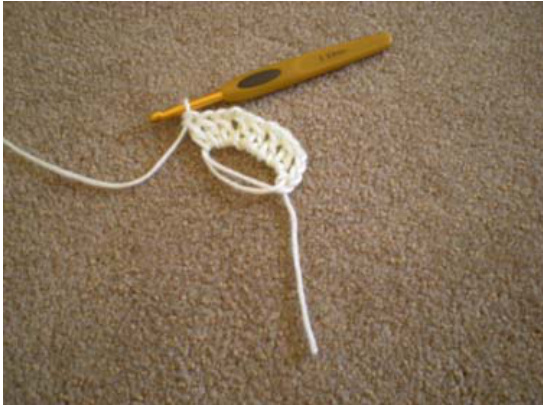
2. First row worked into the ring:
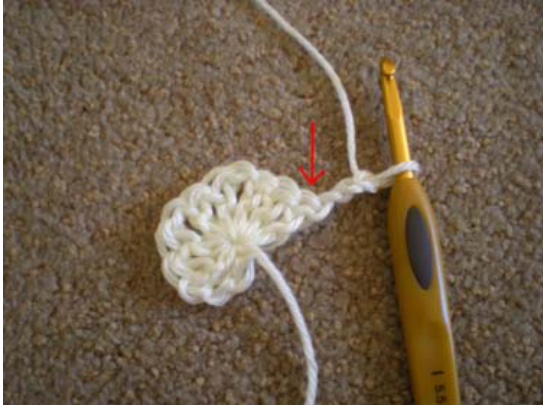
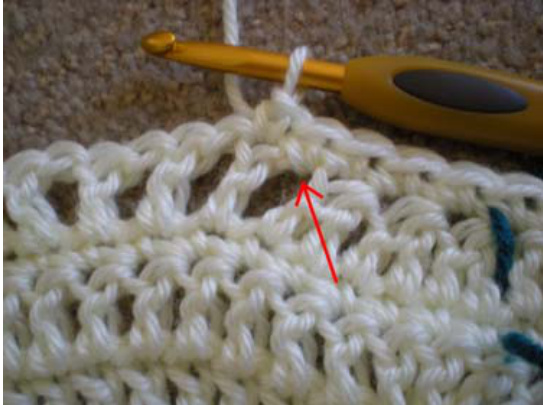
4. Arrow indicates the base of turning chain stitch:
6. Rows 1-5 completed (Size A):
h Kukuchek 2010. Please do not redistribute or sell without my permissiol
7. Working row 6 (first sc row) :
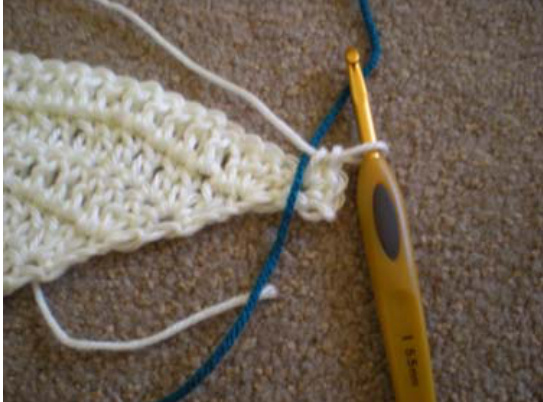
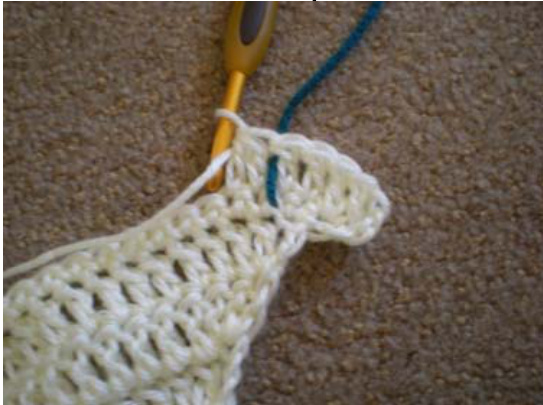
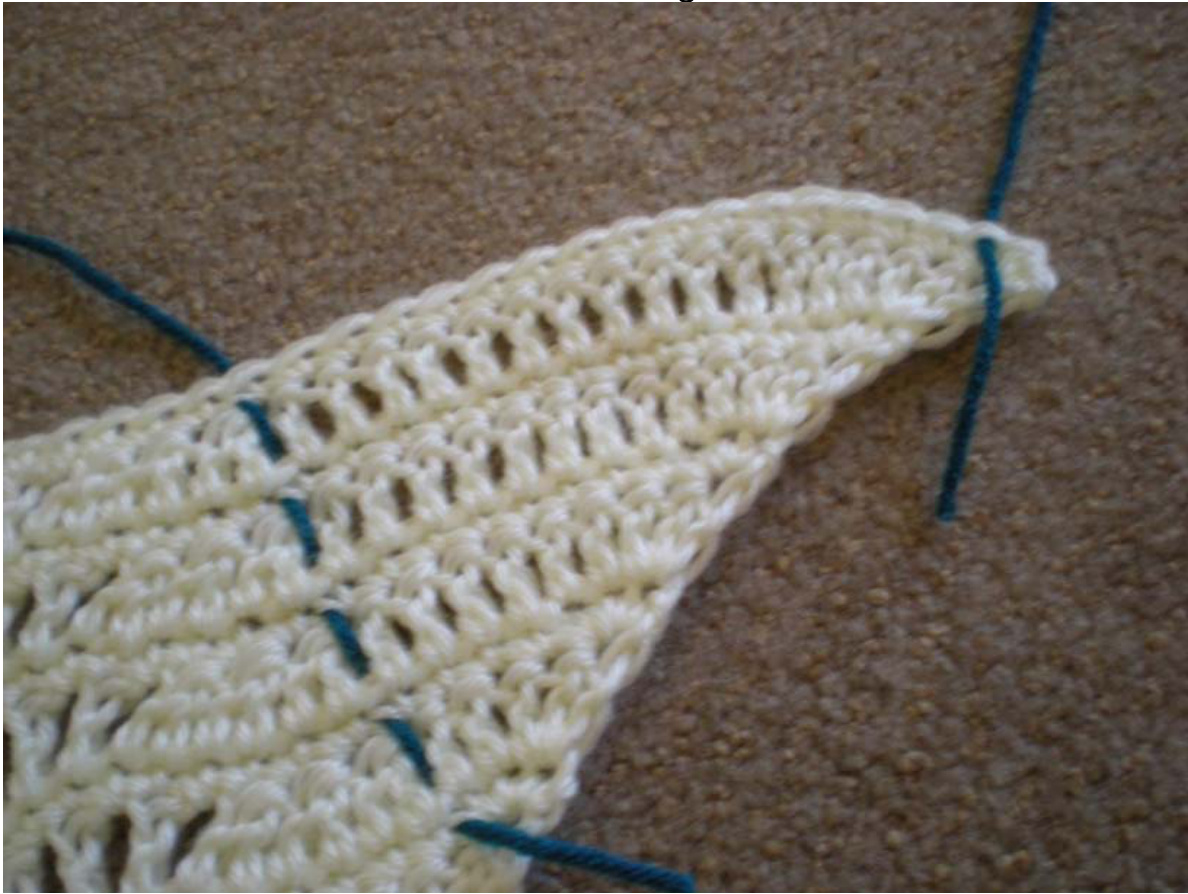
9. First marker placed:
8. About to place first marker:
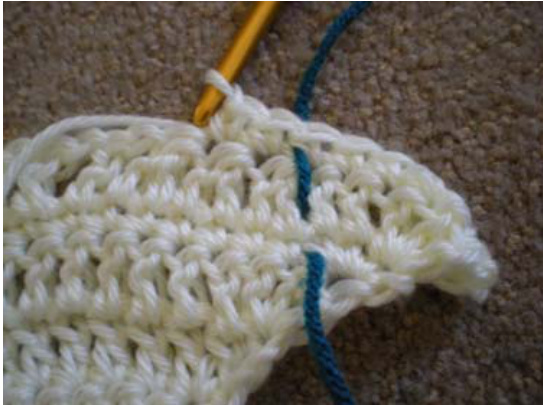
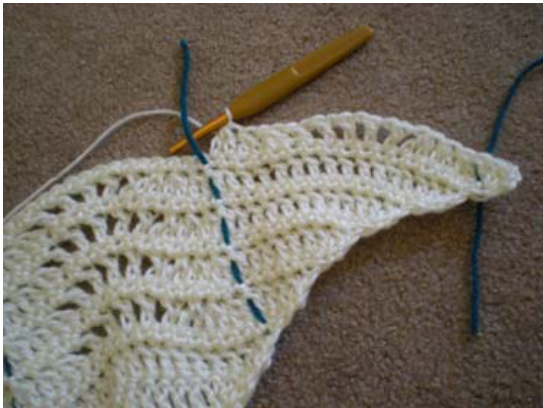
11. About to place second marker:
10. Working past marker:
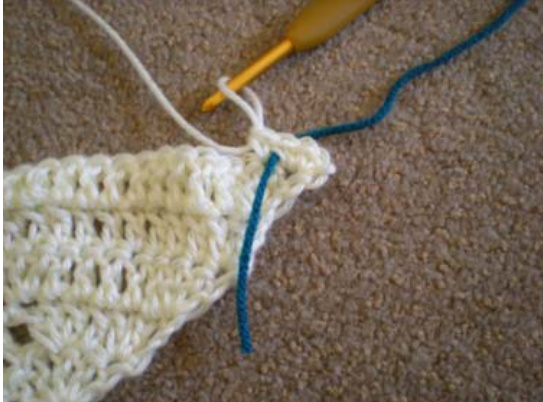
12. Placing second marker:
13. Working past that marker:
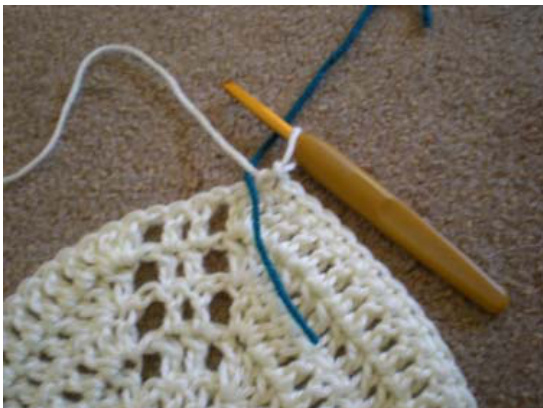
15. Row 9, reaching first marker:
17. Row 9 complete:
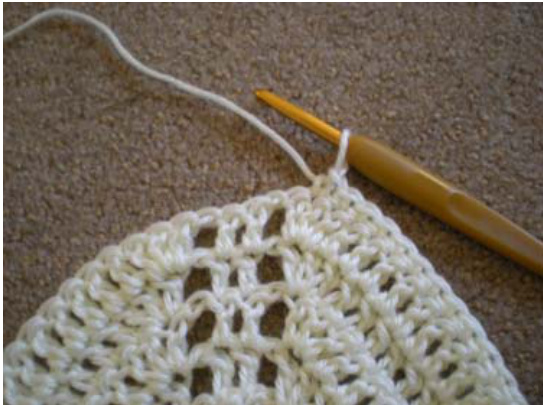
14. Row 8 completed:
16. Replacing marker and starting Feather and Fan pattern:
18. Showing marker and row 2 of Feather and Fan on Row 10:
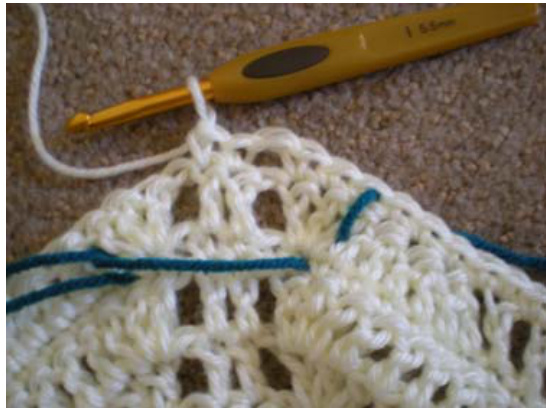
h Kukuchek 2010. Please do not redistribute or sell without my permissiol 19. On row 2 of the Feather and Fan pattern, sc into the ch-1 spaces, not the actual chains (see arrow) :
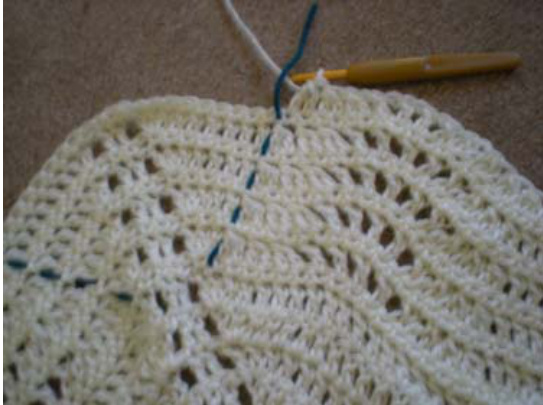
20. Showing how sc rows look in the increase section in the center of shawl:
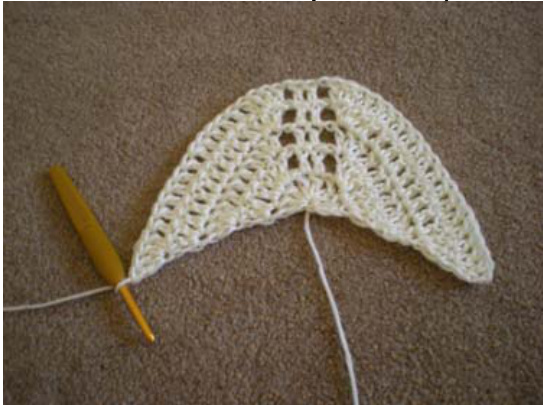
21. Row 10 completed (note that center increase sections are a different size than edge increase sections):
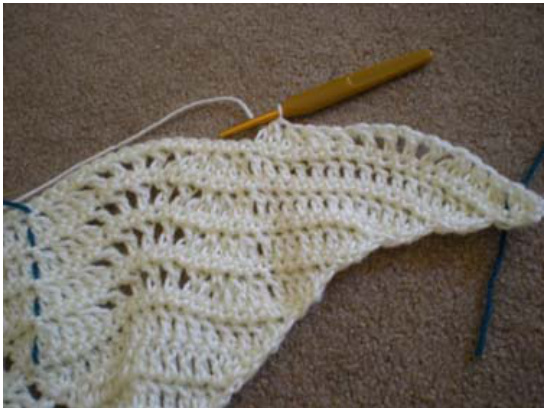
22. Working a second repeat of the Feather and Fan pattern:
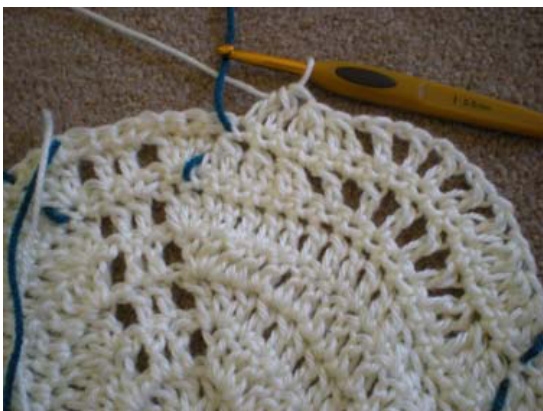
23. Showing how dc rows look in the increase section in the center of shawl:
24. Showing how the edge increase sections look:

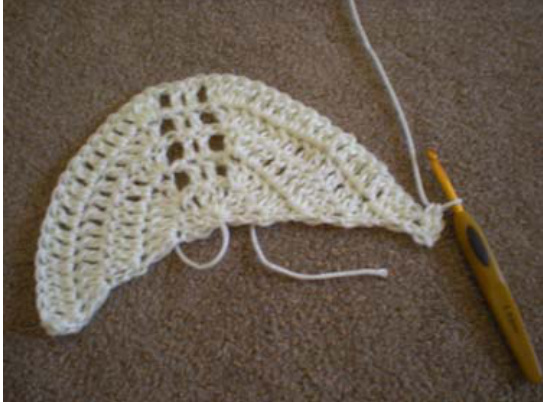
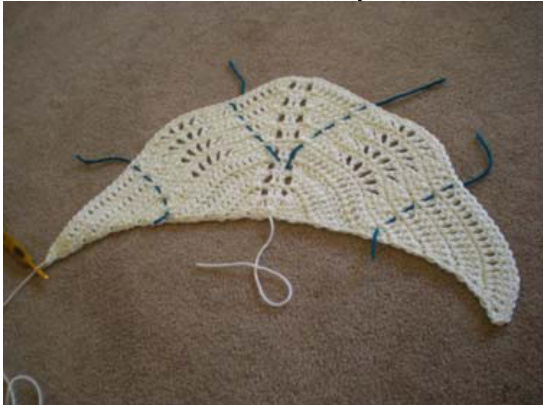
h Kukuchek 2010. Please do not redistribute or sell without my permissiol 25. Rows 1-14 complete:
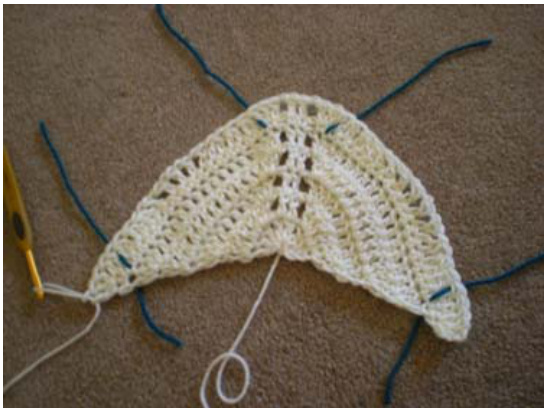
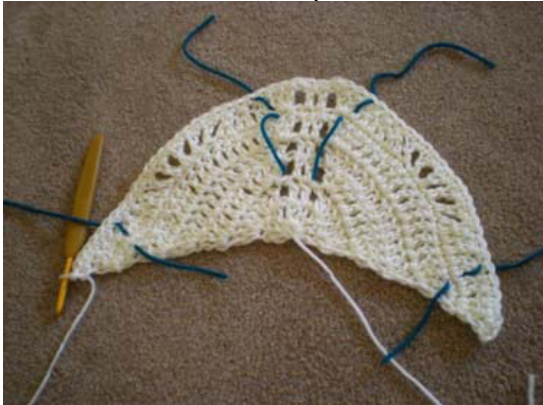
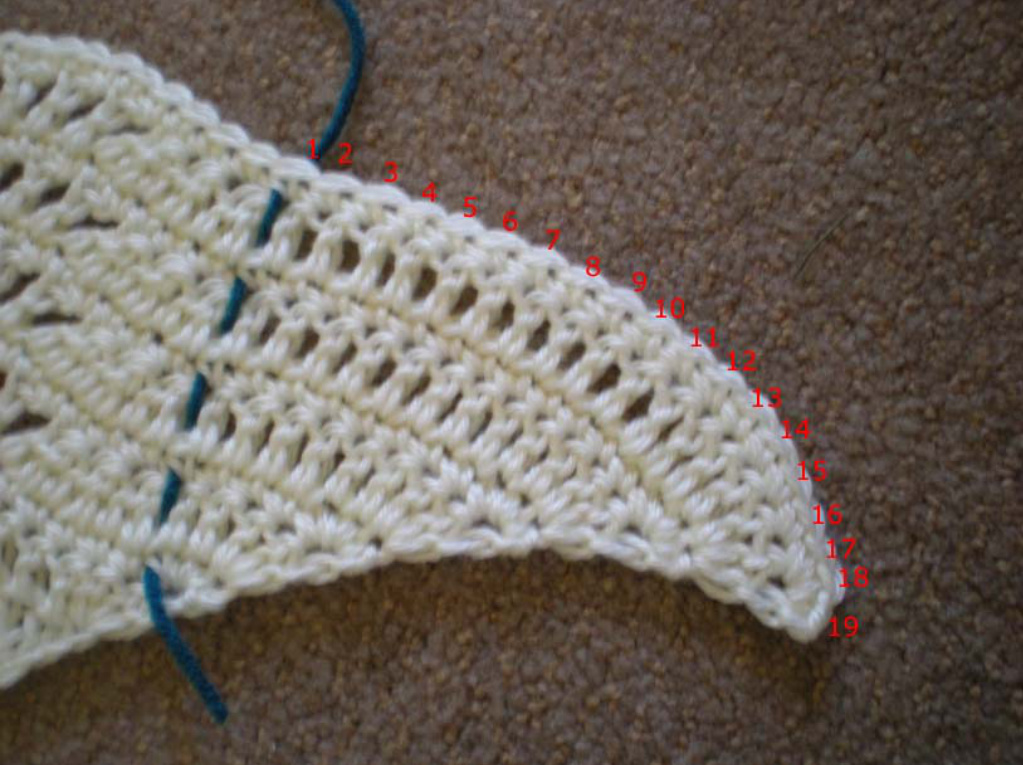
26. Showing that after row 14 is complete, there are more than 17 sts in the edge increase section:
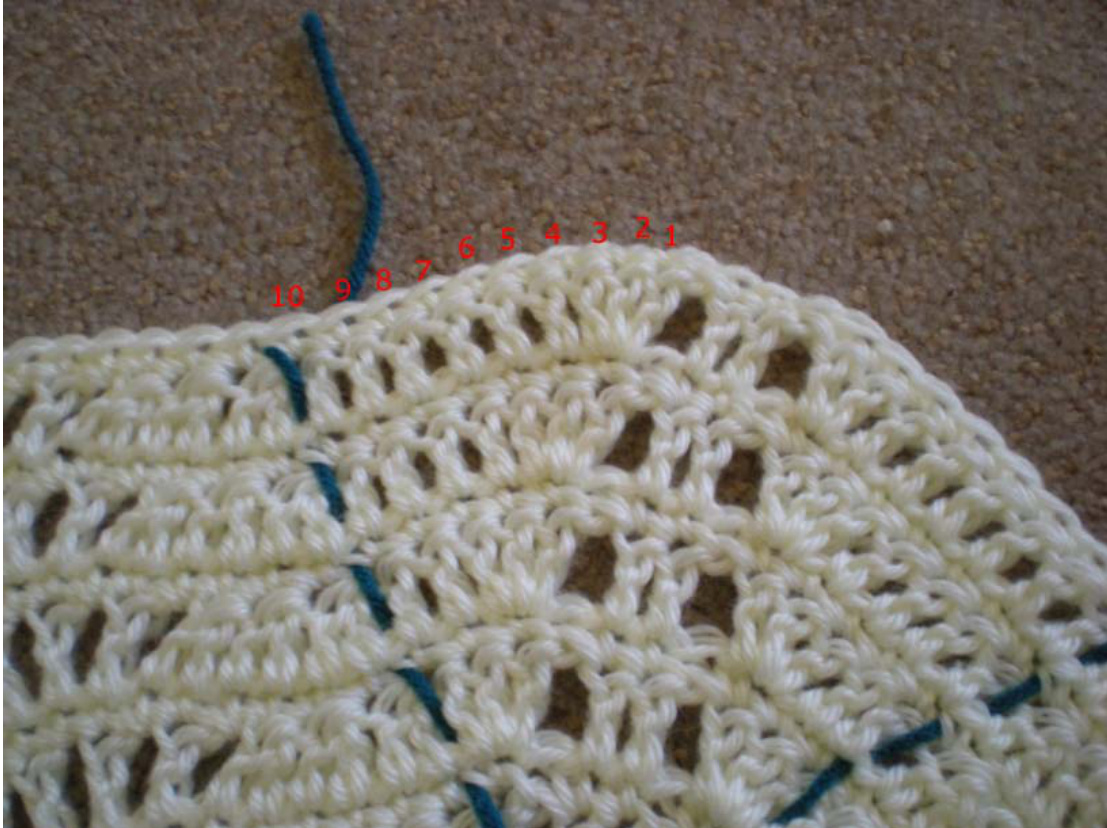
27. Showing that after row 14 is complete, there are not more than 17 sts in the center increase section:
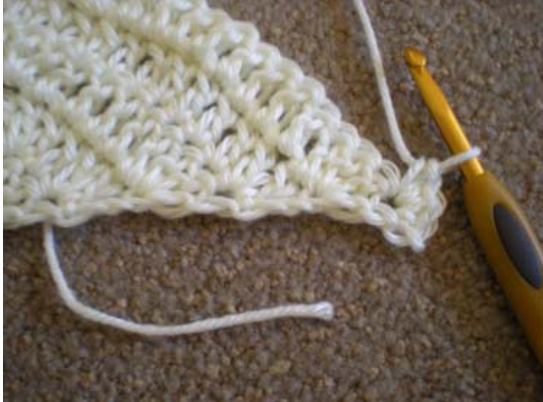
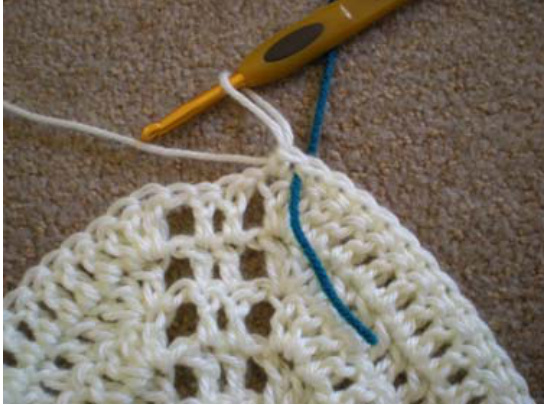
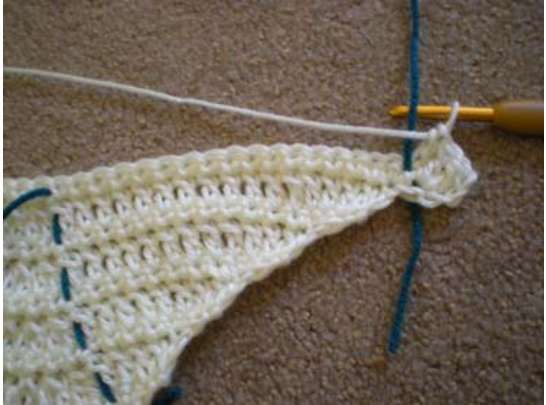
28. To replace marker to add a new Feather and Fan repeat, insert hook between 17th and 18th sts:
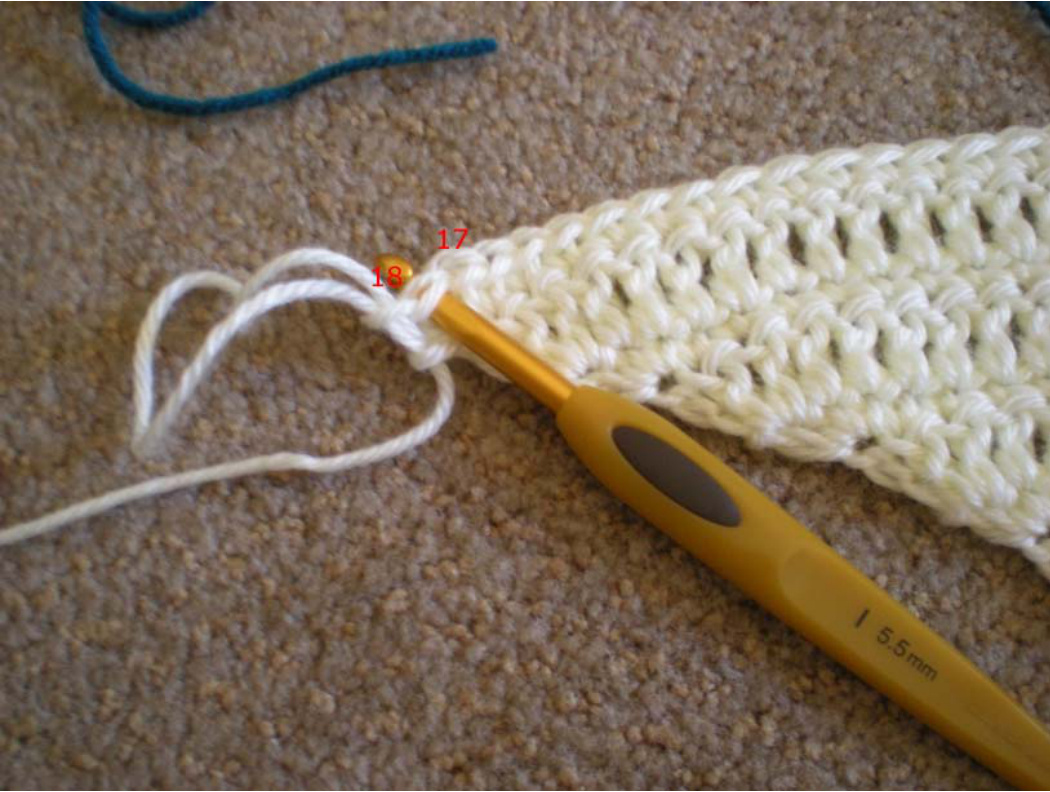
h Kukuchek 2010. Please do not redistribute or sell without my permissiol 29. Pull marker through this space (marker is now in its new position) :
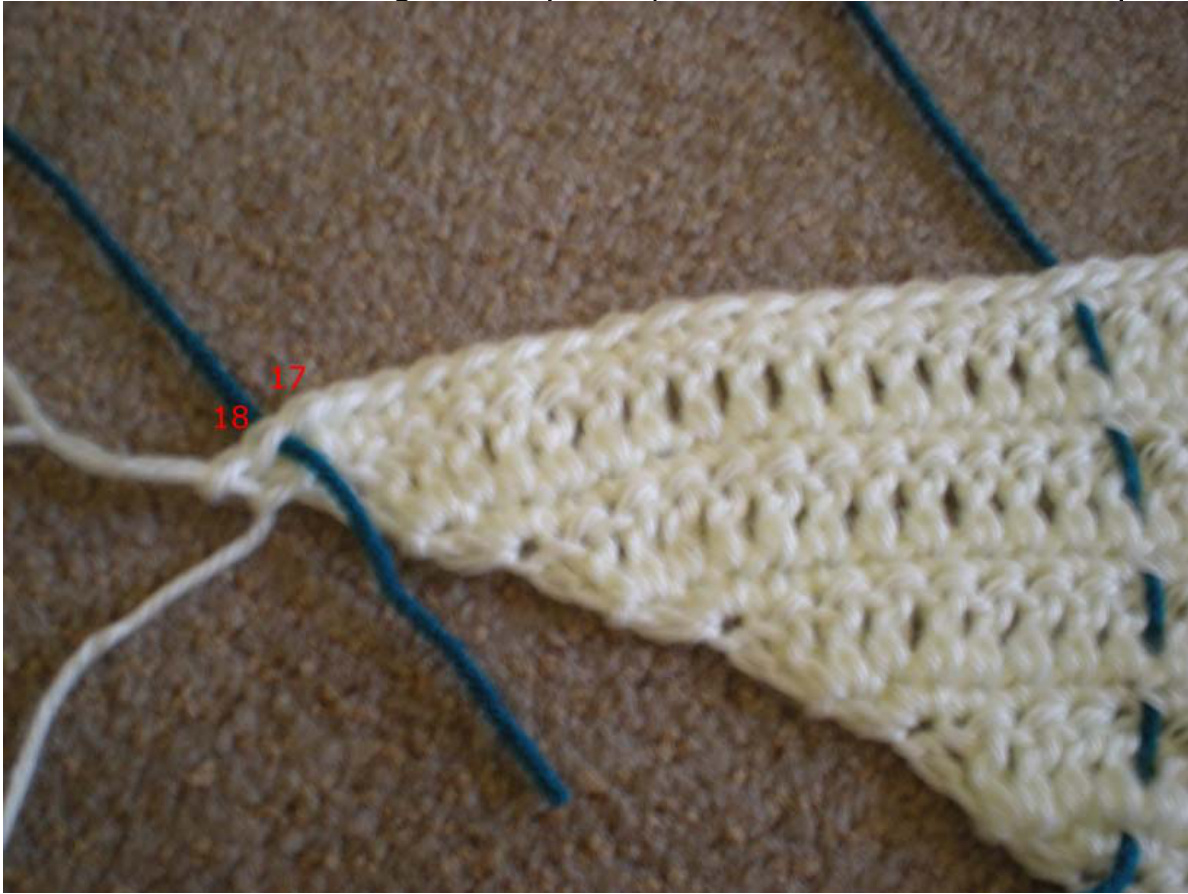
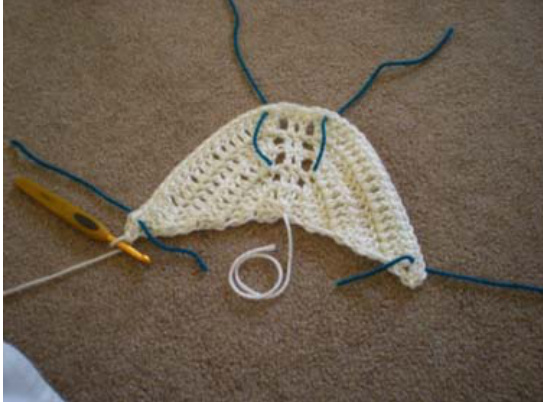
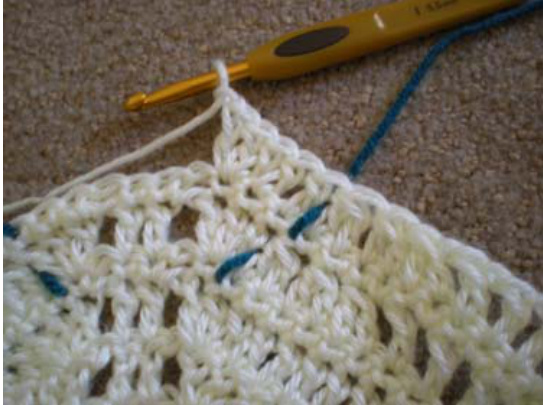
30. Place the new marker on both edges:
h Kukuchek 2010. Please do not redistribute or sell without my permissiol 31. Working a dc Feather and Fan row, reaching new marker:
33. Remove old marker:
34. Do the same thing for the second side:
32. One Feather and Fan repeat added:
33. Continue with normal treatment of center marker:
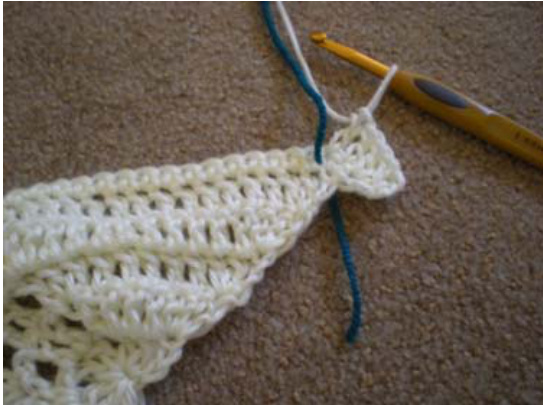
35. Return to working edging as normal and fasten off when you are satisfied with the size:
h Kukuchek 2010. Please do not redistribute or sell without my permissiol


