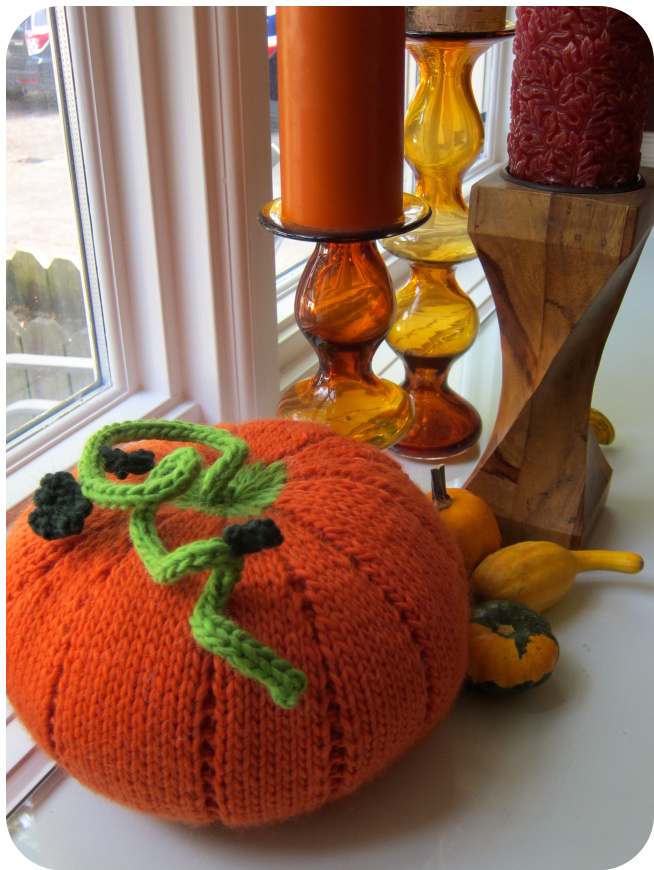
Bi9 ol pumpkin
By Lorraine Keeler Ravelry ID: quichelorraine
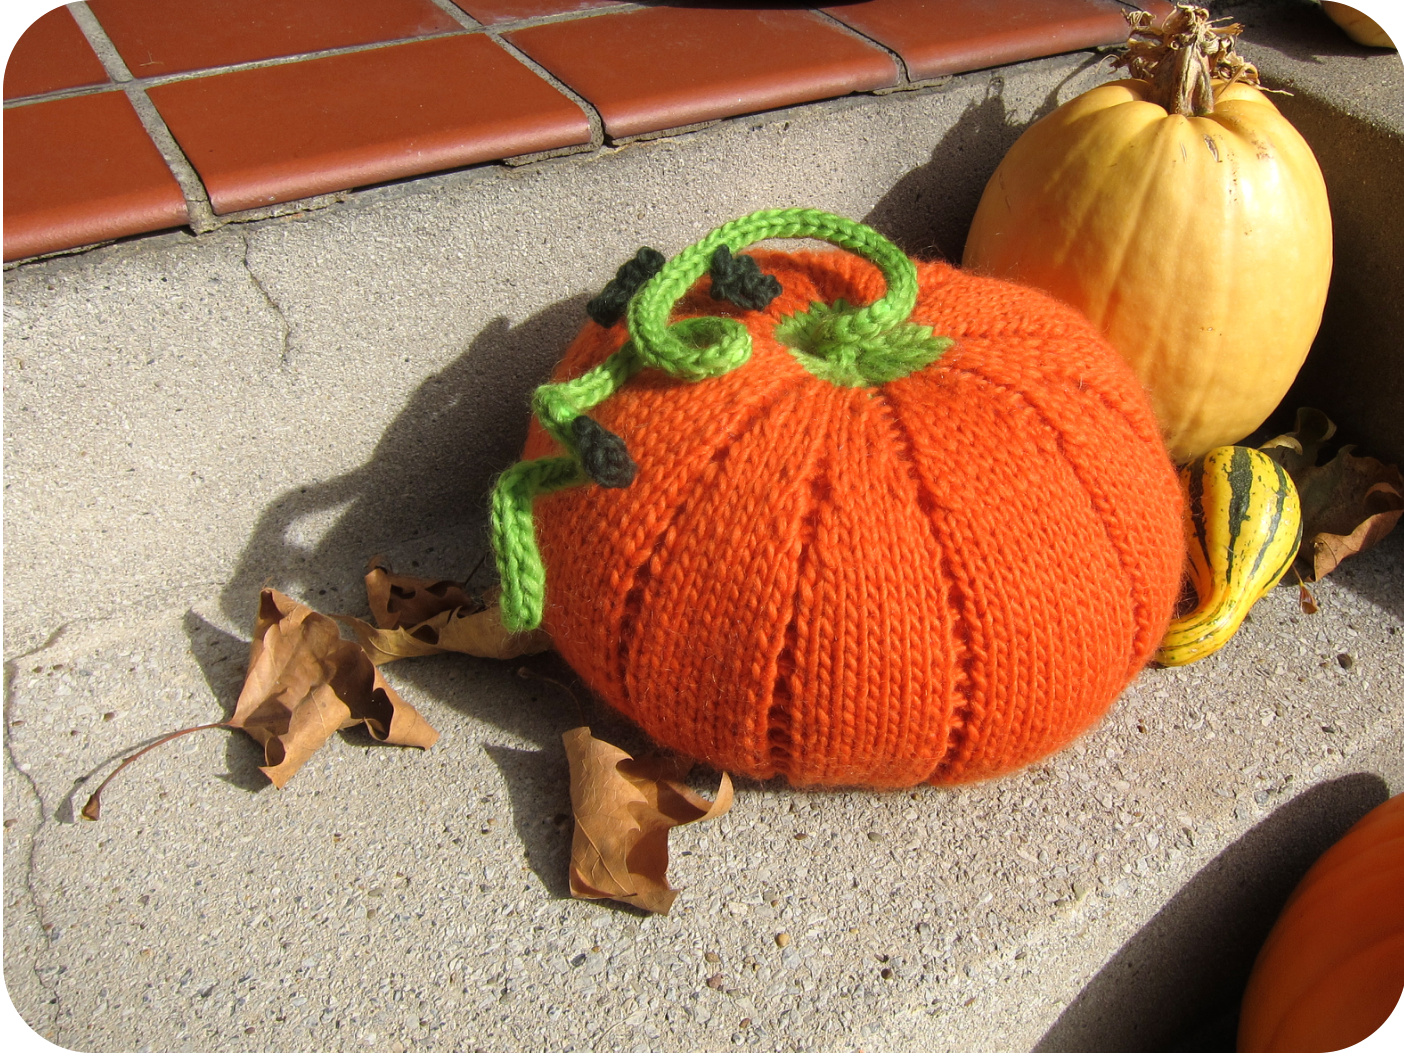
I was looking for a pumpkin pattern with the right bulging, irregular look of a real pumpkin. 1 decided to do it myself, making the pumpkin's ridges pop by purling the stitch below every other row, which pulls the purled ridges inward. The vine is worked with a pipe cleaner inside so you twist and curl it whichever way you like. You could make a brown stem instead and add a duplicate stitch face for a jack-o-lantern! Although I used chunky yarn because I wanted a BIG pumpkin, you could use any yarn with this, depending on your desired size.
Note on yarn and gauge:
This pattern can be knit with any size yarn; the only part that wil need to be changed is how long you work for the body. Use needles appropriately sized to the yarn, making sure the fabric is tight enough that the stuffing won't show through. The pipe cleaner might not fit into a 3-stitch i-cord in a fine yarn but you could use wire or skip the pipe cleaner and sew the vine into place. Materials: 5 DPNs, size US 10.5. 16" circular needle size US 10.5. Yarn needle. 2 pipe cleaners. Stuffing.
Yarn:
Brown Sheep Lamb's Pride Bulky. MC: Orange You Glad (M110), CC1: Limeade (M120), CC2: Deep Pine (M172). Gauge: 14 sts and 17 rows = 4 inches. Finished size: height: 5.5 inches, circumference: 33 inches.
Base (see page 4 for chart):
Using scrap yarn, CO 24 with provisional cast on. Divide between 4 DPN's. With MC, knit 1 round.
Row 2: \*Inc1, k2, p1, k2, inc1, p1\* around (32 sts). Rows 3, 5, 7-9 and 11-13: Work in established pattern: knit the k sts and purl the p stitches. Row 4: \*K 3, inc1, p1, inc1, k3, p1\* around (40 sts). Row 6: \*Inc1, k4, inc1, p1\* around (56 sts). Row 10: \*lnc1, k6, inc1, p1, inc1, k3, inc1, k3, inc1, p1\* around (76 sts). Row 14: \*Inc1, k8,inc1, p1, inc1, k4, inc1, p1, inc1, k4, inc1, p1\* around (100 sts). Rows 15-17: Knit the ksts but on p stitches, begin altenating purling and purling the stitch belowevery other row (video instructions here). Row 18: \*K10, p1, k6, inc1, p1, inc1, k6, p1\* around (108 sts)
Body:
Work according to rows 15-17 for 5 inches (for squat pumpkin, shown) or longer for rounder pumpkin. If working a different gauge, work untildesired length. End with row on which the stitches below were purled.
Top:
Row 1: \*K10, p1, k5, ssk, p1, k2tog, k6, p1\* around (100 sts). Rows 2-3 and 5-6: Work according to previous rows 15-17. Row 4: \*K2tog,, ssk, pstitch below, ktog,k, ssk, p stith below, ktog, k, sk, p stitch below\* aroud 76 sts). Row 7: \*K2tog, k4, ssk, p1, k2tog, k2, k2tog, k1, ssk, p1\* around (56 sts). Rows 8, 10, and 12: Knit the k sts and purl the p sts (stop purling stitch below). Row 9: \*K2tog, k2, ssk, p1, k2tog, k2, ssk, p1\* around (40 sts). Row 11: Switch to CC1. \*K2, ssk, p1, k2tog, k2, p1\* around (32 sts). Row 13: \*K2tog, k1, p1, k1, ssk, p1\* around (24 sts). Cut yarn, leaving a long tail. Put yarn on needle and slip through live stitches twice, cinching together to close hole. Knot yarn, do not cut. Stuff pumpkin from the bottom. Remove waste yarn and cinch bottom as top, knotting yarn and cutting tail. Using tail from top of pumpkin, push needle through the pumpkin to the bottom, thread around the cinched portion, thread through to top, and repeat once more. Pull thread so that top is pulled inwards, creating a bulging look. Knot yarn and hide ends by threading them into center of stuffing. Vine (make one, or as desired): Using CC1, pick up 3 sts from top of pumpkin. Begin i-cord, working in pipe cleaner as you knit. To do this, k3 sts, wrap the working yarn around the outside of the pipe cleaner, and begin next row (see below). Work to desired length (you can twist pipe cleaners together for a longer vine).
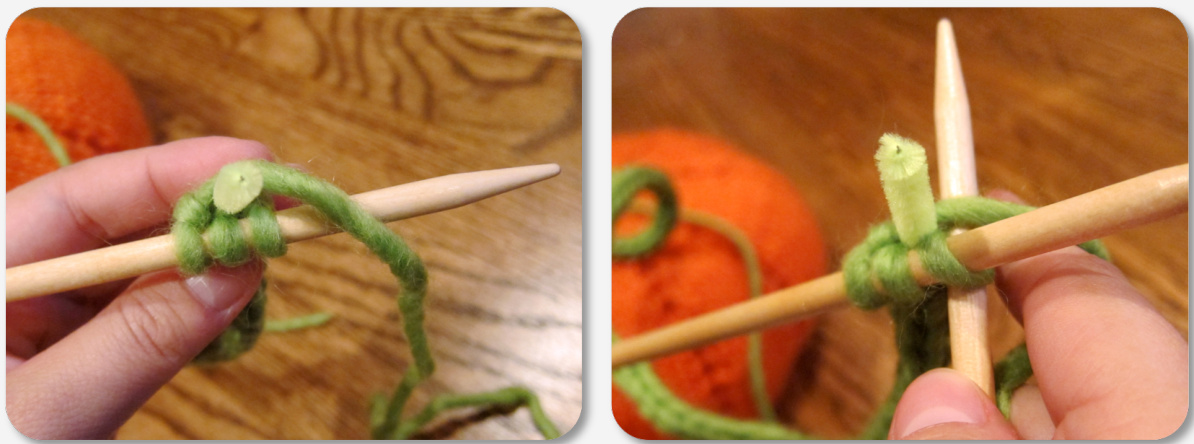
Knitting the pipe cleaner into the i-cord: 1: At the end of the row, carry the yarn around the outside of the pipe cleaner. 2: Begin knitting the next row. Pulling the yarn snug will hide the pipe cleaner. Big leaf (make one, or as desired): CO 5 in CC2. Knit 2 rows. Next row: K2tog, k1, k2tog. Knit 1 row. Next row: k3tog. Cut yarn and pull through stitch. Small leaf: (make 2, or as desired): CO2 in CC2. K 2 rows. Next row: k3tog. Cut yarn and pull through stitch. Sew leaves to vine. Weave in ends. Twist vine into desired shape.
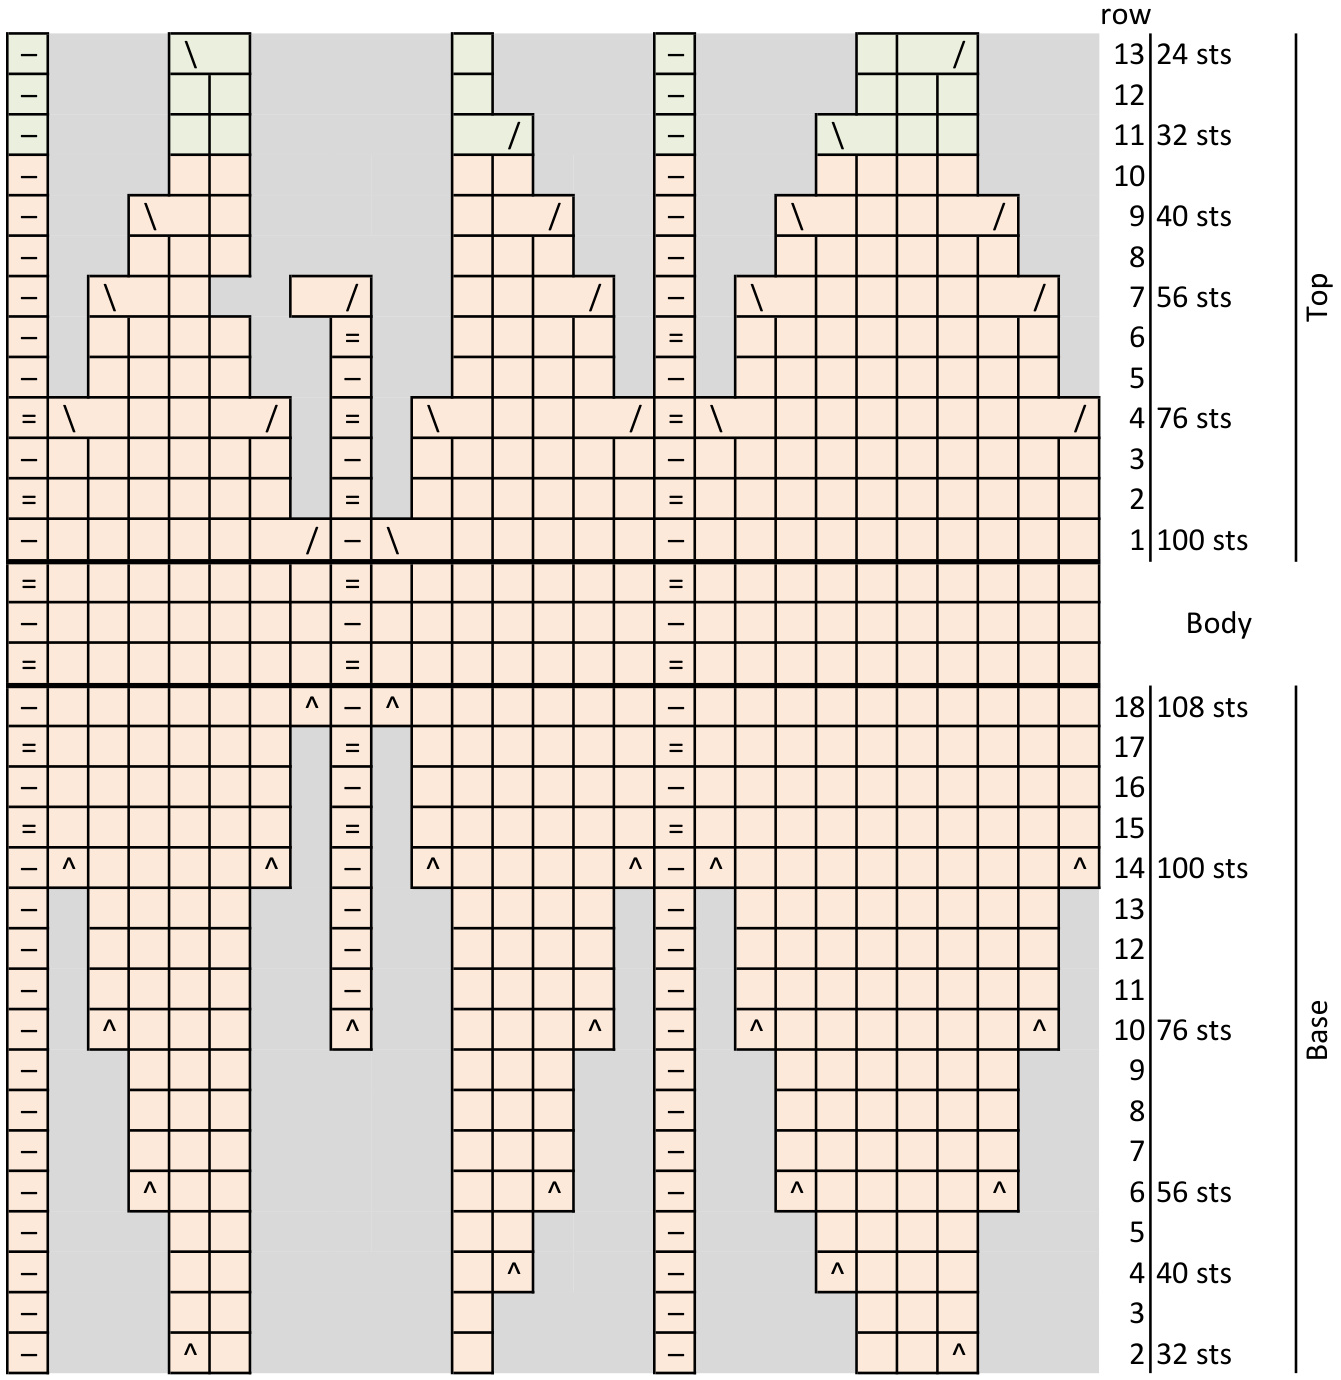
Key: :MC : CC1 : knit purl : purl the stitch below : inc1 : k2tog : ssk


