Florelei
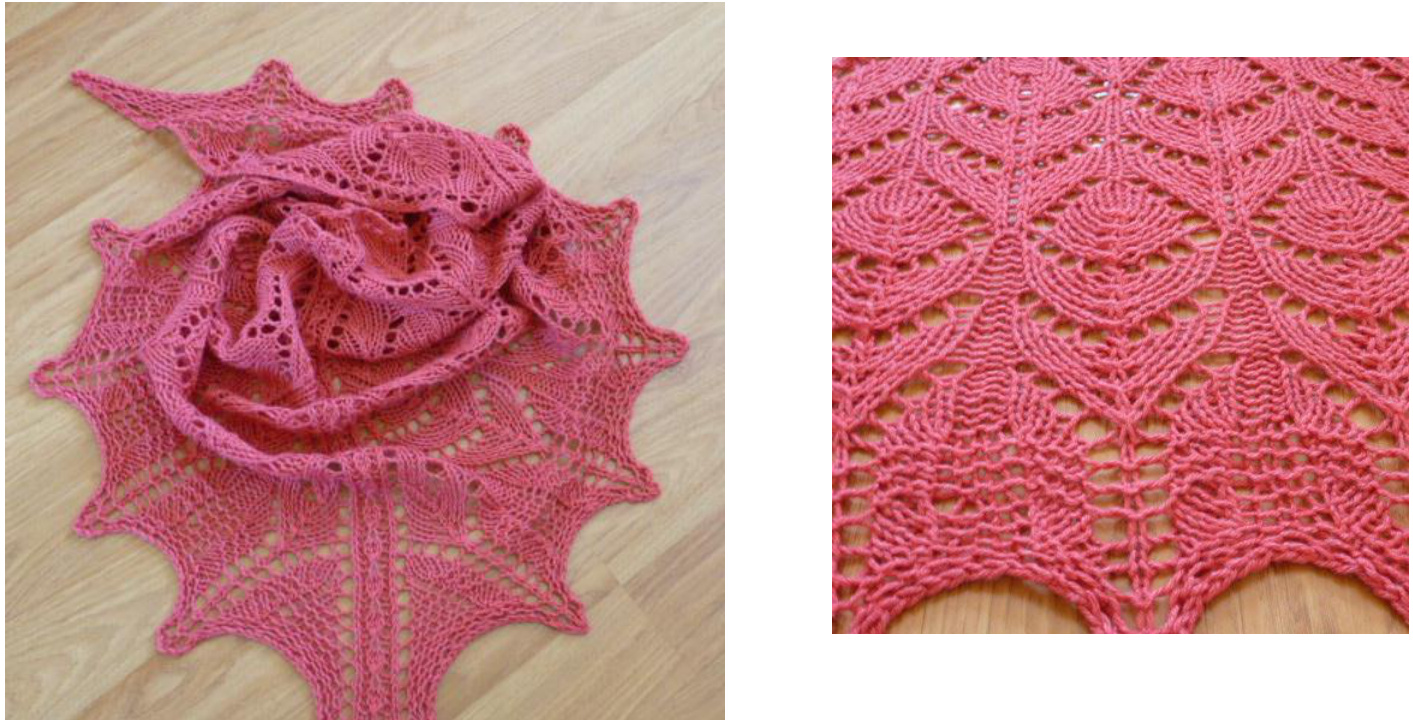
tch patterns create a flower motif and a welcome reminder that spring isn't that far o Made in a merino/silk blend, Florelei is light with a lovely drape.
Yarn and Tools
Knit Picks Gloss DK [70% merino, 30% silk; 123yd/112 m per 50 gr ball]; 3 balls 32’" or longer 6mm circular needle Up to 20 stitch markers Size Blocked 60" x 28"
Gauge
I', blocked. As gauge isn't crucial, select a yarn and needle that creates a nice fabric.
Abbreviations
Standard knitty.com abbreviations are used except: p3tog - purl 3 together S2KP - slip 2 knit-wise, k1, pass slipped sts over (centered double decrease) SK2P - slip 1 knit-wise, k2tog, pass slipped st over (left-leaning double decrease)
Cast on and Set-up
CO6 Row 1 (WS): kfb 5 times, k1 (11 sts) Row 2: k2, yo, k1, yo, (k1, kltbl) twice, (k1, yo) twice, k2 (15 sts) Row 3: k2, p4, k1, p1, k1, p4, k2
Shawl Body
Start the shawl body with Chart A, which shows all rows and stitches. Work Charts B, C, D and E in that order.
About The Remaining Charts
· The garter stitch border is not shown; start and end all rows with knit 2. · Work the sections in each chart in the following order: 1, 2, 3, Spine Chart, 1, 2, 3. · Section 2 in Chart C is repeated 3 times each half, 5 times in D and 7 in E. Place new markers as needed between the 11-stitch sections.
Charts B, C and D
· These charts show the right side rows only for one half of the shawl body. On the WS, knit the knits and purl the purls & yarn overs as they appear.
Chart E
· Much of this chart is garter stitch. RS rows are charted and WS rows are written out. Note that the final 4 rows of the Spine have a different stitch pattern. · The chart ends with RS row 93.
Spine Chart
· The Spine Chart shows both right and wrong side rows. Its row numbers correspond to the row numbers in the body.
Bind off
This bind off on the WS adds an extra stitch between the existing stitches to create a very stretchy edge that will let you block the shawl fully. It also uses up yarn at a ferocious rate so allow 16 yards. Note: To reduce fullness, the extra stitch is not added along the spine. Begin by purling 1 stitch. Step 1: \*Insert left needle into back of st on right needle and p1, return this st to left needle and p2tog; repeat from \* to first spine marker. Step 2: \*\*Return st from right needle to left and p2tog; repeat from \*\* 6 times to next spine marker. Step 3: Repeat Step 1 from \* to end of shawl. Fasten ends and block.
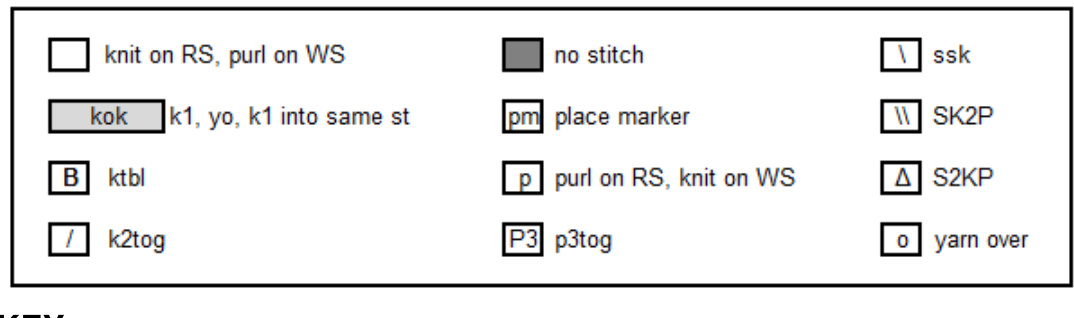
CHART A
CHART B
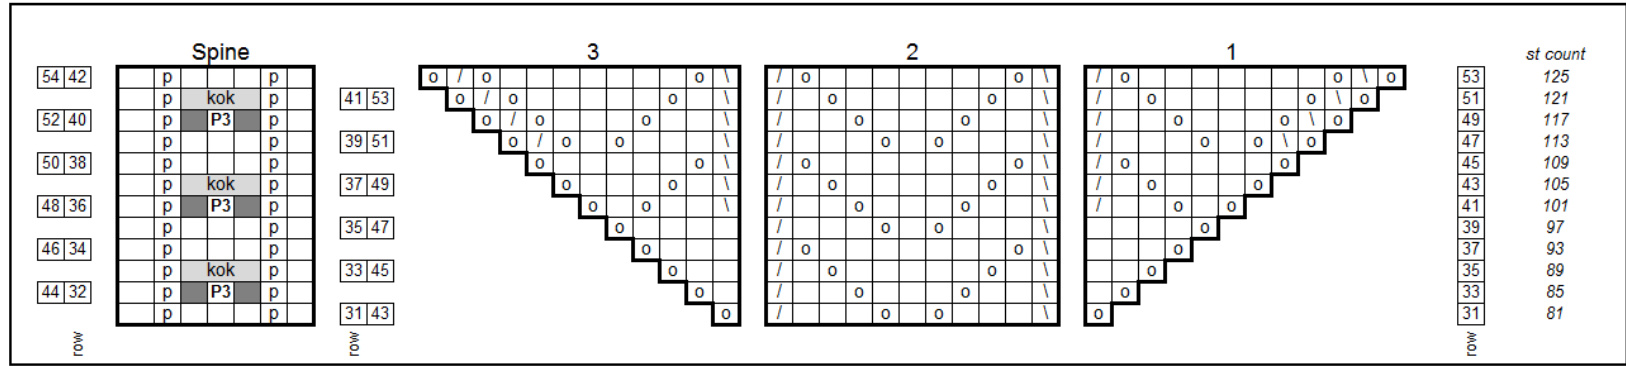
CHART C
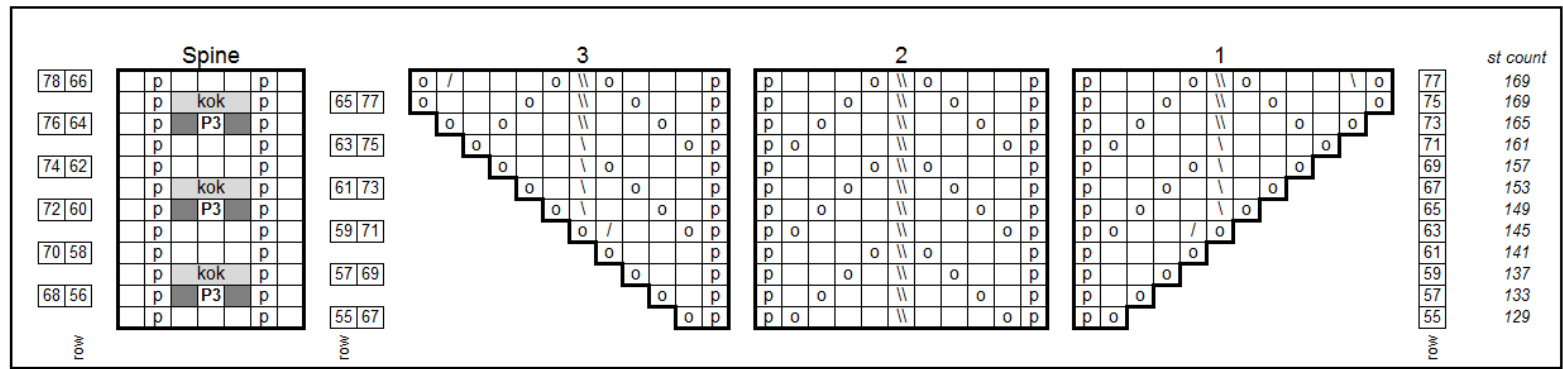
CHART D
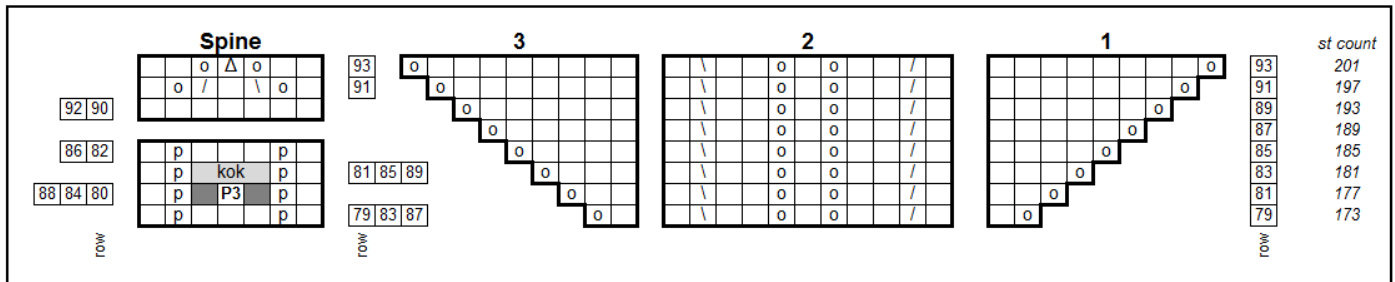
CHART E
Chart E, Sections 1, 2 & 3 WS rows
Rows 80, 82 and 84 - knit all the sts in sections 1, 2 and 3 Rows 86 and 88, sections 1 and 3 - knit all the sts Rows 86 and 88, section 2 - knit st #1 and #11 only in each repeat (2 through 10 are purled) Rows 90 and 92 - knit all the sts in sections 1, 2 and 3 Row 94 -bind off


