NOCTILUCA
A knitting pattern for a neckpiece
Kathleen Rogers
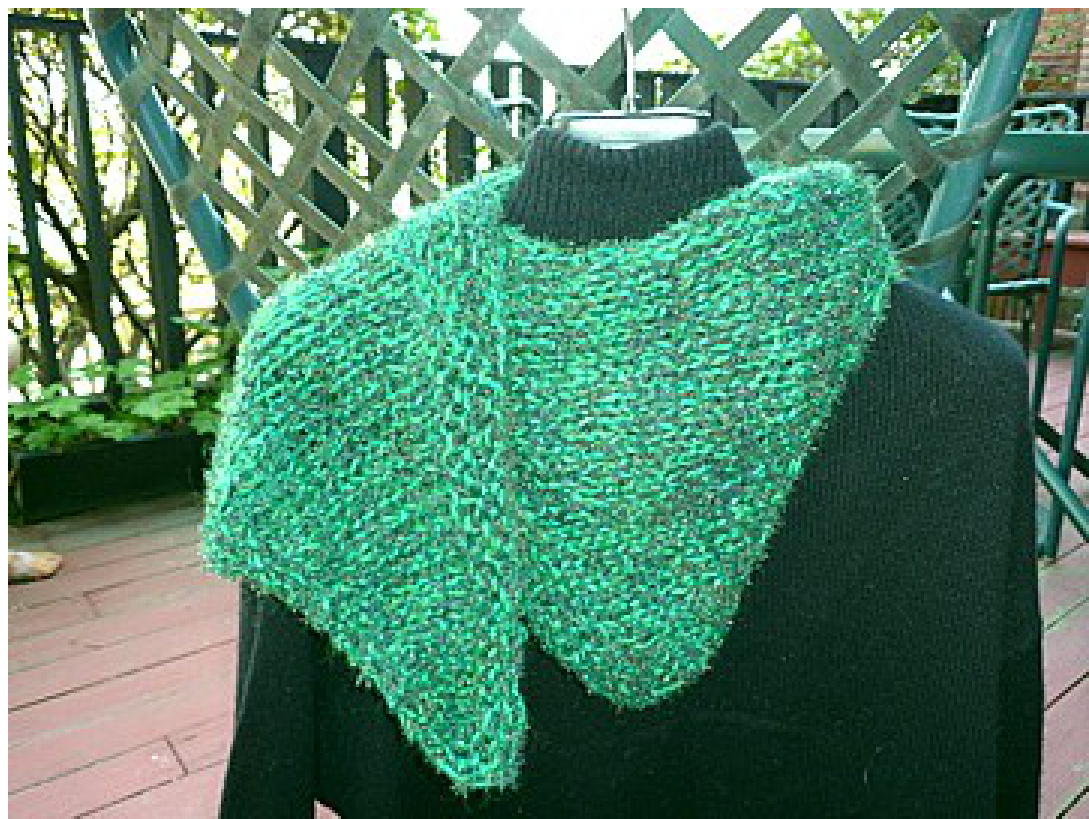
Noctiluca
ABOUT THIS PATTERN: For months the three yarns sat on the cabinet daring me to do something. I knew I wanted them all together. My first thought was a rectangular wrap. Next up a two-rectangle wrap: stockinette and reverse stockinette at right angles. Then I put the yarns on the needles and let them have their way. As I knit, I knew this combo called for asymmetrical form and the result is a neckpiece than can be worn in many ways around the neck and shoulders, and, if you have a sense of the absurd, the waist, the hip, or even the head. The name Noctiluca was inspired by one of the yarns I used, the metallic "Phos", short for phosphorescent. It put me in mind of sea organisms that glow in the dark. One of the most common is Noctiluca scintillans, or "sea sparkle." (Thank you, wikipedia.) As I knit, I wanted to shape organic forms, and ended up with a narrow scarf with two fin-like extensions. FINISHED SIZE: $5~\%^{\prime\prime}$ by $49^{\prime\prime}$ plus width of "fins" YARN: (A) Artfibers KYOTO (silk, mohair, wool) 50 gms/110yds, Color 31 (B) Artfibers PH0s (tactel, nylon, metallic) 63 gms/110 yds, Color 11 (C) habu textiles A-148 (stainless steel, wool) 6 gms/110 yds, Color 5997 (These are the actual amounts I used: one entire ball of KYOTO and small amounts from larger cones of the other two yarns.) SUBSTITUTIONS: yarns of your choice (A) a thicker, drapey, fluffy base yarn (DK, sport, or light worsted) (B) a thinner, contrasting (in color, texture, shine, etc.) carry-along (C)the third yarn should be one of the stainless steel combos such as those available from habu textiles or Lion Brand's LB Collection NEEDLES: US Size $13/9.00\mathsf{m m},$ . or size that gives you a fabric you like NOTIoNs: Tapestry needle to weave in ends, crochet hook (optional) NOTE: This pattern is EASY, requiring knowledge of knit, purl, casting on and binding off, and a simple increase (knit in front and back of stitch), and bias or sloped bind-off. (Bias Bind Off directions are at end of pattern.) TIPS: This piece is knit with all three yarns held together. If you think it will help, you can wind all three together so you can work with one ball. You can easily adjust the length or width of the piece by adding stitches or rows. The angle of the "fins" can be reduced by doing the increases every other row.
ABBREVIATIONS:
${\sf K}={\sf K}{\sf n i t}$ $\textsf{P}=\mathsf{P}\mathsf{u}\mathsf{r}|$ $\mathsf{K F B=}$ Knit into front and back of stitch (an increase) $\mathsf{W S=}$ Wrong side (the inside, back, or private side of the fabric) $\mathsf{R S}\ =$ Right side (the outside, front, or public side of the fabric) $_{\mathsf{C O}}=\mathsf{C a s t}$ on BBO $=$ Bias bind off
STEP ONE: Cast On
Holding all three yarns together, cast on 11 stitches, using your preferred cast on method.
STEP TWO: Border
Row 1 (RS) Knit all stitches. Row 2 (WS) Knit all stitches. Step Three: Pattern (Stocking stitch with one garter stitch at each edge) Row 3 (RS) K all stitches Row 4 (WS) K1, P9, K1 Rows 5-42: Repeat Rows 3 and 4 nineteen more times. STEP FOUR: Increases for first "fin". NOTE: Increases are worked on both the right side and wrong side of the fabric. The RS increase is worked on the second stitch of the row. The wS increase is worked on the second to last stitch of the row. Row 43 K1, KFB, K to end of row. Row44 K1, P until two stitches remain, KFB, K1 Rows 45-64 Repeat Rows 43 and 44 ten more times. There will be 33 stitches on the needle. STEP FIVE: Garter stitch and partial bind off Row 65 (RS) K all stitches Row 66 (WS) K all stitches Row 67 (RS) Using Bias Bind Off, bind off 8 stitches,Kremaining stitches Row 68 (wS) K all stitches Row 69 (RS) BBO 7 stitches, k remaining stitches Row 70 (wS) K all stitches Row 71 (RS) BBO 7 stitches, K remaining stitches After finishing Row 71 you will have 11 stitches on the needle once again. STEP sIX: Pattern Stitch (Stocking stitch with one garter stitch at each edge) Row 72 (WS) K1, P9, K1 Row 73 (RS) K all stitches Row 74 (WS) K1, P9, K1 Rows 75-94 Repeat Rows 73 and 74 ten more times STEP sEVEN: Increases (for second "fin" on the opposite edge of the piece) Row 95 (RS) K until two stitches remain, KFB, K1 Row 96 (WS) K1, KFB, P until one stitch remains,K1 Rows 97-116 Repeat Row 72 and 73 ten more times until there are 33 stitches on the needle STEP EIGHT: Garter stitch and partial bind off section Row 117-119 Work 3 garter stitch rows (K all stitches, ending on a RS row) Row 120 (WS) Using Bias Bind Off, bind off 8 stitches, k remaining stitches Row 121 (RS) K all stitches Row 122 (WS) BB0 7 stitches,K remaining stitches Row 123 (RS) K all stitches Row 124 (WS) BBO 7 stitches, K remaining stitches NOTE: At this point you can bind off as follows over the next six rows or continue working even for a while and then bind off. Row 1 (RS) K all stitches Row 2 ( WS) BBO 4 stitches, K remaining stitches Row 3 (RS) K all stitches Row 4( WS) BBO 3 stitches, K remaining stitches Row 5 (RS) K all stitches Row 6 (WS) BBO 3 stitches, K remaining stitche Draw yarn through remaining 2 stitches and fasten off.
STEP NINE: Finishing
Weave in ends. If you wish, and there is a long enough tail remaining, you can crochet a chain and fasten it to the bound off edge to create a loop that can be used in arranging the neckpiece. There is no "correct" way to wear this piece. Be inventive. Wear this any way you want. It can be arranged around the neck and shoulders in many ways as a decorative accessory for a plain knit top or jacket. See the examples on the Noctiluca project page on ravelry where my ID is katrog. The inclusion of the stainless steel/wool yarn in the mix creates a fabric that is easy to drape and shape.
BIAS BIND OFF DIRECTIONS
For the shaped portion of the Scarf use the BIAS (or SLOPED) BIND OFF which yields a smooth slope, as opposed to a step effect. Here's how to do it: On the row before the bind-off row, leave the last stitch in the row unworked on the left hand needle. Turn the work. There will be one stitch on the right hand needle (the unworked stitch from the previous row). Slip the first stitch from the working needle onto the right hand needle. There will now be two stitches on that needle. Using the tip of the left-hand needle, pass the rightmost stitch on the right hand needle over the stitch closest to the tip. There will be one stitch on the right hand needle. (If you are a visual learner, check out www.knittinghelp.com or The Knitter's Companion by Vicki Square.)


