PROMENADE, EASY DOILY & DISHCLOTH
Designed by Linda W. Browning Tinyknit on Ravelry http://www.tinyknit.com May 10, 2011
NOTE to beginners:This patfem includes a short photo tuforialonpage 6.Please takeafookbeforebeginning.Thanks!
Supplies:
Short (16") circular needles appropriate for your yarn, about a US size 2-4 (2.75-3.50mm) for a doily. This is optional for the dishcloth: US size 6-8 (4.0-5.0mm). Double pointed needles, set of 5, to match circular needles, US size 6-8 (4.0-5.0mm) for dishcloth. Stitch marker(s), at least 1 for a row marker, and up to 7 more if you would like to mark the end of each repeat in the pattern (total of 8). Needle for weaving in yarn ends. Fingering or thinner weight yarn for doily (50 yards, 46 meters) or worsted weight for washcloth (50 yards, 46 meters).
Abbreviations:
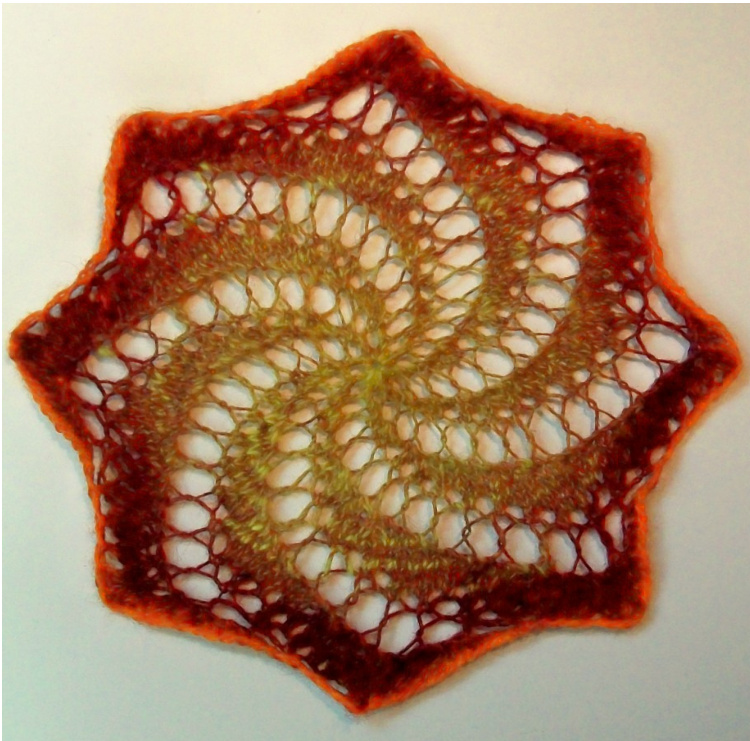
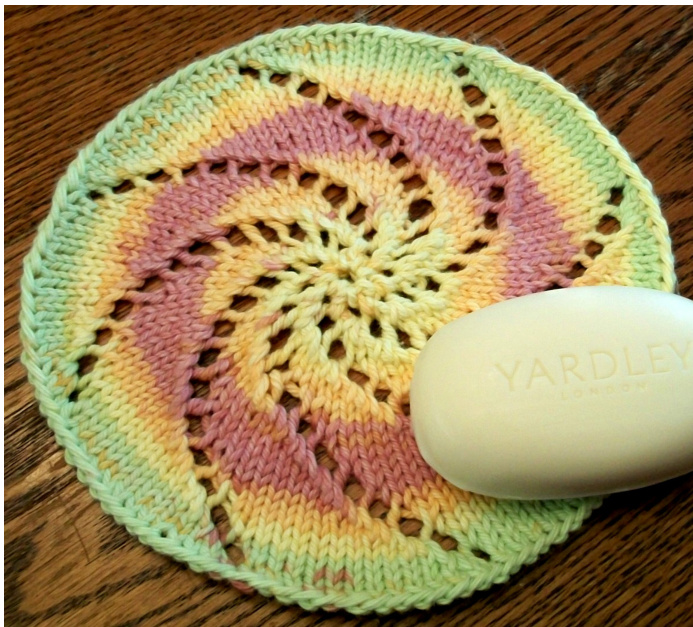
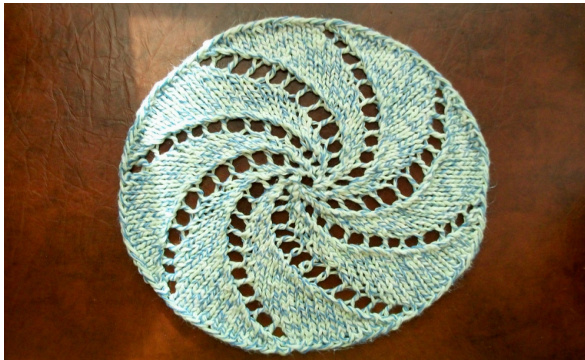
KKnit YO OYarn over K2tog /Knit two stitches together Thank you to my testers on Ravelry: annarie18, asdlane, binframed, cheryl63, crochetamommy, evilmichelle, ginger72, havetoomuchyarn, lumberjill, mamaEs, mozartatk, neon628, pygoradreams, qtpieknitter, sixgordons, treaclepaws, and villiputti. Some doilies are easier to knit than others, but this one may be the simplest of all! Using just three different stitches (knit, yarn over, and knit two together), you can make a doily or dishcloth in no time! This pattern is quicker than most, in part because there is no bindoff. Promenade is knitted from the outside inward. It's perfect as a first experience for either knitting in the round or simple lace knitting. Knit yours in a worsted cotton yarn for a dish or wash cloth. Try fingering or even lace weight yarn for a delicate doily. Promenade is the fourth in a collection of dance inspired doilies. In ballet, a promenade is when the dancer slowly turns in place, thus creating a swirl or spiral, as in this doily. For more in the dance series, please look at Rondeau, Polonaise, and Quadrille Knitted Lace Doilies.
Doily Instructions:
Using your circular needles, cast on 136 stitches VERY loosely. Being careful not to twist your stitches, join your kniting in the round. This simply means that instead of turning your knitting around to knit rows, you will be knitting in a circle. Your first knit stitch will be in the very first stitch you casted on. You will continue in this way for the entire project, never turning your work, but knitting only in a circle. It is an excellent idea to use a stitch marker here, right before your very first stitch of round 1. Begin with the written instructions below, or use the chart on page 3. Each instruction will be repeated 8 times per round of knitting, which is shown below. Stitches 1 Knit all stitches. 136 2 NOTE: You may place a stitch marker at the end of each of the following 8 repeats to help keep track of the lace pattern. [K2tog x 6, (YO, K1) x 5, YO] x 8 3 [K2tog x 2, K13] x 8 120 4 [K2tog x 4, K3, (K1, YO) x 4] × 8 5 [K2tog x 2, K11] x 8 104 6 [K2tog × 4, K, (K1, YO) x 4] × 8 7 [K2tog, K11] x 8 96 8 [K2tog × 4, (K1, YO) x 4] x 8 9 [K2tog, K10] x 8 88 10 [K2tog, K1, K2tog, K4, (K1, YO) x 2] x 8 11 [K2tog, K9] x 8 80 12 [K2tog, K1, K2tog, K3, (K1, YO) × 2] × 8 13 [K2tog, K8] x 8 72 14 [K2tog, K1, K2tog, K2, (K1, YO) x 2] x 8 15 [K2tog, K7] x 8 64 NOTE: You will want to switch to double pointed needles when working with circular needles becomes too difficult. Evenly divide the stitches over 4 needles so that you have 2 repeats on each needle. 16 [K2tog, K1, K2tog, K1, (K1, YO) x 2] x 8 17 [K2tog, K6] x 8 56 18 [K2tog, K1, K2tog, (K1, YO) x 2] x 8 19 [K2tog, K5] x 8 48 20 [K2tog, K1, K2tog, YO, K1, YO] x 8 21[K2tog, K4] x 840 22 [K2tog x 2, YO, K1, YO] x 8 23 [K2tog, K3] x 8 32 24 [K2tog, K2, YO] x 8 25 [K2tog, K2] x 8 24 26 [K2tog, K1, YO] x 8 27 [K2tog, K1] x 8 16 28 [K2tog, YO] x 8 29 [K2tog] x 8 8
Doily Chart:
Start at the bottom of the chart in the lower right hand corner. All rounds in this chart are knitted right to left. Each square is 1 stitch. If you have any concerns, check to see that the written instructions agree with your interpretation of the chart. If you still have problems, please send me a message on Ravelry, and I'll be happy tohelp you out!
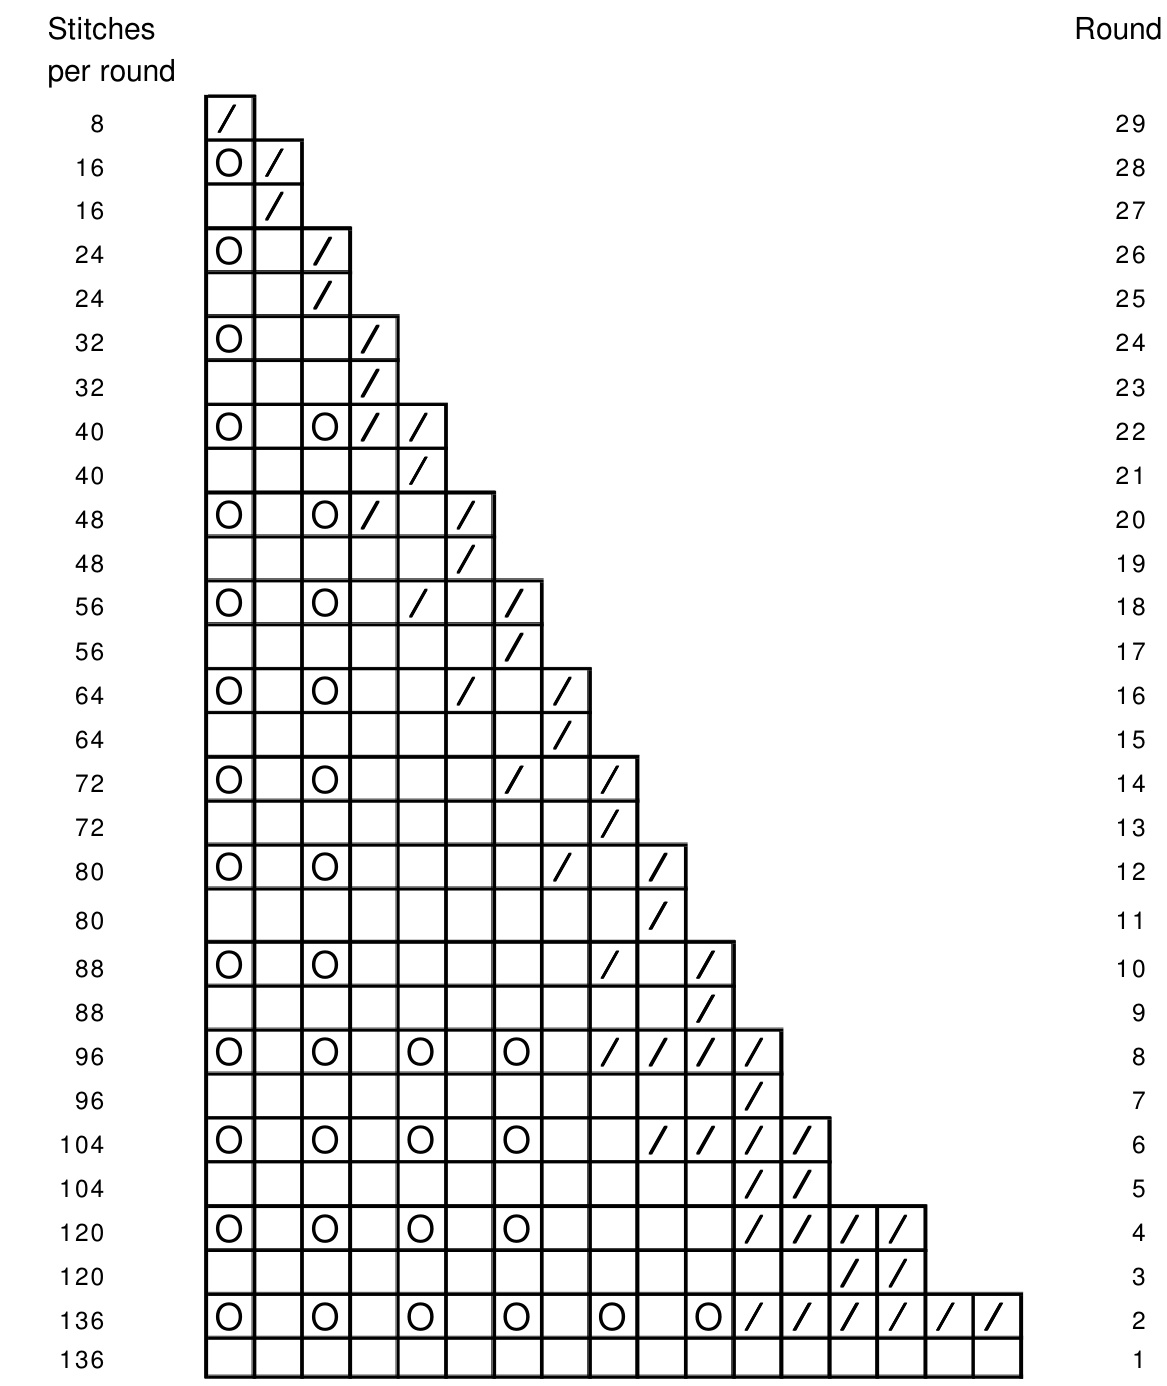
Abbreviations: KKnit YO Yarn over K2tog Knit two stitches together
Dishcloth or Washcloth Instructions:
Using your circular or double pointed needles, cast on 104 stitches VERY loosely. Being careful not to twist your stitches, join your knitting in the round. This simply means that instead of turning your knitting around to knit rows, you will be knitting in a circle. Your first knit stitch will be in the very first stitch you casted on. You will continue in this way for the entire project, never turning your work, but knitting only in a circle. If you are using circular needles, it is a great idea to use a stitch marker here, right before your very first stitch of round 1. If you are using double pointed needles, this is optional. Begin with the written instructions below, or use the chart on page 5. Each instruction will be repeated 8 times per round of knitting, which is shown below. Round Stitche 1 Knit all stitches. 104 2 NOTE: You may place a stitch marker at the end of each of the following 8 repeats to help keep track of the lace pattern.This may not be needed if you are using double pointed needles. [K2tog, K11, YO] x 8 3 [K2tog, K11] x 8 96 4 [K2tog, K10, YO] x 8 5 [K2tog, K10] x 8 88 6 [K2tog, K9, YO] x 8 7 [K2tog, K9] x 8 80 8 [K2tog, K8, YO] x 8 9 [K2tog, K8] x 8 72 10 [K2tog, K7, YO] x 8 NOTE: You will want to switch to double pointed needles when working with circular needles becomes too difficult. Evenly divide the stitches over 4 needles so that you have 2 repeats on each needle. 11 [K2tog, K7] x 8 64 12 [K2tog, K6, YO] x 8 13 [K2tog, K6] x 8 56 14 [K2tog, K5, YO] x 8 15 [K2tog, K5] x 8 48 16 [K2tog, K4, YO] x 8 17[K2tog, K4] x 84018 [K2tog, K3, YO] x 8 19 [K2tog, K3] x 8 32 20 [K2tog, K2, YO] x 8 21 [K2tog, K2] x 8 24 22 [K2tog, K1, YO] x 8 23 [K2tog, K1] x 8 16 24 [K2tog, YO] x 8 25 [K2tog] × 8 8
Dishcloth or Washcloth Chart:
Start at the bottom of the chart in the lower right hand corner. All rounds in this chart are knitted right to left. Each square is 1 stitch. If you have any concerns, check to see that the written instructions agree with your interpretation of the chart. If you still have problems, please send me a message on Ravelry, and I'll be happy to help you out!
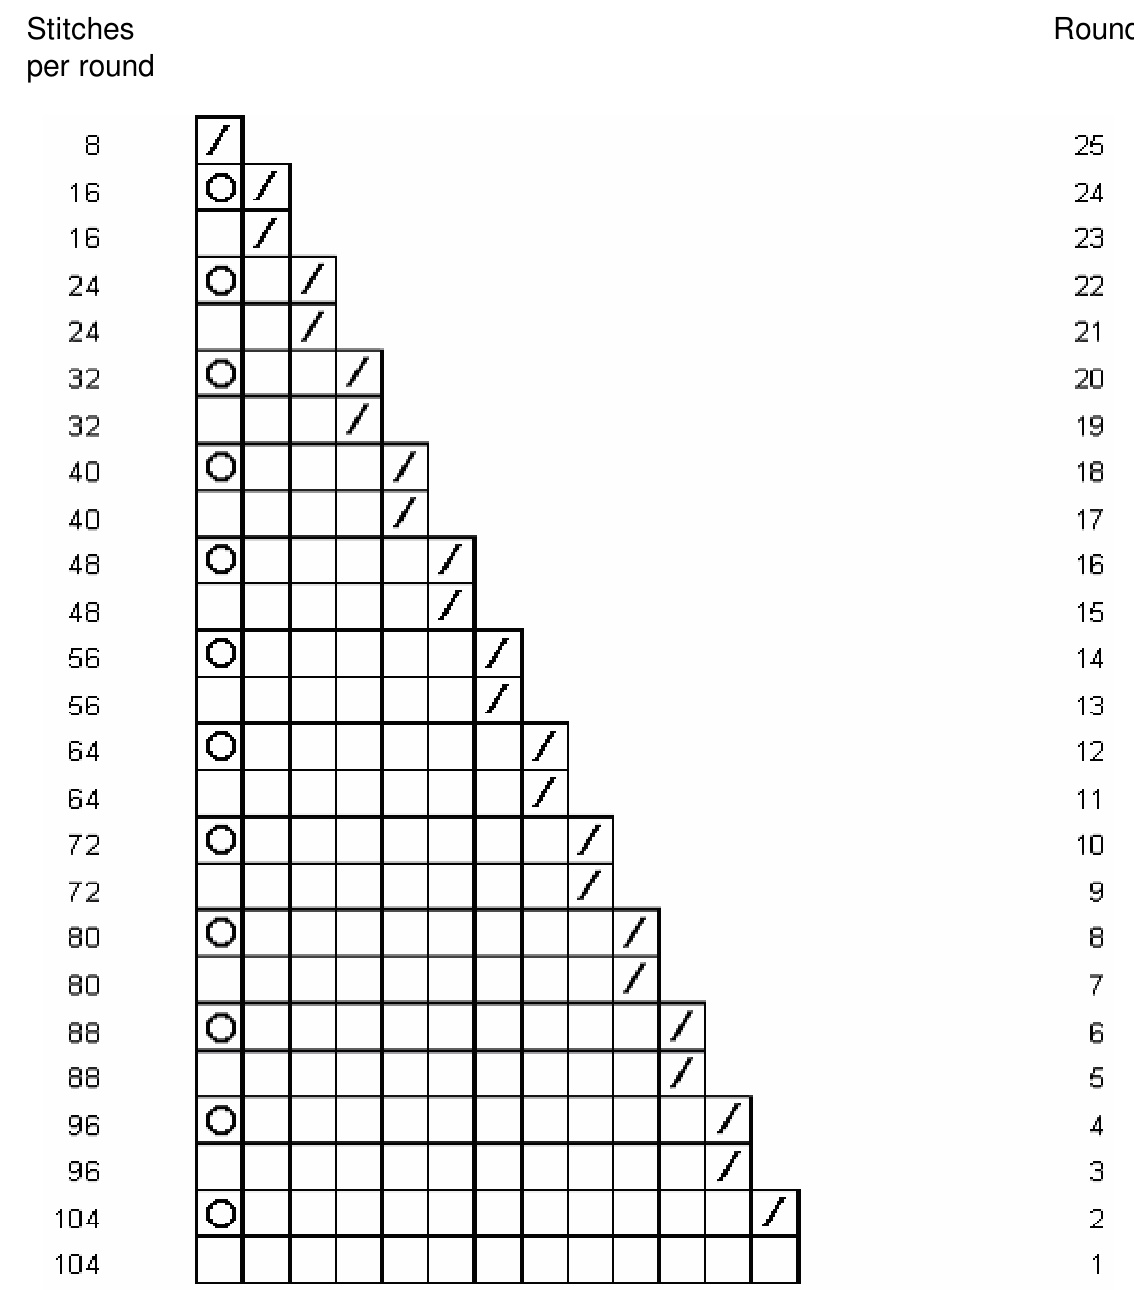
Abbreviations: KKnit YO Yarn over K2tog Knit two stitches together
Step by Step for Beginners:
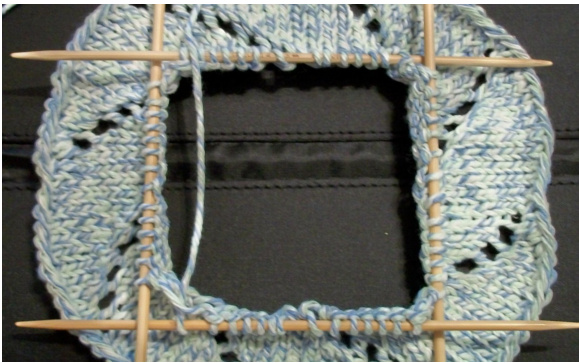
The following photos show step by step how the dish cloth is made. I was using double pointed needles, but you may use circular needles to do the magic loop method. Since I don't use magic loop, I can't help you with that at this time. IMPORTANT: Don't forget that the cast on must be very loose. I usually hold two needles together as one for my cast on, or you may use a needle several sizes larger so it will be nice and stretchy!
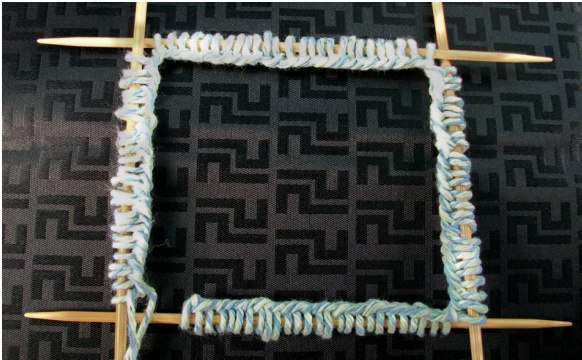
At left, all stitches are cast on. Be careful not to twist them - they must all face in the same direction. After casting on, knit the very first stitch and pull tightly so there isn't a gap between the stitches.
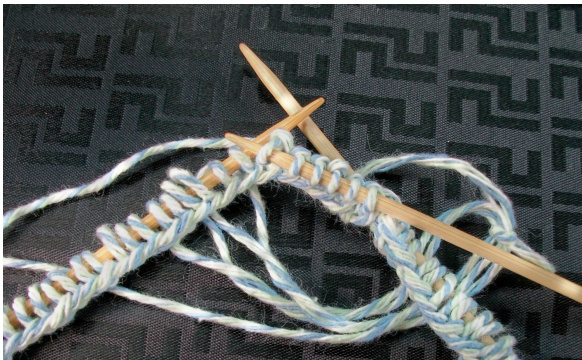
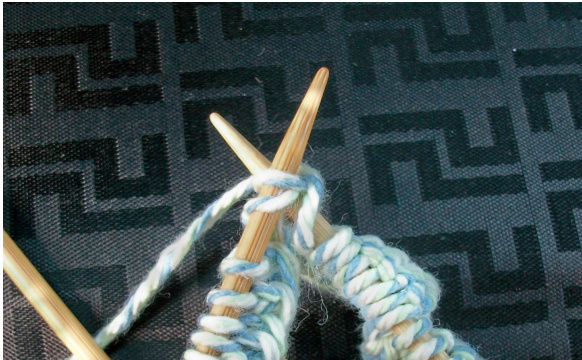
The photo at left shows the K2tog stitch. Knit two stitches together as if they were just one stitch. At right, the YO is shown. Simply wrap the yarn around the right needle one time. This creates the open pattern.
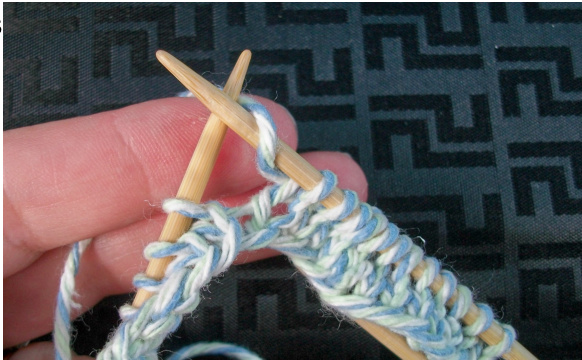
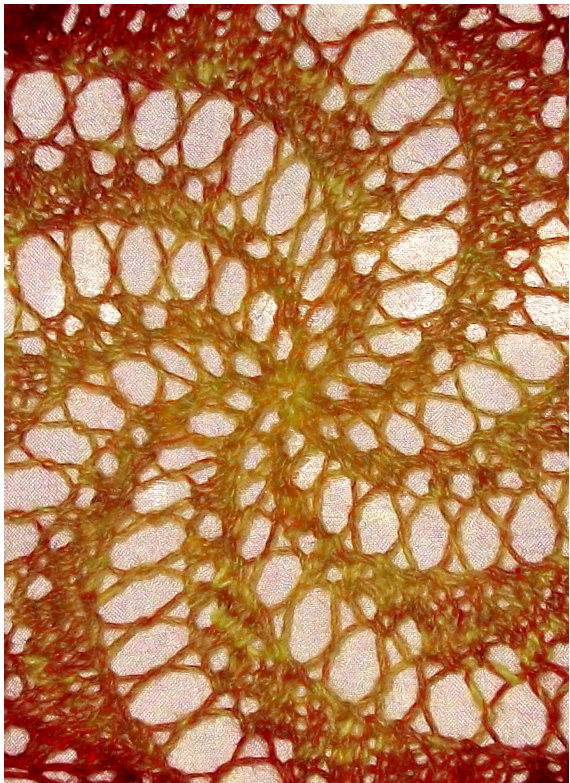
After you have knitted a bit, you will see a pattern emerge. At right, all of the knitting is complete, and all that remains is finishing steps.
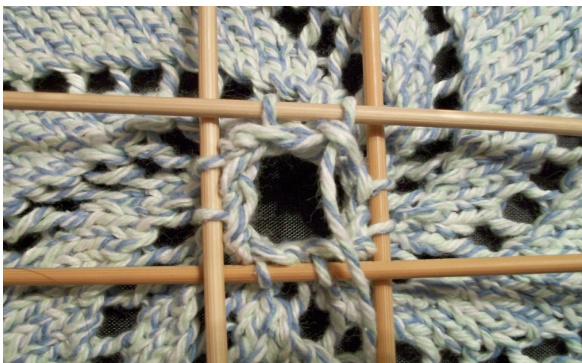
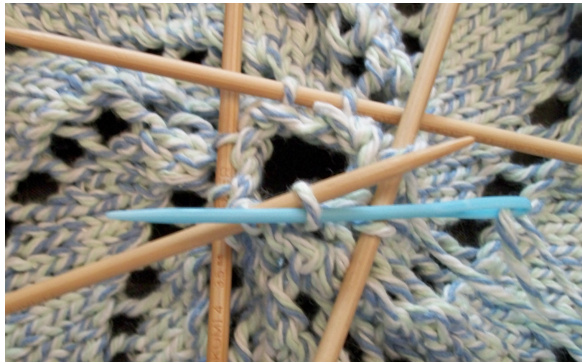
Break the yarn off leaving a long tail. Thread the yarn into a needle. Weave the needle through each of the last 8 stitches. Tie off on the wrong side. Weave in your other end. Block if desired - DONE!
Finishing Instructions:
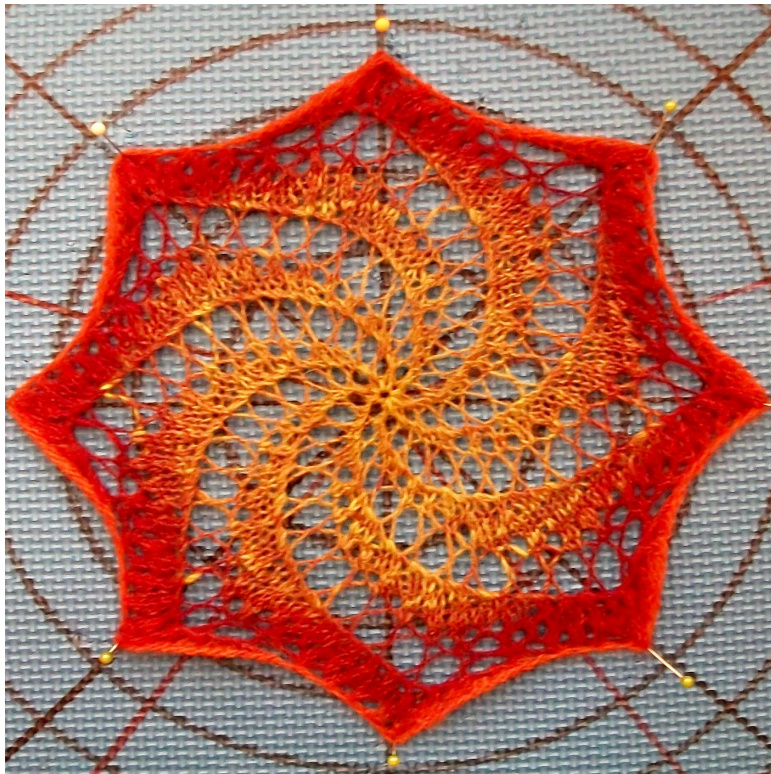
After you have completed the final round, break off your yarn, leaving a long tail. Thread a tapestry needle with the yarn tail. Weave the needle and yarn through the remaining 8 stitches, one at a time, in the same order you would have knitted them. Then, bring through to the wrong side of your work. Tie off securely, especially if this is a dish cloth that will see some hard scrubbing work! Weave in the cast on end and also tie this off securely. You must block your doily for it to stay flat. You may also block your dish or wash cloth, but this would be optional. I lightly ironed mine to make it flat. Wash Promenade lightly and blot on towels. Pin out on a blocking mat. I like to use foam mats for this purpose, but other ideas include towels or a bed. Stretch the 8 sides out, as shown in the photo. You will see that the doily will have 8 curves. These are located at about the midpoint between the yarn over sections. Stretch these out and pin. Allow to dry before removing the pins. You may also spray your doily with starch if you'd like it to have more body.

Linda loves lace! While she enjoys just about any craft that uses yarn, knitting lace is her favorite. Since she lives in sunny Florida, working with lightweight yarns and open patterns just seems to comenaturally.Shefindssomethingmagicalincreatingintricatepatternswithabeautifulyarn.


