The Kia-Ora Snuggle Hat by Helen Jacobs-Grant 2009 all rights reserved http://myheartexposed.co.uk email : myheartexposed@me.com
The "Kia-Ora Snuggle" is named for three reasons : a) The name 'Kia-Ora' comes from the Maori word meaning 'good health'. b) The colours and texture remind me of the old $\mathbf{80^{\prime}s}$ calypso style adverts for the Kia-Ora drink c) This project was designed with little Miss Imogen in mind, who is just full of well being, vitality and health, always fun and loves to snuggle. This wasn't always the case, she was born so tiny and was very ill for the first weeks of her life. Making up for it now though and at nine years old she is so springy and bouncy she always makes everyone around her smile and that is what I hope for anyone who generously gives this hat to someone special, that they feel uplifted by knitting and wearing it and that a warm smile shines through the face. as I cant see to do this with a crochet hook I use this improvised method for all my cast on edges : make a loop in your yarn and form a slip knot, place loop on peg 1 and pull working yarn to secure, with working yarn coming from behind the loop and in towards you from between pegs 1 and 2, catch the working yarn from the side of peg 1 by inserting your hook upwards into the first loop pulling the new loop down through the side of the stitch and back towards you from the side of the peg 1 and place the new loop on to peg 2 pulling the working yarn behind the pegs as you go along. (note that the new loop comes from behind and along the side of the first loop on peg 1 straight on to the next peg without going over peg 1 at all) \*Feel free to use the regular crochet cast on instead if that is easier for you\*
Knit Stitch :
place working yarn across the pegs above the stitches going in the direction you are working in, insert your hook upwards into the first stitch, hook the working yarn and pull it downwards to form a loop sticking out from the stitch that is on the peg, hold this new loop firmly and gently lift everything off the peg replacing it with your new loop you are holding, tug working yarn to secure.
Purl Stitch :
place working yarn across the pegs below the stitches going in the direction you are working in, insert your hook downwards into the first stitch, hook the working yarn and pull it upwards to form a loop sticking out from the stitch that is on the peg, hold this new loop firmly and gently lift everything off the peg replacing it with your new loop you are holding, tug working yarn to secure.
Flat Panel Bind Off :
knit first stitch, knit second stitch but whilst holding your new loop, instead of placing it back on the peg, pullit over to the previous stitch and place it on top of it, lift the bottom stitch over the top one and off the peg, move your remaining stitch over one place to the empty peg and repeat this process of knitting the next stitch moving the new loop back one place and lifting off the bottom stitch on that peg then moving your new stitch over to the empty peg along the row until all your stitches are bound off, cut working yarn leaving a long tail, pull tail through last stitch lifting the stitch off the peg pulling yarn to secure.
Pattern Notes :
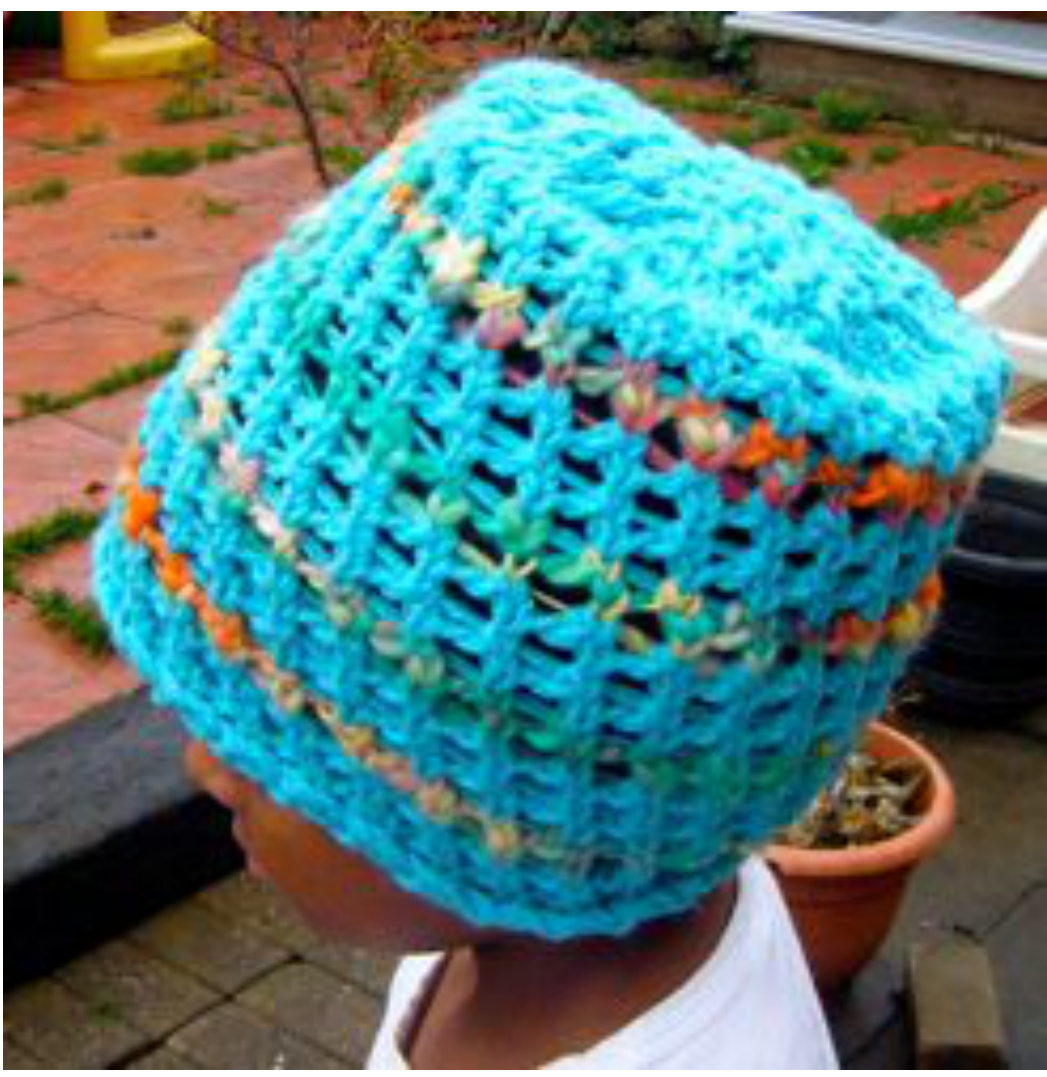
1 : Use any size round loom that will fit over the head of the intended wearer (1/2 inch regular gauge hat loom was used for the example shown in the photos) Aran or Bulky weight use one strand for regular gauge two strands for knifty knitters Boucle, Slubbed or Textured yarn use one strand for all looms (two strands of turquoise DK Robin Double Knit acrylic and one strand of handpainted medium slub pure wool was used in the example shown in the photos) You will also need your loom hook and a large eye sewing needle Instructions : 1 : crochet cast on join in the round 2 : knit row 3 : move 1 to next peg, knit top loop then lift the bottom loop over the new top loop all on the same peg, continue all the way around passing your working yarn behind the empty pegs as you work $4:$ knit all the pegs with stitches on passing your working yarn in front of the pegs 5 : ewrap and knit of every peg repeat steps 3, 4 and 5 until your tube piece is long enough to fit around your head comfortably ( I did a total of 14 repeats ) 6 : divide your stitches into five sections by tying a piece of scrap yarn in between each of your five sections 7 : working on one set of stitches only, knit two rows next row follow the stitch pattern as before, each time you have finished rows 3, 4 and 5 move the two end stitches in one place and lift the bottom loop off over the top one so that you have decreased your row by two stitches when you come to the last two stitches just knit two rows and bind off 8 : complete all five sections then join each of your five triangles in the center pulling your working yarn down inside your hat $\mathfrak{g}:$ carefully seam up the edges of your five triangles to form the flat top of the hat, weave in all the loose ends inside 10 : take lots of photographs and enjoy


