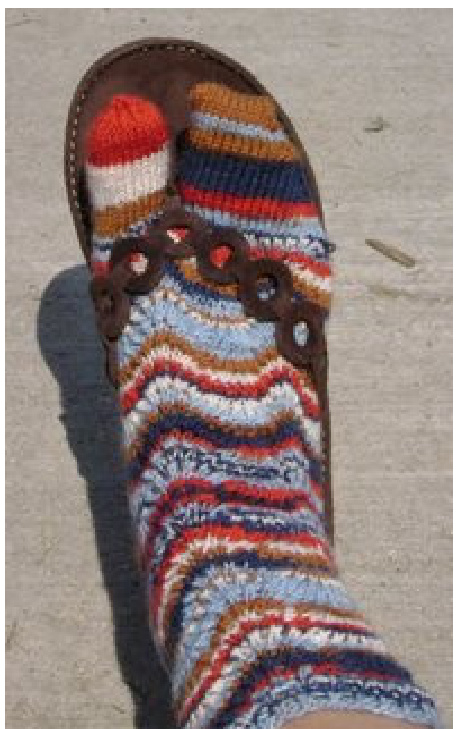
Fourth of July Socks
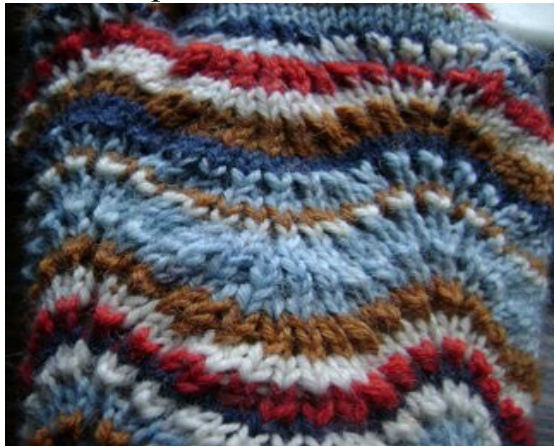
I am of the snooty opinion that crocheted items should look crocheted, and knitted items should look knitted. I realize that there are other Feather and Fan sock patterns on the web, but they didn't appeal to me, as they had a vaguely disturbing crocheted look to them (no offense to the excellent author of the pattern). This pattern fixes that "problem". The modified Feather and Fan stitch pattern I have used here is excellent for showing off self-striping sock yarn, and even has a bit of lace in it! The easy stitch pattern continues down the heel flap, making it perfect for clogs or open heeled shoes. Also, I have included options for a regular shaped toe or a split toe (for those fip-flop fiends!) Wear these with a pair of your favorite jeans, and won't you be the stylish knitter! Why hide hand-knitted socks under old tennis shoes - flaunt your fiber art skills with flip-flops!
Materials: 4 US size 1 double pointed needles, 300-350 yards of self striping fngering weight yarm (pattern was knitted with Lion Brand's Magic Stripes yarn), 1 darning needle, 2 stitch holders (small holders work best, or a long piece of yarn will do nicely). Gauge:40 stitches $=1$ inches in K 1, P1 ribbing, or 36 stitches $=4$ inches in Feather and Fan pattern. (NOTE: I prefer snug socks, so you might want to try a size 2 or 3 needle if you think you'd like your socks a bit more lose. The gauge I chose should comfortably fit a 9 inch ankle.) CUFF: CO 72 stitches. Divide stitches on 3 needles, 36 stitches on needle #1 and 18 stitches on needles #2, and $\#3$ . Work in K1, P1, ribbing around for 3 rows. Begin Feather and Fan pattern as follows: Row 1: \*(K2tog) 3 times, (K1, YO) 6 times, (K2tog) 3 times.\* Repeat from \* to $^*4$ times. Rows 2 - 4 (WS): Knit Repeat rows 1 - 4 until sock cuff measures desired length, usually 4 - 6 inches. HEEL FLAP: Work heel fap on needle #1 only. Row 1: \*(K2tog) 3 times, (K1, YO) 6 times, (K2tog) 3 times.\* Repeat from \* to \* 2 times. Turn. Rows 2 - 4 (WS): Knit. Turn. Repeat rows 1 and 2 five times. TURN HEEL: Row 1: Sl1, K19, K2tog, K1. Turn. Row 2: Sl1, P5, P2tog, P1. Turn. Row 3: Sl1, K6, K2tog, K1. Turn. Row 4: Sl1, P7, P2tog, P1. Turn. Row 5: Sl1, K8, K2tog, K1. Turn. Row 6: Sl1, P9, P2tog, P1. Turn.
Continue in this fashion, increasing 1 stitch after each slipped stitch, util row 15 WS; 2 stitches on the needle). Then, Sl1, K20, K2tog. Turn. P19, P2tog. Turn. Sll, and knit across. GUSSET: With fee needle, pick up and knit 18 stitches fom lft edge ofhel fap. Combine stitches fom needles $\#2$ and #3 onto one needle, and $[^{\ast}(\mathrm{K}2\mathrm{tog})\,3\$ times, (K1, YO) 6 times, K2tog) 3 times.\* Repeat fom \* to $^*2$ times] across. With free needle pick up and knit 18 stitches from other side ofheel flap, and (using same needle) knit 10 stitches from next needle. Transfer remaining stitches to the next needle, which is now needle #1 (92 stitches). Row $1!\mathrm{K}$ around all needles. Row 2: K acrossto last three stitches, K2tog, K1. K across needl #2. On needle #3, K1, SSK, K across needle. Row $3!\,\mathrm{K}$ around all needles. Row 4: K across to last three stitches, K2tog, K1. On needle #2, [\*(K2tog) 3 times, (K1, YO) 6 times, (K2tog) 3 times.\* Repeat from \* to $^*2$ times] across. On needle #3, K1, SSK, knit across. Repeat rows 1 - 4 until 72 stitches remain. Then, K across needles #1 and #3, and continue folowing stitch pattern on needle $\#2$ until foot reaches the gap between big toe and middle toe. TOE SHAPING (Regular toe): Row 1: Knit across to last three stitches, K2tog, K1. On needle #2, K1, SSK, knit across to last three stitches, then K2tog, K1. On needle #3, K1, SSRagni2across. Row 2: K around. Repeat rows 1 and 2 until there are 16 stitches lef. Combine stitches from needles $\#2$ and $\#3$ Ontoone needle, and join the stitches on the two remaining needles with kitchener stitch. TOE SHAPING (Split toe, right foot): Row 1: Knit across to last three stitches, K2tog, K1. On needle #2, K1, SSK, knit 21. Place remaining 12 stitches on Needle #2 to a stitch holder (a piece of yarn works wel). On Needle #3, place 12 stitches to another stitch holder. Transfer a few stitches from Needle #1 onto Needle #3 (doesn't really matter how many) and knit across Needle #3. Row 2: Knit around. Row 3: Knit across to last three stitches on Neede #1, then K2tog, K1. On Needle #2, K1, SSK, knit across needle. Knit needle #3. Repeat rows 2 and 3 until there are 20 stitches leff. Place stitches from needles #3 and #1 onto one needle, and close opening with kitchener stitch. Big Toe: Slip stitches from two stitch holders onto three needles (8 per needle). Join yarn at edge of sock and knit around until the gap between the big toe and the rest ofthe toes. Pick up a stitch from the corner, then pick up a stitch from the other corner (so there's not a big hole in between your toes). Knit around untl toe is 1/4 inch shorter than desired length. K2tog around once. K around next row. K2tog around to last stitch, knit last stitch. Cut a 6 inch tail and weave through stitch loops. Finish off. TOE SHAPING (Split toe, leff foot): Row 1: Knit 6, place next 12 stitches from Needle #1 onto stitch holder, then 12 stitches from Needle #2 onto another stitch holder. Knit remaining stitches on Needle #2 until last three stitches, then K2tog, K1. On Needle #3, K1, SSK, knit across needle. Row 2: Knit around. Row 3: Knit Needle #1, on Needle #2, knit to within last three stitches, then K2tog, K1. On Needl #3, K1, SSK, knit across. Repeat rows 2 and 3 until there are 20 stitches leff. Combine stitches from Needles #3 and #1 onto one needle, and sew toe closed with kitchener stitch. Knit big toe same as for left foot.

$\sim$ this is a free pattern from DutchOrchid Designs. You can visit Rachel's blog at http://alohaknitter.blogspot.com


