Nurgake (Little corner)
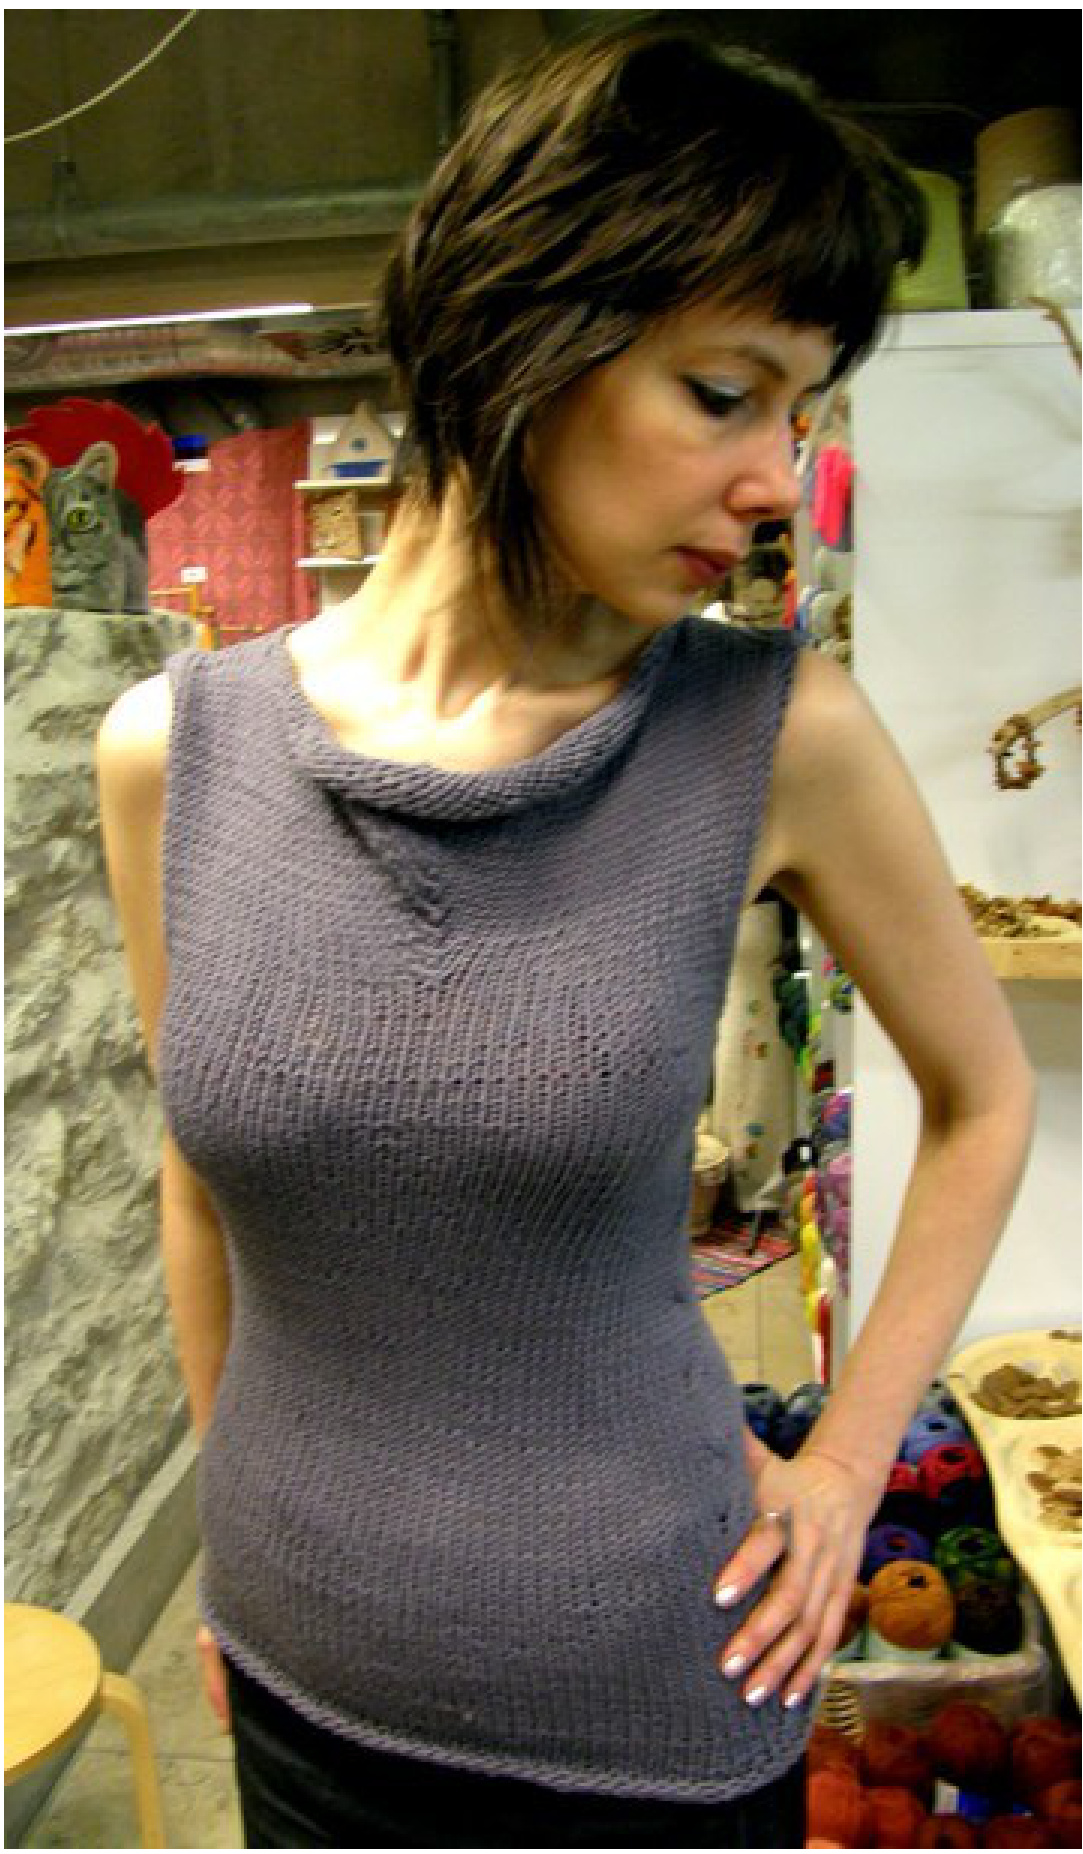
Yarn: Drops Paris, $100\,\%$ cotton, $50\ \mathrm{g}/75\ \mathrm{m}$ (4.5-5 skeins) Needles: 4.5 and $5\;\mathrm{mm}$ Gauge: stockinette stitch $10\;\mathrm{cm}\!\sim\!12{,}5$ st Chest circumference: $80\;\mathrm{cm}$ (the fabric is stretchy) Fits size S (34-36) Step 1. Cast on 47 st on $4.5\;\mathrm{mm}$ needles using waste yarn (provisional cast-on). Knit 40 rows (22 cm) in stockinette stitch. At 41th row add 1 stitch at both edges (after the first edge stitch and before the last edge stitch). You have 49 st. Knit one more row (the wrong side row), now you have 42 rows altogether. This is the upper part of the back piece (from shoulders to the end of the armholes). Step 2. Remove the waste yarn from 10 stitches starting from the left edge and put them on the needle (from the beginning of blue line to the point where the red line starts), then take a piece of waste yarn and provisionally cast on on the same needle 47 st (these sts will form the collar, the red line), then remove the waste yarn from the last 10 stitches on the right side of the back piece and put them on the needle (the second point where the red line ends and the blue line continues. You have 67 st now.

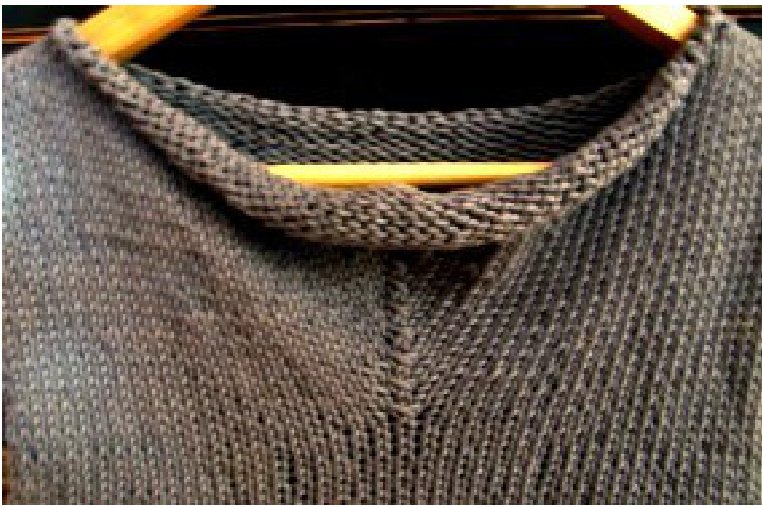
Step 3. Knit 10-12 rows in stockinette, then start decreases that will form the ,corner" of the collar. The decreases are made in the center of the row. Knit 31 st, make vertical double decrease (slip one, knit 2 together, pass slipped stitch over), knit to the end of the row. Now you have 65 st. Knit 3 rows (one WS row, one RS row, one WS row) and in the next RS row repeat the decrease (63 st). Knit 3 rows and decrease again (61 st). Then make decreases every RS row until you have 49 st lft. Now the width of the front piece is the same as that of the back piece. Knit as many rows as needed so that the length of the back and the front piece is equal. Step 4. Now join the pieces and work in round. You have $49+49=98$ st. If you need, you can cast on additional stitches between the back and the front part. Some knitters have a different gague in circular knitting (it is a little tighter than in flat knitting). In that case use needles $5\;\mathrm{mm}$ for round knitting. After 9 rows, make cables on the sides on 4 st (2 st from the front part and 2 st from the back part): take 2 st on the cable needle before the work, knit the next 2 st, knit 2 st from the cable needle. Knit 8 more rows. In the next row, make cables on the sides: 2 st on the cable needle behind the work, knit 2 next st, knit st from the cable needle. Continue in the same way, making the cables as described. Continue until you have the desired lenthg. Knit 4 rows in reverse stockinette (in circular knitting it means purl all rows), then 1 row in stockinette (knit all stitches). Bind off loosely. I have the following suggestion for bind-off knit 1 st (let's call it first stitch), make yo, knit the next st (let's call it second stitch), pass yarnover over the second stitch, pass the first stitch over that stitch. Continue in the same way: you have one stitch on the needle (the first stitch), yo, knit 1 (second st), pass yarnover over second st, pass the first stitch over that stitch. In this way, the edge is elastic and rather definite. Finishing: Collar: remove the waste yarn and take the stitches on circular needles. You have 27 st of the back part and 47 st of the front part. Knit one row (right side facing you), picking up 1-2 st between the back and the front part, if necessary. Bind off loosely. Armholes: pick up stitches of the armholes, right side facing you. Knit 1 row. Bind off loosely.