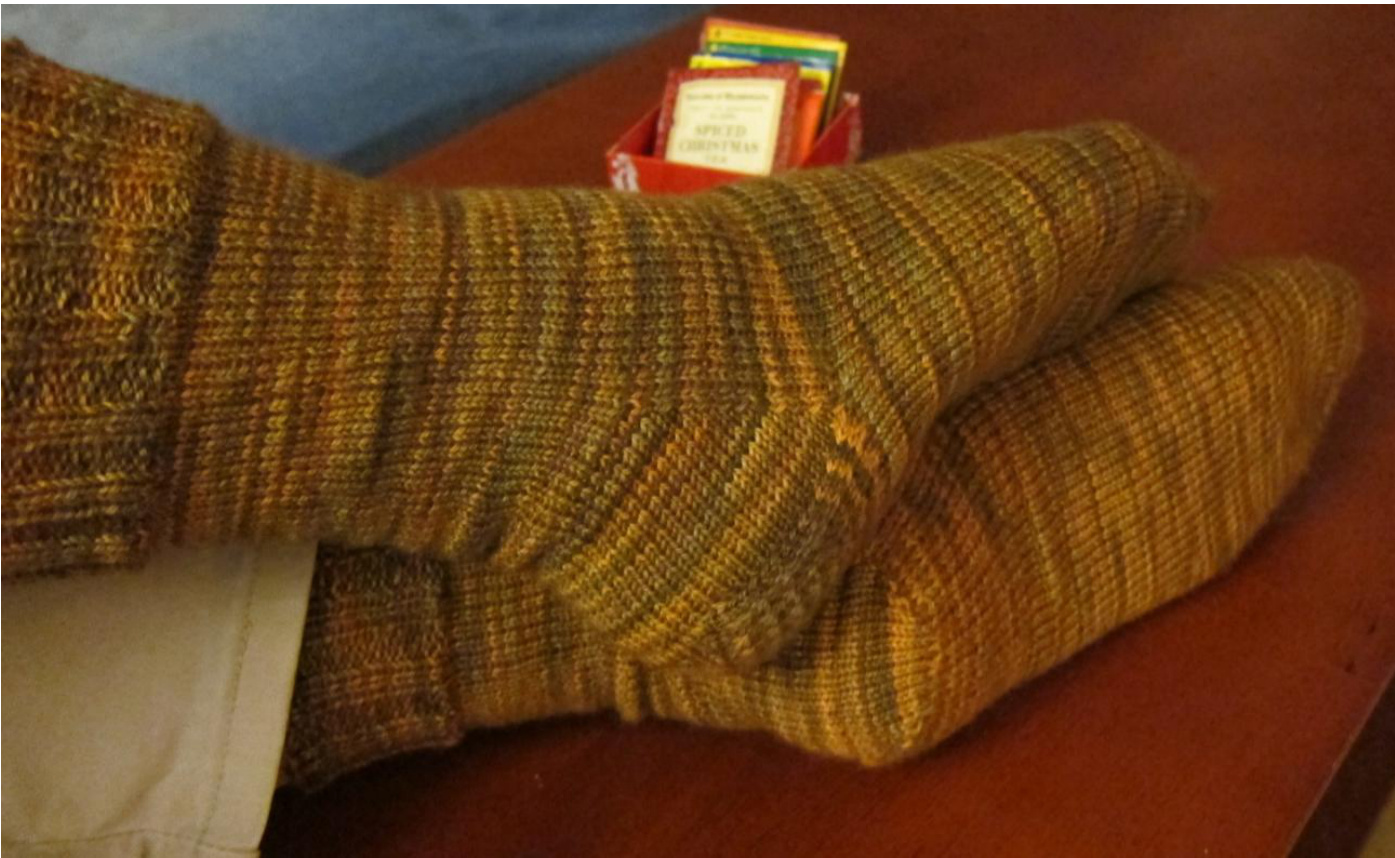
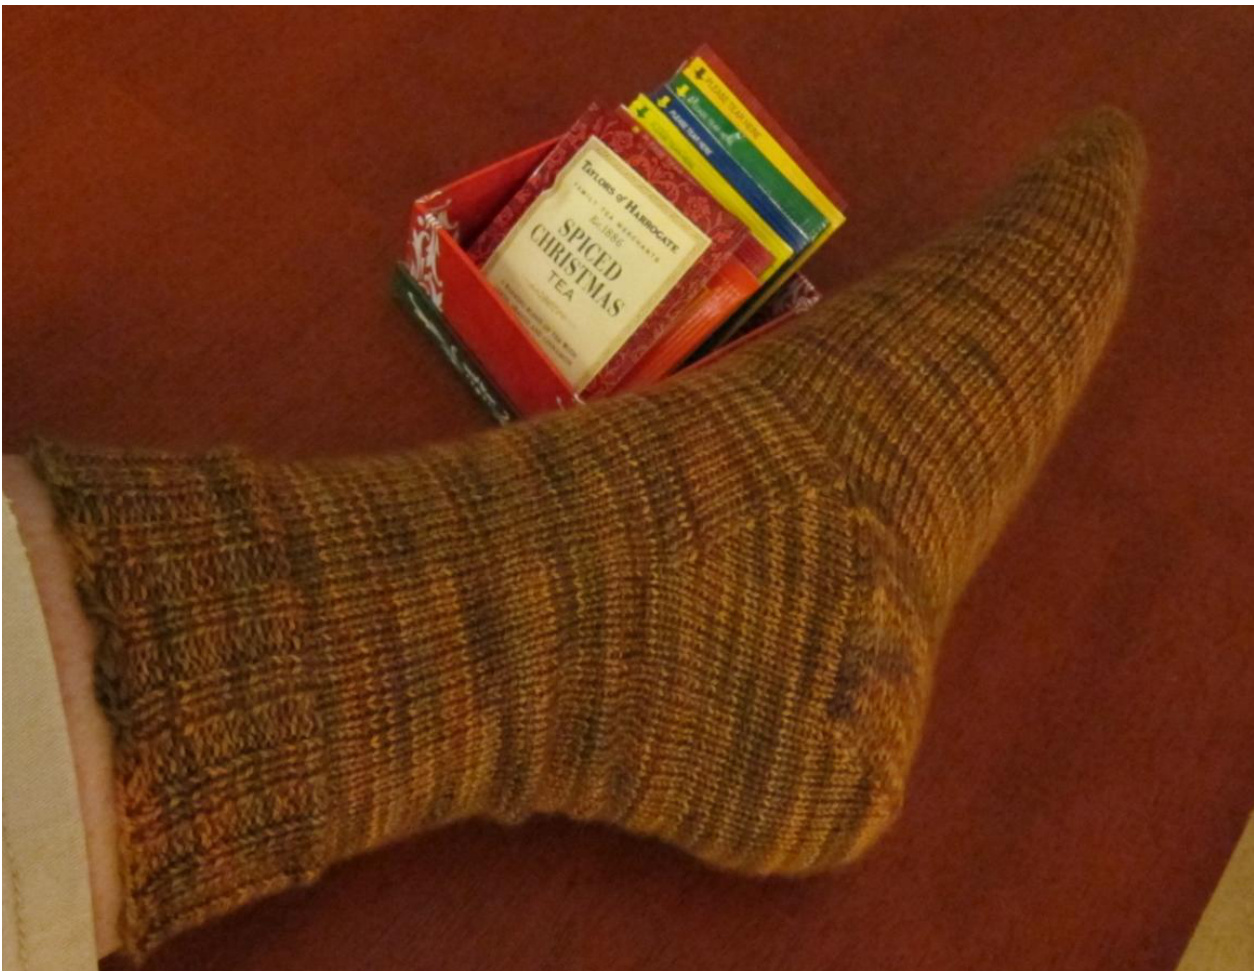
Muleteer Socks by GINEVRA
This isn't a fancy pattern; it's an account of my preferred toe-up sock technique. I decided to write it up because I couldn't find a pattern using this construction to file my socks under on Ravelry. I named them Muleteer Socks for several reasons. 1) I wear almost nothing but clogs in the wool sock season (aka winter) so I don't need my heels reinforced on the back. However, I wear them out quickly under the bottom of the heel. This sock is constructed with the reinforced heel flap in that spot to prolong my socks' lifetime. Muleteers are tough, durable workmen and these are tough, durable socks. 2) Also, mules are another name for clogs. I think it's funny. The pattern is extremely flexible and can be made with virtually any stitch count. General instructions are given, and stitch counts for a sample sock, women's size 10, are included as a guide. It is written for Magic Loop, but you could knit it with two circs or with DPNs just as easily. Make two at a time, one from each end of the ball (or divide in two by weight) to maximize yarn usage. Yarn: 1 100-gram skein of fingering weight yarn. Sample knit in Fleece Artist Nova Sock (color Bronze). Needles: Size needed to create a firm fabric at a suitable gauge. Sample knit using Knitpicks Classic Circulars, 32" US 1 (2.25 mm) and 32" US 2 (2.75 mm). Gauge for sample sock: 9 st/in
General Method
Sample Sock
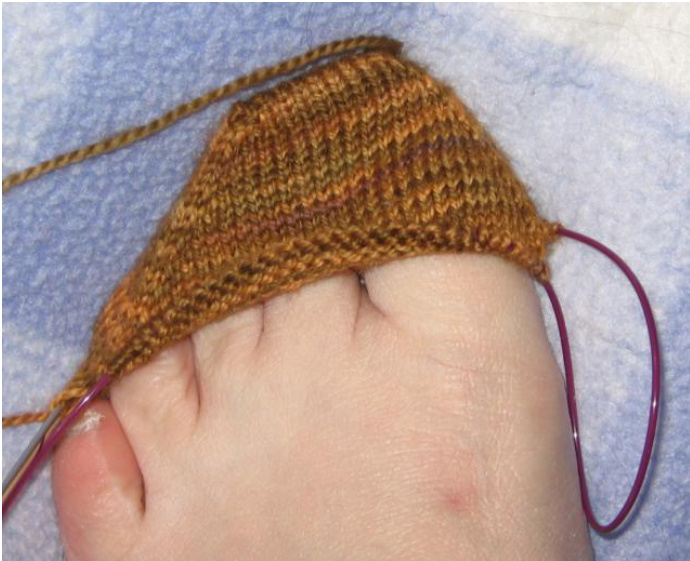
Toe
Using Judy's Magic Cast On, cast on 8 to 12 stitches on each point of the circular needle. Rnd 1: knit. Rnd 2: \*k1, m1L, knit to 1 stitch before end of needle, m1R, k1\* repeat from \*. Repeat Rnd 1 and 2 until the sock toe, slightly stretched, fits over the first 4 toes on your foot. (This allows you to use the toe as a gauge swatch when knitting with a new yarn. Assuming the needle size gives you a fabric you like, you now know the best stitch count for your yarn with zero time wasted.)
Toe
Cast 8 st onto each needle; 16 st total. After Rnd 1 and Rnd 2, there are 20 st total This toe fit when there were 64 st total, 32 on each needle.
Foot
Knit the foot, trying on the sock occasionally. Stop knitting when it reaches the place where your leg meets your foot when slightly stretched. Note: If you have a high arch, stop a bit sooner and knit your heel flap a bit longer. I stopped when my sock measured 7.5 inches from the toe tip (relaxed).
Heel Flap (worked over half the stitches) Rw 1: \*Sl 1 purlwise, k1. Repeat from \* to end. Rw 2: Sl 1 purlwise, p to end. Repeat rows 1 and 2 until (a) the heel flap is square (usually you will knit the same number of rows as stitches you are working the flap over) or (b) the heel flap just reaches the back of your heel when the sock is stretched comfortably on your foot. Over 32 stitches, knit in heel stitch (left) for 32 rows (16 slipped stitches).
Heel Turn
Rw 1: Sl 1, knit until you are three stitches past the center point, ssk, k1, turn. Count the stitches you left unworked when you turned. This number is N. Rw 2: Sl 1, purl until the number of stitches remaining is N plus three , p2tog, p1, turn. The same number of stitches should remain unworked on each side of flap after the gap. Rw 3: Sl 1, knit to one stitch before the gap, ssk across the gap, k1, turn. Rw 4: Sl 1, purl to one stitch before the gap, p2tog across the gap, p1, turn. Repeat rows 3 and 4 until no stitches remain unworked. Rw 1: Sl 1, k18, ssk, k1, turn. Rw 2: Sl 1, p7, p2tog, p1, turn. 10 st remain unworked on each side of flap after the gap. Rw 3: Sl 1, k8, ssk across the gap, k1, turn. Rw 4: Sl 1, p9, p2tog across the gap, p1, turn. Rw 5: Sl 1, k10, ssk across the gap, k1, turn. Rw 6: Sl 1, p11, p2tog across the gap, p1, turn. Rw 7: Sl 1, k12, ssk across the gap, k1, turn. Rw 8: Sl 1, p13, p2tog across the gap, p1, turn. Rw 9: Sl 1, k14, ssk across the gap, k1, turn. Rw 10: Sl 1, p15, p2tog across the gap, p1, turn. Rw 11: Sl 1, k16, ssk across the gap, k1, turn. Rw 12: Sl 1, p17, p2tog across the gap, p1, turn. 20 stitches remain on the heel needle.
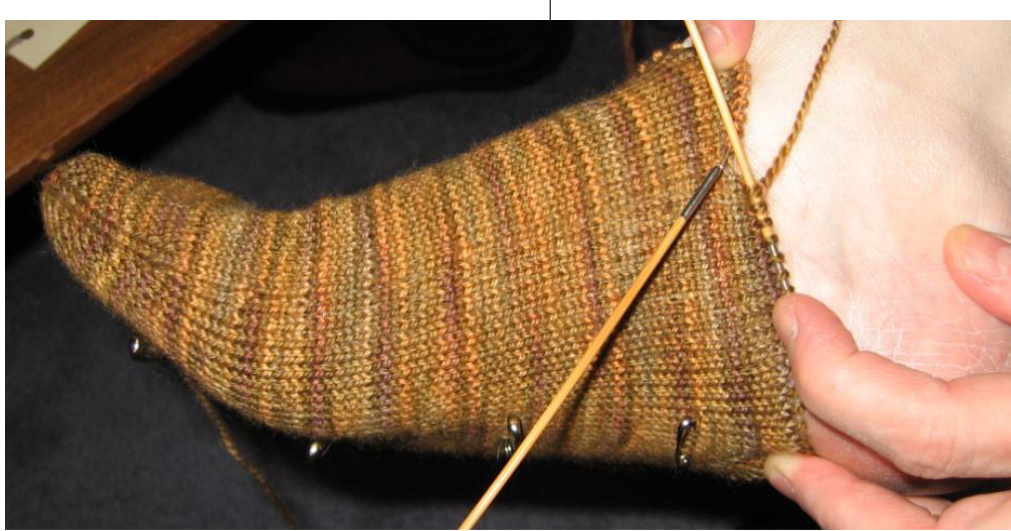
Gusset
Knit across half the heel stitches and arrange needles so this is the beginning of the round. Pick up and knit one stitch for every two rows down the side of the heel flap. Pick up two extra stitches in the gusset to prevent holes. Place marker. Knit across the instep. Place marker. Pick up two stitches in the gusset, and then one stitch for every two rows up the other side of the heel flap. You are working in the round again. Rnd 1: Knit to three stitches before the marker. K2tog, k1, slip marker, knit across instep, slip marker, k1, ssk, knit to end of rnd. Rnd 2: Knit. Repeat Rnd 1 and 2 until you are back to the original number of stitches. Knit across 10 heel stitches and arrange needles so this is the BOR. Knit the remaining 10 heel stitches. Pick up 16 stitches down the heel flap. Pick up 2 stitches in the gusset. Place marker. Knit across instep. Place marker. Pick up 2 stitches in the gusset. Pick up 16 stitches up the heel flap. Knit to end of rnd. 88 stitches total. Rnd 1: Knit to three stitches before the marker. K2tog, k1, slip marker, knit across instep, slip marker, k1, ssk, knit to end of rnd. Rnd 2: Knit. Repeat Rnd 1 and 2 24 times. Your sock is now down to 64 stitches again.
Leg
Knit the leg, trying on the sock occasionally. Stop when the leg is long enough to make you happy, or when you think you are approaching the limits of the yarn.
Cuff
Knit 20 rounds of k2 p2 ribbing. Switch to a needle 2 sizes larger and knit one round of ribbing. Bind off loosely using Jeny's Surprisingly Stretchy BindOff (http://www.knitty.com/ISSUEfall09/FEATjssbo.php) Weave in ends. I knit my leg 4.25 inches past the end of the gusset. 21 rounds plus the bind off gave me just over 2 inches of ribbing. You can use however much youwant. Bind off (as left) and weave in ends.