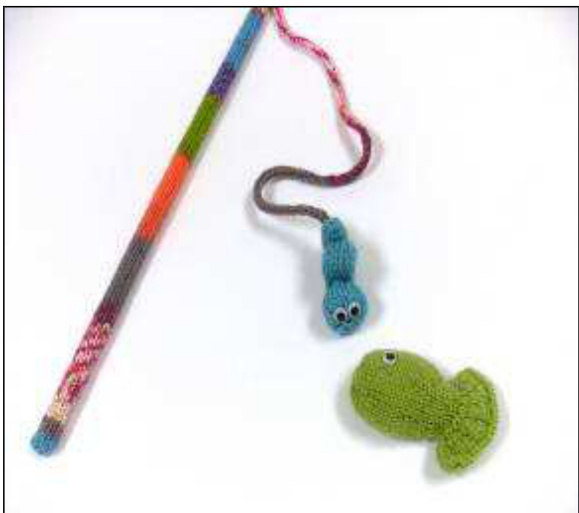
Fish Story designed by Nancy Anderson
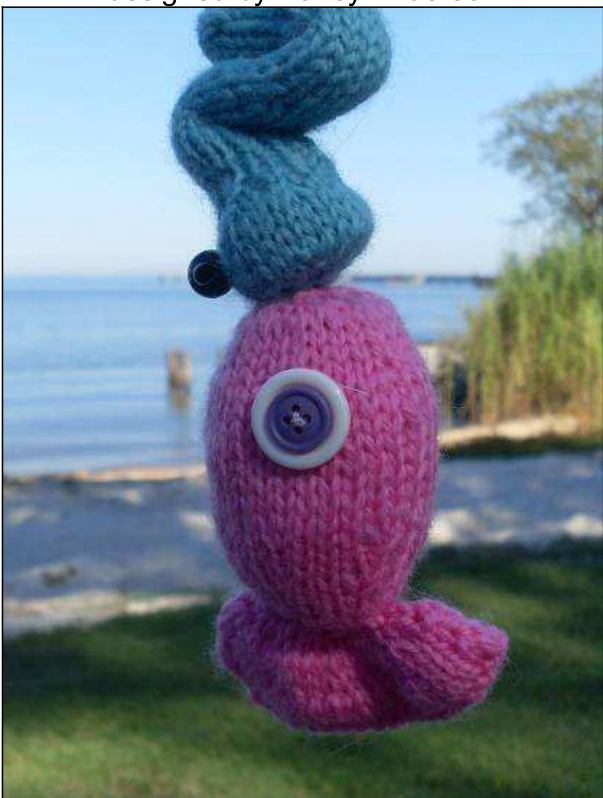
Easy, fast project perfect for using up small amounts of yarn...Knit tube slips over 38" dowel to form fishing rod...Use self striping worsted weight yarn for fishing rod & a variety of yarn remnants for colorful fish & worm. ..Fish have a magnet inside so they can be caught by the magnet insidetheworm.
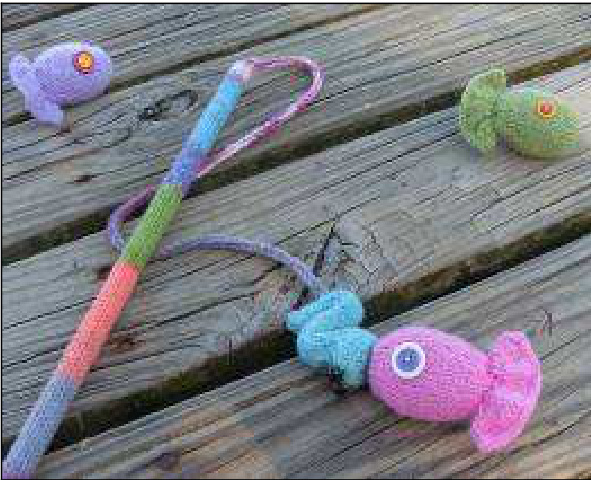
SKILLLEVELEaSy SKILLS REQUIRED knitting on circular needle or dpns, knit, kfb, k2tog, knitted I-cord. SIZE Fishing rod is 19 % " long, (line is 20 " long). Fish is 3 %2 " from nose to tail. Worm is approximately 4 12" long before shaping.
MATERIALS
YARN
This pattern requires approximately 55 yards of worsted yarn (referred to as MC - main color) for the fishing rod & I cord fishing line & less than 20 yards per (1) fish or worm (referred to as CC - coordinatingcolor). Copyright Nancy Anderson, 2011. All rights reserved. For personal use only. Contact designer at nanderson360@gmail.com
YARNSUSEDINMODEL
Fishing Rod: Red Heart Stripes, “"Cancun Stripe" [100% acrylic; 170 yards/ 156 meters per 3.5 ounce/100 gram ball]; color 942 Cancun Stripe; approximately 55 yards. Fish & Worm: Stitch Nation Washable Ewe, [100% super wash wool; 183 yds/167meters per 3.5 ounce/100 gram ball]; assorted colors; Robin's Egg, Green Apple, Dragonfly & Lilac.
RECOMMENDEDNEEDLES
US 4/3.5 mm circulars or (4) US 4 dpns - for fish & worm US 6/4 mm circulars or (4) US 6 dpns - for fishing rod
NOTIONS
Stitch marker, Tapestry needle, stuffing, 3/8" dowel cut to size (19 %2" ), 1" diameter magnets, (1 each per fish & 1 for worm), 2 buttons, (or wiggly eyes or post & washer eyes) per fish and worm.
GAUGE
Gauge is not important for this project. Stitches should be worked tightly enough as to prevent stuffing showing through. Use smaller needle than size recommended for yarn in order to obtain tightlyknit fabric.
ABREVIATIONS
Dpn = double point needles MC = main color, this will be the yarn for the fishing rod. CC = coordinating color, this will be the yarn used for fish & worm. K = knit stitch Kfb = increase made by knitting in the front & back of a stitch. K 2 tog = decrease made by knitting 2 stitches together St(s)- stitches
PATTERN NOTES
?All components are worked in the round. Fishing rod utilizes wooden dowel inserted into the knitted tube. Magnets are used in both the worm and the fish for "catching" the fish. These are placed in the mouth end of the fish & worm before stuffing. For best results use a strong magnet, (1" diameter). Pay close attention to which side of the magnet will be facing outwards. Make certain that the magnetic field of the magnet in the fish is compatible with the magnetic field for the magnet in the worm, (remember grade school science & the North & South polarity of a magnet). Test this before proceeding by holding the fish up to the worm, if it sticks it's good but if the poles are off it won't and you won't be able to "catch" any fish. Remember that opposites attract. Place eyes on both sides of the head using your choice of buttons, safety eye (post & washer eyes) or wiggly eyes. Please be safe. Toy not suitable for babies or very young toddlers due to choking hazards from small pieces & long length of knitted cord, which could get wrapped around little necks &extremities. I-cord is worked on 2 dpn's or circular needle used as straight needles. To make I-cord, knit required stitches, making certain to pull the stitches tightly for good tension. Rather than turning work after stitches are made, slide it to the other end of needle and work the stitches. Repeat process of sliding and knitting until optimal length is achieved. Bind off and use yarn tail to close live stitches.
INSTRUCTIONS
Fishing Rod
Using MC & Size 6 needles, CO 9 sts, join. Rnd 1-114: K in each st around: 9 sts. Rnd 115: K 1, [K2 tog] around: 6 sts. Rnd 116: K 1, [K2 tog] around: 4 sts. Rnd 117: K 1, K 2 tog, k1: 3 sts Next Step: Begin fishing line; work in I-cord for 20 ". Finish off, leaving yarn tail for attaching worm.
Worm
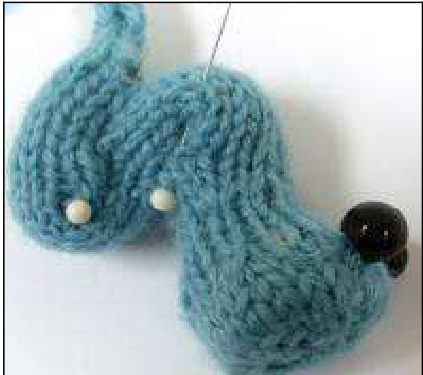
Using CC & size 4 needles, CO 6 sts. Rnd 1: Kfb in each st around: 12 sts. Rnd 2: [K1, kfb] around: 18 sts. Rnd 3: [K2, kfb] around: 24 sts. Rnd 4-6: K in each st around: 24 sts. Rnd 7: [K2, K 2tog] around: 18 sts. Rnd 8: K in each st around: 18 sts. Rnd 9: [K1, K 2tog] around: 12 sts. Begin stuffing by placing magnet 1s, followed by stuffing. Continue to stuff as rounds are worked. Rnd 10: K 2tog, k 8, k 2 tog around: 10 sts. Rnd 11-12: K in each st around: 10 sts. Rnd 13: [K4, kfb] twice: 12 sts. Rnd 14-27: K in each st around: 12 sts. Rnd 13: [K2 tog, k 4] twice: 10 sts. Rnd 28-48: K in each st around: 10 sts. Rnd 49: [K 1, k 2 tog] around: 7 sts. Finish stuffing. Rnd 50: [K 1, k 2 tog] twice, k 1: 5 sts. Finish off, leaving yarn tail for shaping worm.
Fish
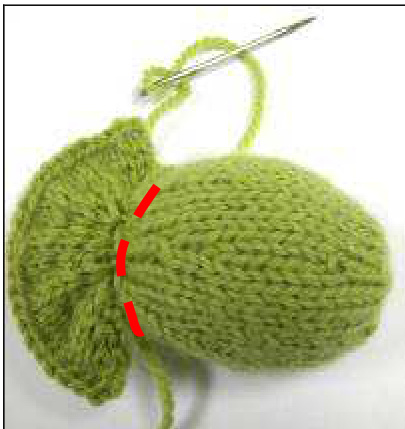
Using size 4 needles & CC, CO 6 sts. Rnd 1: Kfb in each st around: 12 sts. Rnd 2: [K1, kfb] around: 18 sts. Rnd 3: [K2, kfb] around: 24 sts. Rnd 4-6: K in each st around: 24 sts. Rnd 7: [K3, kfb] around: 30 sts. Rnd 8-15: K in each st around: 30 sts. Copyright Nancy Anderson, 2011. All rights reserved. For personal use only. Contact designer at nanderson360@gmail.com Rnd 16: [K3, K 2tog] around: 24 sts. Rnd 17-18: K in each st around: 24 sts. Rnd 19: [K2, K 2tog] around: 18 sts. Rnd 20-22: K in each st around: 18 sts. Rnd 23: [K1, K 2tog] around: 12 sts. Rnd 24: K in each st around: 12 sts. Rnd 25: [Kfb] around: 24 sts. Rnd 26: K in each st around: 24 sts. Rnd 27: [K1, Kfb] around: 36 sts. Rnd 28: K in each st around: 36 sts. Rnd 29: [K2, Kfb] around: 48 sts. Rnd 30-31: K in each st around: 48 sts. Insert magnet first, place stuffing firmly behind the magnet to hold it in place. Test the magnet polarity by holding the fish up to the worm, (if it sticks, it's good, if not, turn magnet around to other side). Do NOT stuff tail portion. Use 3 needle bind off or stitch end closed using yarn tail Referring to the photo, stitch through layers at the junction where the tail begins to further hold stuffing and magnet in place & to add a bit of shaping, pull tightly & finish off.
FINISHING
Using yarn tail from worm, thread tapestry needle & bend the 1st 3'd of the worm. Stitch this bend to form the first hump of the worm's back. Repeat for 2"d part of the worm. Set aside.
Shaping the worm Slip dowel in knitted fishing rod & close hole using yarn end. Attach worm to end of “fishing line" using the yarn tail from the line. Weave and trim ends. Copyright Nancy Anderson, 2011. All rights reserved. For personal use only. Contact designer at nanderson360@gmail.com
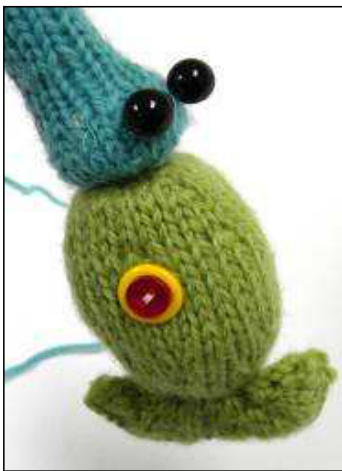
Sew or glue eyes onto worm as pictured. Avoid placing the eyes on top of the magnet as this will effect the strength of the magnet by creating a barrier between the magnet in the fish & the one in theworm.
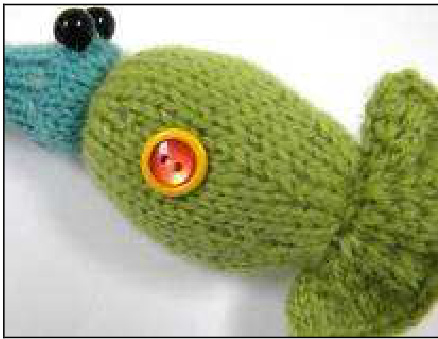
Using buttons, (2 per fish), sew eyes to head on top and bottom at the same location. (Model 's eyes in picture consist of 2 different sized buttons layered to create colorful, interesting eyes). Thank you for purchasing my pattern. I hope that you will enjoy knitting it as much as I enjoyed designing it. Please contact me with questions or concerns at the email address found in the footer of this document. And come visit me at yarnjulelpsontheveranda.com or on Ravelry where my user name is Missjulep. Finally, this is your pattern, you purchased it. What you do with the finished Fish Story Game is your own business. However, please do not reproduce or sell this pattern without my express permission.


