La vie en rose shawlette
Styled by Karen Burns for AslanTrends Brasil
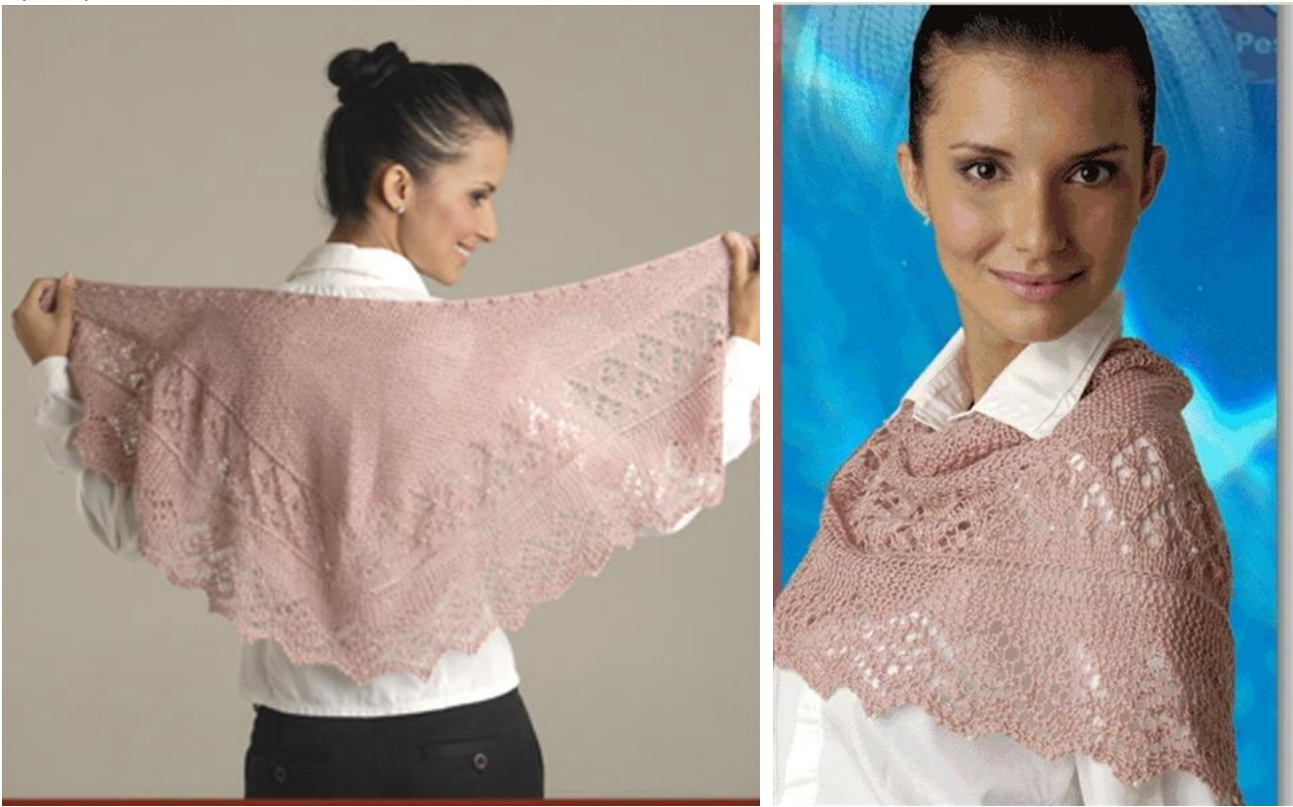
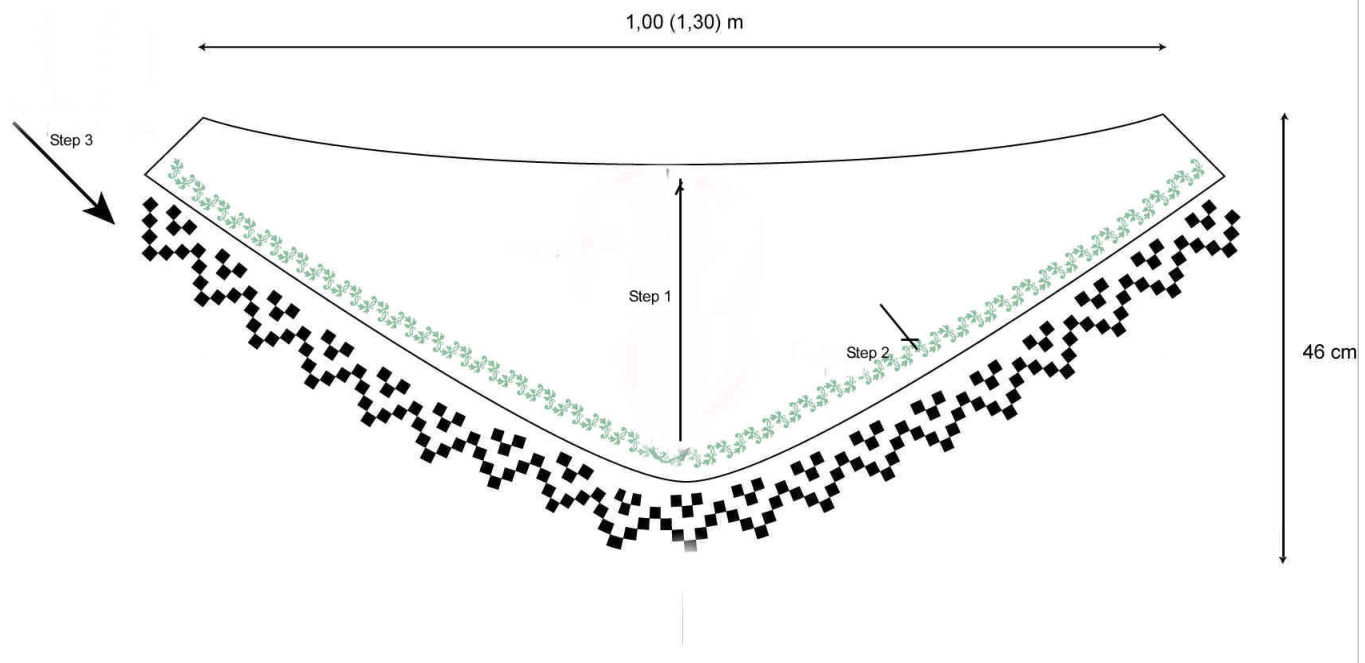
Triangular shaped shawlette, slightly rounded, framed by a double lace edge and modeled by shortened rows Finished measurements after blocking: 46 cm. (18") width at the central point and 100 (130) cm. (40 or 51 inc.) length Knitting skill level 3-4 (of 5)
Material:
700 m. (766 yards) any fingering weight yarn Circular knitting needle 4.5 mm. (Us 7) 80 cm.(40 inc.) or longer Circular knitting needle 3.0 mm. (Us 4) 80 cm.(40 inc.) or longer Crochet hook 3.0 mm (US D3) Pearls or beads 6 mm. (optional) Crochet hook 0.6 mm. (optional) Stitch markers, rust- proof pins and darning needles
Stitches used in the pattern
Garter Stitch: knit every row Stockinet stitch: knit on right rows, purl on wrong rows Lace edge 1: see chart 1. Lace edge 2: see chart 2
Abbreviations used in the pattern
st (s).- stitch(es); k- knit; p- purl; rs.- right side; ws - wrong side; ssk - slip, slip, knit these 2 stitches together; sk2p- slip 1, knit 2 together, pass slip stitch over the knit 2 together; k2tog - knit 2 stitches together
Pattern Notes
The shawlette is knitted in one piece using circular knitting needles (back and forward) and in 3 (three) stages, without breaking the yarn: Step 1: base triangle shaped with short rows. For short rows over garter stitch, please take a look here Step 2: lace border 1 by picking up stitches Step 3: lace border 2 attached do part 1 and 2 (no sew) · It might be easier to follow the lace pattern if you use stitch markers placed after each repetition. For placing beads with the crochet hook, please take a look here. ·Read the chart from right to left. On the Rs, knit the stitches as shown on the chart. ·On the Ws, knit the stitches as they are presented (knit over knit and purl over purl). Purl the yarn over Knit the increases with Make 1 (M1) Lift the yarn lying between the stitch just worked and the next stitch and place it on the left hand needle, then knit (or purl) into the back of this loop . . The instructions between brackets (x) are for the larger size, suitable for L/XL ( 40 cm.; 16 inc. back width)
Directions
Step 1: base triangle in garter stitch (knit the first stitch of every row as a K = edge stitch) Using the circular knitting needle 4.5 mm. (Us 7) cast on 3 st. and knit the first row From row 2 on: k1., M1, k2. Repeat the increases like given on row 2 until you have 90 (102) on your needles.
Short row shaping
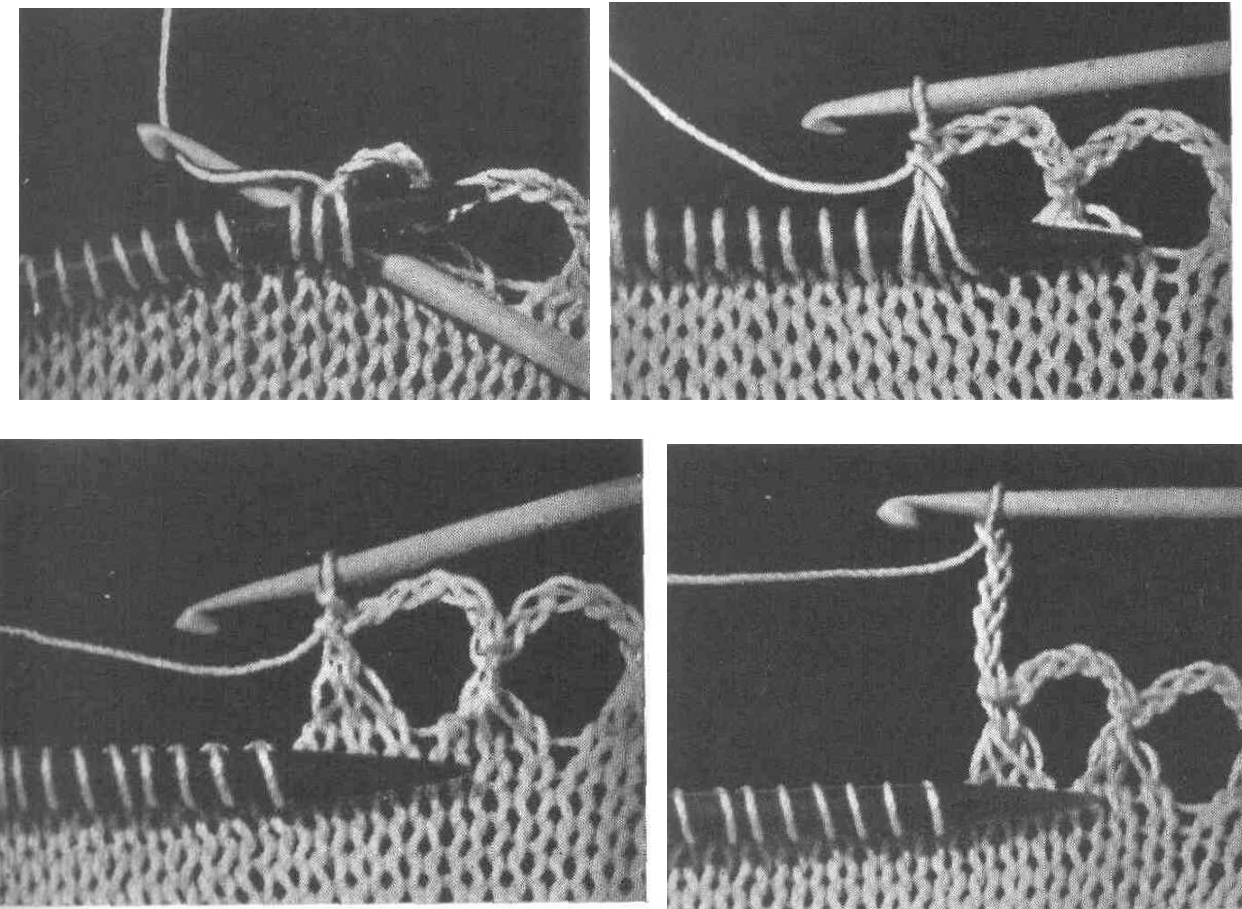
While working the short rows to give the shawl its shape, continue to increase between the edge and the first stitch Row 1: K 33 (37), turn and Row 2: knit all stitches on your left needle Row 3: K 32 (36), turn and Row 4.: knit all stitches on your left needle Row 5.: K 31 (35), turn and Row 6.: knit all stitches on your left needle Note: Do not forget to increase 1 st. on every odd row (RS); at the same time you knit 1 st. less at the end of each odd row (Rs). In every ws row there will remain 2 unworked sts. on your left needle. : work as set (short rows + increasing) until you have finished one side Knit one row (ws) across all stitches and work the other side of your shawl alike again, starting with 33 (37) for the short row shaping. To finish knit one row (ws) across all stitches. Do not break the yarn. Bind off all stitches along the neckline using a crochet bind off, as follow: \*Chain 5, insert crochet hook into the back of the 4 sts. on your knitting needle (as if to knit), pull yarn through the 4 st.; single crochet\*, repeat from \* a \* until you bind off all the stitches. (llustration shows how to the bind off 3 stitches instead 4 stitches)
Do not break the yarn.
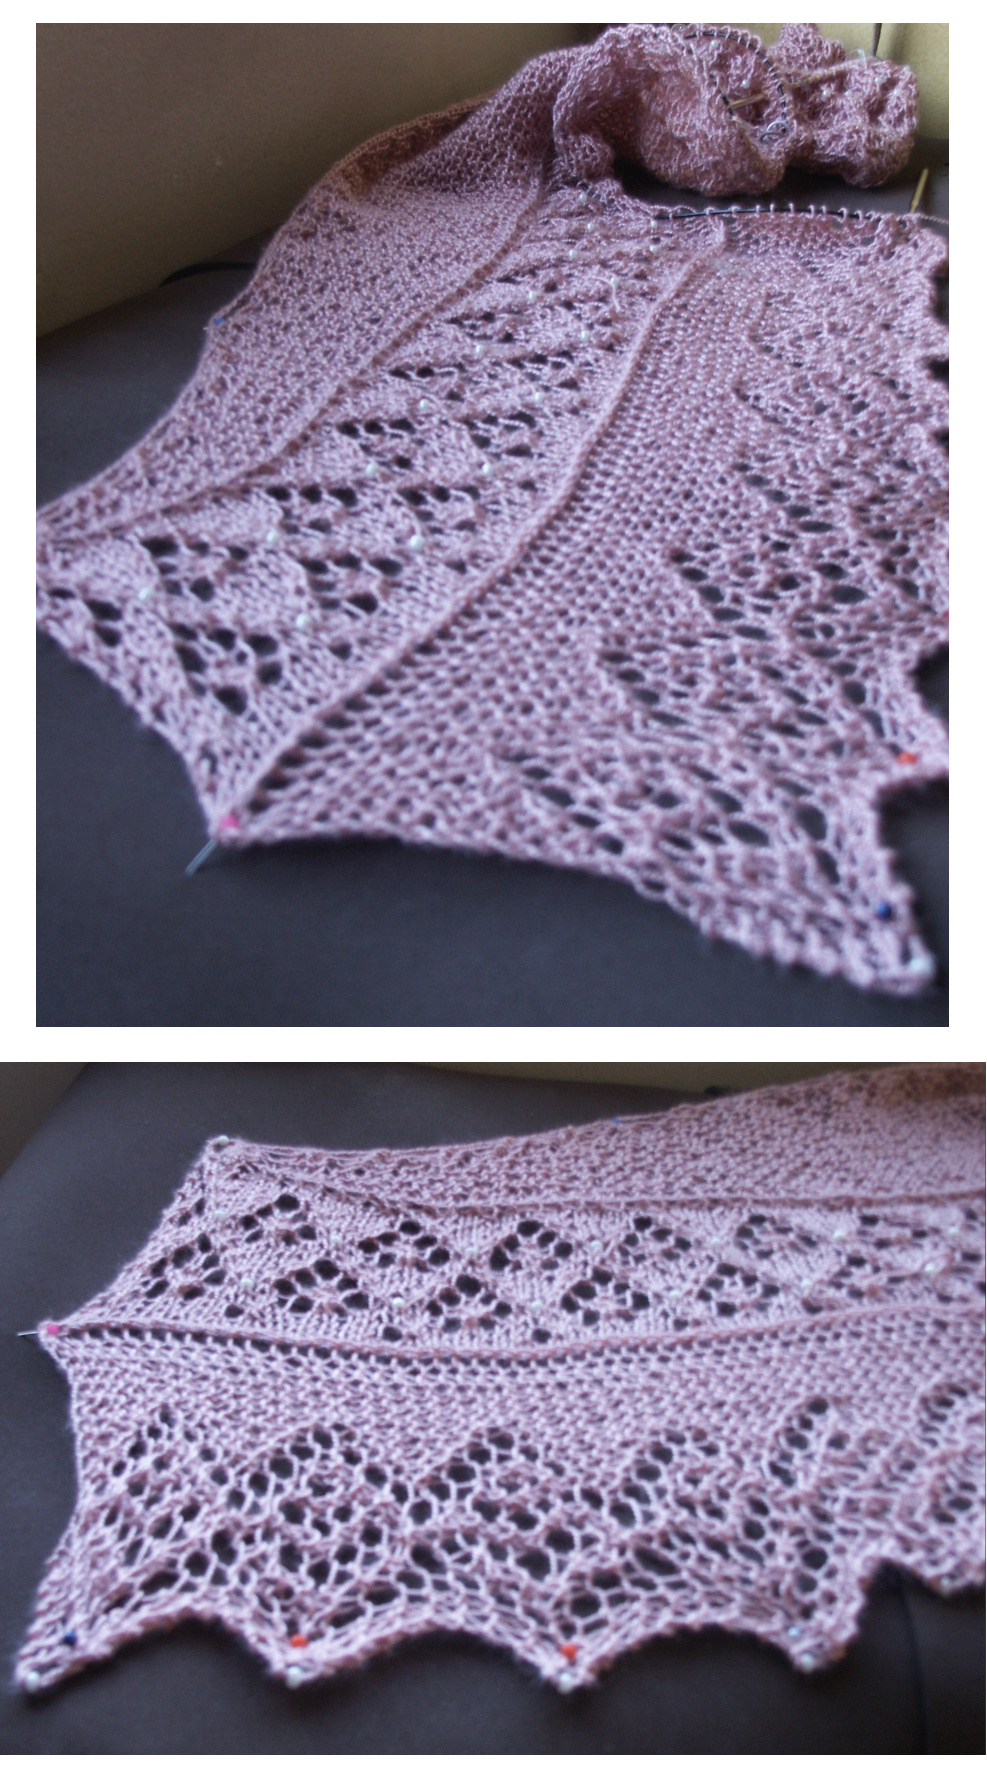
Step 2: Using the smaller knitting needles pick up 115 (131) sts., pick up next st. (place a stitch marker before and after this stitch - this is the central stitch market on Chart 1); needles pic up 115 (131) sts. - 231 (263) stitches on you needles) Change to larger needle (4.5 mm, Us 7) and knit 2 rows. Knit according to chart 1. After you finish chart 1 (row 1 to 16), knit 2 rows. Do not break the yarn. Step 3: Attached lace edge (Chart 2) After you finish chart 1, at the end of the last row, cast on 15 st.(use the cable cast on method). Knit 2 rows\* and work according Chart 2. \* To attach the lace edge to the main section, on RS knit until 1 st. before the edge (14 sts): slide the next stitch knitwise, knit the first stitch on your left needle (this is a stitch from your main section), pass the knitted stitch over the slipped stitch), turn On Ws you will slip the first stitch from your left needle purlwise to your right needle and than knit according to the chart. (you just did a sl1, k1, psso). Repeat this instructions until all stitches from the main section are attached to the lace edge.
Blocking
To enhance the shawl details: first pin along the longer edge, then pin along the centre and finally pin the other points. Remove the pins when the shawl is completely dried. Weave the ends.
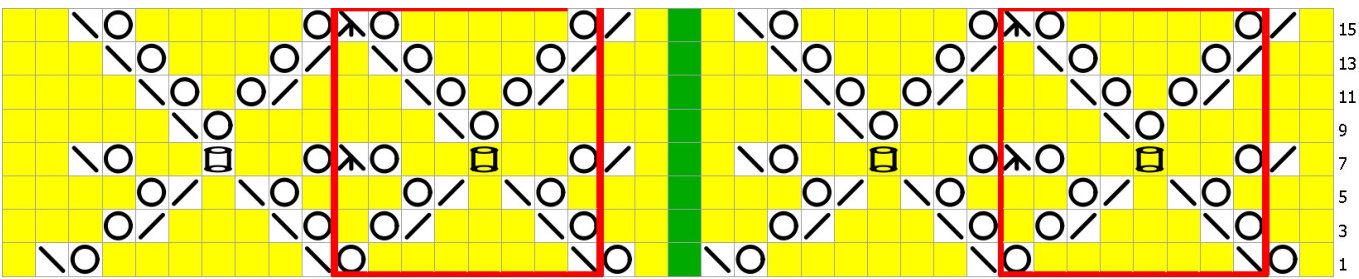
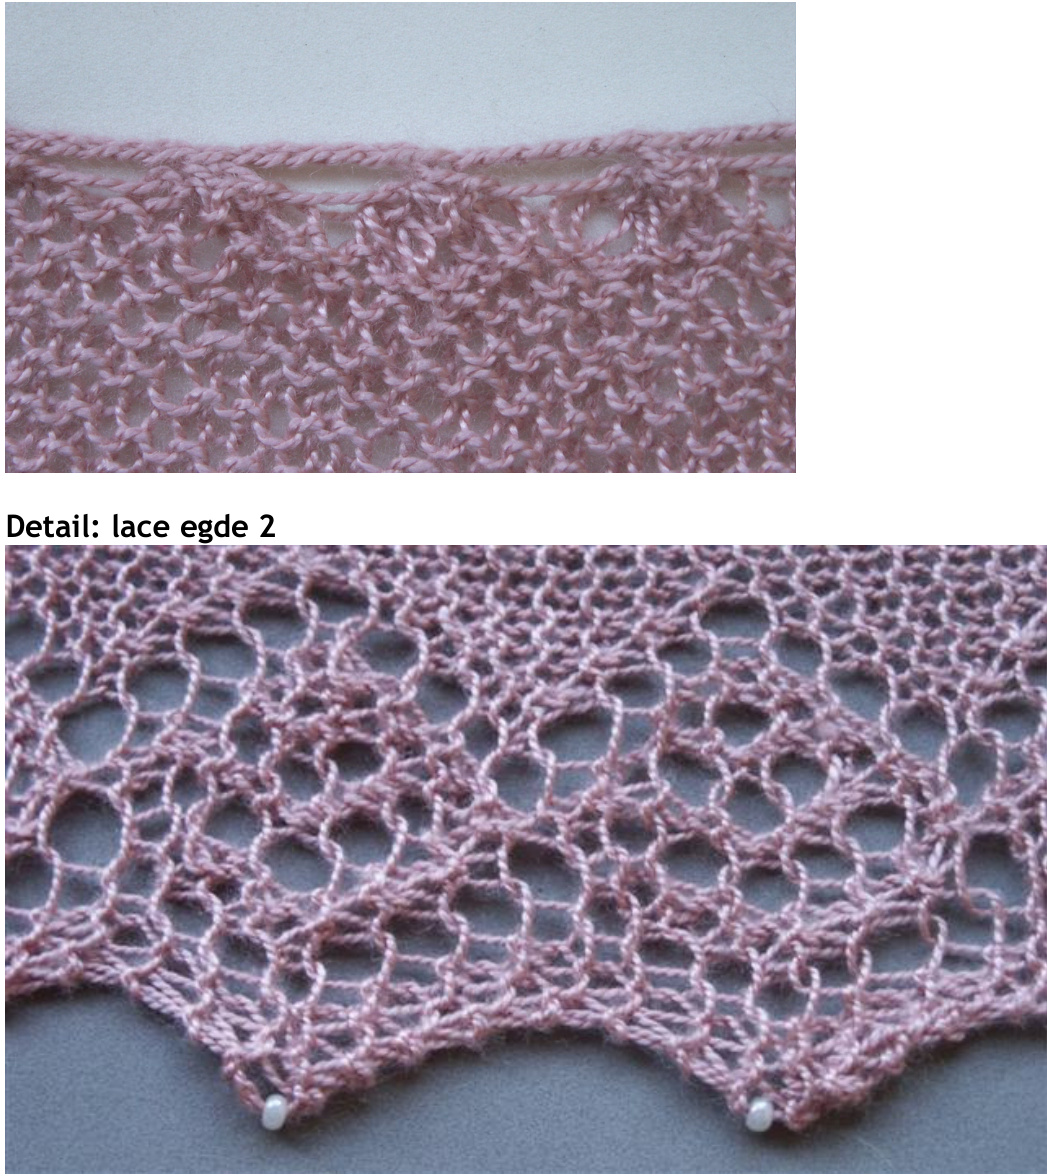
Chart 1: Lace edge 1 Chart 2: lace edge 2
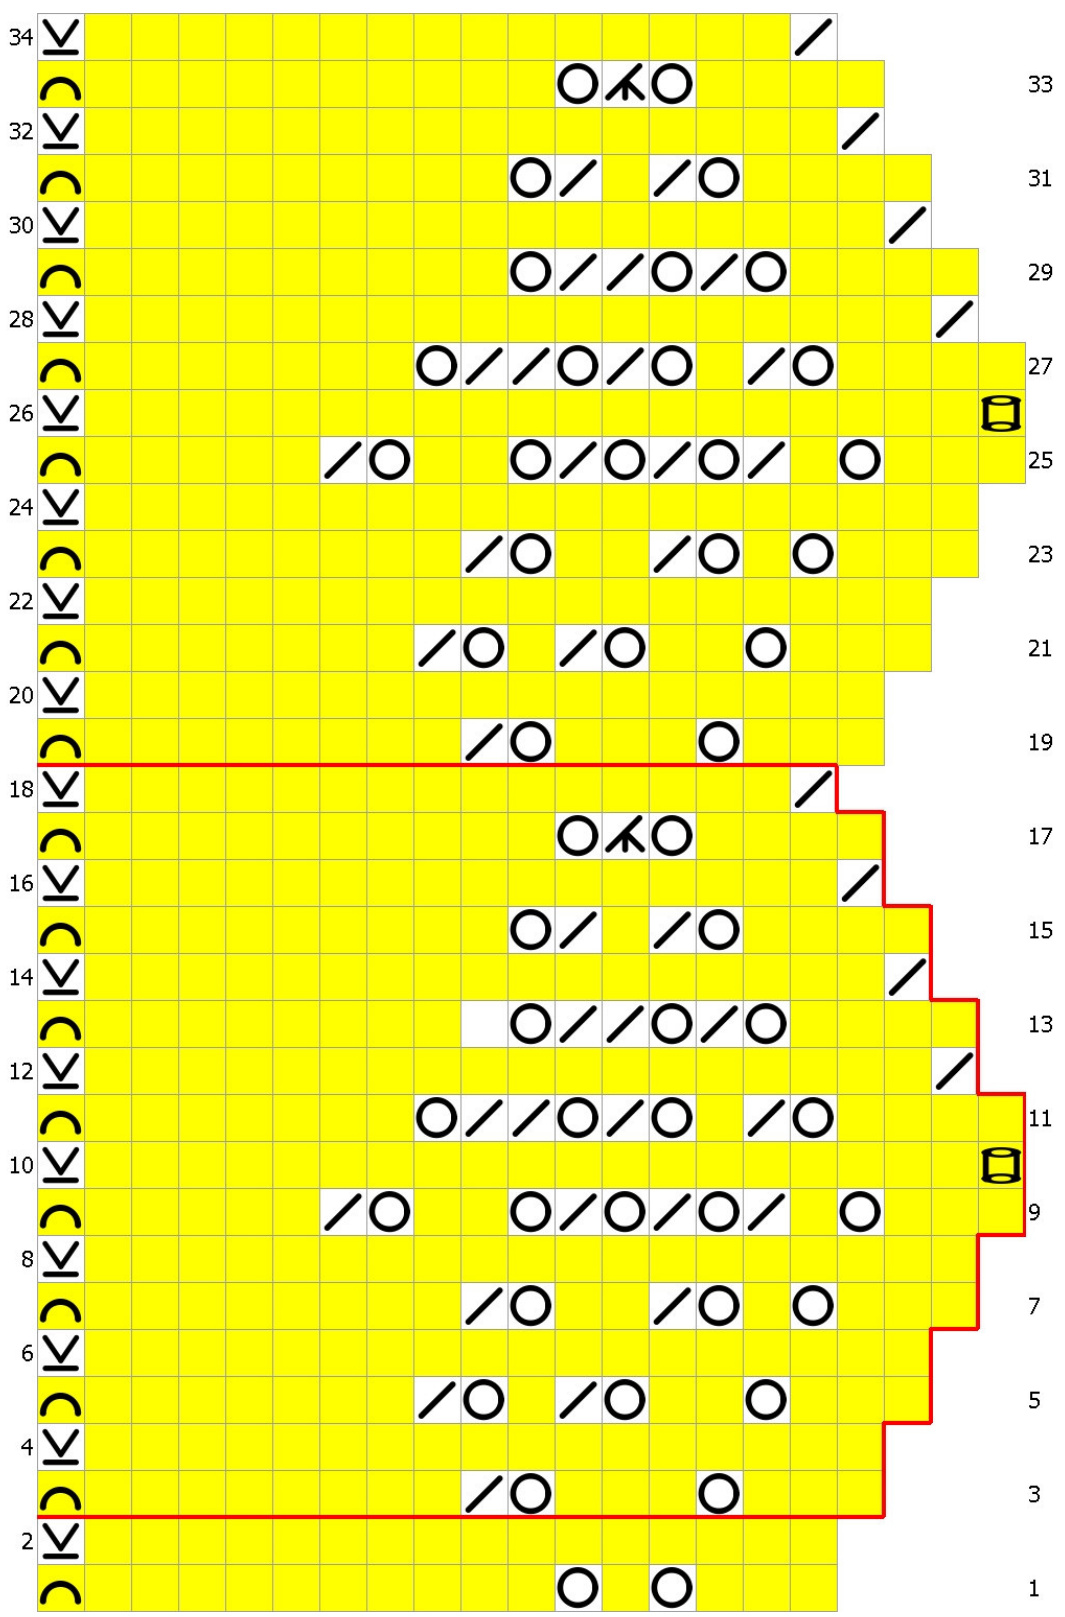
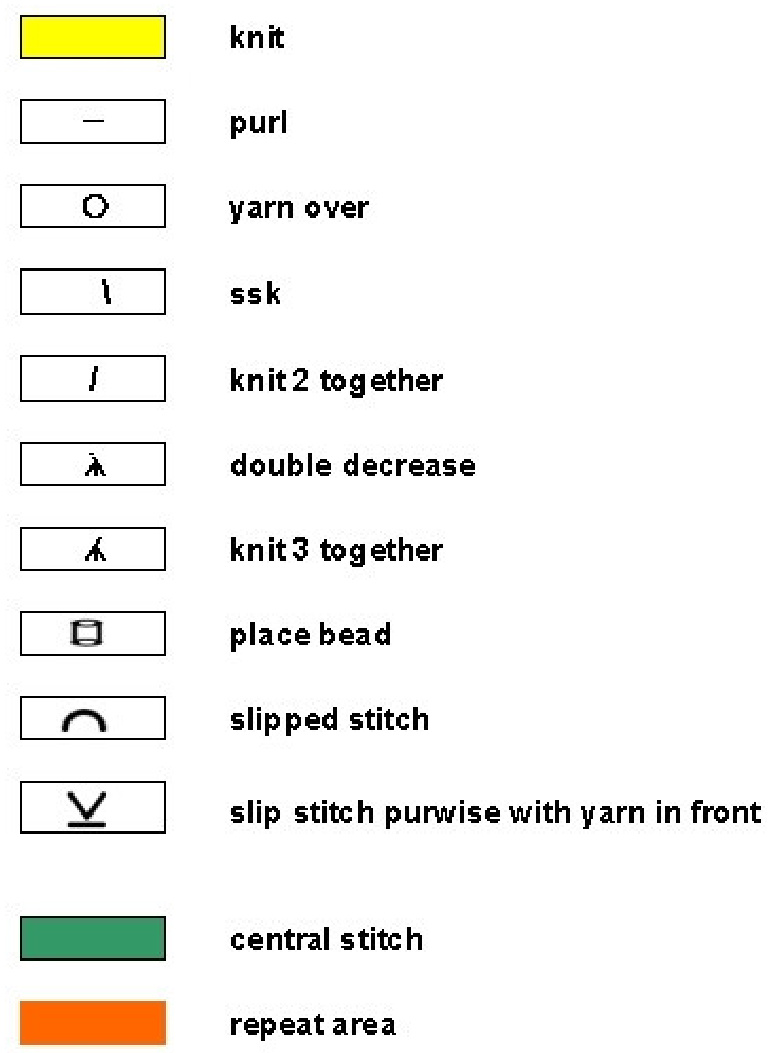
Chart key
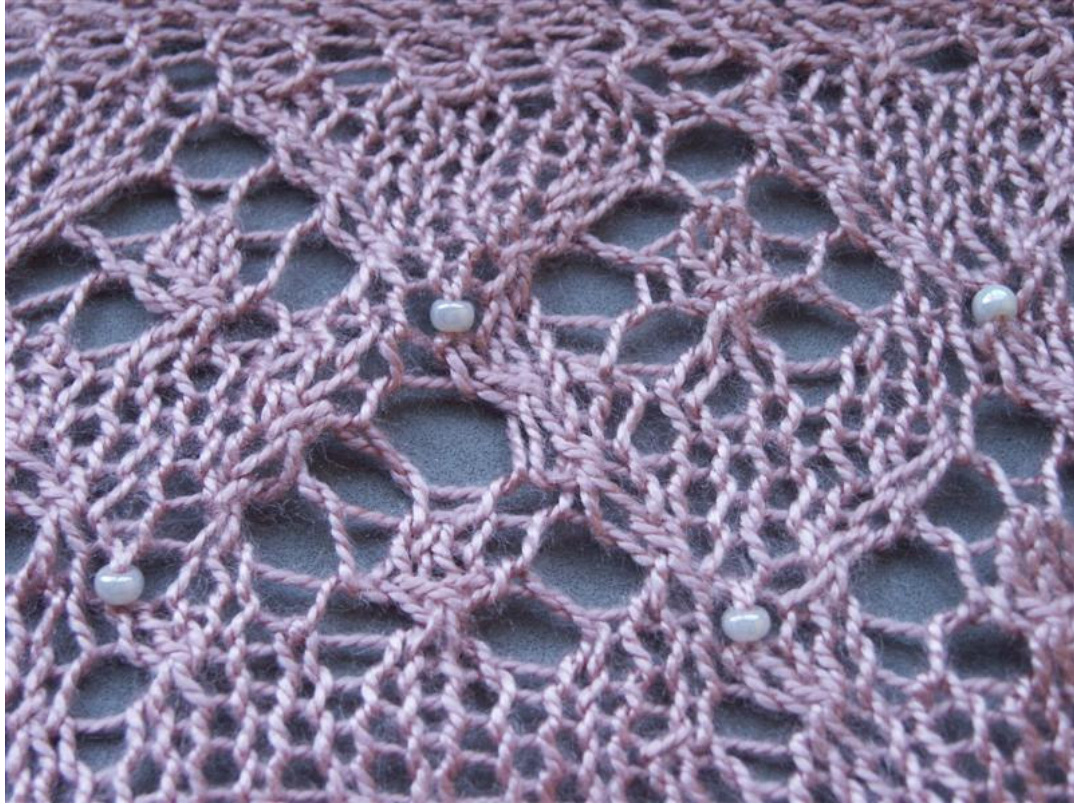
Detail: lace edge 1
Schematics