Greggory
I've been making wire and bead tiaras for several years... I don't know why it never occurred to me until now that I should have a go at knitting one. I wanted to share a how-to as well, because some people on my LJ have said they're interested, and also because there seems to be this massive thing about them, that they're unachievable glorious things and you need an unfair amount of talent to make them. Not true! It's fiddly and it takes practice to make your wires look neat (and when I was doing this for my job I would literally bleed from the fingers every day - I won't pretend the wire doesn't hurt your hands, just so you're prepared for how sick you feel when you accidentally ram wire under your fingernail OH GOD THE PAIN) but if you take it slowly and look at it as lots of tiny simple steps instead of an overwhelming final piece, then it's like a horizontal sparkly jigsaw. :D I'm going to give a step-by-step explanation of how I made mine, but of course any beads can be substituted for a similar or completely different look, whatever you want. I'm really sorry if any of this comes across as patronising, I just want to cover everything because I've been making tiaras for so long and I don't want to make the dumb mistake of just assuming that people know what to do if they've never touched jewellery wire before. :) Onward!
Materials:
\*Scraps of laceweight yarn in green and pink - I used merino, but anything at all works. $*4.5\mathsf{m m}$ knitting needles \* Tapestry needle \* Scissors - I use florist's scissors because they're especially good for cutting wire, but you don't have to buy scissors specially for the purpose. Any strong scissors should work, though obviously they'll go blunt much more quickly if they're used a lot for wire. \* Jewellery wire - I'm using reels I've had for ages and the stickers have fallen off so I can't be exactly sure of the gauge, but I think the thinner wire is about 26g and the thicker about 22g. The thick isn't as important because you can just use two strands of the thin if you need to. $^{\ast}\ 10$ iridescent green heart-shaped beads \* 10 dark purple large bugle beads \* 3 green leaf-shaped beads \* 3 small yellow star beads \* 3 black beads \* 6 skeleton leaves - 2 blue, 2 black, 2 purple \* metal alice band
Knitted leaves: Make 5
1. Longtail cast on 3 sts in green. 2. p to end 3. k1, yo, k1, yo, k1 - 5 sts 4. p to end 5. k2, yo, k1, yo, k2 - 7 sts 6. p to end 7. k3, yo, k1, yo, k3 - 9 sts 8. p to end 9. k to end 10. p to end 11. k to end 12. p to end 13. ssk, k5, k2tog - 7 sts 14. p to end 15. ssk, k3, k2tog - 5 sts 16. p to end 17. ssk, k1, k2tog - 3 sts 18. p to end 19. k3tog - 1 st Cut the yarn a few inches long and then pull the needle up, lengthening the loop until the tail comes right through. Pull this tight to define the point at the tip of the leaf - you'll get an ugly knot, but DON'T WORRY! Thread the tail onto a tapestry needle and weave into the back of the leaf, which should draw the knot backwards and hide it. Secure and trim yarn.
Knitted flowers: Make 3
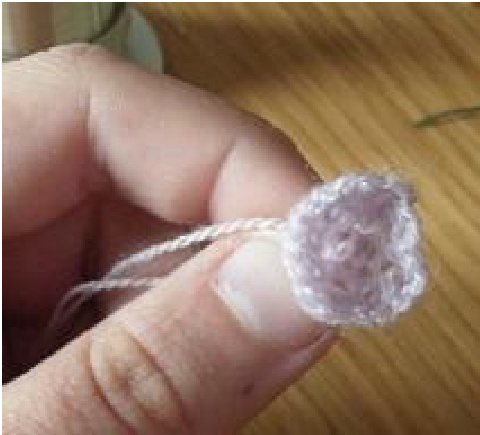
1. Longtail cast on 20 sts in pink. 2. p to end 3.k2togacross -10 sts 4. p to end 5. k2tog across - 5 sts 6. p to end. Bind off and cut yarn long enough to sew the side edges together into a sort of cone shape.
Wiring leaves:
Cut 5 pieces of the thicker wire into six-inch lengths. To form each leaf, thread the wire through the base of the leaf below a yo hole, not through the hole itself because that won't be secure enough. Carry on threading the wire in and out of the leaf as if you're sewing a running stitch around the perimeter. It gets a bit fiddly when you're turning the corner on the pointy tip, but persevere! Wire bends and fabric stretches, it will work, just breathe. ;) (I hate this bit, can you tell?) It'll look like a crumpled mess at this point, but when the wire is threaded all the way around the leaf and out again at the bottom near where you started, then you can start forming the shape of the leaf. Straighten the knitted fabric, spread it out along the wire, and pinch the tip to make it leaf-like. Once you're happy with the shape, grip the base tightly between your right thumb and forefinger and use your left thumb and forefinger to twist the two legs of wire around each other. IMPORTANT: your right hand should be moving away from you when twisting, your left hand should be moving towards you. This is important because later on when the wires get twisted together to form the tiara shape, they all need to be twisted the same way to keep it smooth or itll get too bulky. I'm righthanded, I'm not sure if this is going to feel totally alien to lefties or what - I think as long as you twist the same way every time then it'll be okay. This is what you'll end up with:
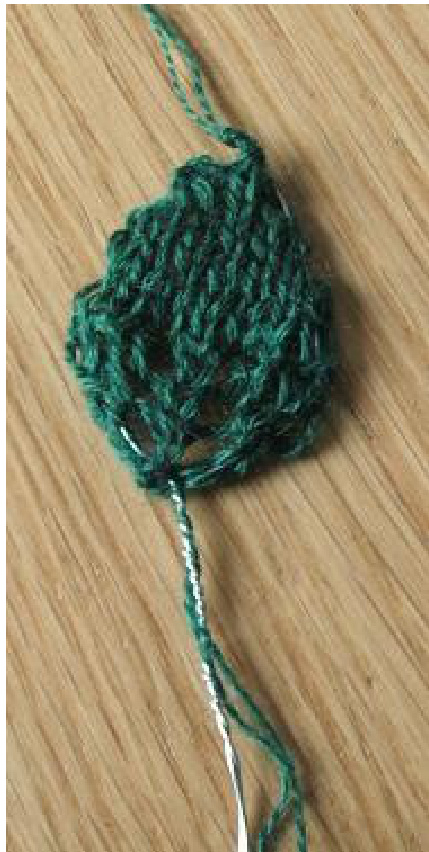
I've not woven my cast-off tail in yet on that picture, but my cast-on tail is twisted into the wires. Weave it into the back of the leaf as wellif you prefer, either way works to keep it secure. I thought I was being end because the stem wasn't visible like I thought it might be.
Wiring flowers:
Cut a length of the same thicker wire and thread it through the star bead so half of the wire is sticking out from each side. Pinch the two legs of wire with your thumb and forefinger so they bend down neatly flush with the edges of the bead. Jab the two wire legs through the knitted fabric in the centre of the flower and pinch and twist in the same way as with the leaf. Repeat for all three flowers. This is the bit I don't want to sound like a patronising cow about. ;) It's easy to twist beads onto wires, but I'm a neat freak about my beading and I just want to show the best way to hide as much of the wire aspossible. Cut a length of the thinner wire about 6 inches long and thread it through the heart bead from the bottom to the top, placing the bead halfway down the wire.
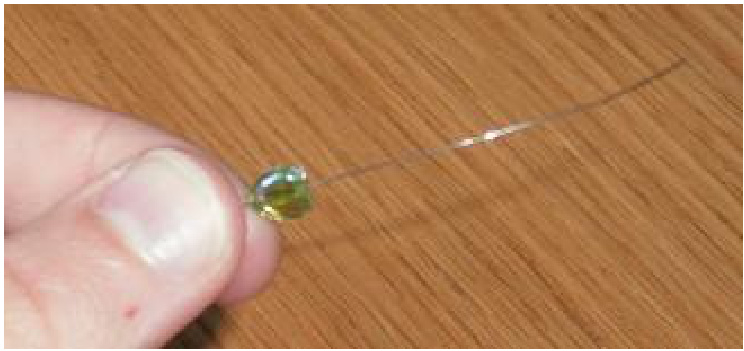
Use your thumb to fold the wire down one side of the bead.
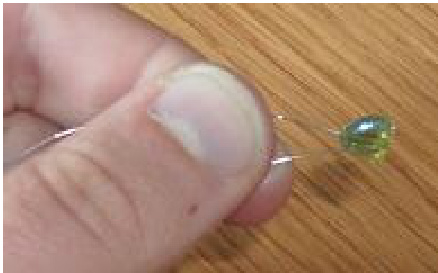
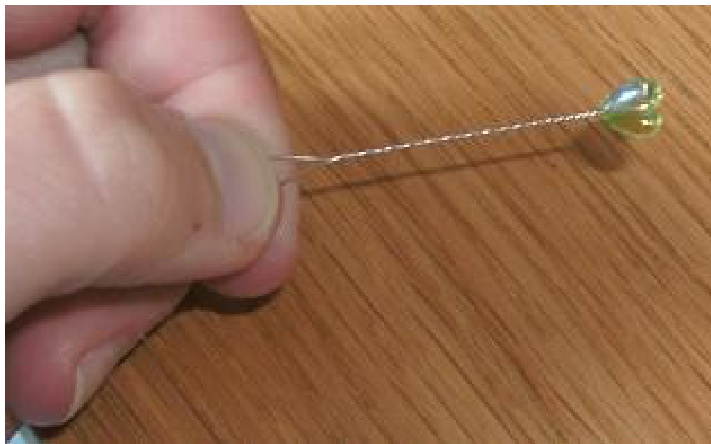
This is the same method to use for nearly all beads. It's common sense for something like this heart bead, but the same goes for round and bicone beads as well - if you always make sure the hole running through the bead is vertical and not horizontal, the majority of the wire can be hidden behind the bead in your finished piece. If your bead is horizontal you'll have a sort of smiley-face effect where you can see the silver wire coming down from the hole to the point where you twist it. It's not hugely important, I'm sure lots of people probably wouldn't even notice, but it's a habit I got myself into because when you're making them all the time you get obsessed with details. ;) So, do this for all the beads except the large black ones, which are all threaded onto a single piece of wire and twisted together into a sort of triangle.
Wiring skeleton leaves:
This bit is FUN. There's something weirdly satisfying about the crunch these things make when you squash them. :D Cut six more lengths of thin wire first, because it's impossible to do that once you've started. Take one of the skeleton leaves and bring the two points down together - don't crease it in half, just bring the points down and hold them. Now bring the sides down so the leaf becomes unrecognisable as a leaf, just a crispy clump of colour. (I mean it, I love this bit!) Starting about halfway down your piece of wire, wrap it tightly three times around the skeleton leaf, making sure all four sides are caught down,
Forming the bead units:
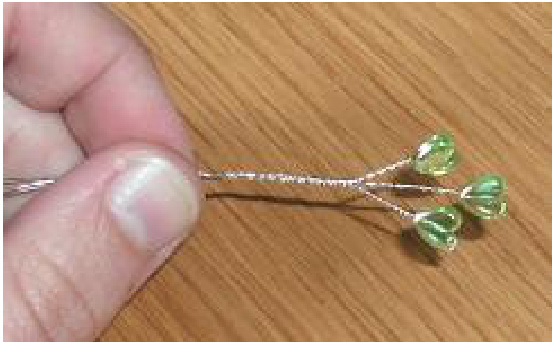
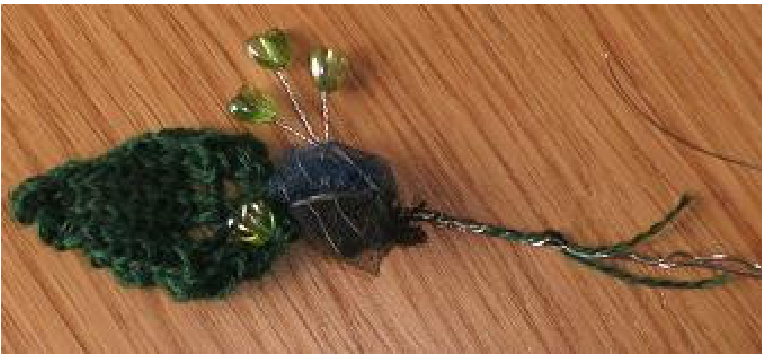
The way I do this is tricky to get across in words. Really, of course, you can do it however is comfortable for you as long as it gets the same result. My personal method is to hold three wire stems parallel between your thumb and forefinger ll and arrange them into shape there. Bring the right bead behind the centreoneand the left beadinfrontof the centre one,and jigle themallaboutuntil you're happy with the proportions.
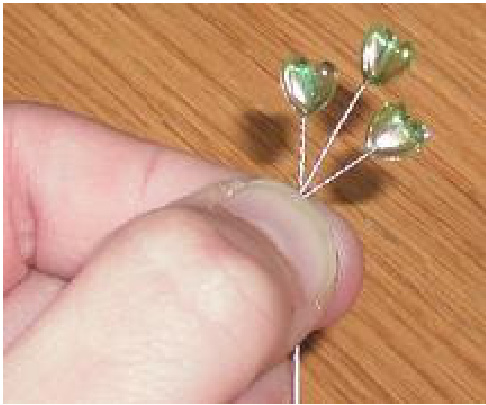
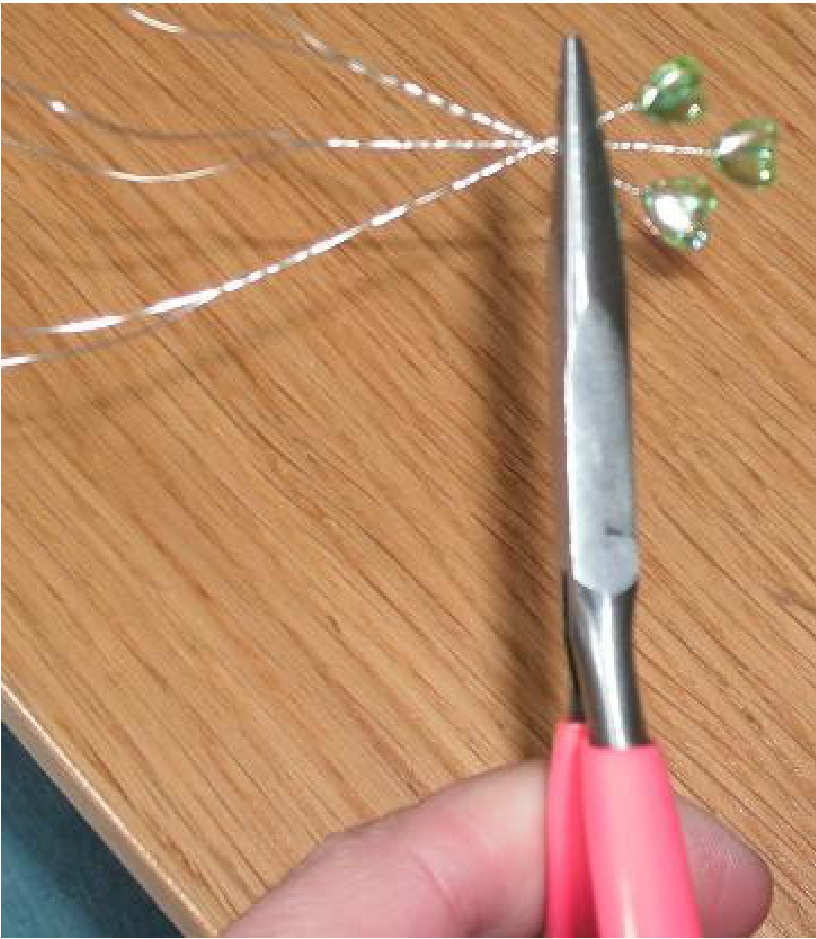
Then, pinch the point where the wires cross firmly between your right thumb and forefinger and, like before, twist all the wires together with your left. (Left towards, right away. Sorry to keep going on about that but it took me forever and a day to stop twisting them however I felt like. :D) It might be easier to grip the crossing point of the wires with flat-nose pliers if you can't quite get the hang of holding wires so tightly:
It's the same principle for making units of 5 beads, you just add two more below your first three. So, you need: 2 units of 3 heart beads 1 unit of 3 leaf beads 2 units of 5 bugle beads OKAY, six pages in and all the prep is finally done! Thank you for sticking with it. ;)
Forming the tiara:
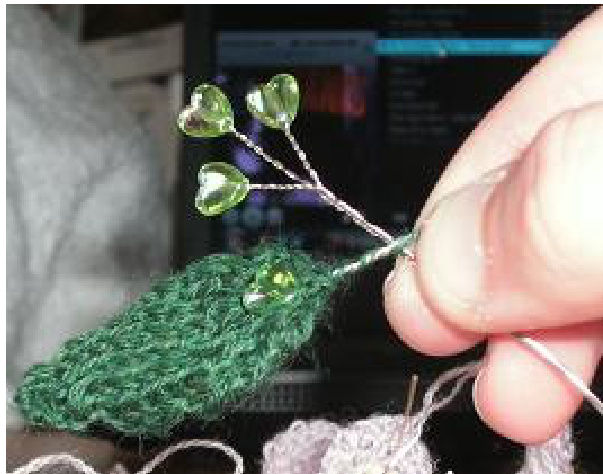
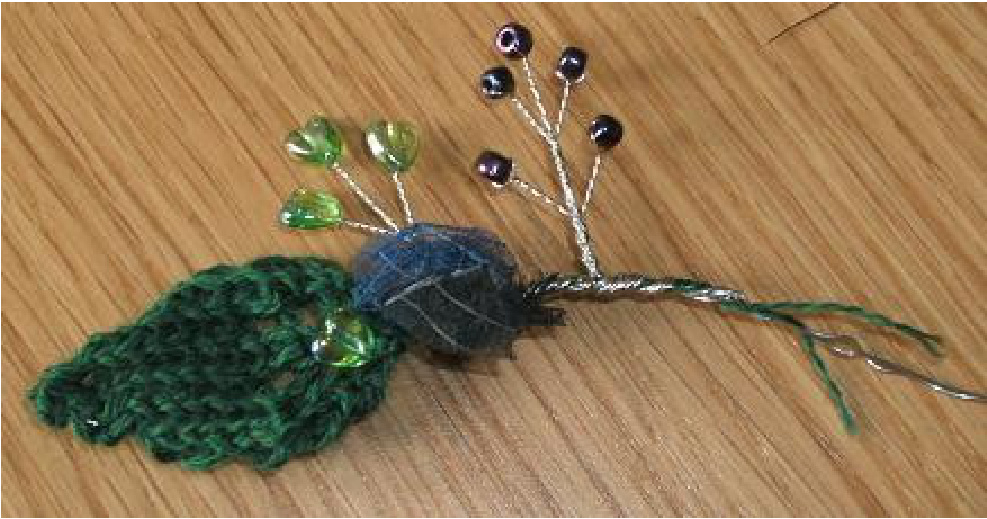
If you've got the hang of making the small 3- or 5-piece units, you shouldn't have any problems putting all the bits together to make the tiara. It's really just a bigger, more intricate unit. :D The idea is the same. Start off with one of the knitted leaves. Hold it on its side, so the point is at your left and the twisted wire at your right. Thread one of the single heart beads through the base of the leaf and twist the wires together. Work across, one piece at a time. Hold each piece behind the main twist of wire and arrange it until you're happy, just like with the smaller units.
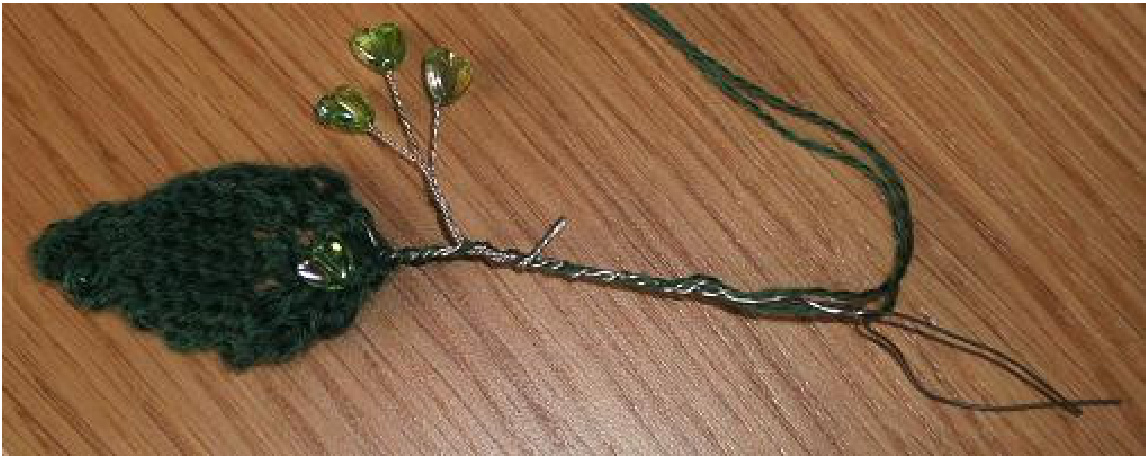
Carry on twisting the short piece of wire until it's no longer visible:
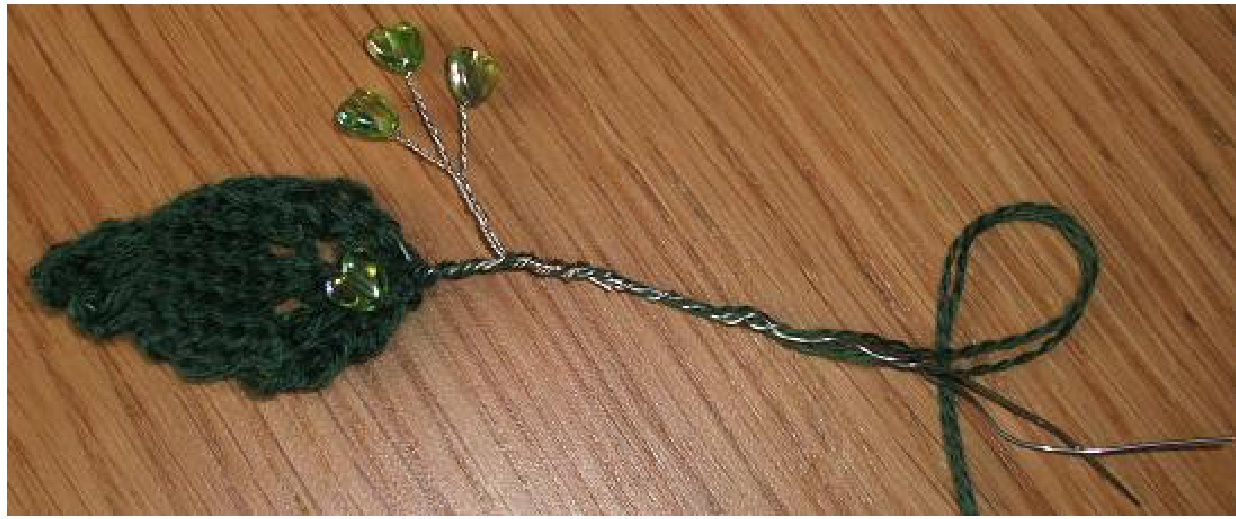
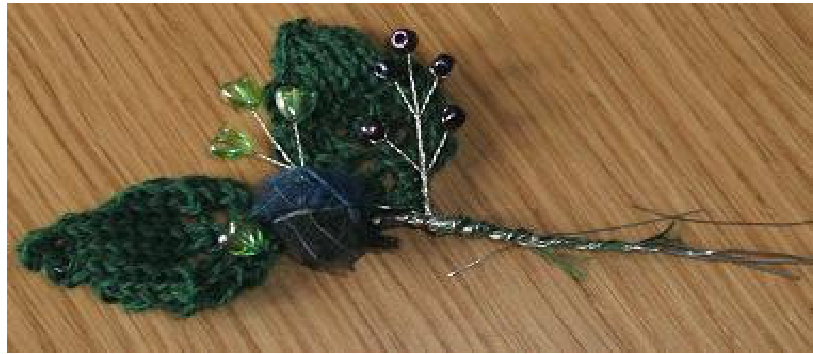
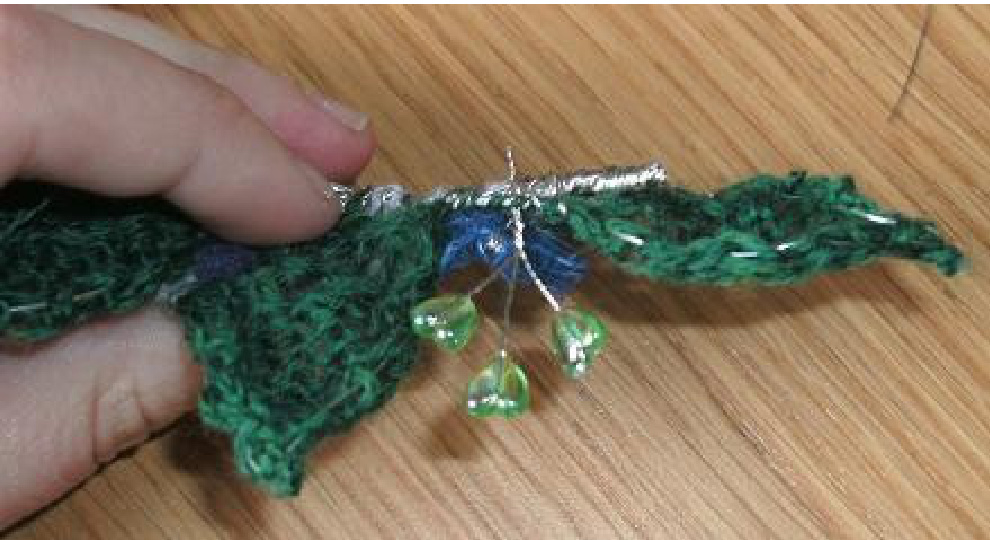
See? All wires twisted the same way in the prep blend together in the big piece. :D Add a blue and a black skeleton leaf bundle, one on top of the other:
Add a unit of 5 bugle beads:
Add another knitted leaf:
Keep adding your prepared pieces. Do it methodically, one at a time from left to right. Its allogical, just take it slow and look at each piece individually and it won't be as daunting as it might seem.
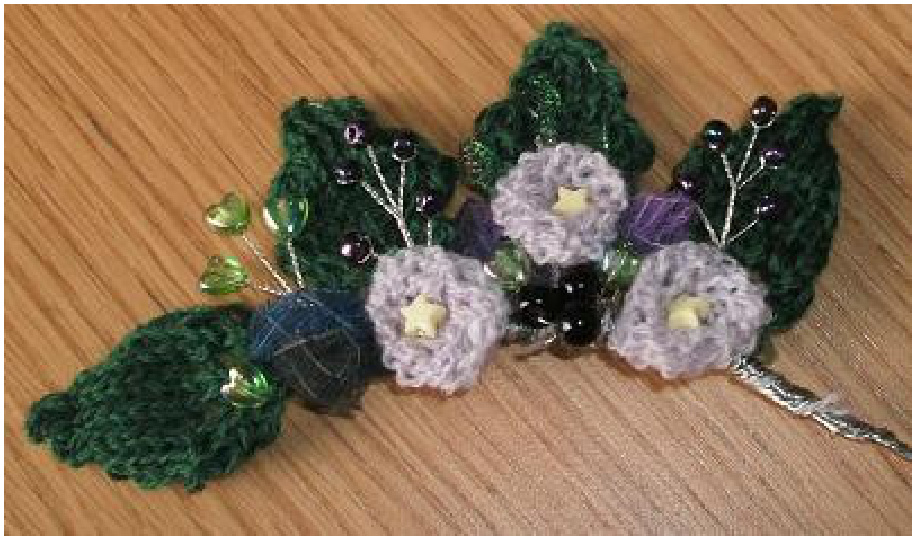
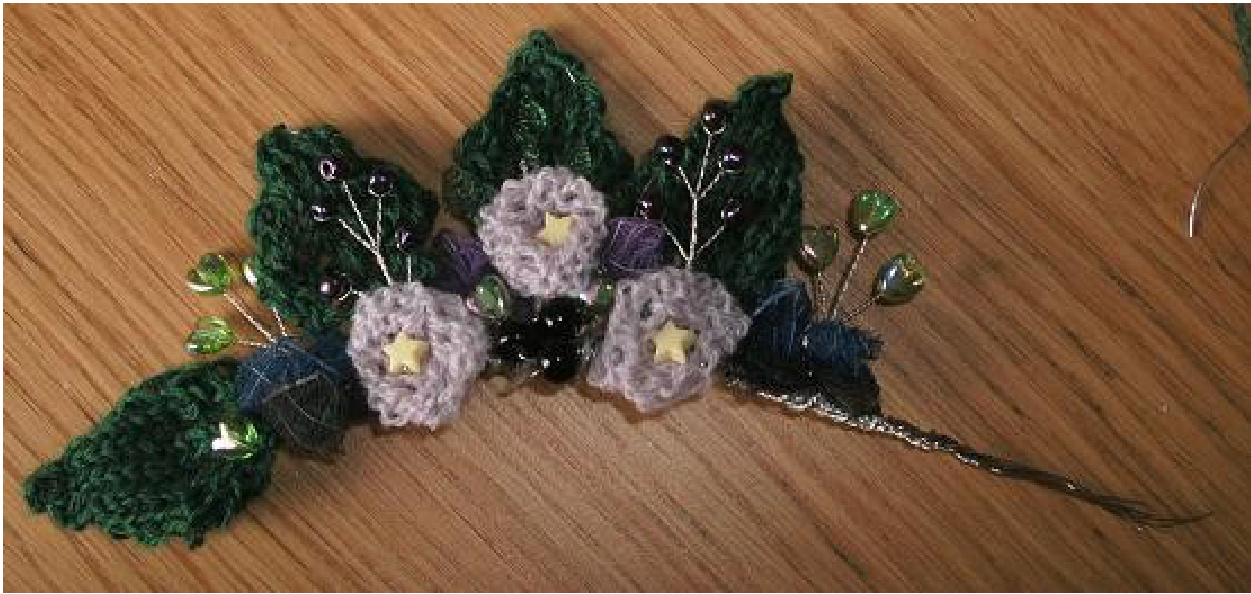
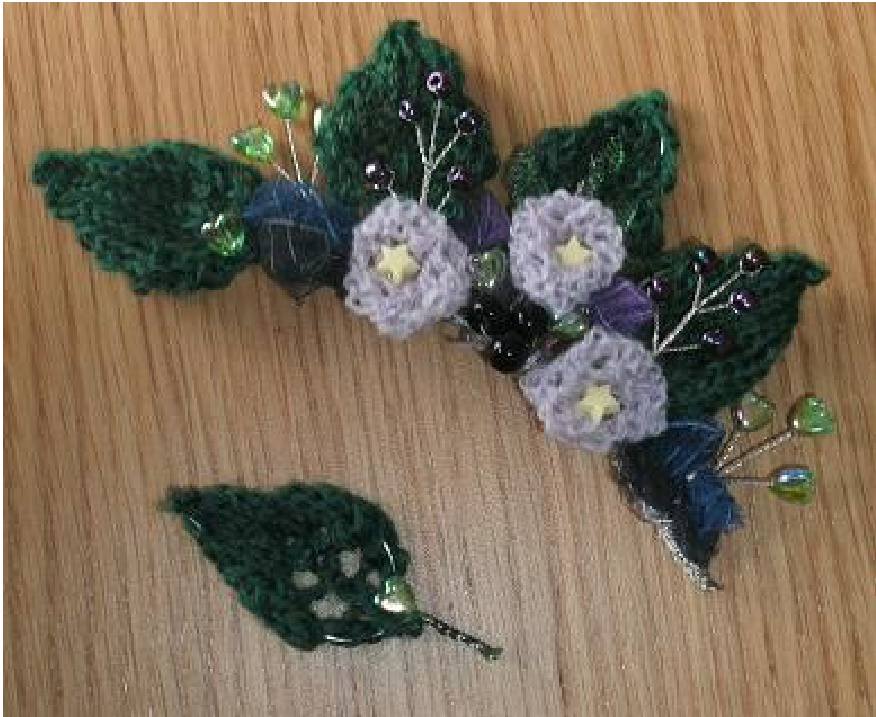
This picture isn't very clear, so here's how I placed these new bits: first the knitted flower, then the green heart bead, then the purple skeleton leaf behind it. The middle section is layered from the front to the back - place the knitted flower, then the unit of 3 green leaf beads directly behind it, then the knitted leaf, and finally the three black beads twisted together on the same wire. That's the middle section done! Refer again to the bigger picture on Page 1 because it's much easier to see where everything goes. Once themidde it isdone,therest isareeze bcause it's jst mirrr mage of the first half Co exactly what you did before, but backwards.
The last pieces you place should be the second set of blue and black skeleton leaves. Now you trim it off ready to add the very last piece. Twist the main wires at the right of those skeleton leaves extra tightly to make sure nothing falls apart (fingers or pliers, whichever you prefer, just make sure it's good and tight) and then trim the wires so you're ieft with a stub about two centimetres long. Wire the last remaining heart bead into the last knitted leaf as you did at the very beginning, then trim these wires short as well:
This is another fiddly bit. Cut a length of thinner wire about eight inches long (this is a bit too long, but it's so much easier when you've got more wire to work with and it's worth the waste), then arrange the stub of the leaf with the stub of the main tiara piece. Shuffle it around until it's positioned well and the whole piece looks symmetrical, then wrap your wire around the stubs to secure them together. It might feel clumsy but stick with it - if it's not finished very well then it looks clunky and lopsided and that'll ruin your work. If it looks wrong, untangle the wire and cut a new piece to try again until it looks good.
Wiring the tiara to the band:
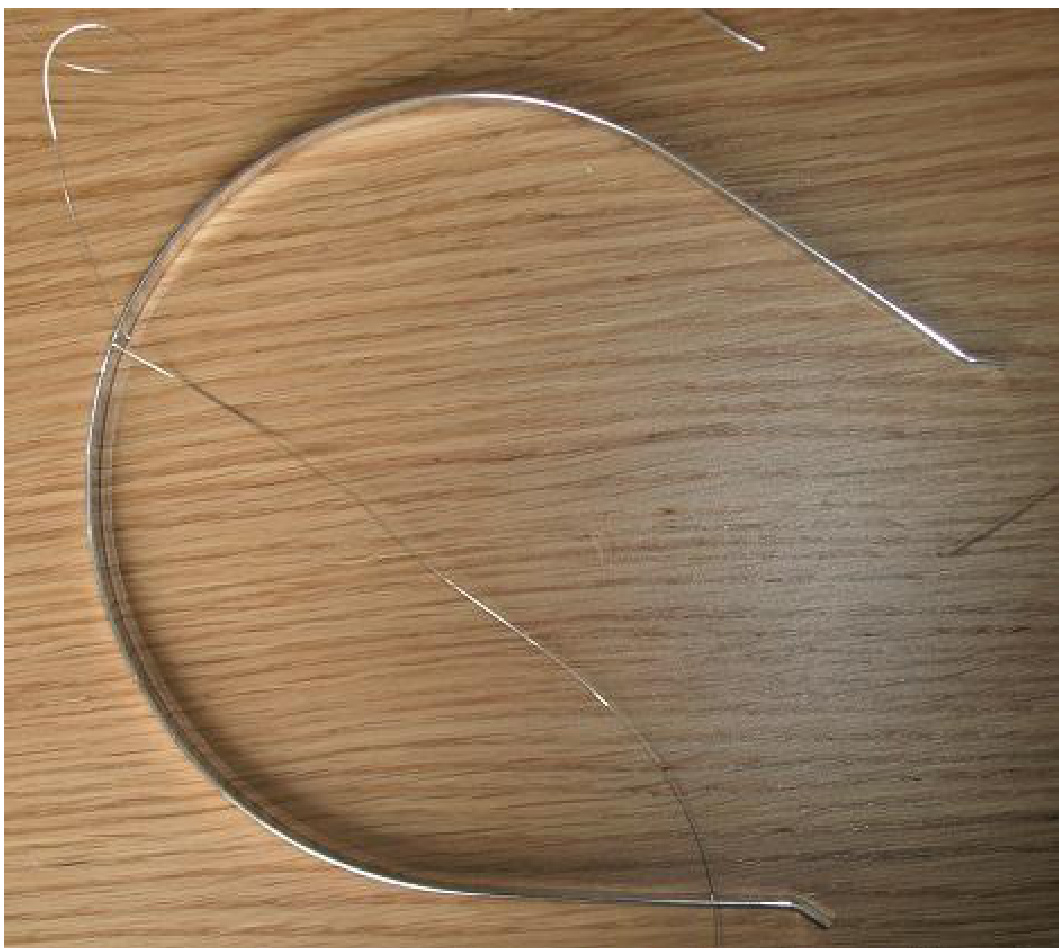
To position the piece properly, cut another piece of thin wire about two fet long (again slightly too long, but it's so much easier and you can always save the cut-off bits for wiring more beads) and fold it in half to find the centre. Wrap this point three times around the middle of the alice band so you've got two long pieces of wire the same length.
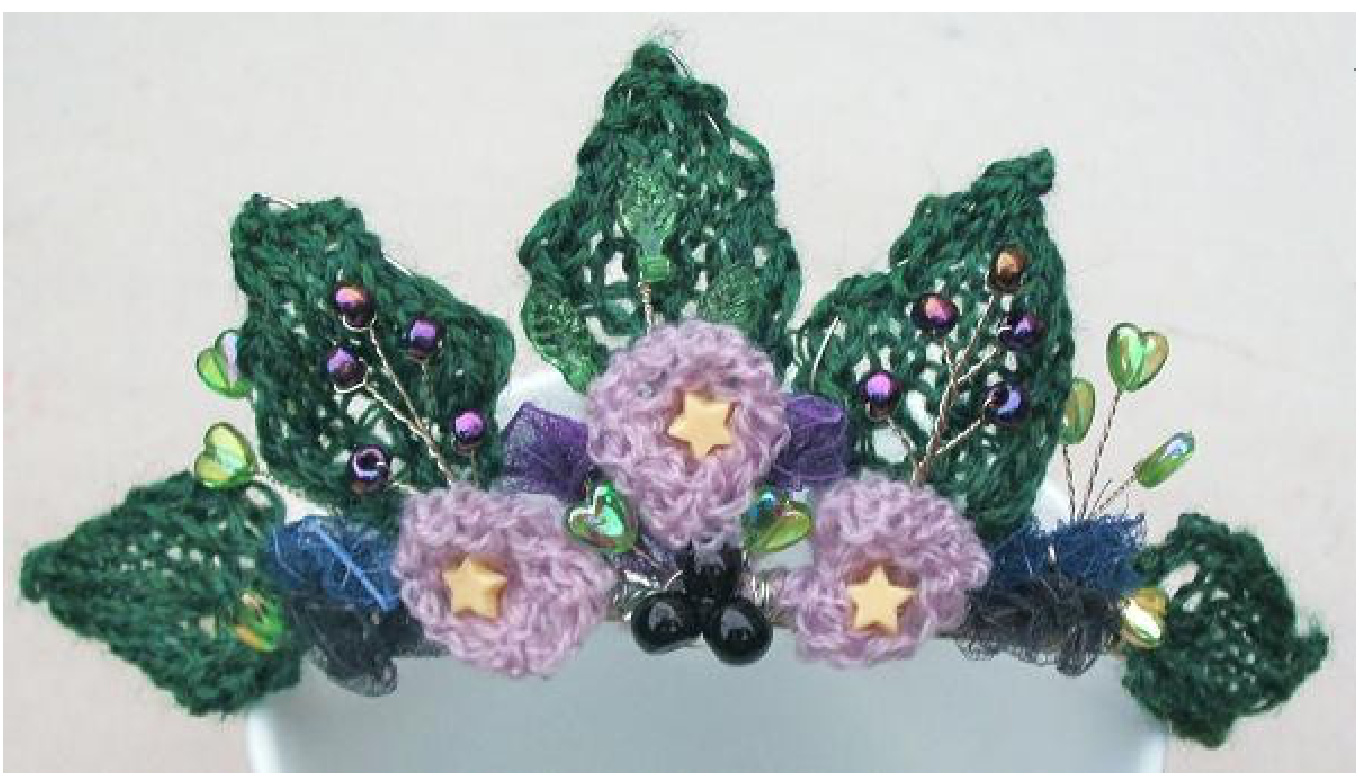
Place your tiara piece on top of the band so the centre beads line up with the point where your wire is fixed. Start wrapping the wire around the band and the tiara piece in the same way you twisted your wires together, right hand wrapping away from you, making sure to go between all the beads and leaves and not accidentally catch something. The idea is to make the wire as unobtrusive as possible. Keep wrapping and binding the tiara piece down until you reach the end, and then leave the rest of the wire loosetherefornow. I find it easier to turn the tiara around to bind down the second side so I'm always wrapping the wire the same way with my right hand. Do whatever's comfortable for you. When both sides are wired onto the band, have a good look at it to check how even it is. It almost definitely won't be exactly even, mine never are and I've been making them for years. The tiara piece slides along the band as you're wiring it on. All you need to do it slide it back into place so it's centred. Once you're happy with the position, wrap the remaining wire at each side twice again around the wired piece and the band together and then two or three more time around only the band, under the knitted ieaf. Do it as tightly as you can manage without snapping the wire to make sure it won't slip at all when you're wearing it. Cut the wires short and tuck them away like before so you don't accidentaly scratch yourself with the sharp ends. ...and we're done! There are a billion possibilities for this. It all depends on the yarn/needles you use for the leaves and flowers, the colours, the beads. Add more knitted pieces and bead units to make it longer, or use units of five and seven instead of three and five to make it taller. Run wild! I would love to see what people come up with if anybody wants a go, because it was great fun to make. :D Please email me if you've got any questions or if you find a mistake in any part of the pattern: inthereeperbahn@googlemail.com Good luck!


