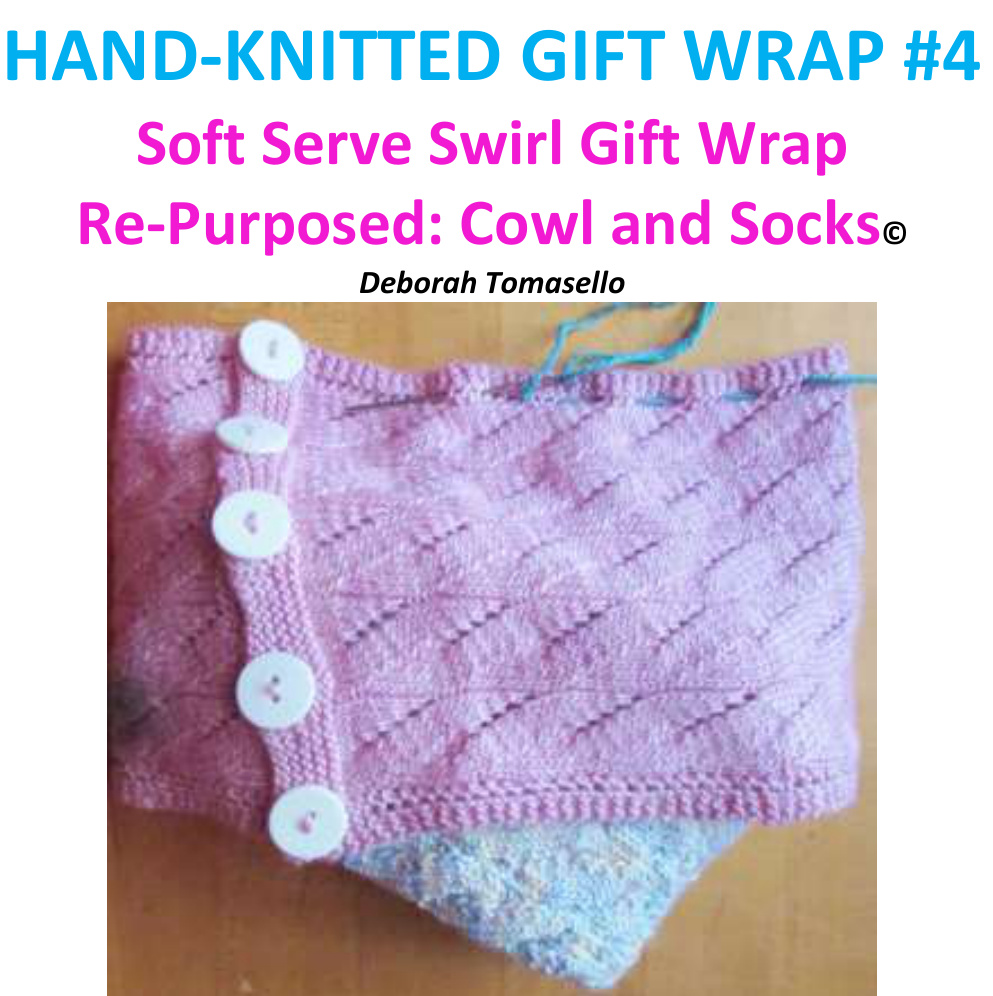
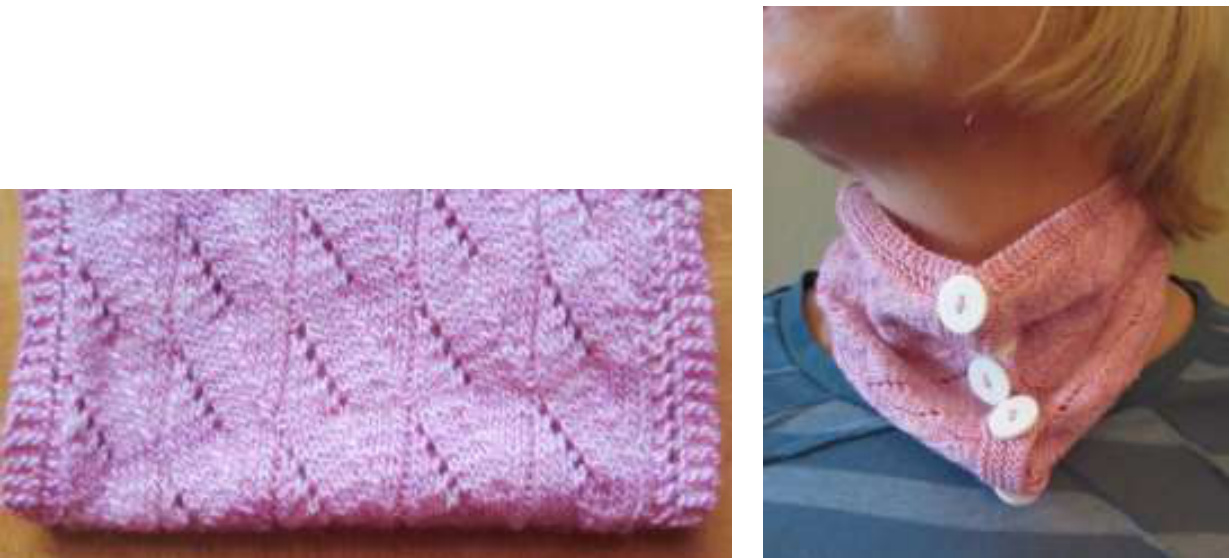
What better way is there to present a hand-knitted gift item than in a hand-knitted gift bag? The thoughtfulness that went into the knitted gift can be extended to the gift wrap, and this will enhance the recipient's happiness and appreciation. Well-planned presentation adds to the joy of the gift-giving experience for the gifter as well as for the giftee. And who among us has cleaned up all that expensive wrapping paper after a holiday celebration and not thought about the wastefulness? We live in an age when people are growing more concerned and conscientious about environmental issues and the need to avoid pointless waste. Soft Serve yields a beautiful wrapping for hand-knitted socks, mitts or any other gift item that becomes, after the gift is opened, a beautiful cowl! Instructions are included for matchingsocksandcowl/wrapper. SIZE: TBD by knitter. Cover cowl is short, only 24". But by working additional pattern repeats, you can make your cowl/gift wrap as long as desired. Socks are Woman/Teen Small (#1 needle), Med. (#2 needle), or Large (#3 needle), depending on needle size used. MATERIALS: Cowl/wrap: Approx. 5Og of fingering yarn (or more if you want a longer cowl) #1, #2, or #3 needles. Five %-inch or % inch buttons Tapestry needle Scrap yarn for closing wrapper Socks: Approx. 100 g fingering yarn Five #1, #2, or #3 DPNS Tapestry needle GAUGE: Working pattern as described, using #1 needles, should yield approx. 8" sock circumference. Larger needles will result in larger socks ABBREVIATIONS: K2TOG= knit 2 stitches together SSK= slip one stitch, then slip the next. Insert left needle into the front loops of the slipped stitches and knit them together from this position K=knit P= purl SL= slip the stitch purlwise PSSO= pass slipped stitch off YO= yarn over INSTRUcTIONs: Cowl/wrap: Using desired needle size, CO 61 sts. Work 10 rows garter st. Then begin following chart. NOTE: Every stitch in every row is worked as seen on the chart. Please read “"A Word About the Chart" before beginning. You will be working a garter edge on each side, and you will be adding YOs that will serve as holes through which yarn will be added to close cowl as gift wrapper later. Work chart as many times as you want until you reach your desired cowl length. Create button band: knit 4 rows garter st. Turn. K4, BO2, k11, BO2, k11, BO2, k11, BO2, k11, BO2, k3. Turn. K3, CO2, k11, CO2, k11, CO2, k11, CO2, k11, CO2, k4. Turn. Work 4 more rows garter st. BO. Finishing: Tie or weave in any/all yarn ends. Soak and block flat to desired shape. Attach buttons to line up with buttonholes.
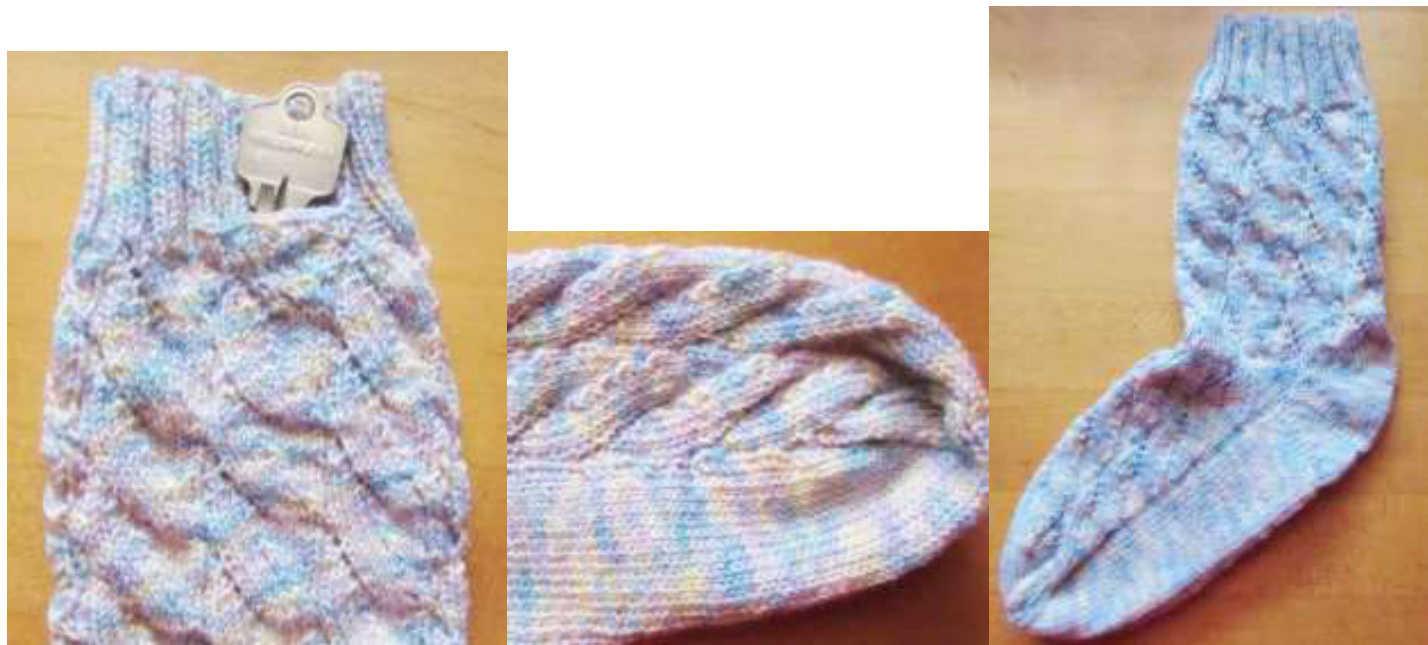
INSTRUcTIONs: Socks: Socks are worked top-down. Different sizes are achieved simply by changing needle sizes. LEG: Using either #1, #2, or #3 DPNs (depending on size desired), CO 68 sts. (17 sts on each of 4 DPNs). Join to work in round, placing marker and being careful not to twist stitches (if using a circular needle). Knit 18 rounds 2x2 rib. Add pocket on last ribbing round if desired. Also on last ribbing round, increase 2 sts evenly around to work sock on 70 sts, rather than 68. After ribbing, begin following sock chart. OPTIONAL SECRET POCKET: (One sock only): On last ribbing round, knit first 11 stitches. Using spare needle, knit the next 14 stitches (DO NOT RIB). Turn. Work back and forth ON THESE 14 STS ONLY, in stockinette, for 24 rows. BO. Set spare needle aside. Leaving another long tail, CO 14 sts, and continue ribbing around. Follow sock leg chart through round 46 or 58, depending on desired leg length. HEEL: My socks feature the Sweet Tomato Heel (STH). You may use the heel of your choice, but I recommend one that does not employ a flap or gussets to allow for an even design flow through the instep. For a tutorial on the STH, see this video: https://www.youtube.com/watch?v=IRc3309JUyc Once you understand how to knit the STH, proceed using the STH heel instructions, knitting heel working three wedges. Rearrange stitches so that you have 18 sts on needle 1, 17 sts on each of needle 2 and 3 (these comprise the 34 instep sts) and 18 sts on needle 4. You will be working your heel on the 36 sts on needles 1 and 4. Work wedges leaving 8 stitch pairs on each side (4 heel sts left unpaired between pairs). Knit according to pattern across the instep stitches between wedges. Follow the chart for the instep stitches (the sts you have on needles 2 and 3). After working the first half of wedge one, work across the instep per round 59 of the chart (all knit sts), then work 2 rounds around before beginning 2nd wedge. The 2nd wedge willuse the appropriate part of charted lace pattern on instep sts in round 62. Then work 2 rounds around before beginning 3rd wedge. The 3'rd wedge will use the appropriate part of charted lace pattern on instep sts in round 65. FOOT: Rearrange sts again for the foot, placing 15 sts on needle 1, 20 sts on needle 2, and 20 sts on needle 3, and 15 sts on needle 4. Work chart for about 50 rounds (Knit additional rounds if you want the foot longer). END on a knit round, decreasing 2 sts evenly around so that you work toe on 68 sts. Arrange sts for toe so that you have 17 sts on each of the 4 needles.
TOE:
Decreasefortoe asfollows: Needle 1: K to last 3 sts of NEEDLE 1, K2TOG, K1 Needle 2: K1, K2TOG, knit remaining sts. Needle 3: K to last 3 stitches of NEEDLE 3, K2TOG, K1 Needle 4: K1, K2TOG, knit remaining sts. Repeat rounds until there are 14 sts total on needles 1 and 4 and 14 sts total on needles 2 and 3. (7 sts on each needle) Place sts from needles 4 and 1 onto one needle (14 sts). Place sts from needles 2 and 3 onto one needle (14 sts). Graft the remaining stitches together using Kitchener st. Finishing: With long tails left from detaching and CO pocket sts, sew pocket down to inside of sock. On the front of the sock, if ribbing is desired on top of pocket, pick up the 14 c0 st loops andwork a 2x2 rib (starting and ending odd rows with knit 2, and even rows with purl 2), back and forth for 6 rows. BO. Secure ribbing sides to sock. Tie and weave in or trim all yarn ends at beginning and ends of rounds. Wash & block to fit.
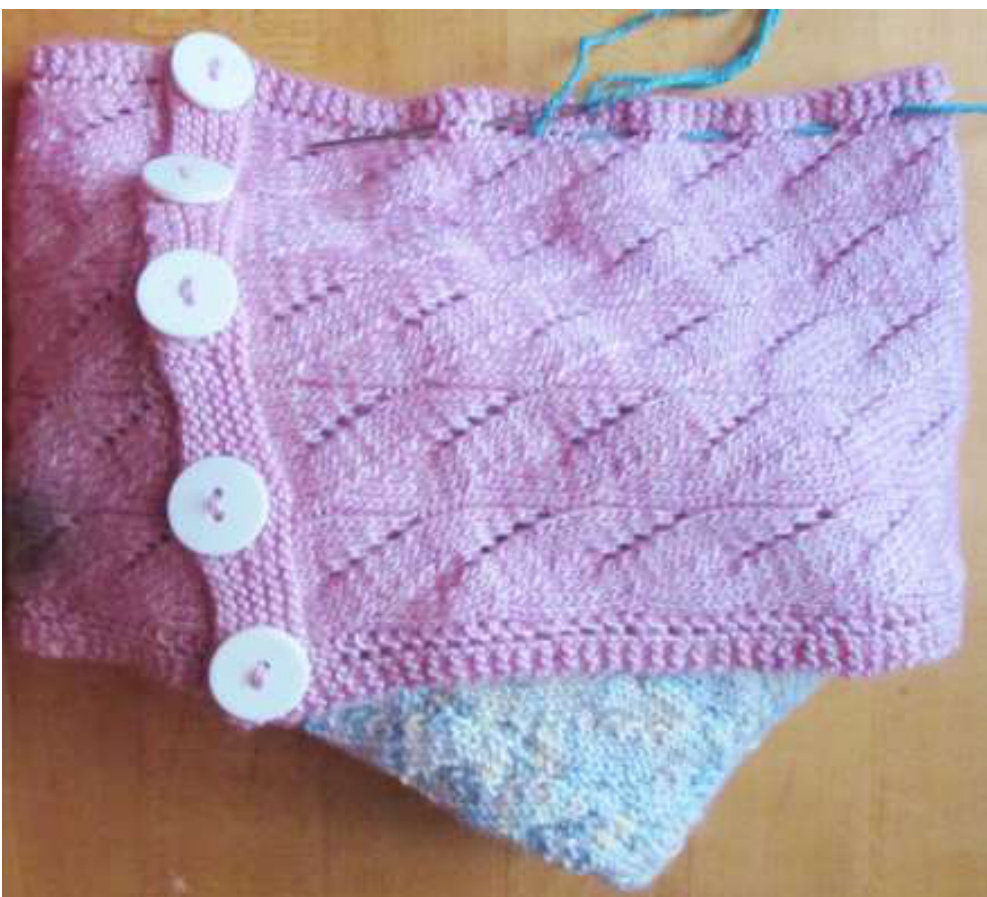
CREATING Gift Wrap:
As shown in photo, use tapestry needle and weave a running st with scrap yarn through the edge holes of cowl created by YOs when knitting. Weave through both layers of cowl to close edge. Place socks (or other gift) inside and repeat the running st process with scrap yarn on the other side to complete closure. To open gift, simply pull the scrap yarns out.
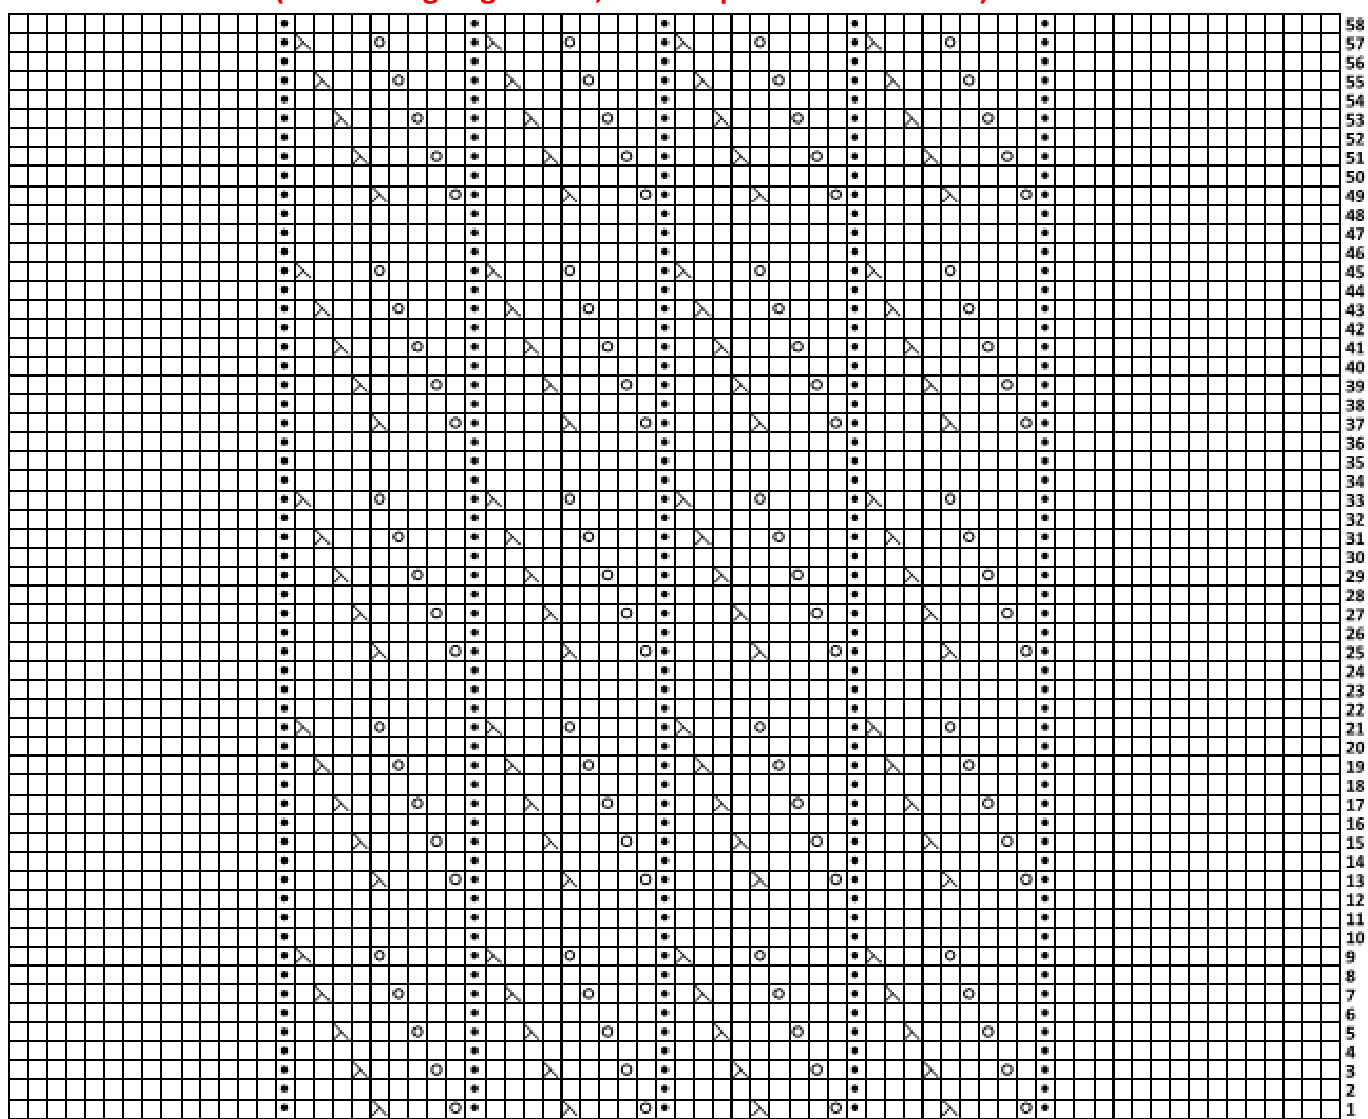
A word about the chart: Traditionally, lace charts have been written to be a symbolic representation of what the knitted piece should look like as seen from the front side. This means that, if you were knitting back and forth, you'd have to create a st on the back side that would result in the st that appears on the chart from the front side. (You are, no doubt, familiar with the blank square meaning k on the rs and p on the ws). Charts were written this way so the knitter could visualize what the design would look like when knitted, but it necessitated some fancy stitch-translating in the knitter's brain. We no longer need to have charts represent the design. We have digital cameras and can show actual swatches of the piece, so we can know what it looks like without having to interpret chart symbols. This makes life easier and eliminates that mental translation step. You simply notice which side of the chart a particular row is numbered, and you begin working from that side across, knitting the st the symbol represents. If you see a blank square, you always knit the st (see legend), and if you see a black dot in the square, you always purl that st, regardless of the direction from which you read the chart. Easy! And, you can always use the written instructions if you have chart allergies.
CHART (Cowl/ Wrap) WORKED FLAT
| 12 | ||||||||||||||||||||||||||||||
| 口 | 11 10 | |||||||||||||||||||||||||||||
| 0 | 9 | |||||||||||||||||||||||||||||
| 口 | ||||||||||||||||||||||||||||||
| 口 | 口 | |||||||||||||||||||||||||||||
| 7 | ||||||||||||||||||||||||||||||
| 口 | 6 | |||||||||||||||||||||||||||||
| 口 | 5 | |||||||||||||||||||||||||||||
| 口 | 4 | |||||||||||||||||||||||||||||
| 3 | ||||||||||||||||||||||||||||||
| 口 | 口 | 2 | ||||||||||||||||||||||||||||
| 1 |
10598555482509876548240837654320987654222201987154321987654321
Legend:
Knit Purl Yarn Over K2tog SSK Slip 1, knit 1, pass slip st off (PSSO)
CHART REPEAT (Socks) WORKED IN-THE-ROUND

SOCK LEG CHART:
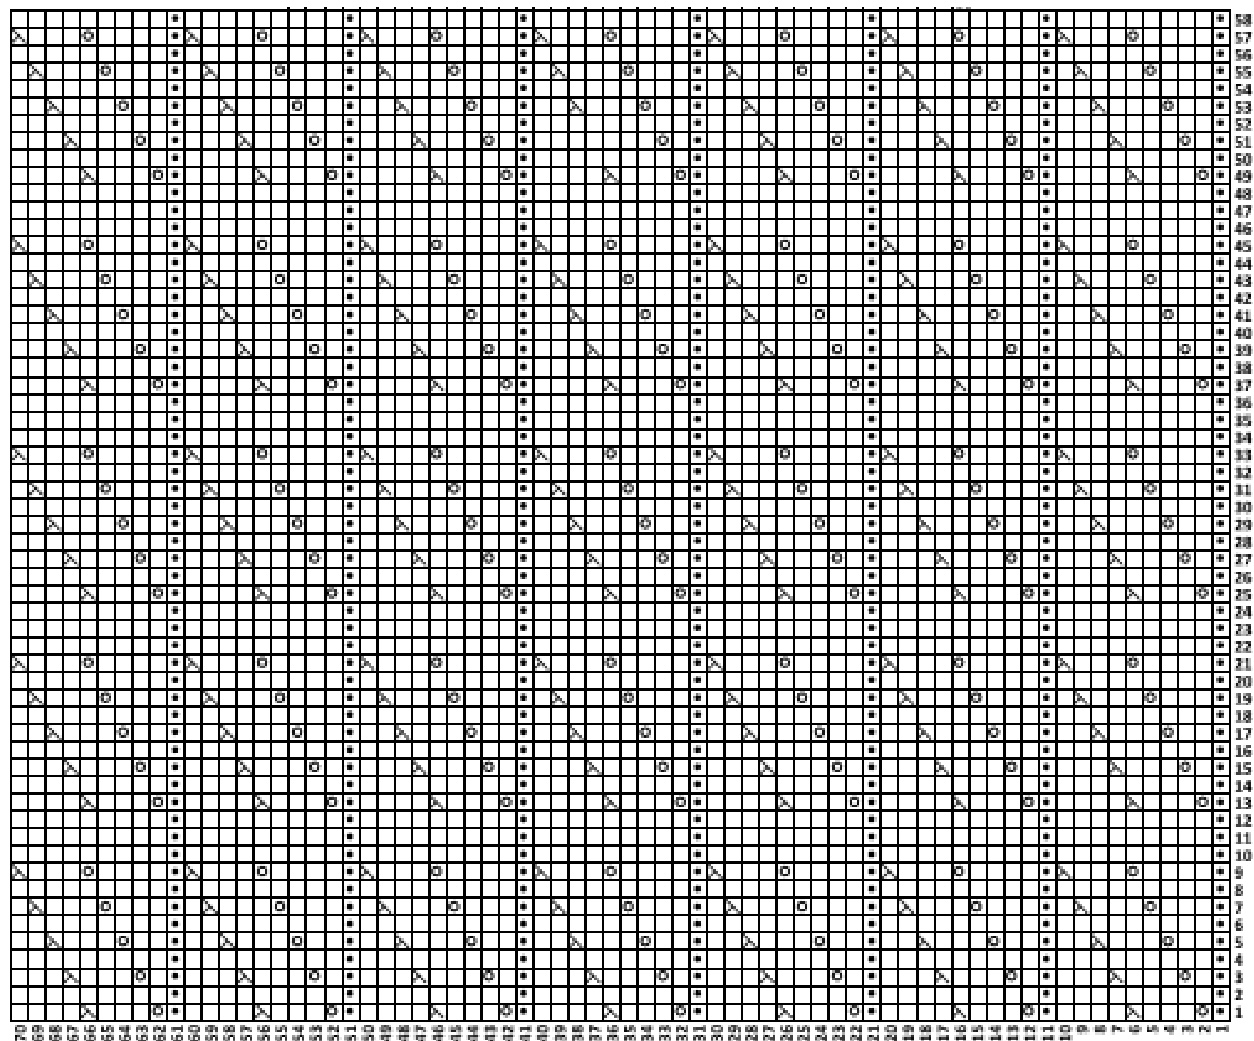
SOCK HEEL CHART: (Round 58 shown again for reference purposes only)
口59中
SOCK FOOT CHART: (Numbering begins as 1, but it equates to round 66.)
Copyright @ 2015 by Deborah Tomasello All rights reserved. This pattern or any portion thereof may not be reproduced or used in any manner whatsoever without the express written permission of the publisher. WARNING: Giving or accepting a free copy of this pattern, without permission of the designer, is stealing.


