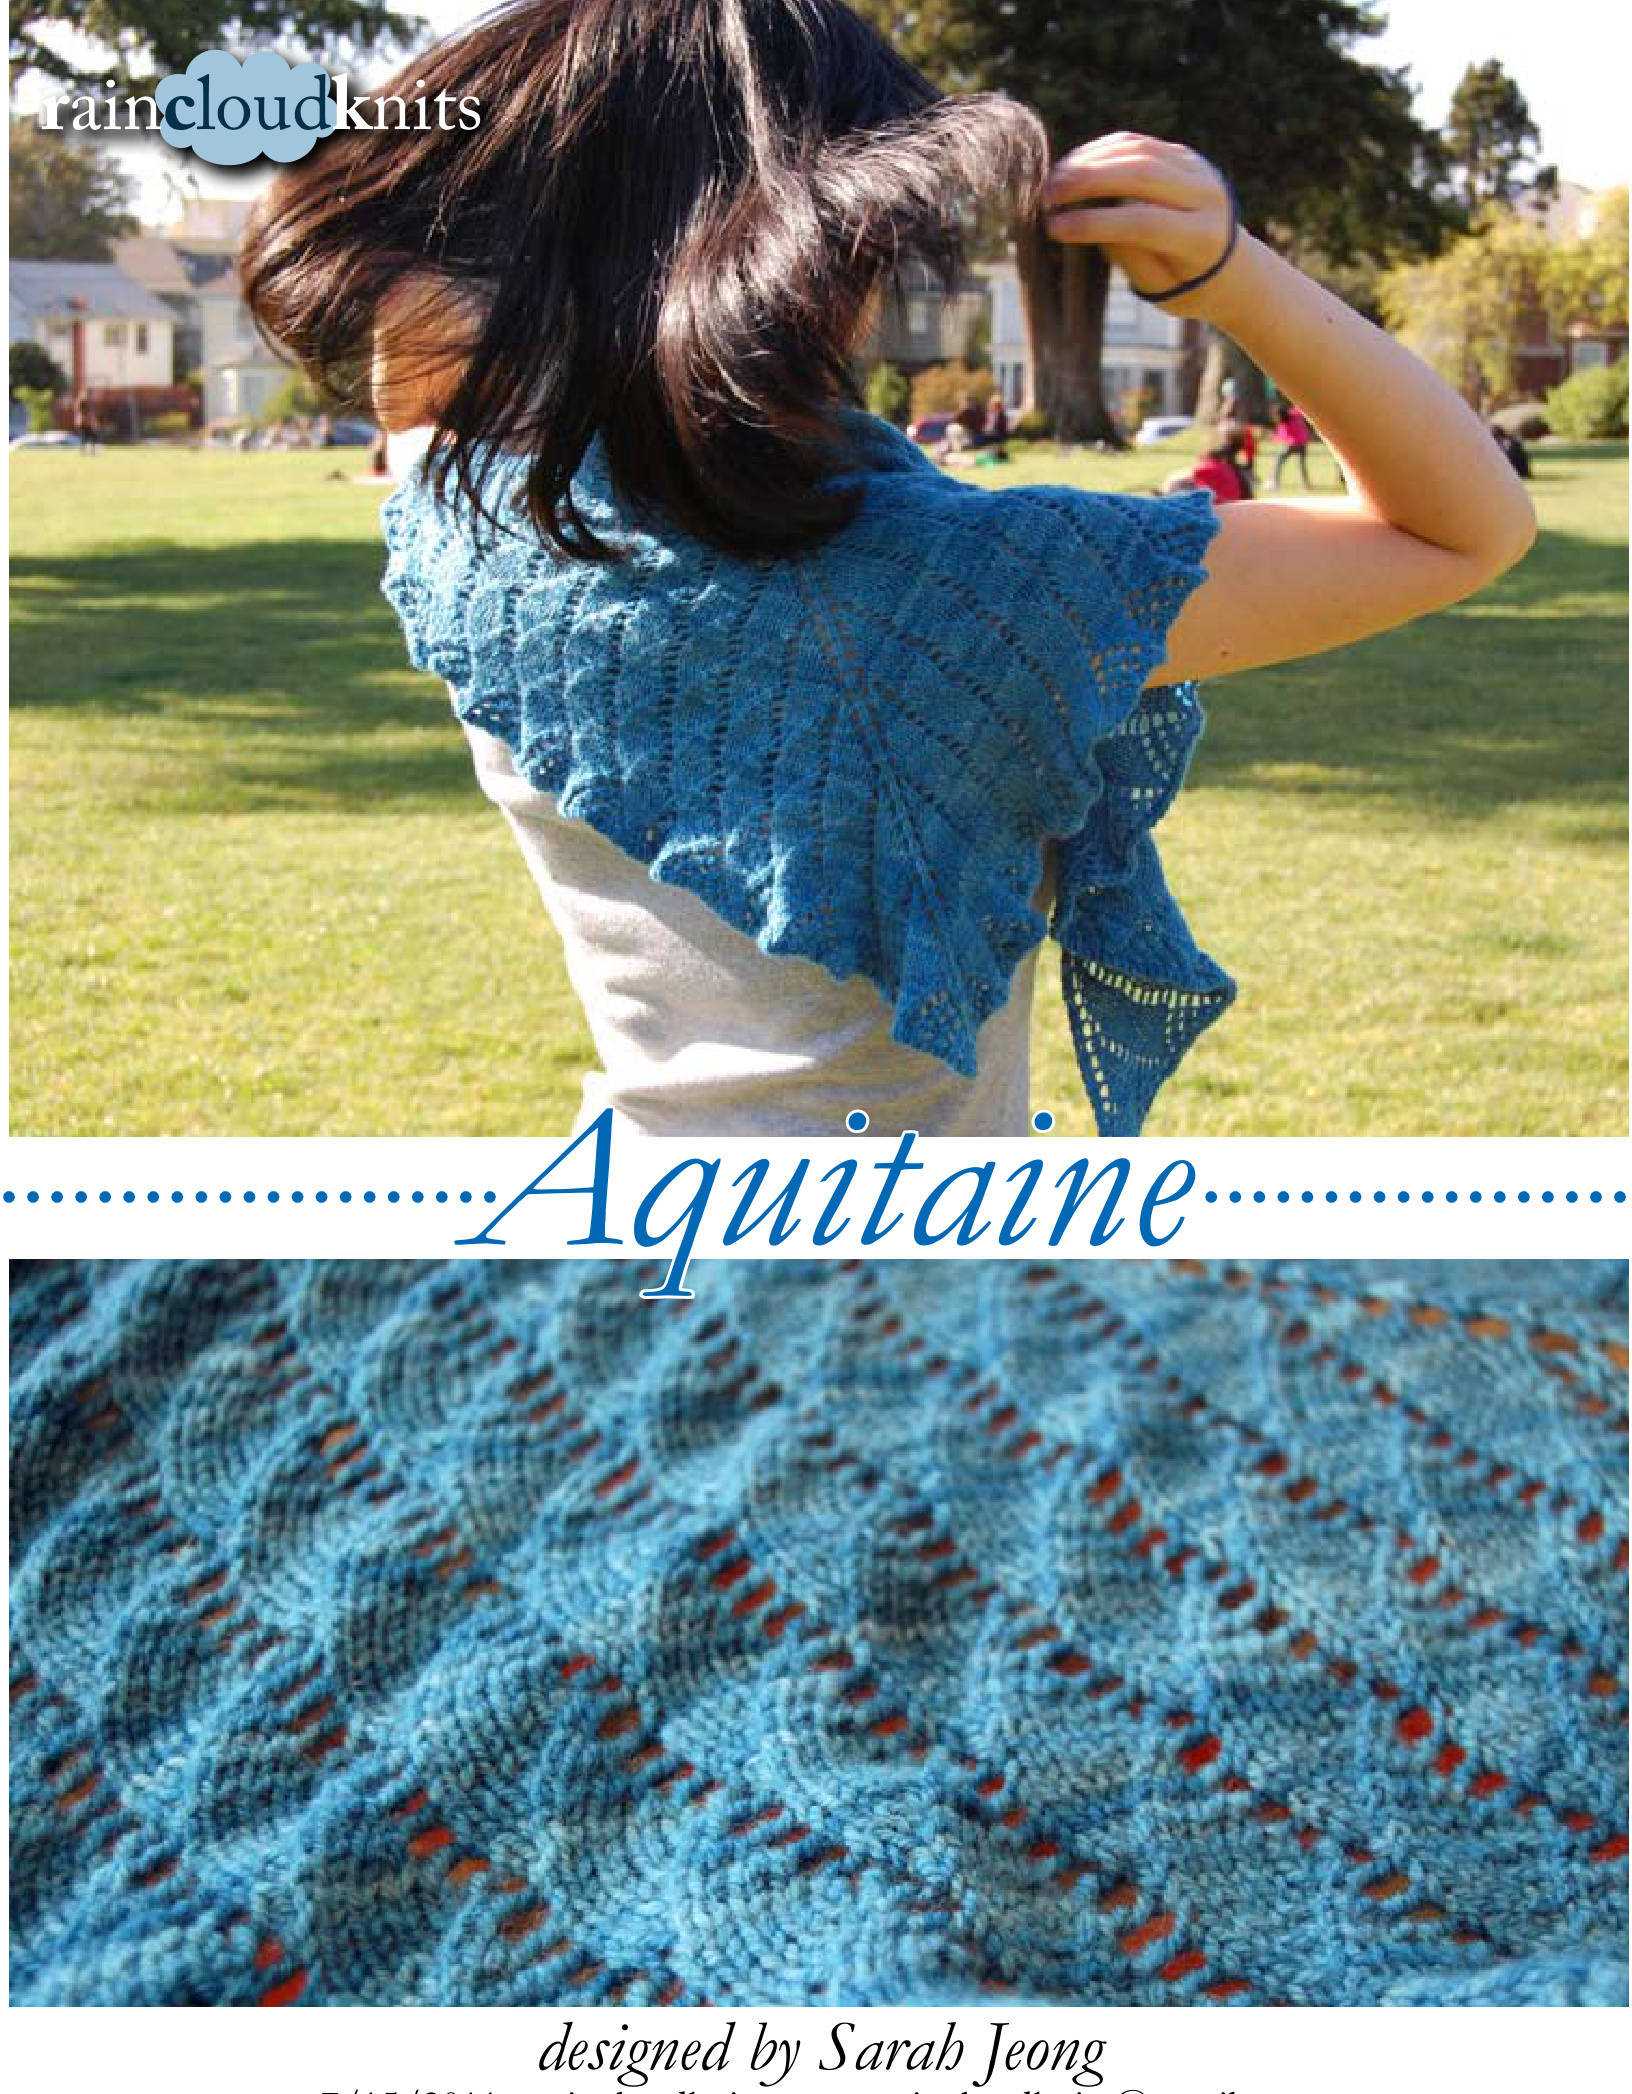
7/15/2011· raincloudknits.com · raincloudknits@gmail.com photography by Erin Amelia, Sarah Jeong, Liam Kukuchek
Aguitaine
Materials
about 412 ydsof fingering weightyarn Shown in Rio de la Plata Sock, Evergreen (1 skein, 437 yds) (in blue) and Sanguine Gryphon Skinny Bugga!, Nightcrawler (1 skein, 450 yds) (in pink) US 6 circular needles, at least 32 inches, or whatever size to get gauge yarn needle, for weaving in ends
Sizing
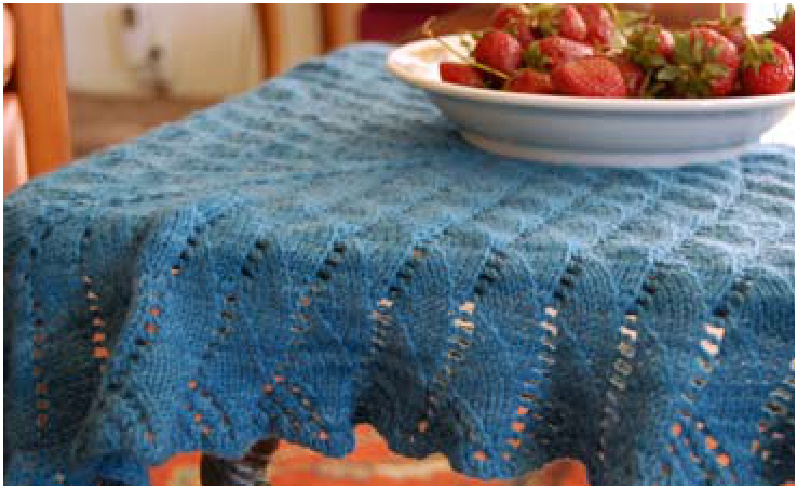
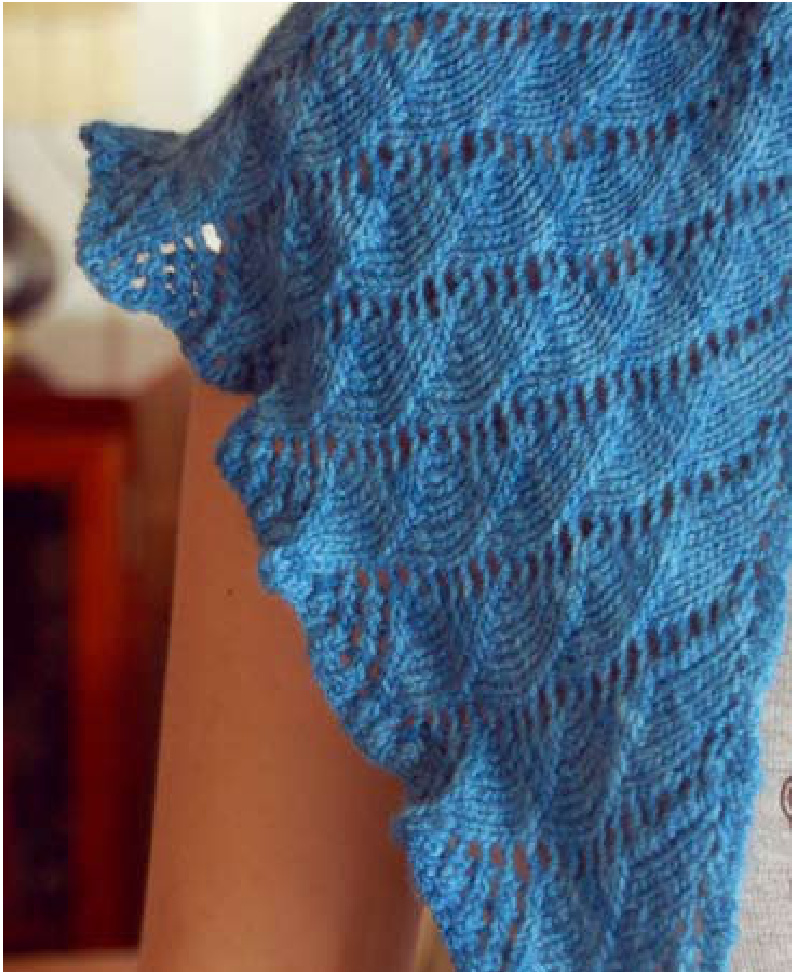
Aquitaine can be knit at any size. Directions are given for a shawlette that uses about 4oo yards of yarn, but this shawl can be upsized by any number of repeats of Chart 1.
Dimensions
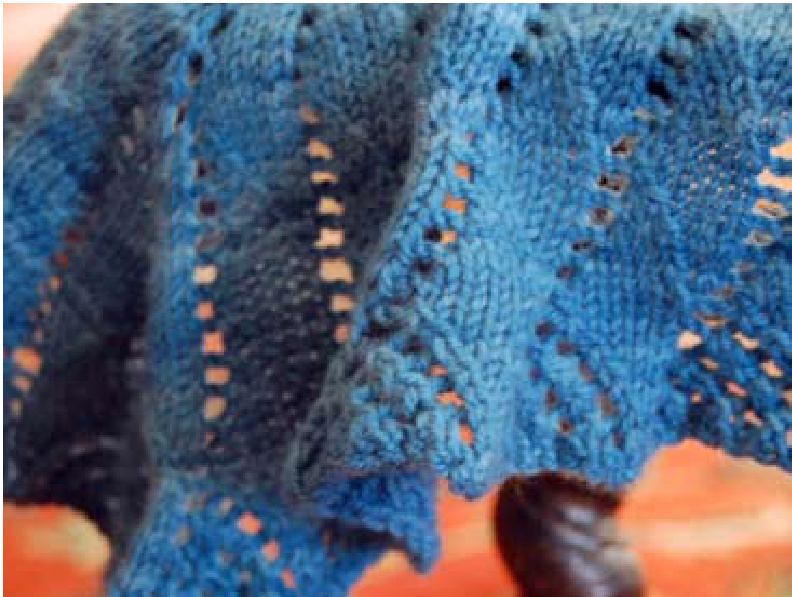
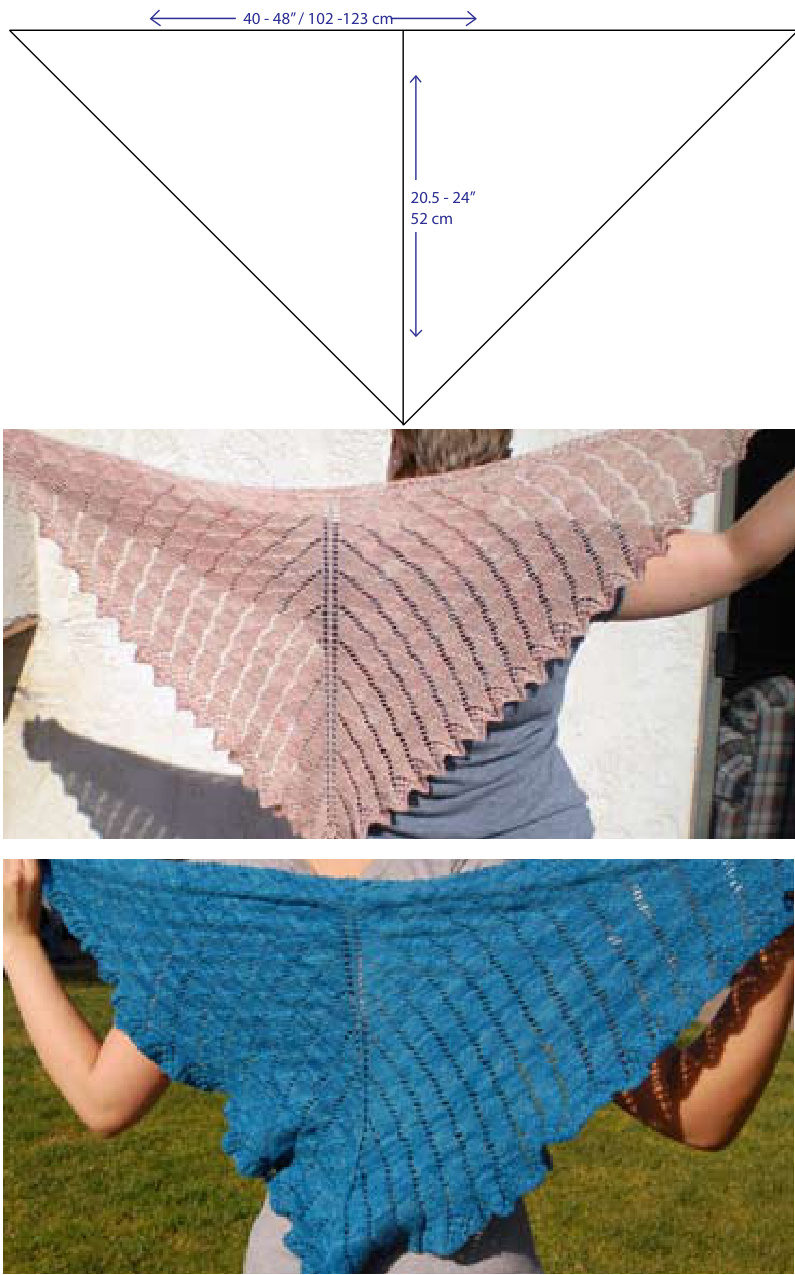
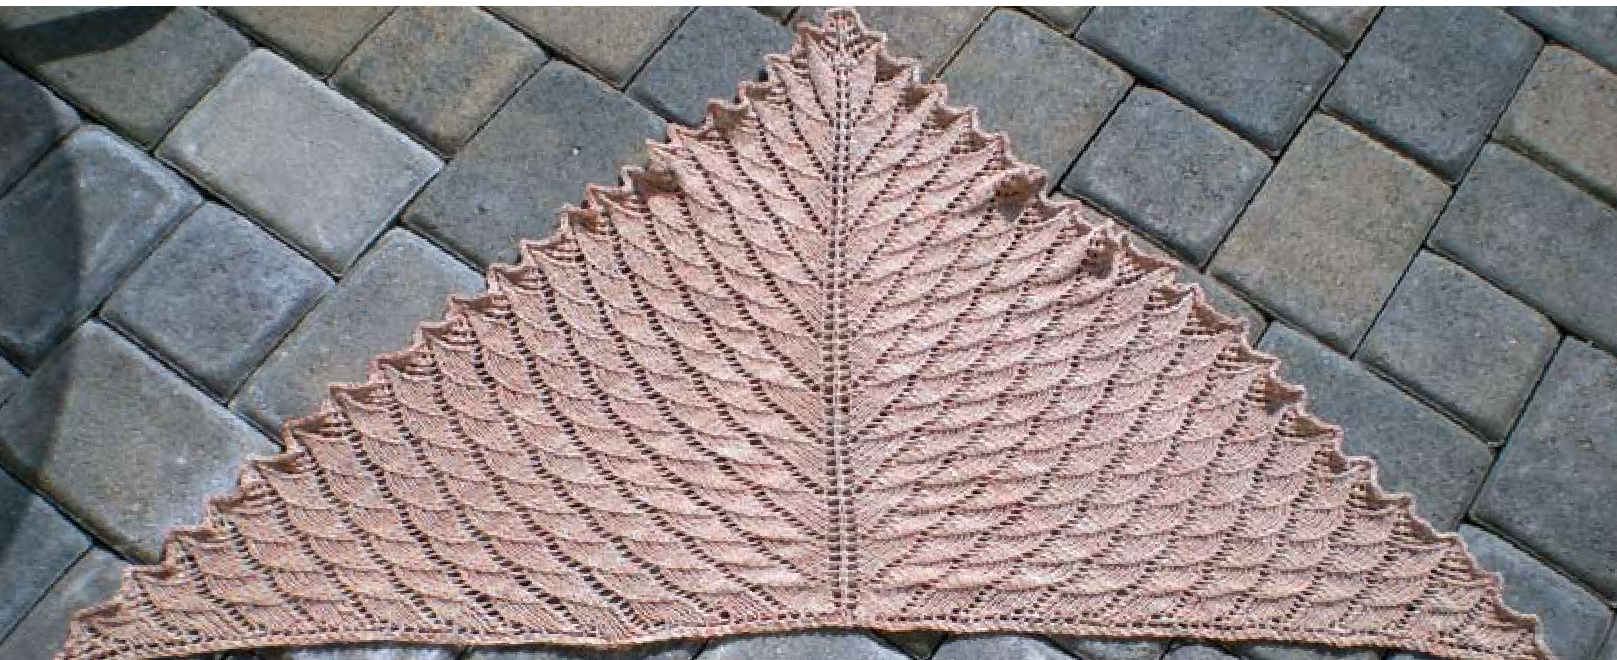
Blocked dimensions: blue sample: 40" wingspan, 20.5" depth pink sample: 48" wingspan, 24" depth
Gauge
blue sample: 24 sts / 30 rows in stockinette = 4" pink sample: 20 sts / 28 rows in stockinette = 4"
Note on yarn weight:
Matching a particular gauge is not essential, since a shawl is not a fitted garment. Hence, two gauges have been listed, along with the dimensions they produced. But although gauge is not important for sizing purposes, it should still be snug enough to allow the “scales" of your stitch pattern to "pop." You may find that you need to go down a needle size or two from what is recommended.
Aguitaine
Abbreviations k: knit p: purl yo: yarn over k2tog: knit 2 together ssk: slip 1 knitwise, slip 1 knitwise, return both stitches to left needles, knit them together through back loop k2togtbl: knit 2 together through back loop pm: place marker slm: slip marker [] or (): repeat instructions inside parentheses or brackets as many times as directed in pattern.
Starting Directions
Cast-on / Garter Stitch Tab
Cast on 3 sts. Knit 6 rows. Pick up 3 sts along the side. Pick up another 3 sts from the cast-on. (9 sts).
Set-up Rows
Row 1: K2, pm, k2, pm, k1, pm, k2, pm, k2. Row 2: K2, slm, p to last 2 sts, slipping all markers, then k2. Row 3: K2, slm, yo, k to next marker, yo, slm, k1, slm, yo, kto next marker, yo, slm, k2. (Stitch count increased by 4). Row 4: Repeat Row 2. Repeat Rows 3 and 4 three more times. (25 sts). Proceed either to the Written Directions (this page) or the Charted Directions (next page), whichever one you prefer.
Written Directions
Part 1: Plumage
Row 1 (RS): K2, slm, yo, k2tog, yo, (k4, k2tog, yo) until last two stitches before next marker, k2, yo, slm, k1, slm, yo, k2, (yo, ssk, k4) until last two stitches before next marker, yo, ssk, yo, slm, k2. Row 2, 4, 6, 8, 10 (WS): K2, slm, p until last two stitches, slipping all markers, k2. Row 3 (RS): K2, slm, yo, k1, k2tog, yo, (k3, k2tog, k1, yo) until last three stitches before next marker, k3, y0, slm, k1, slm, yo, k3, (yo, k1, ssk, k3) until last three stitches before next marker, yo, ssk, k1, yo, slm, k2. Row 5 (RS): K2, slm, yo, k2, k2tog, yo, (k2, k2tog, k2, yo) until last four stitches before next marker, k4, yo, slm, k1, slm, yo, k4, (yo, k2, ssk, k2) until last four stitches before next marker, yo, ssk, k2, yo, slm, k2. Row 7 (RS): K2, slm, yo, k3, k2tog, yo, (k1, k2tog, k3, yo) until last five stitches before next marker, k5, yo, slm, k1, slm, yo, k5, (yo, k3, ssk, k1) until last five stitches before next marker, yo, ssk, k3, yo, slm, k2. Row 9 (RS): K2, slm, yo, k1, yo, k3, k2tog, yo, (k2tog, k4, yo) until last six stitches before next marker, k5, yo, k1, yo, slm, k1, slm, yo, k1, yo, k5, (yo, k4, ssk) until last six stitches before next marker, yo, ssk, k3, yo, k1, yo, slm, k2. Repeat Rows 1-10 ten times, or until desired length (265 sts). (Each full repeat of Charts 1R-iL will increase the stitch count by 24 sts.)
Part 2: Feathers and Fluff
Row 1 (RS): K2, slm, yo, k2tog, yo, (k4, k2tog, yo) until last two stitches before next marker, ssk, slm, k1, slm, k2tog, (yo, ssk, k4) until last two stitches before next marker, yo, ssk, yo, slm, k2. Row 2, 4, 6, 8 (WS): K2, slm, p until last marker, slm, k2. Row 3 (RS): K2, slm, yo, k2tog, k1, yo, (k3, k2tog, yo, k1, yo) until last stitch before next marker. Slip 1 stitch purlwise, remove marker. Slip 1 stitch purlwise, remove marker. Place slipped stitches back on left needle. Place marker, slip two stitches knitwise at the same time (as if to k2tog), knit next stitch, then pass the 2 slipped stitches over. (Yo, k1, y0, ssk, k3) until last three stitches before next marker, yo, k1, ssk, yo, slm, k2. Row 5 (RS): K2, slm, yo, (k2tog, yo) twice, [k2, (k2tog, yo) twice, k1, yo] until next marker, slm, k1, slm, [yo, k1, (yo, ssk) twice, k2] until last four stitches before next marker, (yo, ssk) twice, yo, slm, k2. Row 7 (RS): K2, slm, (yo, k2tog) twice, k1, yo, repeat [k1, (k2tog, yo) three times, k1, yo] until next marker, slm, k1, slm, [yo, k1, (yo, ssk) three times, k1] until last five stitches, yo, k1, (ssk, yo) twice, slm, k2. Row 9 (RS): K2, slm, (yo, k2tog) three times, [(k2tog, yo) four times, k1, yo] until next marker, slm, k1, slm, [yo, k1, (yo, ssk) four times] until last six stitches, (yo, ssk) three times, yo, slm, k2. Work Rows 1-9 once (439 sts). Turn work and bind-off, as shown on next page.
Bind-off
With wrong side facing, use the Lace Bind-off: K 1, (k 1, slip two knit sts back to left needle, k2togtbl), repeat the instructions between the parantheses, until one stitch remains, cut yarn, leaving a generous tail. Pull tail through last stitch. Weave in ends and block.
Charted Directions
Chart 1: Plumage
The two stitches at the beginning and the two at the end are always worked in garter stitch. Only the RS rows are charted. The WS rows should be purled, except for the garter edges. In other words, work this section as follows: RS: K2, slm, work desired row of Chart 1R, slm, k1, slm, work desired row of Chart 1L, slm, k2. WS: K2, slm, p until last marker, slm, then k2. Repeat row 1 to 10 ten times , ending with 265 stitches, or until desired length. Each full repeat of Charts 1R-1L will increase the stitch count by 24 sts.
Chart 2: Feathers and Fluff
Like Chart 1, Chart 2 is divided into 2R and 2L, to be worked on the first half and the second half respectively. Like the Chart 1 section, one should work the Chart 2 section as follows: RS: K2, slm, work desired row of Chart 2R, slm, k1, slm, work desired row of Chart 2L, slm, k2. (See note for Row 3). WS: K2, slm, p until last marker, slm, then k2. Work Chart 2 from row 1to row 9 once. (439 sts). Note on Row 3: When you reach the last stitch of Chart 2R, slip the stitch, remove marker, slip another stitch, and remove the other marker. Place slipped stitches back on the holding needle. Place marker, and then work the centered double decrease (slip 2 stitches knitwise at the same time, as ifto k2tog, knit next stitch, then pass the 2 slipped stitches over.). Place marker. Work Chart 2L. When you have finished Row 9, turn work and bind off, using the Lace Bind-Off (see written instructions).