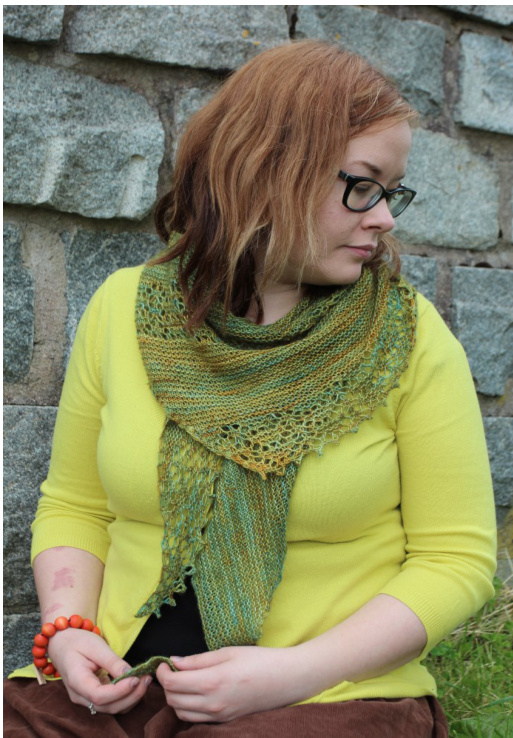
NURMILINTU
Heidi Alander The name Nurmilintu comes from an old Finnish lullaby: Nuku, nuku, nurmilintu...(Freely translated: "Sleep, sleep, little bird..'

Yarn
Madelinetosh Tosh Merino Light (100 g / 385 m; 100 % merino wool) color Filigree, one skein. Shawl shown used almost the whole skein.
Needles
3.5-4 mm or to obtain gauge
Gauge
20 sts / 34 rows = 10 cm blocked garter stitch; gauge is not crucial but knitted fabric should be relatively loose
Notions
Darning needle Blocking pins
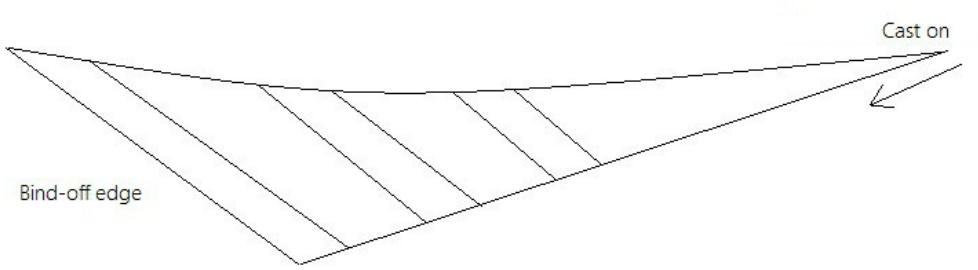
Part 1 - garter stitch Co 4 sts. Set-up row 1: k 1, kfb, k to end. Set-up row 2: k1, k2tog, kfb, k 1. Row 1: k 1, kfb, k until 3 sts before end, k2tog, k 1. Row 2: k until 2 sts before end, kfb, k 1. Repeat rows 1-2 until you have 79 sts on the needle.
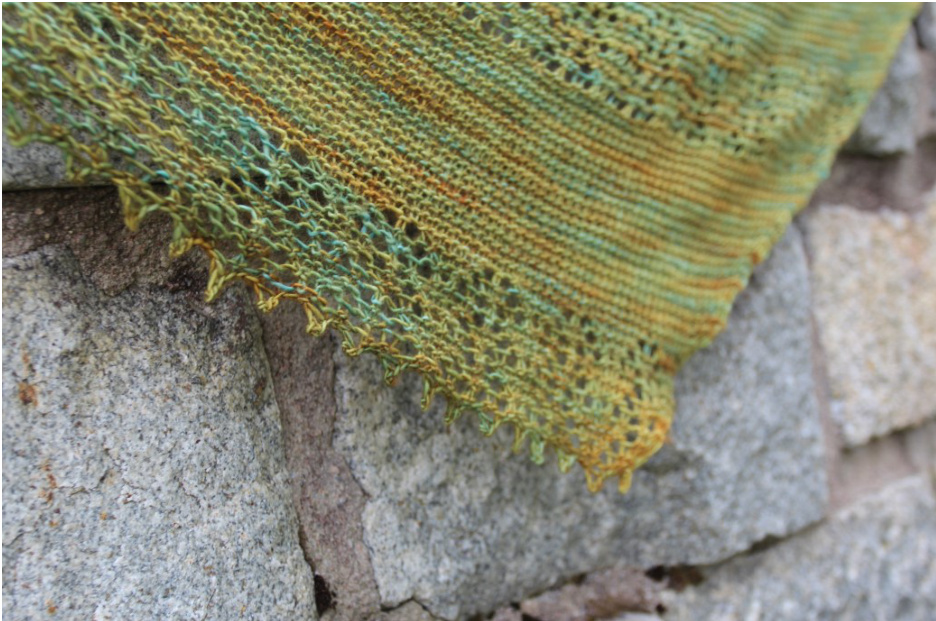
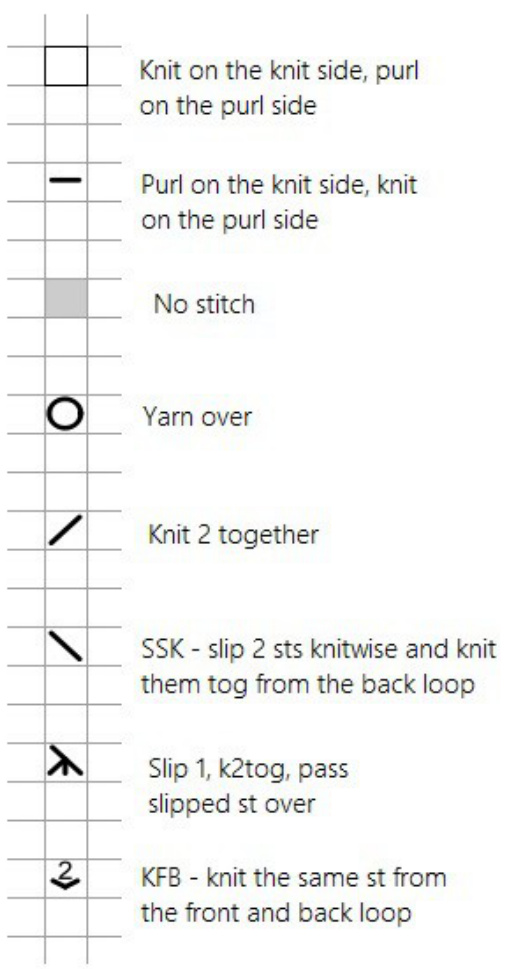
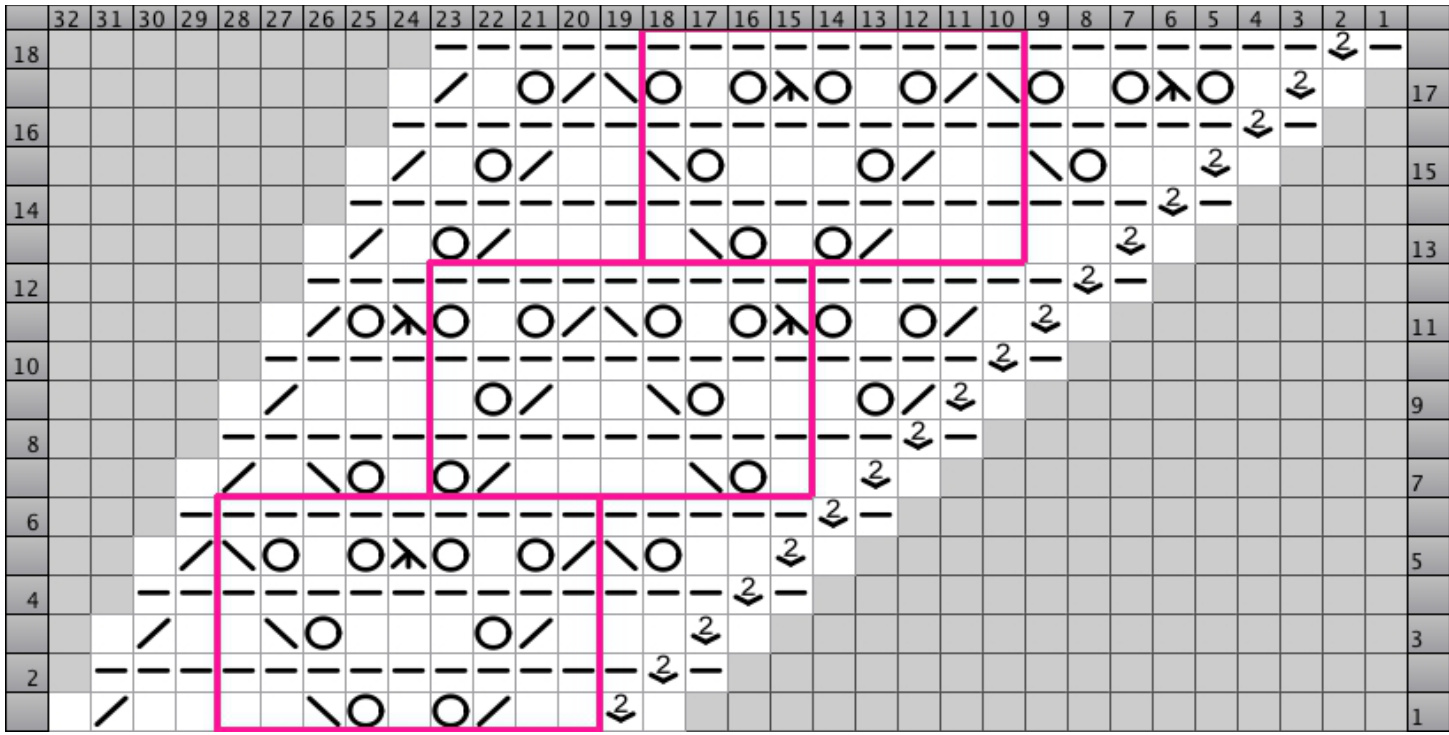
Part 2 - lace Start knitting according to the chart. Read chart from right to left on the right side and from left to right on the wrong side. Work chart rows 1-18 once. Repeat sts in the box appropriate times. 115 sts. Part 3 - garter stitch Repeat rows 1-2 from the garter part 1 until you have 733 sts Part 4 - lace Repeat part 2. - 142 sts. ① Heidi Alander 2014. For personal use only. Photos Tina Rammo. Part 5 - garter stitch Repeat rows 1-2 from the garter part 1 until you have 160 sts. Part 6 - lace Repeat part 2. - 169 sts. Note: you may alternate garter stitch and lace parts more times if you wish. (Then you'll need more yarn.) Bind-off BO 1 st. \* Using knitted cast-on, CO 2 sts. BO 5 sts. \* Repeat until all sts have been bound off. Weave in ends. Blocking Soak shawl well. Start blocking by pinning the upper edge. (This doesn't need to be too even, you may fix it later.) Upper edge is a little bit curvy. Then start pinning the bind-off edge - I pinned every picot of the edge. This edge is pretty straight. Then pin the last edge; this is also straight. Now you have some kind of shape - if it seems misshapen, breathe in and start fixing. It's gonna be alright! :)
① Heidi Alander 2014. For personal use only. Photos Tina Rammo. Chart
Abbreviations