"A Mighty Good Yarn" Designs by Elizabeth Cobbehttp://mightygoodyarn.blogspot:com lizcobbe@yahoo.com
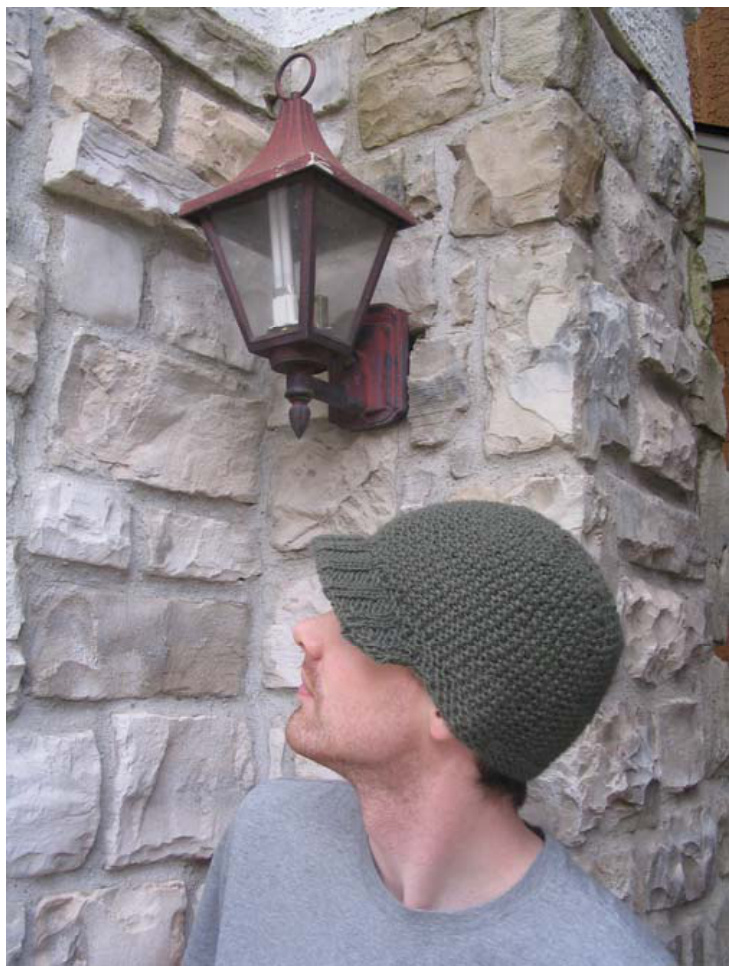
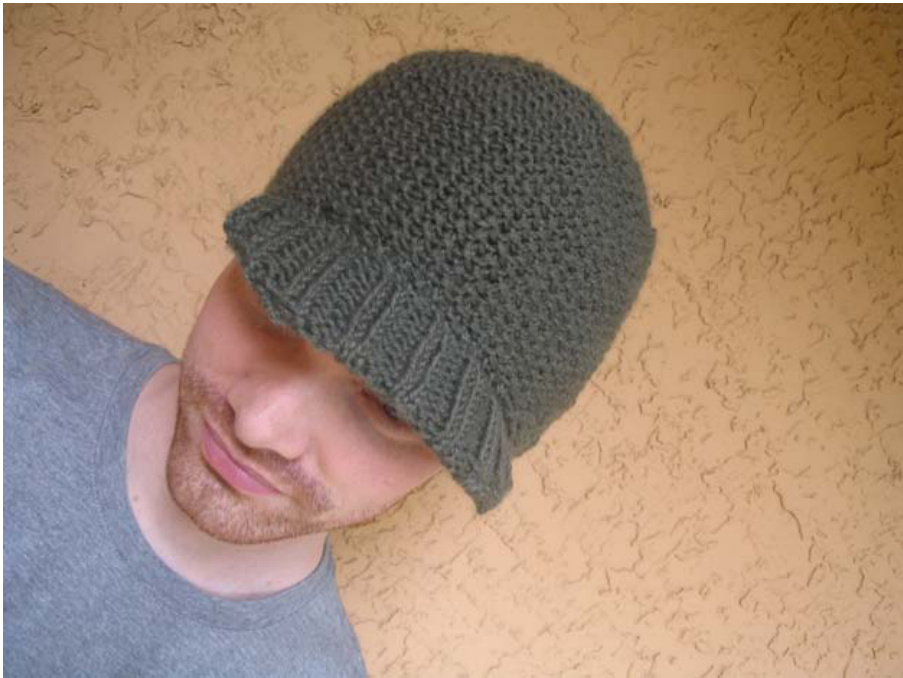
Reasonably Hip
I created this hat for my significant other, who was once described as “reasonably hip" by our local newsmag. You can wear it cocked to the side, or straight foward like a baseball player. A single-color yarn choice makes it cool but not flashy,nitybut not crazy. All in all? It's reasonably hip. This hat is also a great pattern for beginners who want to bump it up a notch, or for more seasoned knitters looking for a fun, portable project. The body of the hat calls for seed stitch with a garter stitch edge. The visor consists of a "pouch" of 2x2ribbing on top and stockinette underneath, with an insert of plastic canvas (available at embroidery stores or craft chains) to hold the shape. I used short rows on the bottom edge of the hat and also on the visor to make sure the visor curvesover the face. I intentionall created this hat to fit alitle on the loose side for the average and reasonablyhip adult head, whether male or female. Don't be alarmed if it covers the tops of your ears! Trust me: you look great. This pattern was originally published in the December 2007 issue of Magknits.
Difficulty Level: Intermediate
Materials needed:
Plymouth Yarn Encore $[75\%$ acrylic, $25\%$ wool; 200 yards $(180\;\mathsf{m})$ per 100g skein] color: 045; 1 skein 1 set US #7 (4.5mm) dpn, or two circular needles tapestry needle one sheet Quick Count Plastic Canvas or other suitable material for brim safety pin or removable stitch marker Sizes: One size fits most. Finished circumference measures 19 inches $(48.5\,\mathsf{c m})$ unstretched. Gauge: 15 sts $=4$ in $(10\;\mathsf{c m})$ in seed stitch
Stitch instructions
Seed stitch: (worked in round over odd number of sts) Round $1!\,^{\star}\mathsf{k}\mathsf{1}$ , $\mathsf{p}1^{\star}$ to end. Round 2: $\star_{\mathsf{p}1}$ $\mathsf{k}\mathsf{1}^{\star}$ to end. Basic $_{2\times2}$ rib: (over a multiple of 4 sts) Every row: $^{\star}\mathsf{k}2$ ,, $\mathsf{p}2^{\star}$ to end. (lf over a non-multiple of 4 sts) Row 1: $^{\star}\mathsf{k}_{2}$ $\mathsf{p}2^{\star}$ to end. Row 2:k all knit sts, p all purl sts. Short rows: As directed, work in the round or along a row until directed to turn. Slip one stitch from the left needle to the right. Pull the yarn over, and slip that stitch back to the left needle. Now move the yarn back over, turn your work, and proceed. I have used the abbreviation “"w&t" to indicate the end of a short row.
Pattern: Body of hat
CO 63 sts. Join, k 1 rnd. Begin short rows in garter stitch: Row 1: k35, w&t. Row 2: k36, w&t. Row 3: k37, w&t. Row 4: k39, w&t. Row 5: k41, w&t. Row 6: k43, w&t. Row 7: k45, w&t. Row 8: k47, w&t. Row 9: k49, w&t. Row 10: k51, w&t. Row 11: k53, w&t. Row 12: work in seed st for 56 sts, w&t. Row 13: work in seed st for 59 sts, w&t. End short rows. Begin working again in rnd. Work in seed stitch until hat measures 6 in (15 cm) from CO row. The measurement should be taken from the bottom edge of the hat, where back of the wearer's neck will be. Begin dec: Rnd 1: \*Seed stitch for 7 stitches, then k2tog.\* Rep 7 times. Rnd 2: seed stitch (and alternating rnds) Rnd 3: \*seed stitch for 6 stitches, then k2tog.\* Rep 7 times. Rnd 5: \*seed stitch for 5 stitches, then k2tog.\* Rep 7 times. Rnd 7: \*seed stitch for 4 stitches, then k2tog.\* Rep 7 times. Rnd 9: \*seed stitch for 3 stitches, then k2tog.\* Rep 7 times. Rnd 11: \*seed stitch for 2 stitches, then k2tog.\* Rep 7 times. Rnd 13: \*K1, k2tog.\* Rep 7 times. Rnd 14: k2tog, rep 7 times. Thread yard through remaining loops and work end into the hat.
CO 34 sts.
Begin short rows: Row 1: work $_{2\times2}$ rib for 24 sts, w&t. Row 2: work 2x2 rib for 14 sts, w&t. Row 3: work 2x2 rib for 18 sts, w&t. Row 4: work $_{2\times2}$ rib for 22 sts, w&t. Row 5: work 2x2 rib for 25 sts, w&t Row 6: work 2x2 rib for 28 sts, w&t. Row 7: work 2x2 rib for 31 sts. End short rows. Continue 2x2 rib for 4 rows. BO all sts in pattern. Leave a generous tail to sew visor to hat.
Bottom of visor
Pick up middle 14 sts of front edge of visor. Row 1 [WS]: p14, CO 10 sts. Row 2 [RSj: k24, CO 10 sts. You should now have 34 sts with the top half of the visor hanging from your needles. Begin short rows: Row 3: p24, w&t. Row 4: k18, w&t. Row 5: p22, w&t. Row 6: k25, w&t. Row 7: p28, w&t. Row 8: k31. End short rows. Work rows 9-12 in St st. BO all sts.
Finishing
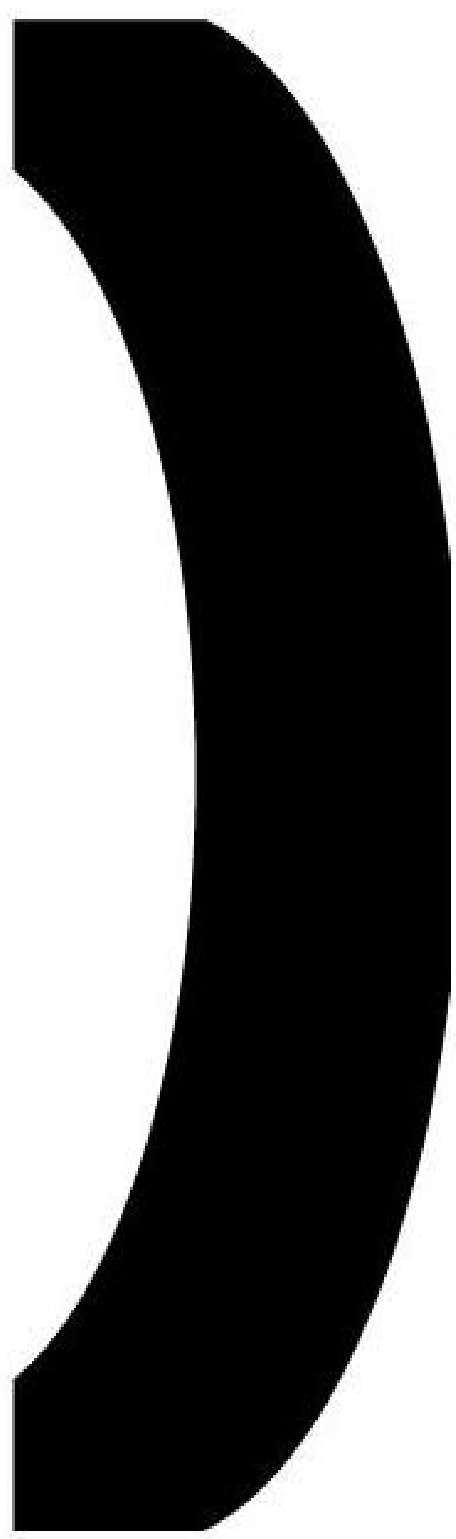
Print the template and use it to cut a visor from a sheet of plastic canvas. Note that when you print the template, it should measure 8 inches by 2 inches (21 cm by 5 cm). Stretch the top and bottom knitted pieces over the plastic shape, and seam closed around the sides, being careful to cover any jagged bits of the canvas. Finally, sew the visor to the front of the body of the hat. Weave in loose ends. Please email the designer at lizcobbe@yahoo.com if you have questions. $\circledcirc$ 2007 Elizabeth Cobbe.
Visor Template