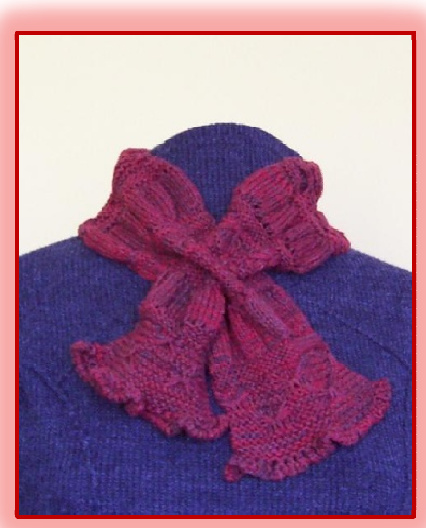
Fuego Scarf
by renee ferguson Whip up this little treat as a gift or for yourself to keep warm in style. This neck wrap design can be made in any color of your choice, my preference was to use a luxuriously soft blend of silk & cashmere from Posh Yarns in the UK. I have enjoyed using mine in a winter version of a necklace over sweaters and sometimes, just with a blouse in early Spring for outdoor SunDowners? One size fits all butshould you prefer tomake a longer version of it knit away with pleasure until you reach your ideal length of choice. TENSION: 24 sts and 30 rows = 10cm, in St st using 4.5mm needles.
You'll need:
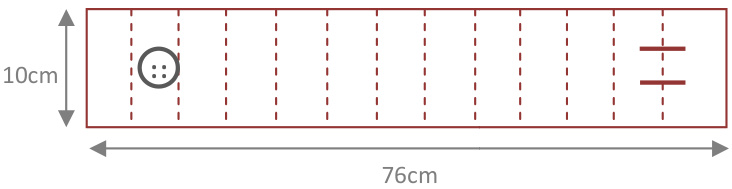
· 1 skein of Eva 2-ply yarn by Posh Yarns in Hearth (55% silk, 45% cashmere; 40o yds/55g). You can find this at www.poshyarn.co.uk ● #3.5mm (US 4) single pointed needles Abbreviations wyif = with yarn in fro · stitch holder, stitch counter, and crochet hook sts stches RS = right side WS = wrong side ● Optional: 1 large button, (approx 6cm). k= knit sl = slip stitch ● Hot cup of something and some music. p=purl k2tog = knit 2sts toge' Cut two strands of yarn, 1.5m each, and roll into little balls and set aside. Using #3.5mm needles, CO 25sts. Knit the first row as follows: \*k1, yo\* repeat from \* to\*. Row 2: \*k2tog\* repeat from \* to\*. Work the next 6 rows in Garter st. Begin knitting Mini-Butterfly Pattern over the next 16 rows as follows: Rows 1, 3,5& 7: sl1, k4, \*wyif sl5, k5\*, repeat from \* to \*. Row 2 and all even rows: purl all sts. Row 8: k5, \*insert LH needle through the 3 loose strands that are on the front side of work (below the next st), and purl these strands together with next st on needle, P5\*, repeat from \* to \*, end with p5. Rows 9, 11, 13 & 15: wyif sl5, k5, wyif sl5, k5, wyif sl5. All even rows: purl all sts. Row 16: \*insert LH needle through the3 loose strands that are on the front side of work (below next st), and purl these strands together with next st on needle, k5\*, repeat from \* to\*. Page 10f3 Rows 17 - 19: Knit RS row, purl WS row, knit RS row so that these three rows are purled on the RS. You will now incr sts on next WS Row 2o: \*p1, yo\* repeat from \* to\*. Knit in St st for 10 rows. On Row 31 decr sts: \*k2tog\* repeat from \* to\*. Rows 32 - 34: Purl WS row, knit RS row, purl WS row so that these three rows are purled On the RS. Repeat these 34 rows 5 more times. When you have completed the sixth repetition, only knit 16 rows of the Mini-Butterfly Pattern to include the openings for the loops to tie one scarf end through. You will now need to use the two balls of yarn set aside at the start. Knit as follows: Rows 1,3,5 & 7: sli, k4, wyif sl5, attach new ball of yarn and k5, attach new ball of yarn and Wyif sl5, k5. Row 2 and all even rows: pio, pick up next ball and p5, pick up next ball and p10. Row 8: p5, \*insert LH needle through the 3 loose strands that are on the front side of work (below next st), and purl these strands together with next st on needle\*, pick up next ball and p5, pick up next ball and repeat from \* to\*, P5. Rows 9, 11, 13 & 15: wyif sl5, k5, pick up next ball and wyif sl5, pick up next ball and k5, wyif s15. All even rows: pio, pick up next ball and p5, pick up next ball and p10. Row 16: \*insert LH needle through the 3 loose strands that are on the front side of work (below next st), and purl these strands together with next st on needle\*, p5, pick up next ball and repeat from \* to\*, pick up next ball and p5, repeat from \* to\*. Knit 3 rows as follows: knit RS row, purl WS row, knit RS row so that these three rows are purled on the RS. You will now incr sts on next WS row: \*p1, yo\* repeat from \* to\*. Knit in St st for 1o rows. On nth row decr sts: \*k2tog\* repeat from \* to\*. Knit 3 rows as follows: knit RS row, purl WS row, knit RS row so that these three rows are purled on the RS. Knit one more sequence of the Mini-Butterfly Pattern, followed by 6 rows in Garter st. Seventh row (RS), incr sts: \*k1, yo\* repeat from \* to \*. BO all sts using a crochet hook: pull yarn through 2sts at a time. This will help to keep the swirl at the edge.
FINISHING
Weave in loose ends with a tapestry needle and iron gently and quickly with low heat on wrong side, covering with a cotton cloth or pillow case and using only a little steam.
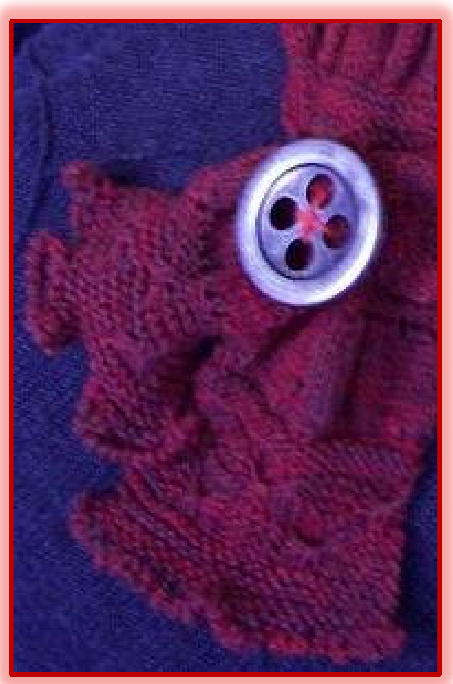
You can now choose to sew a button onto the front of this scarf, just between the opening where the other end loops through. Or, leave without a button and choose to use a brooch pinned to this section whenever you fancy.