@Jane Thornley. This pattern is not to be copied or reproduced without permission from the author unless it's for personal use.

@Jane Thornley. This pattern is not to be copied or reproduced without permission from the author unless it's for personal use.
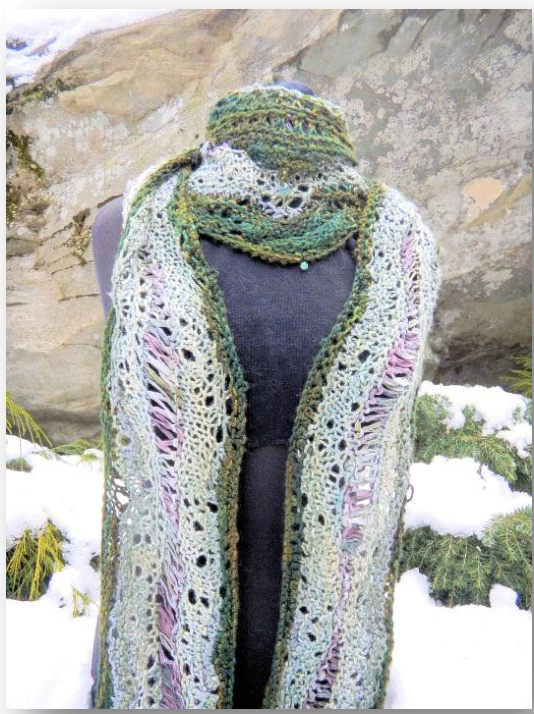
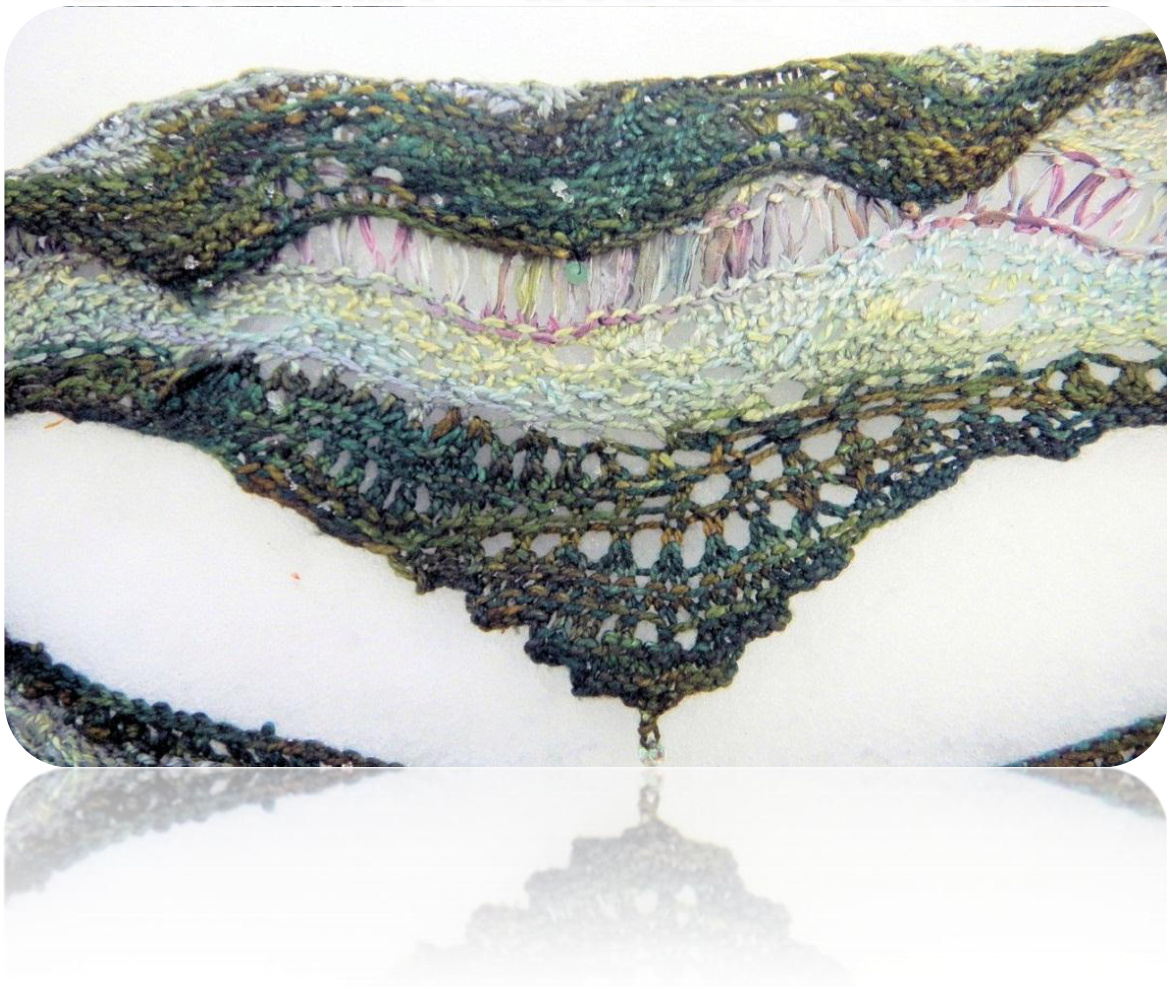
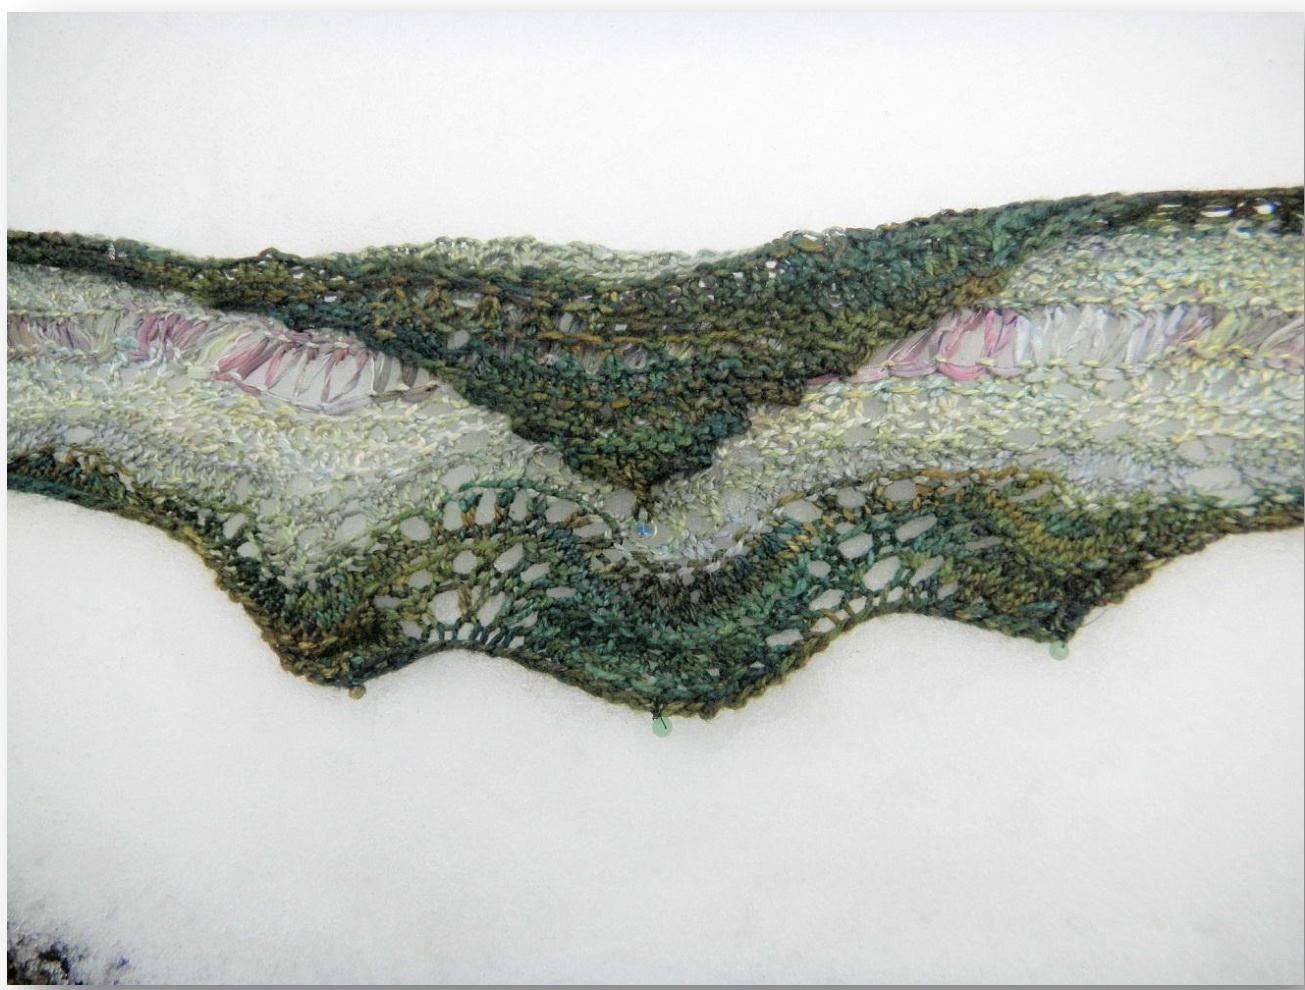
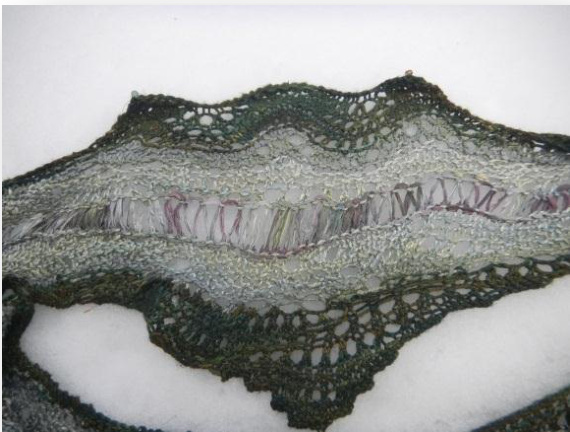
Here's where you can try your hand at random lace (so fun and forgiving) while creating a free-flowing scarf featuring feather and fan plus a single row of undulating drop stitch. The overall effect is a river flowing through a snowy wood, lacy, lively, and lovely. To add to the effect, try adding a single drop of water (bead) to frontal piece to catch the light plus three round beads to each of the bottom 'waves'. I used one in hand-blown glass plus three stone beads. The front panel is folded so that a rivery flow overlaps another around the neck while the river flows down the front on either side.
MATERIALS
3 tones of yarn plus approximately 25 yards of a ribbon or tape -- about 250 yards altogether. I used primarily Fleece Artist Mulberry Tussah Swiss-spun silk with Colinette Giotto as the river row. Three small beads for each tip of the frontal pieces top waves and a single glass or crystal bead for the lower filigree lace drop 1 set 5mm/ US needles (straight or circular) @Jane Thornley. This pattern is not to be copied or reproduced without permission from the author unless it's for personal use.
INSTRUCTIONS
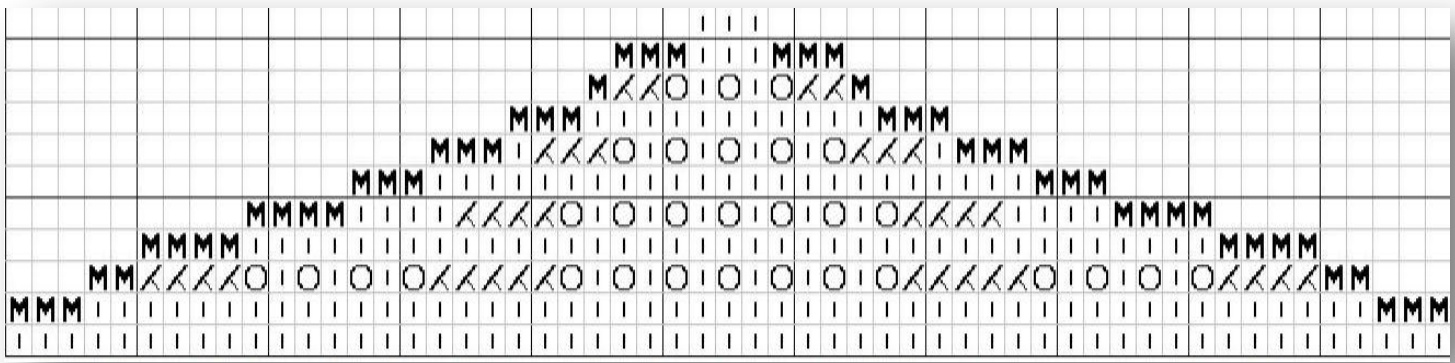
\*Scarf begins at the bottom of the central panel with sets of feather and fan. Stitches are then cast on in intervals on either side followed by one long cast-on for each end. A chart is provided to guide increases as well as the feather and fan lace segments highlighting the central panel. With darkest color yarn, cast on 40 stitches. Knit the first row. Follow chart for cast-on increases and placement of yarnovers, knittwo-togethers and for casting on new stitches at the end of rows. Every second row of the chart is the reverse row. After the first 40 @Jane Thornley. This pattern is not to be copied or reproduced without permission from the author unless it's for personal use. stitches are cast, subsequent rows on either side of the central pane grow through cast-ons shown on the chart until a total of approximately 58 stitches are on the needle (this number needn't be exact). Following that, cast on 50 stitches on each side of the panel, still keeping with the darker yarn. \*Cast on 65 on either side for a longer Scarf. Knit the next row straight across Change yarns to second darkest yarn and work random lace straight across all stitches while simultaneously casting on one stitch at the beginning of every row) Random lace is, as the name implies, random, meaning yarnovers are made and then later knit together to create the desired effect with random seed worked between yarn overs. Here's how this might look across 9 stitches (always knit the first and last stitch of every row): O K, p, k, yo, p3tog, yo, k, p, k O On reverse side, work seed (p, k) I randomize my seed also, meaning I don't fret whenever I end up with uneven seeds and will knit into a knit, for instance, until I can return to the rhythm. Here's random lace charted. It's easier to keep track of yarnovers by flanking on either side of the knit-three-togethers. \* Chart complements of Mary Whitehouse, my friend in York, England, who has a close working relationship with both the right and left sides of her brain!) @Jane Thornley. This pattern is not to be copied or reproduced without permission from the author unless it's for personal use. RANDOMLACE
| WS→ | - | — | 1. | 1. | - | |||||
| - | - | o | K | 0 | - | - | - |
| Symbol | Right side | Wrong side |
| Knit1 | Purl1 | |
| Purl 1 | Knit1 | |
| Yarnover | Yarnover | |
| 不 | Purl3 | Knit3 |
| together | together |
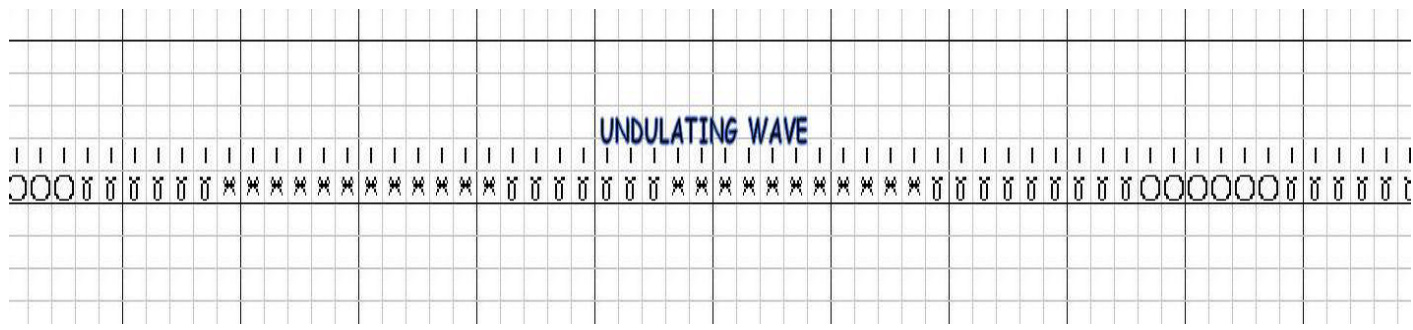
Continue with random lace and, after 4 rows, change to lightest yarn and continue with random lace for 13 or more rows. \*you might also make feather and fan sets amid the random lace, positioning them directly over the first three sets in the central panel and working the rest of the row in random lace. On next right-side row and with ribbon, work a two-row set of undulating wave following the chart as a suggested guide. Basically, undulating wave is created by sequentially working yarnover clusters from 1 wrap, to two wraps, to three wraps and working down sequentially from 3, 2, 1. Clusters need not be even. For instance, you might work 4 1-wrap yarnovers followed by 6 2-wrap yarnovers, followed by 5 three-wrap yarnovers. A yarnover wrap is simply about wrapping the yarn over your needle, knitwise, a certain number of times. Traditional yarnovers consist of one wrap. Randomize! On reverse row, knit. Continue with random lace and the lightest yarn for 10-13 rows Jane Thornley. This pattern is not to be copied or reproduced without permission from the author unless it's for personal use. (number need not correspond with first half) while simultaneously binding off one stitch at beginning of every row until beginning the 4 rows of the darker yarn (corresponding to the other side).Continue working random lace. I positioned three yarnovers in a row directly mid-panel before changing to the darkest yarn on the next row. Change to darkest yarn, knitting up to the center panel. Begin chart for placement of feather & fan segments. Work two rows. At the beginning of the next row, bind off 50 stitches or number cast on during major increase, knit across the center stitches before binding off the remaining stitches on the opposite end, leaving only the panel stitches on the needle. Reattach yarn and follow chart for the top of the panel, ending with a point. I know we're trained that numbers matter and must be exact. Here they're not and it doesn't matter. If you're off a stitch or two, what's the problem? A slight asymmetry won't show. FINISHING Block lightly with a steam iron on the silk setting to define your lacy neck panel. Though there's no need to trim your scarf along all edges, you might decide to finish off your curved ends with the dark yarn to tidy things up visually. Just take your darkest yarn and pick up and knit stitchfor-stitch along just the ends of your scarf. Knit 1 row and then bind off.
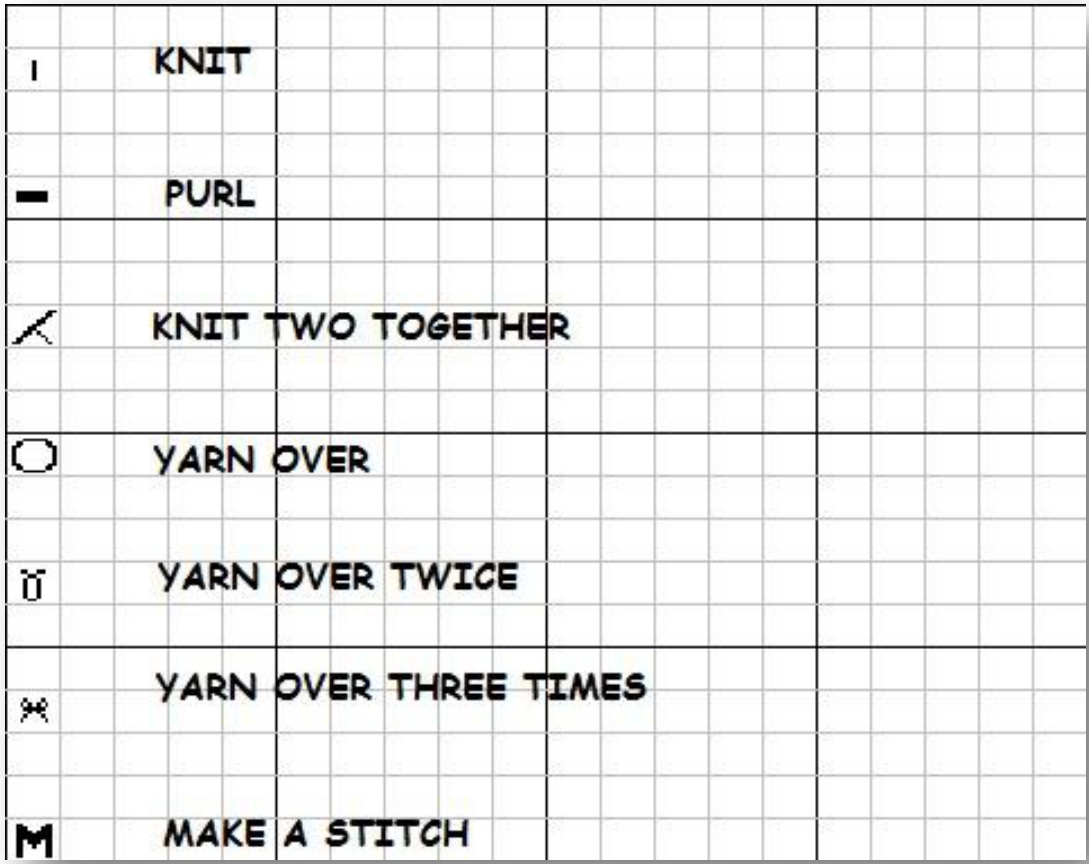
Beads really finish this design while adding a bit of weight to the curves and points of your piece. I added three round beads to each of the bottom panel's 'waves' with a single glass droplet on the top pointed end. Jane Thornley. This pattern is not to be copied or reproduced without permission from the author unless it's for personal use. CENTRAL PANEL CHARTS SYMBOL LEGEND
Jane Thornley. This pattern is not to be copied or reproduced without permission from the author unless it's for personal use.
BOTTOM CHART
\* Note: the top knit row of this chart indicates the cast-on row for extending the scarf on either side. Begin chart at the bottom and work upwards.

TOP CHART
@Jane Thornley. This pattern is not to be copied or reproduced without permission from the author unless it's for personal use.
MIDDLE CHART
For me, charts are never meant to be followed stitch-by-stitch since that defeats the whole spirit of free-range knitting. Here, I offer them only as placement guides and one possible approach. The feather & fan sequences in the central panel are most effective when the yarnovers are positioned in a certain way to take full advantage of their wavy nature. However, if you compare the photograph with the chart, you may notice certain discreptencies, such as rows of stockinet between a feather & fan sequence, for example. This creates a flat expanse between purl ridges. On the other hand, following the chart exactly offers another, equally interesting, possibility. And, there are more, as always with freerange knitting. That's part of the adventure. So please don't gnash your teeth as you knit this free flowing scarf. Instead, allow yourself to deviate, wander, take tributaries and knit into the flow.


