It soundshplesslygeeky,but th ropectofknittingabiusoop,wa possiblyftigestreansearedwtkirobablyturi if youreadmyblog.)It satisfiedmytwomajorreasons forembarking on the adventureofmaking smethingmyselhadneveseenninastoreiwas totalynquusitwashallenandcoolingothfthethin meant thatwasguaranteedtob stoppedonthestreetwitinqurewhic would eadtoamopportunitieormetsathemaicalhrasehan madeitmyself. I'vebeen knitting for about ayearand ahalf now,and canI say,that phrase never gets old.It brings a primal satisfaction likebeing5years old and having your parents stickyourfinger-paintingontherefrigerator,orhaving theentire school applaud your work in the annual school musical.If I can say that the design is my own as well, Let's just say the high is better than a black cat espresso.1 However, I realize that not everybody sharesmy shameless need for attention or my seeminglyendlessdesiretotreatmyknittingasaseriesof puzzlesthatneed solvingInthat spirit ’veincluded twoversionsof this paternheStraigt Arrowforthosewhoselifeisquitecomplete without actual hassleof kniting a mobiusfromthemiddle whenthesamething can easilybe accomplished witha bitof seamingBewarned howeverthatveonlludedchart forthStraigt Arrow,with minimal instructions,as Ihaven't knit it myself.(It defeats thepoint a bit forme).heinstructions should work,especially if you areanold handat double knitting, but may need a little tweaking. For mobius purists like me there is the “FullCycle” version. I hope you enjoy it. Thecast onis the trickiest part,but patience will berewarded.veincluded some pictures to tryto clarifythe procedure forcasting on.Feedback is of course always appreciated and you can contact me at theblog oremail info posted at the topof thepage.
1.As referencedinEsquire's 6o thingsworth shortening your lifefor. $^{\leftarrow}\!\!\underline{{{\mathrm{A}}}}$ tipleNotetheexceedingheavbodwithhocolate, caramel nd drie-fuit notnt that you're vibrating. That means it's working."
GAUGE
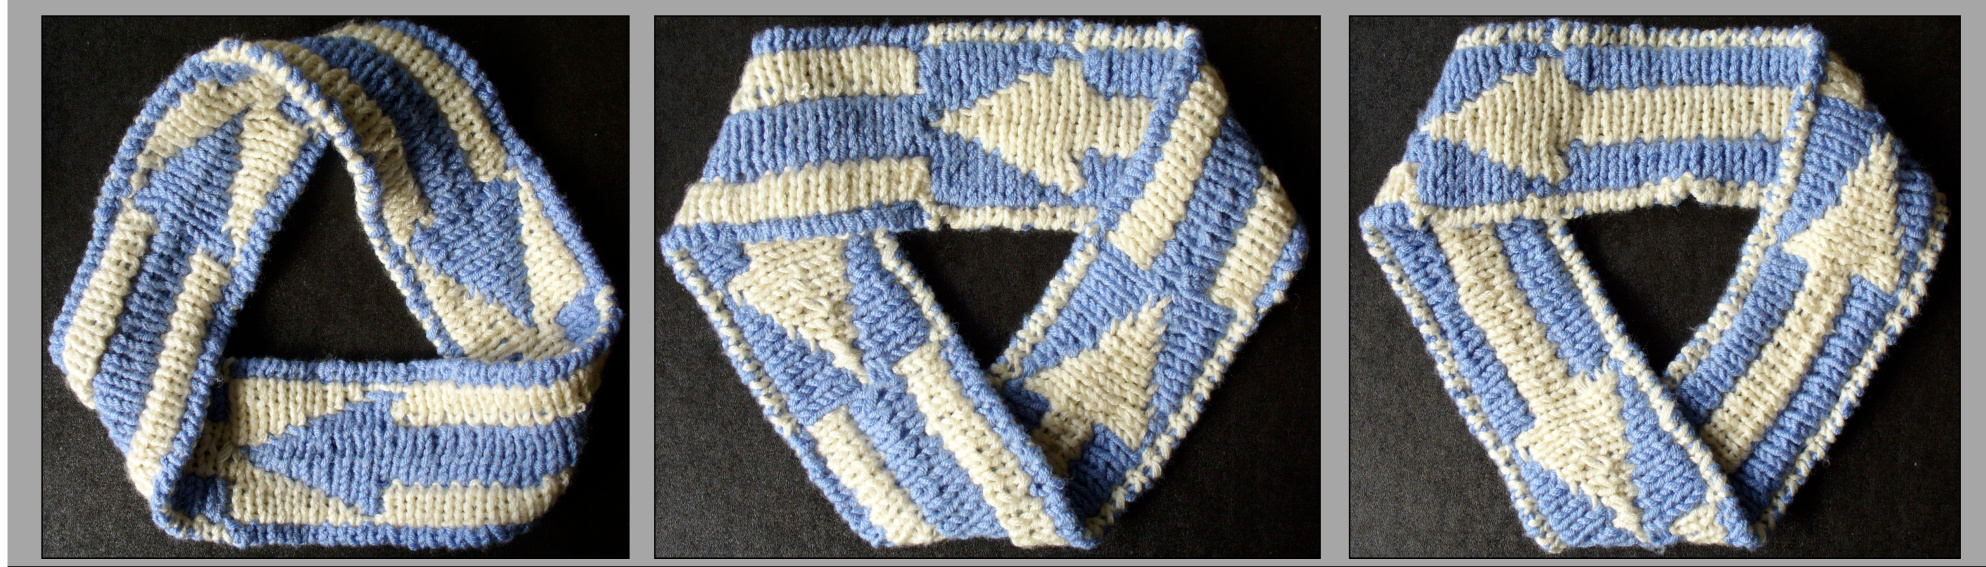
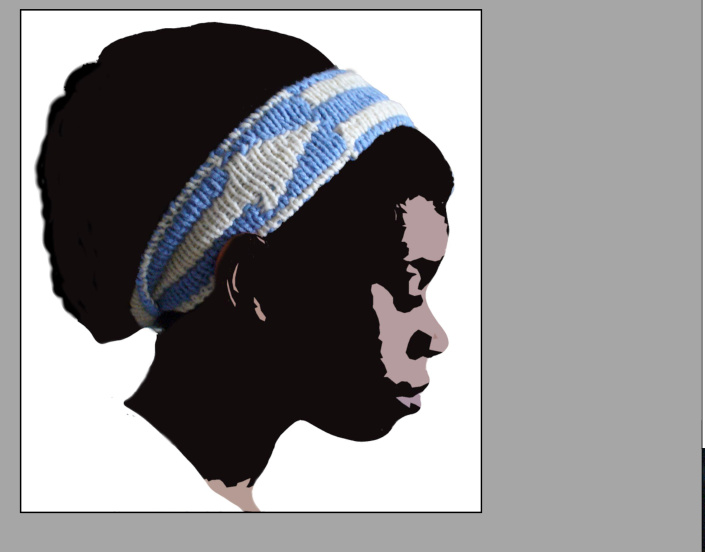
Earwarmer #12 sts/20rows $=4^{\circ}$ in stockinette stitch Headband #15 sts/28 rows $=4^{\prime\prime}$ in stockinette stitch Difficulty:Not forthe faint ofheart Version 1-The Straight Arrow Tame Version 2 - Full Cvcle Wild Featrihst double provisional cast on with a twist), tubular bind off.
Medium - a mildly snug fit around a 21-inch head, including thick hair.
Fora smaller sizeI would recommend removing stitches fromtheback-endof eacharrow.fyourgaugematchesmine subtracting a stith perarrowwillmae your band more than 1.5 inches smaller. Converslyoralarersizeaddstithesothback-ndfeacharro.fu gaugematches mine adding a stitch per arrow will make yourbandmore than 1.5 incheslarger.
FINISHED MEASUREMENTS
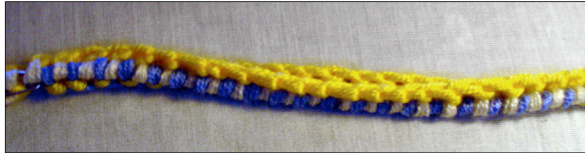
25-inch practical cireumference. This means 5o inches measured down the center ofthe mobius.Remember it's one-sided so actual measurements are doubled.),3.5 inches wide Headband (using sport weight yarn) 19.5 inches long, 2.75 inches wide
MATERIALS
LionBrand Microspun $[100\%$ Microfiber Acryli; 168 yd/m per 70g skein]; color: 1 skein each Lilac & Ivory. TheMirpuorsfinbutyumaywantyasimilareghtyawithr spring and stretch. The Microspun seems to lose its elasticity quickly. 2 long (I used 31-inch) US $\#4/3.5\mathrm{mm}$ circular needles (they should be the same length) Optional: size D (3.25 mm)Crochet hook Not strictlyecessarybutitwillmakelifesierlightymalle you'reyourneedlehelps. Blunt tapestry needle 1.If you'reknittingtheStraightrrow,youllhavetouse yourowdisretion onbestmthod forcastingnandbindingoffasIhavenotnit thisne myself.Iwould probablywant todoanicestretchytubularbindoffwhich means choosing somemethod of tubular orprovisional castonif you want the edges to match. On a test swatch I did forthe Earwarmer, (see the second silhouette picture onPage2) Iused alongtail cast onholding both yarns togetherresultwasacctablthuhterewaitgiead link toasugested teciquein thlegendf I get tothisinthefuureor anyone tries this and has a recommendation, let me know and Ill add it.
2. Reading the Charts.
a)Each square onthechartrepresents 2stitche,knit stitch,inthecolorn the chartand1purl stitch in the opposite color.You'llalways work the knit stitch first,then the pur stitch.Row1of each chart represents the cast on row. The first half of the cast on stitches are done on 2 needles and arerepresented in Chart I. In the instructions, needle 1 willalways represent the chart; needle 2 willbe the opposite. (See Note 5 for details.) b) The cast on is continued in Chart II. See Note 6 for details. 3.There are twomethods fordouble knitting.One involves working bothcolors at the sametitin trigh sideanding thpsit sidh otherworks onecoloreveryotherrow,slipping thestitches forthenonworkingcolor.ortraightrrowIwouldusetheslippingmethodbecau find it tedioustowork thetwoyarnsatonceHowever,forFullCycleIwork both colors at the same time.Ifigure there's enoughtothink about without having to remember which row you are on.Though it looks simple,there's a lot going on so I recommend working the way that makes you most comfortable. 4.Which brings me to this tip: If you are working both colors at the same time, alwaysmovebothcoloryarnstogetherThiswayyoullprevent anystrange crossings or gaps when the yarn switches color.
5.The Cast on for Full Cycle.Read this through carefully and look at the pictures so you get the concept.vetried todescribe thingswith explicit details.(The pictures could be clearer,but keepinmind thatit wasmyfrst time and it was themiddle of the night.)If you arefamiliar with double knittingyoumayfind this annoing and wishto skip some oftheminutia. This isine,just keeinmind that it isverymportantOTOWISTUR NEEDLES AROUND until the final step (Row 2). (If it confuses you, don't worryabout itustgothroughandfollowthestepsItsbesttoreatike thespace-time continuum inStarTrek ortime travel inBack to the Future.In otherwords,don'think about it too much and followthePrime Directive -err.rules. If you run into yourself, well, seek more help.Thats a bit beyond the scope of these instructions.) d) On needle 1 purl the first 24 stitches with color A.Leave enough tailto weaveinattheendfyouhaveabitfagapwhenyoujoinyour stitches you mayalsobe abletocamouflage anyimperfections withyour tail yarn soasGarbowould say,donte stingy.hisproject takesellndera half skeinforachcolor.etneedlbackdowninitsfarposition.Knit24 stitchesinColorBontoneedle2.Same noteabout the tail.Here's where it gets tricky). Hold onto the yarn for Color B and set needle 2 down. Pick up needle1 and continuing where you left off purl thenext $^{24}$ stitchesin ColorB.hiswilljinyourtwoneedles.Whenyouare doneyou should have a totalof48purl stitches on needle 1, 24inColorA and24inColor B.You should have $^{24}$ knit stitches on needle 2 in ColorB which lead into the last 24 stitches on needle 1. e)Now pick upneedland theyarnforColorAand continueknitting on 24 stitcheDropeegrabnedand pur thefinal 2 stith onto needle 1 in Color A. f) Pick up Color B and knit the final 24 stitches onto needle 2.Needle 1 will have 72 purl stitches,24Color A, $^{24}$ Color B, 24 color A. (Again, this will look the first rowonyourchart.)Needle 2will be theopposite: 72knit stitches in B, A, B. a) The base of cast on that I use comes from these instructions at Planet Shoup (http://www.planetshoup.com/easy/knit/scarfmb.shtml). To summarize the concept:firstuseyourgauge to calculate the numberof stitches needed to get the desired circumference (in this pattern it's 72). Cast onthisumberwithalong-tailcastonThisgivesyouthestithesfor thefirstalffyoumbiuForthseondalfouloptheedlbak around tothefirst stitchandpickupastitchinthebottomof eachstitch on theneede untilyoureachtheend,oubling yourfinal stitchcount (144).Got that? Good. Here's how I changed it. b)Thisisdoubleknitting oyouare essentiallyknitting2bandsand eedto doubleyour numbers.Youll be casting on72 stithes forband 1and72 stitches for band 2 (total 144).Youllneed 2 needles. Using waste yarn and the longtail method cast 72 stitches onto each needle.
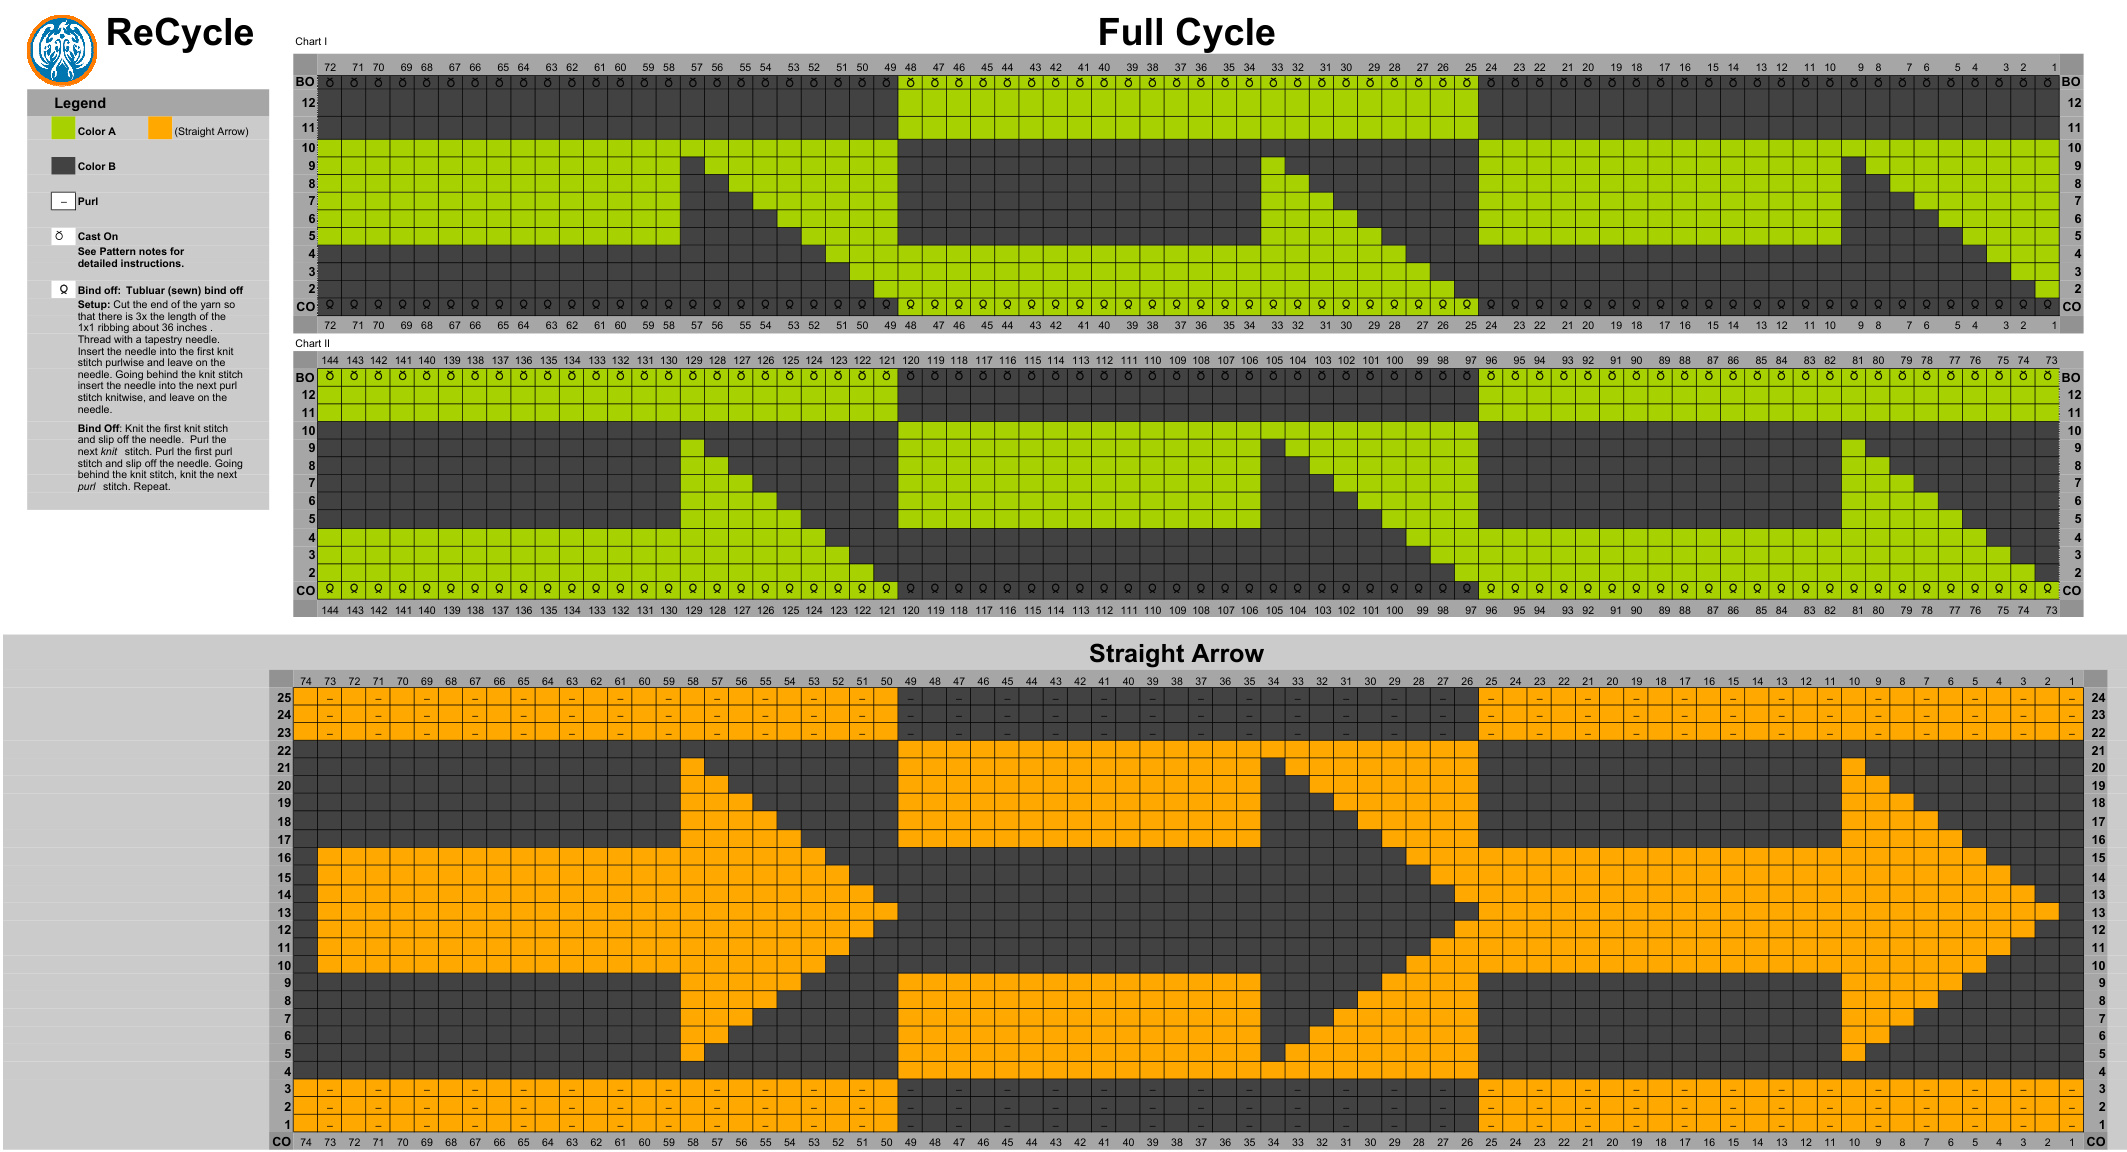
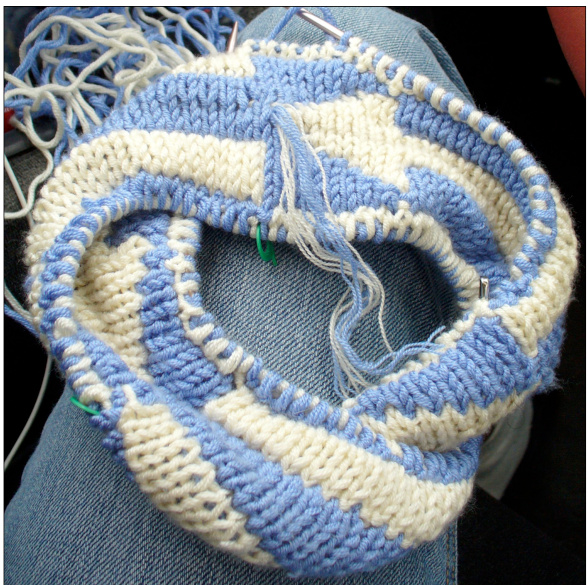
c)Each band has three arrows in alternating colors.On band 1 the arrows are dark (Color A),light (Color B),dark (A) (matching the Row 1on Chart I, convenientlylabeled as $^{*}\mathrm{CO}^{m}$ for cast on.); on band 2 they are the opposite: light (B), dark (A),light (B) (which matches, not incidentally, Row1onChart).oget the arrows started properlyoumustcastn with the alternating colors.This is done one needle at a time.Think of each needle as a separateband.Line up the needles so that they are parallel to you Needle 1 will bethe $1^{\mathrm{st}}$ band, the one closest to you.You'll beknitingntthisYundail farthest awayfrom you.You'lbepurling stitches onto this needle as if you are working the wrong side ofthefabric.(This process will make it easier to keep things from twisting.) be able to wear this when you are done.In a thin,lightweight yarn (the headband version)I doubtyoull evennoticethetwistswhichwill fall at the nape of the neck.In a worsted weight however (earmuf version),the twists become markedly more noticeable.Depending on your yarn this may bug you.In the interests of wear-ability you may want to consider yourcomfortlevel.nehalftwistwillstillgiveyouaruembiuu bulkandmaybepreferableThe truly sensitivemaysay serewitandjust make a plain old flat circle. This screws up the pattern a bit,but hey, I won't tell if you don't. Now's the time to decide.

b) Lay your needle out on a flat surface and arrange the stitches in a circle so that they are not twisted and facing inward and thewaste yarn faces outward.Thentwist the working end of theneedle so that the stitchesface outside and the waste yarn is inside.Just do the one-half twist for a regular mobius, go around 1 full twist more for the full cycle. g)Now youll merge your stitches together onto 1 needlLayboth needles flatonaablemakinguethatthytcrosseachtr.ltht stitchfromneedlepulwiseontoyourworkingneedlIjustusedthe other side of needlei.)Slipthefirst stitch fromeedle 2purlwiseonto your working needle.Continue alternating untilall stitches are merged together onone needle.Remember that each square of the chart represents oneknit stitchinthe color shown and one purl stitch in the oppositecolorRowofChart IisnwomleteCongratulaionsyouve successfullycastonhalfthe stitches!Thismightbeagood timeto takea break(suggest stering learftheboozeyoulnedyourfaultes for the next part.)
7. Finishing the Cast on
a)Atthispoint yu've gotonemergedneedlewithhalfthe cast onstth and 2 setsofwasteyarn sticking out and a twist or three.Nowyoul pick up stitchesforthe second half of themobius.The number of stitches will doubleaganringthetotalcountt88.Whyartheresomanydan stitches?Wellthefirst timethenumber doubled from72becausewe are double kniting (remember Itold youto think ofitastwobands.)This timeit'sduetothewayweareconstructingthemobius.Itisbeing knit from thecenterouthefirsthalfstitcheswillbeknitting fromthemiddle to the top.The stitchesweare about to pick upwill be knitting fromthe middletothebottomNote:ultimatelytherereallyisntatoporabottom, but forthepurposesofclarity,wearegoing toinorethat factrightw.
6.Adding the twist(s) a)At this point wellcreate the mobius.This pattern yields a mobius loop withthree half 1.5)twistswhich accuratelyrecreatestheuniversally accepted recycle symbol. However, you should actually b)The first stitch on your needleis aknit stitch in ColorA.The last stitch on your needle is a purl stitchinColorB.Youare set tojoin yourends in the round.(Take care not to undo your careful twisting.)You'llsee that you'll be properlysetuptoknit,notintothenext stith,butthebottoms of the next stitches.Knit into thefirst colorstitch,(technically,theecond stitch ontopof theneedle-thefirst purl stitch)withcolorB.Thenpurl thefirstColorstith,(thefirstkitstitchonthetopofthenedlewith ColorA.Inessenceyouareknitting intothebottomf thepurl stitche on top onthe needleand purling into thebottom of the knitstitcheontop of the needles.Thecontrastingcolorof the wasteyarnwillmake it easyto see the bottom of each stitch. You'll be following the first row of Chart I.
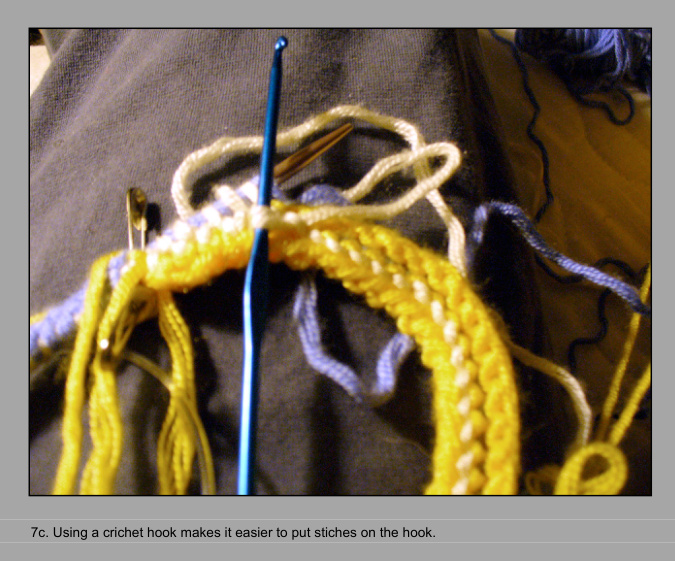
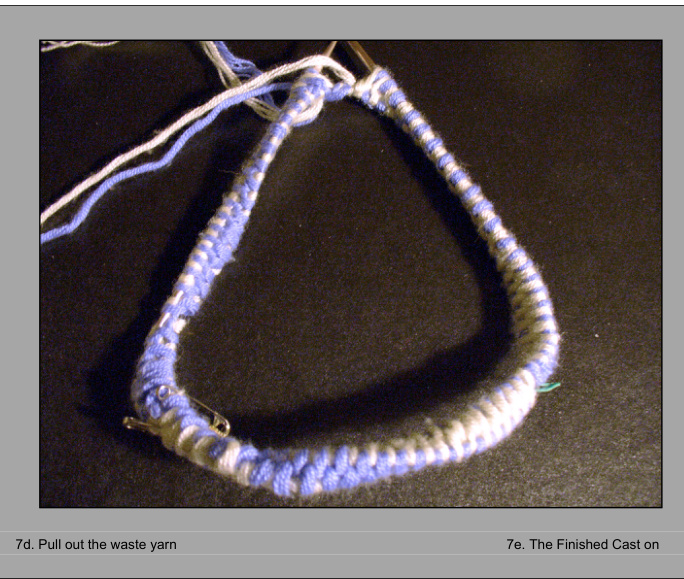
a)HereswherethecrochethokcomesinItwillikelybedifficultopik stitches withtheend of theneedleUsethecrochethooktopulltheyan throughand placeit onyour needle.Repeat this rocedureuntil you pulled a stitch through the bottom loop of every stitch on the needle. b) Pullout the waste yarn The crochet hook may come in handy here too. Someof thyawilltrapedbtweenteeedeDontworryitwill comeoutjustnefitmakesyoufeelbeteryoucanravelthewaste yarn abit as yougobut you willnot be able tofullyunravel it until you completetherow. c) Congratulations again! This time you really are done with the cast on. Take another break.It's smooth sailing from now on. I still wouldn't advise breaking out any booze just yet though.

PATTERNS
Straight Arrow
1. Using both coors, cast on 154 stitches. (That's $77$ stitches of each color. See Pattern Note 1.) Full Cycle 1. Cast on 288 stitches.(You've read the Pattern notes right? See Notes 5-7 in particular.) 2.Proceed according tothechart,starting withChartIand followingwithChart I1.Togethertheymake afullrow,as illustratedbelow.Theyarebrokenu on the chart page to make them easier to print and read.) It's helpful to place a marker at the first stitch and at the middle stitch (after stitch 144). This will give you a visual clue as to which chart you should be following.Chart I refers to the first half of the mobius. Chart II refers to the second half. (See Note 2 for instructions on how toread the chart.) Forthefirstfewrows,thedesignwon'tlook likemuchofanything.Bepatient,the arrowswillshowup soon. 3. Bind off the stitches using a tubular bind off. I tried this using one color to bind off half the mobius and the other color to bind off the other half. It works,but I found that it looks much better and more consistent to bind off the entire mobius in one color.So choose the color you want touse forthe bind off.Cut off a length about 4 times the total length of your ring. If you've never done this bind off before, err on the side of overestimating what you'll need.You've come too far to run out of yarn now. Cut the other color and weave in all ends when you are done. (Instructions for a tubularbind offincluded inthelegend.) 4. Savor your results and brag loudly to your friends.
2.Follow chart.(See Pattern Note 2.) I added ribbing to the straight arrow, and played with doing a tubular bindofftwostitchesatatimeInlydidatestswatchsotheverdictsstill outbut Idolikethedeaofribbing ontheedgetomakeit givetheband more grab. If you wish,ignore the ribbing. 3. Bind off, using a tubular bind-off.
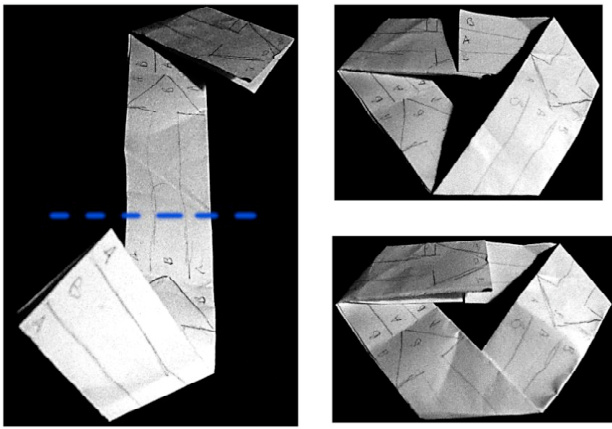
How to fold:Fold the strip as shown onthe left.For one half-twist fold the bottom halfup towards thetopand attachtheedges.Forthree half twistsfold the bottom of the strip underneath and attach the edges.