Designed by Leeana Gardiner
The copyright of this pattern, and all images unless otherwise stated, remains with the author - Leeana Gardiner. It is not associated with Elf on the Shelf or Barbie, these are used as common terms. It is intended for personal use only and is not to be shared with others. Please direct your friends to purchase their own copy! If you are personally hand knitting items, you are welcome to do what you wish with your finished items, whether that be sell, gift or donate. Please do not claim the design to beyour own. leeana@live.com
Gonfenfs
Stitch Glossary. Elf Skirt 3 Elf Mini Skirt 5
Patfern. Netes
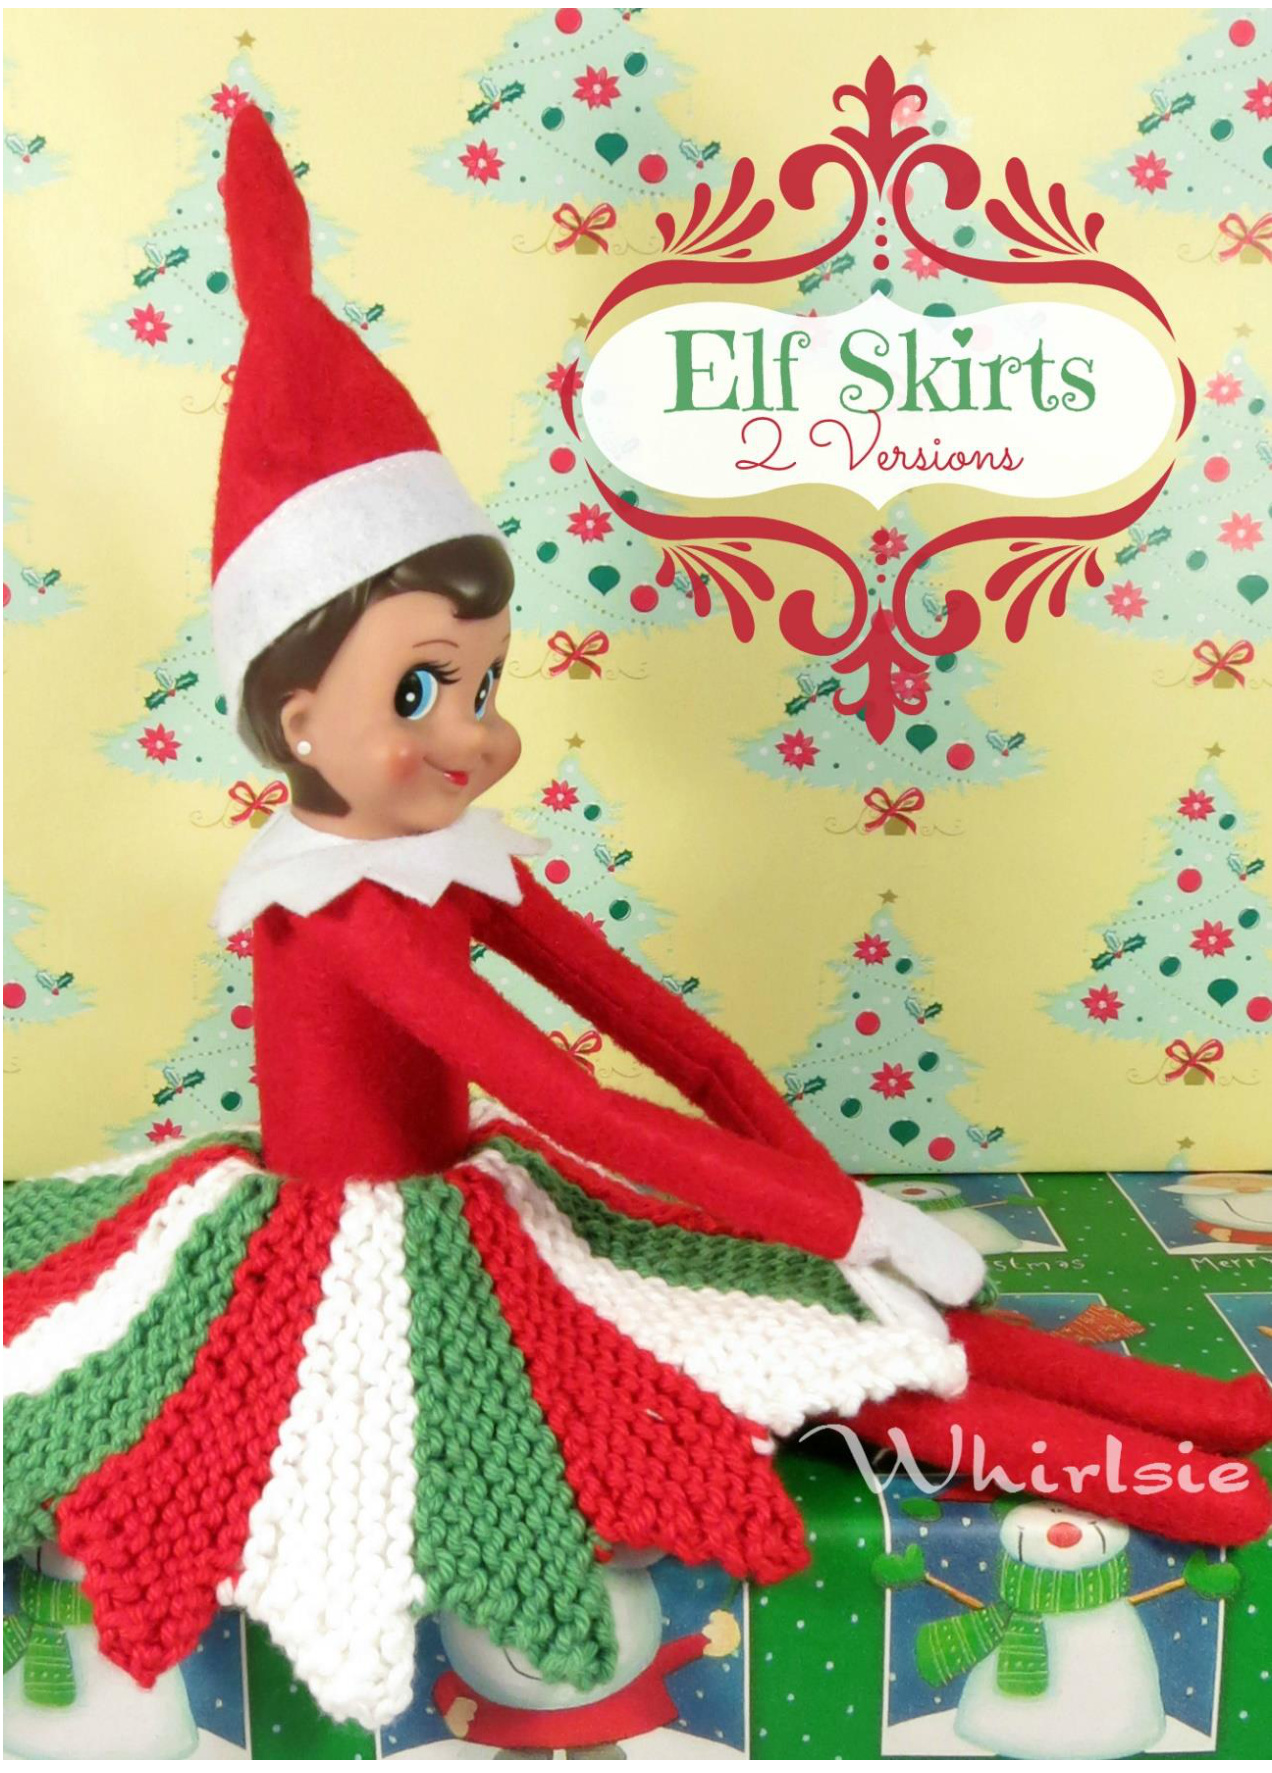
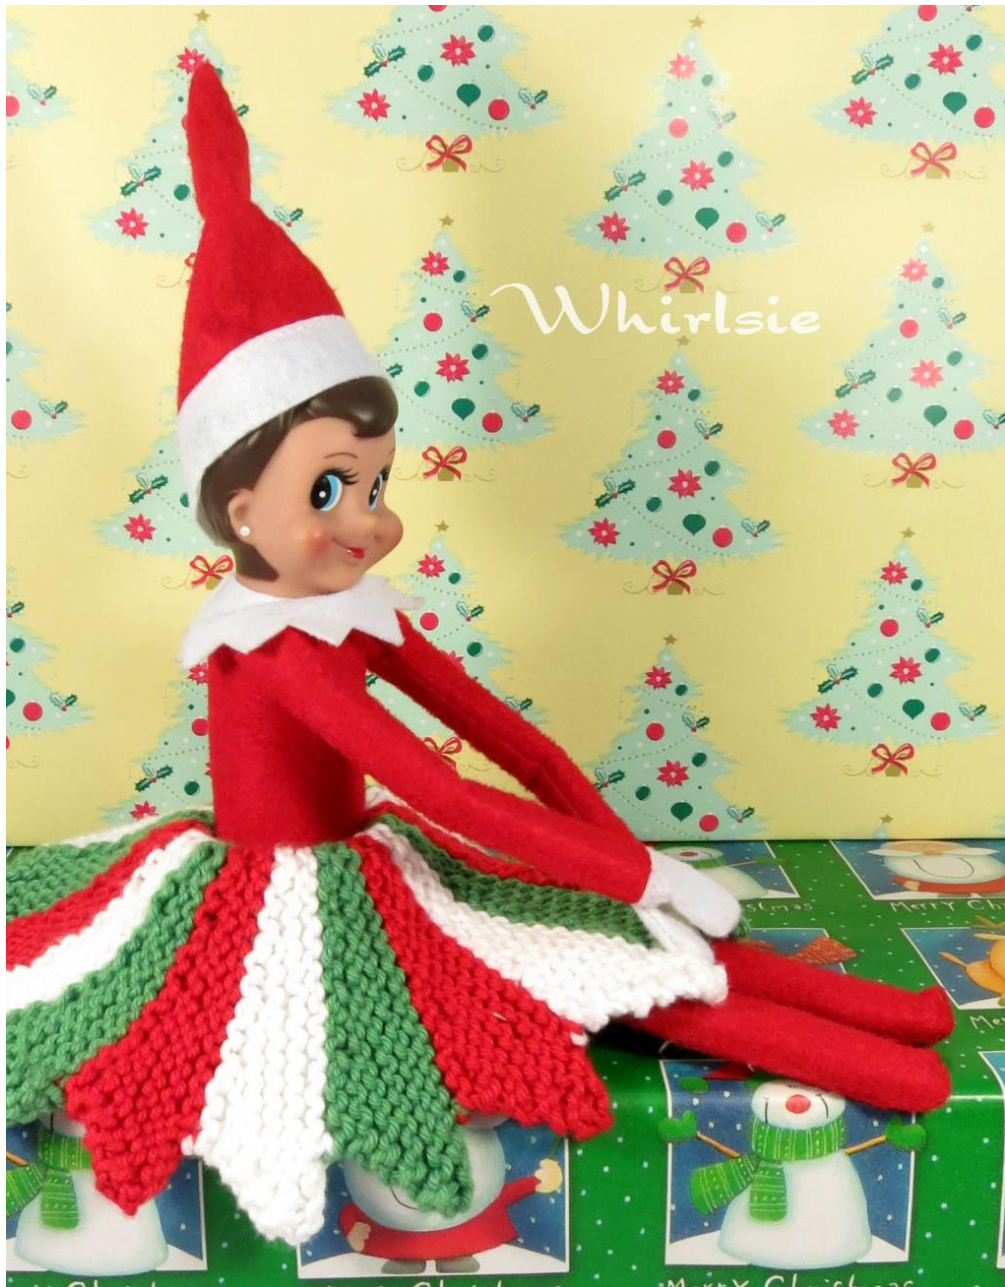
These skirts have been designed for dolls, such as the Elf on the Shelf, Barbie or another doll of a similar height. Both designs are created by working side ways with short rows to help create a circle. They can be made with any colour in any combination you choose. The points are made by casting on stitches and then decreasing. To save sewing in many ends, I recommend carrying the yarn along the side of your work Both skirts were made in an 8ply (DK weight) cotton to help give my chosen doll(Elf on the Shelf) a litle more weight and stability when in a sitting position. k2tog Knit 2 stitches together. w&t Wrap yarn around stitch and turn work to opposite side.
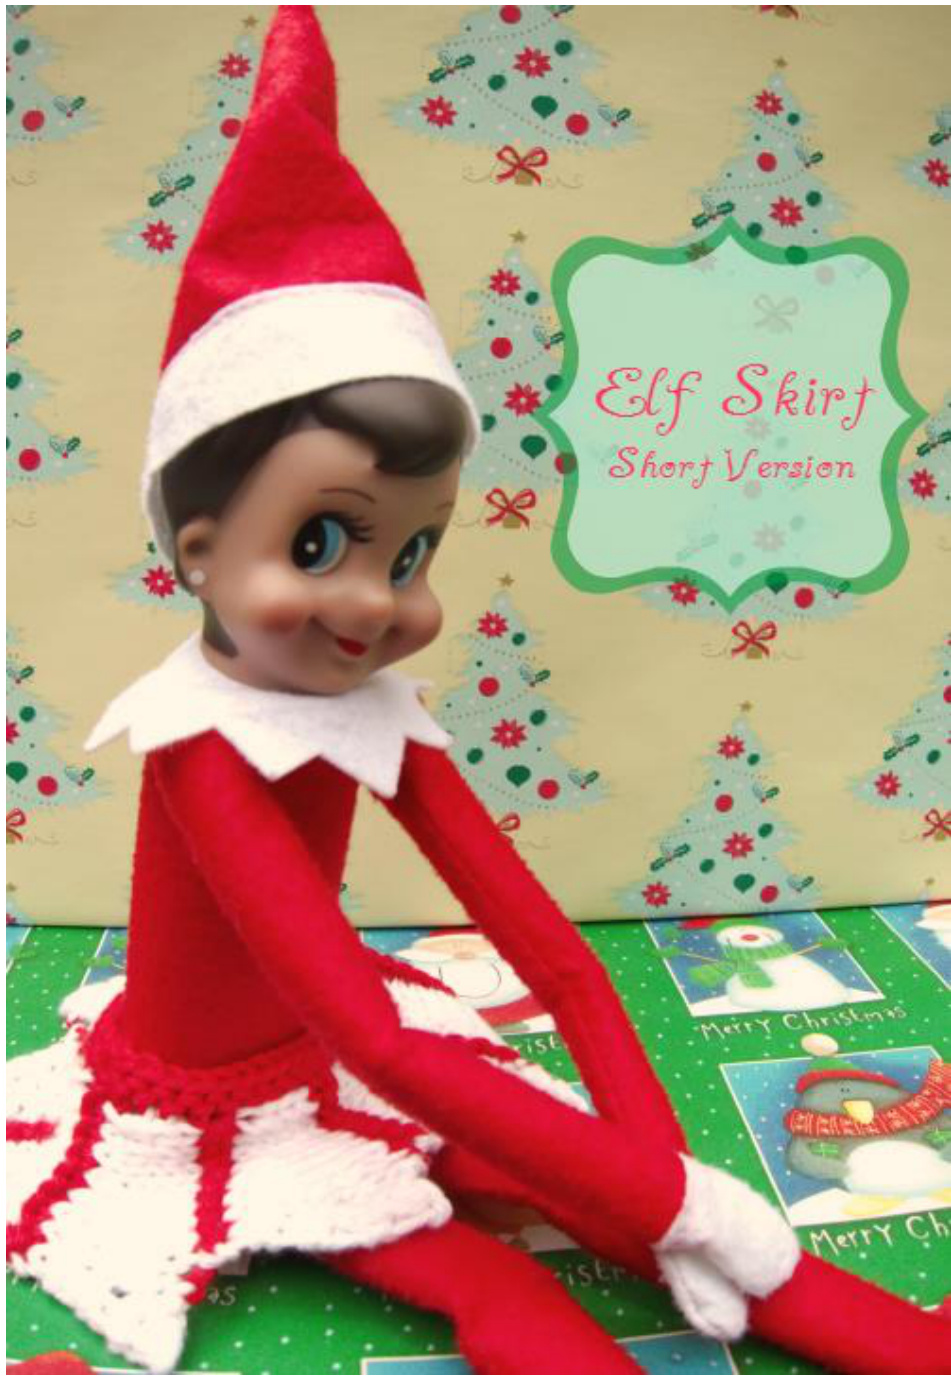
&lf SkirJ
Designed by Leeana Gardiner Sizes Can fit an Elf on the Shelf, a Barbie doll or make to measure. From waist to tip is approximately 9cm or 3.5 inches Yarn 30 - 50g 8 ply yarn (DK weight yarn), I used cotton to help add weight to the sitting elf Yardage 19 - 86 metres or 21 - 61 yards Needles US 6 (4mm) Other tools darning needle for sewing in ends, knitting elastic or shirring elastic Gauge unimportant as pattern is knit to length required
Pattern
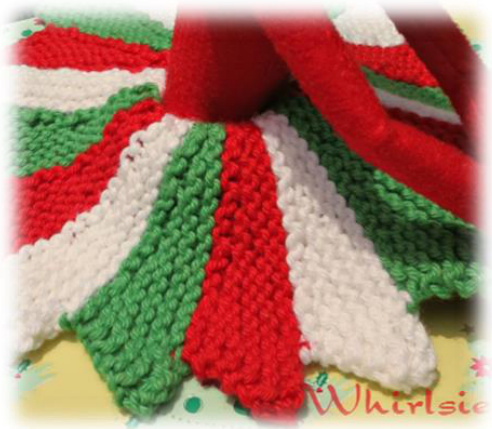
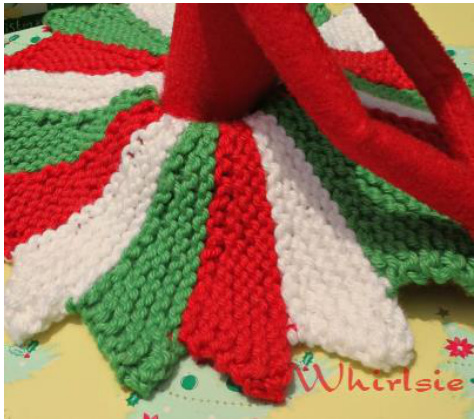
Cast on 25 stitches in red.
Tier 1
Row 1: k to end. Row 2: k to 5 stitches before end, w&t. Row 3: k to 2 stitches before end, k2tog. Row 4: k to 3 stitches before last w&t, w&t. Row 5: k to 2 stitches before end, k2tog. Repeat rows 4 & 5 three more times Row 12: k to end, picking up wrapped stitches and knitting them together with the corresponding stitch on the needle as you go - 20 stitches
Tier 2
Change to green Row 13: k to end Cast on 5 sts Rows 14-24: Repeat rows 2-12.
Tier 3
Change to white Row 25: k to end Cast on 5 sts Row 26-36: repeat rows 2-12. Continue working in this manner until work will fit comfortably around your doll. For the elf shown in the picture, I worked 18 tiers total (6 of each colour). Cast off.
Finishing
Line up your cast on and cast off edges so that they match at the shortest part and your tier points are even. Sew these edges together, leaving a 1" (2.5cm) gap from the shortest edge. Cut a piece of elastic approximately 6" (15cm) long (you can cut it longer to make it easier for threading through, or to fit a Iarger doll). With wrong side facing, loosely thread your elastic through the loops of your knitting 5 stitches down from the shortest edge (this is a 'natural' fold due to the short rows). Tie a knot and sew in the ends. You can also place the skirt on the doll before you tie the knot in the elastic so that when you pull the elastic taut you know it will be the right size for your doll. Sew in all ends and block points out. Fold the top section over to the wrong side at the elastic, this helps to give the skirt a fuller look.
&lf Mini SkirJ
Designed by Leeana Gardiner Sizes Can fit an Elf on the Shelf, a Barbie doll or make to measure. From waist to tip is approximately 6.5cm or 2.5 inches Yarn 10 - 30g 8 ply yarn (DK weight yarn), I used cotton to help add weight to the sitting elf Yardage 19 - 86 metres or 21 - 61 yards Needles US 6 (4mm) Other tools darning needle for sewing in ends, knitting elastic or shirring elastic Gauge unimportant as pattern is knit to length required
Pattern
Cast on 12 stitches in white.
Tier 1
Row 1: k to end. Row 2: p to end. Row 3: k to 2 stitches before end, k2tog. Row 4: p to 3 stitches before end, w&t. Row 5: k to 2 stitches before end, k2tog. Row 6: p to 3 stitches before w&t, w&t. Row 7: k to 2 stitches before end, k2tog. Row 8: p to end, picking up wrapped stitches and purling them together with the corresponding stifch on the needle as you go - 9 stitches
Change to red
Rows 9-10: k to end Tier 2
Change to white
Row 11: k to end Cast on 3 stitches - 12 stitches Row 12: p to end. Row 13: k to 2 stitches before end, k2tog. Row 14: p to 3 stitches before end, w&t. Row 15: k to 2 stitches before end, k2tog. Row 16: p to 3 stitches before w&t, w&t. Row 17: k to 2 stitches before end, k2tog. Row 18: p to end, picking up wrapped stitches and purling them together with the corresponding stitch on the needle as you go - 9 stitches
Change to red
Rows 19-20: k to end. Repeat Tier 2 (rows 11-20) until work will fit comfortably around your doll. For the elf shown in the picture, I worked 9 tiers total. Cast off.
Finishing
With right side facing and using red, pick up and knit approximately 3 stitches for every 4 rows along the short edge (opposite to the 'points'). Knit 1 row and then cast off. This creates your waistband. Line up your cast on and cast off edges so that they match at the waist band and your tier points are even. Sew these edges together. Cut a piece of elastic approximately 6" (15cm) long (you can cut it longer to make it easier for threading through, or to fit a Iarger doll. With wrong side facing, loosely thread your elastic through the loops of your cast off edge of the waistband. Tie a knot and sew in the ends. You can also place the skirt on the doll before you tie the knot in the elastic so that when you pull the elastic taut you know it will be the right size for your doll. Sew in all ends and block points out.


