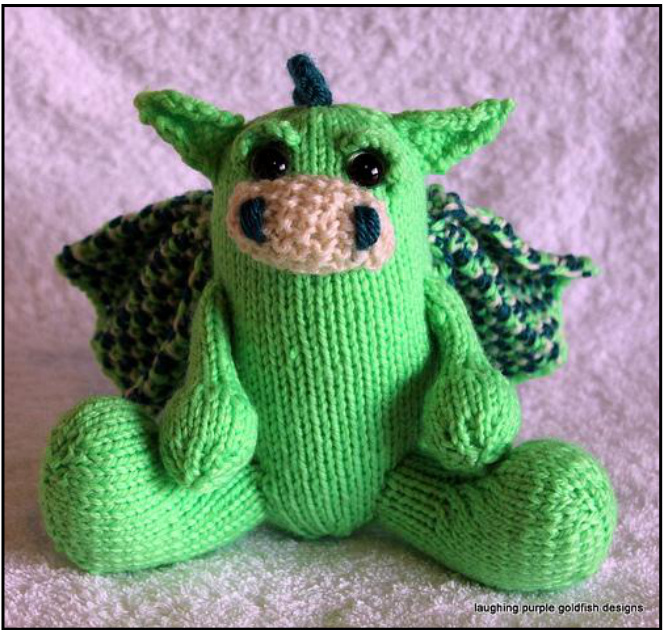
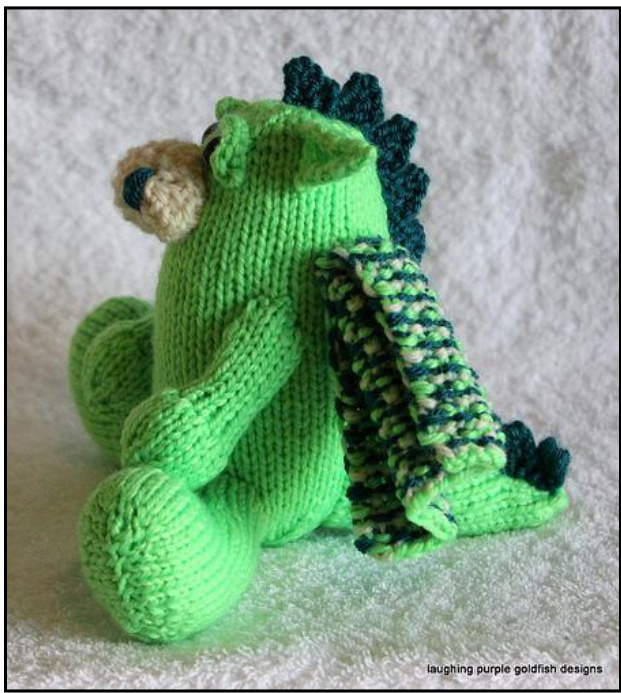
Thirteen the Lucky Dragon
by Sharon Maher laughing purple goldfish designs The dragon is believed by many to be a symbol of power, strength and good luck. Say hello to Thirteen, my friendly version of the legendary creature. With his impish ears and longing eyes, he will charm the socks right off you!
Skill Level
Yarn Used
8ply (DK) Acrylic, 80g/153m, 2.80z/167yds MC Green, 1 ball CC1 Beige, %4 ball CC2 Dark Green, %4 ball
Notions
3 mm knitting needles (US 2 I2) Wool needle Stitch markers 12mm safety eyes (2) Polyfill stuffing, 150g
Finished Size
Toy sits 14 cm (5 Iz in) tall.
Gauge (tension)
For the sample, 21 sts and 34 rows measure 10 x 10 cm / 4 x 4 in, in stocking stitch using 3 mm needles. Exact gauge is not important, but stuffing in the finished doll should not be visible between your stitches. If necessary, change the needle size to suit your tension.
Abbreviations
Standard US abbreviations are used. Thirteen the Lucky Dragon - by Sharon Maher of laughing purple goldfish designs @2012
Special Stitches
There are two different types of increase used in this pattern. Please read the instructions for each increase carefully.
Increase - inc
· Knit into the front and back of next stitch.
Make 1 - M1
· This method creates a neat, invisible increase, with no hole. · Identify the horizontal bar of yarn which lies between the stitch just worked and the next stitch. · Lift this bar using the needle with your unworked stitches on it. · Knit into the back of this loop.
Pattern notes
The dragon body is worked flat from the top down. All other pieces are attached to the main body. Please note that buttons are not recommended on toys for children under three years of age.
Thirteen the Lucky Dragon - by Sharon Maher of (laughing purple goldfish designs' @2012
PATTERN BEGINS
Head and body Begin at top of head.
| Start | Using MC (green), cast on 20 sts. |
| Row 1 | K across - 20. |
| Row 2 and every following alternate row | P across. |
| Row 3 | *K4, M1, K2, M1, K4; repeat from * across - 24. |
| Row 5 | *K4, M1, K4, M1, K4; repeat from * across - 28. |
| Row 7 | *K4, M1, K6, M1, K4; repeat from * across - 32. |
| Row 9 | *K4, M1, K8, M1, K4; repeat from * across - 36. |
| Place marker | Mark centre point of row 9 for eye placement. |
| Row 11 | *K4, M1, K10, M1, K4; repeat from * across - 40. |
| Rows 12 - 48 | Work a further 37 rows in st-st, beginning with a P row - 40. |
| Decrease | Begin to shape the base. |
| Row 49 | * K2, K2tog; repeat from * across - 30. |
| Row 51 | *K1, K2tog; repeat from * across - 20. |
| Row 53 | K2tog across - 10. |
| Row 54 | P across - 10. |
| Finish off | Break off yarn, leaving a 45 cm (18 in) tail. Use the wool needle to thread the tail through the remaining 10 sts on the knitting needle. 5 |
| Seam and stuff | secure. Join row ends from the base to the top of the body. |
| Insert eyes | Stuff 7/4 full with fiberfill. Return to your stitch marker on row 9. lnsert a safety eye 3 sts to each side of this point. There should be approx. 4 sts visible between the eyes. When confident that the eyes are in the correct position, click the safety |
| Complete | ring onto the back of each. Eyes cannot be re -positioned after this step. Finish stuffing the body. Run a gathering stitch along the cast on edge at the top of the head, and pull to close the hole. Secure tightly and weave in any remaining tails of yarn. |
Snout
| Start | Using CC1 (beige), cast on I1 sts. |
| Rows 1 - 4 | *K1, P1; repeat from * to last st, K1 - 11. |
| Row 5 | K2tog * K1, P1; repeat from * to last 3 sts; K1, K2tog - 9. |
| Row 6 | K2tog * P1, K1; repeat from * to last 3 sts; P1, K2tog - 7. |
| Rows7&8 | *K1, Pl; repeat from * to last st, K1 - 7. |
| Row 9 | Inc *P1, K1; repeat from * to last 2 sts; P1, inc. - 9. |
| Row 10 | Inc *K1, Pl; repeat from * to last 2 sts; K1, inc. - 11. |
| Rows 11 - 14 | *K1, Pl; repeat from * to last st, K1 - I1. |
| Bind off | Keeping pattern correct. |
| Fold and Seam | Fold snout in half widthwise, so that the cast on and bind off edges meet. Join the row ends together on each side of the snout. Do not join |
| Stuff | cast on and bind off edges. Lightly stuff the snout with polyfill |
| Attach Embroider | Stitch the snout in place directly below the eyes. Add extra polyfill. |
| Use CC2 (dark green). Work nostrils at the front of the snout, in line with the eyes. Each nostril stands four knitted stitches tall. Simply work one stitch, then another one right next to it (but with exactly the same entry and exit points for your needle). Repeat until there are 4 embroidered stitches side by side for each nostril. |
Eyelids (make 2)
Using MC (green) cast on 7 sts. Bind off. Sew eyelids in place, so that they frame the upper and outer edges of each eye.
Ears (make 2)
| Start | Using MC (green), cast on 6 sts. |
| Rows 1 - 6 | Work 6 rows in st-st, beginning with a K row - 6. |
| Row 7 | K2tog, K2, K2tog - 4. |
| Row 8 | P across - 4. |
| Row 9 | [K2tog] twice -2. |
| Row 10 | P across - 2. |
| Row 11 | K2tog - 1. |
| Finish off | Break off yarn and pull tail through stitch. weave in loose end. |
| Attach | Position ears at the outermost edge of the face, so that the lowest edge of the ear is in line with the lowest part of each eye. Stitch in place. Allow row ends to curl in, giving the ear its distinctive shape. |
Thirteen the Lucky Dragon - by Sharon Maher of laughing purple goldfish designs @2012 Begin at sole of foot.
| Start | Using MC (green), cast on I8 sts. |
| Row 1 | K across - 18. |
| Row 2 and every | P across. |
| following alternate row Row 3 | [K1,M1] twice,K4,[K1,M1] twice, K2; [M1, K1] twice, K4, [M1,K1] |
| Row 5 | twice - 26. [K1,M1] twice,K8,[K1,M1] twice, K2;[M1,K1] twice,K8,[M1,K1] |
| Rows 6 - 12 | twice - 34. Work a further 7 rows in st-st, beginning with a P row - 34. |
| Row 13 | K13, [K2tog] 4 times, K13 - 30. |
| Row 15 | K11,[K2tog] 4 times, K11 - 26. |
| Row 17 | K9, [K2tog] 4 times, K9 - 22. |
| Row 19 | K7, [K2tog] 4 times, K7 - 18. |
| Rows 20 - 26 | |
| Bind off | Work a further 7 rows in st-st, beginning with a P row - 18. |
| Seam and stuff | Leave a 45 cm (18 in) tail for attaching legs to body. Fold the cast on edge in half and stitch together to form the base of the |
| Attach | foot. Stitch row ends together to create the leg seam. Stuff with polyfill. Position legs at the base of the body, so that the inner edge of the leg is in line with the outer edge of the snout. Stitch in place. |
Front legs (make 2)
Begin at top of leg.
| Start | Using MC (green), cast on 12 sts. |
| Rows 1 - 12 | Work 12 rows in st-st, beginning with a K row - 12. |
| Row 13 | K1, inc in next 10 sts, K1 - 22. |
| Rows 14 - 18 | Work a further 5 rows in st-st, beginning with a P row - 22. |
| Row 19 | K1, [K2tog] 10 times, K1 - 12. |
| Row 20 | P across - 12. |
| Row 21 | K2tog across - 6. |
| Finish off | Break off yarn, leaving a 30 cm (12 in) tail. Use the wool needle to thread the tail through the remaining 6 sts on the knitting needle. 5 y hh a a a |
| Seam and stuff | secure. Stitch row ends together. Stuff only the foot section with polyfill |
| Attach | Position front legs at the side of the body, midway between the ears and the hind legs. Stitch in place. |
Thirteen the Lucky Dragon - by Sharon Maher of laughing purple goldfish designs @2012 Tail Work from the base to the tip. Use stitch marker to keep track of decreases.
| Start | Using MC (green), cast on 3o sts. |
| Row 1 | K15,pm, K across - 3o. |
| Row 2 | P across. |
| Row 3 | Decrease row: K across; [K2tog] before and after the marker - 28. |
| Repeat | Repeat rows 2 & 3 until 12 sts remain - 12. |
| Rows 20 - 24 | Work a further 5 rows in st-st, beginning with a P row - 12. |
| Row 25 | K2tog across - 6. |
| Finish off | Break off yarn, leaving a 45 cm (18 in) tail. Use the wool needle to thread the tail through the remaining 6 sts on the knitting needle. |
| Seamandstuff | secure. Use this yarn tail to join the row ends together. Stuff with polyfill |
| Attach | Position tail in a rear central position at the base of the dragon. Stitch in place. |
Spikes
| Start | Using CC2 (dark green), cast on 4 sts. |
| Row 1 | K across - 4. |
| Row 2 | Bind off first 2 sts,K to end - 2. |
| Row 3 | K across - 2. |
| Row 4 | Cast on 2 sts, then K across - 4. |
| Repeat | Repeat rows 1 - 4 until piece measures 13 cm (5 in) |
| Bindoff | |
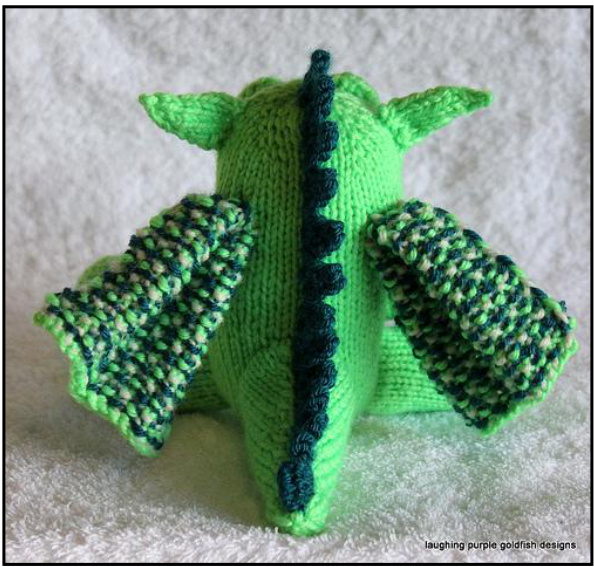
| Attach | Position the spikes in a straight line running from the top of the head to the tip of the tail. The piece will need to be stretched slightly to The stretching process will slightly separate the spikes. Stitch in place. |
Wings (make 2)
Each row of the wings will involve a colour change. Yarns are carried at the side of your work. Do NoT cut yarn with each colour change.
| Start | Using CC1 (beige), cast on 21 sts. |
| Change colour | Join in MC (green). |
| Row 1 | *K1, P1; repeat from * to last st, K1 - 21 |
| Change colour | Join in CC2 (dark green). |
| Repeat | Repeat row 1. |
| Change colour | Join in CC1 (beige). |
| Repeat | Repeat row 1. |
| Continue | Work this pattern for 3o rows in total. |
| Bind off | Bind off in pattern using MC (green). |
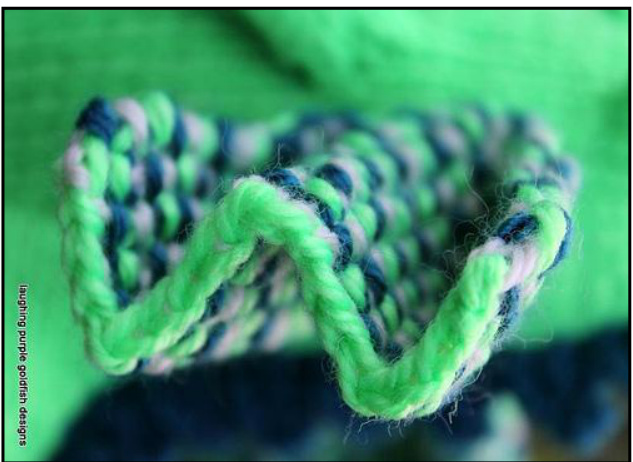
| Pleat | a o o o i g s l three folds in total, creating a "w"' shape. |
| Secure | cast on edge. |
| Attach | Position the wings at a central point between the ears, the front legs and the spikes. Stitch the cast on edge securely to the body of the dragon. weave in all remaining loose ends. |


