Jazz Scarf
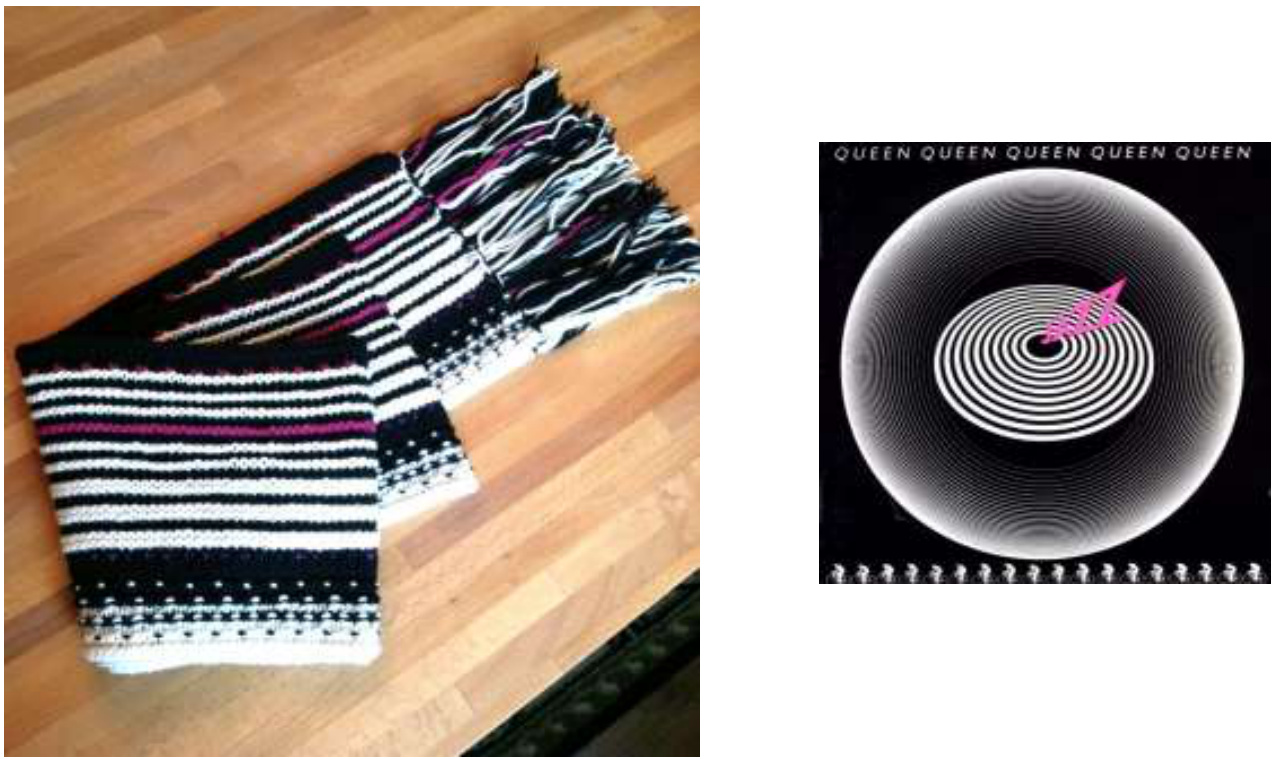
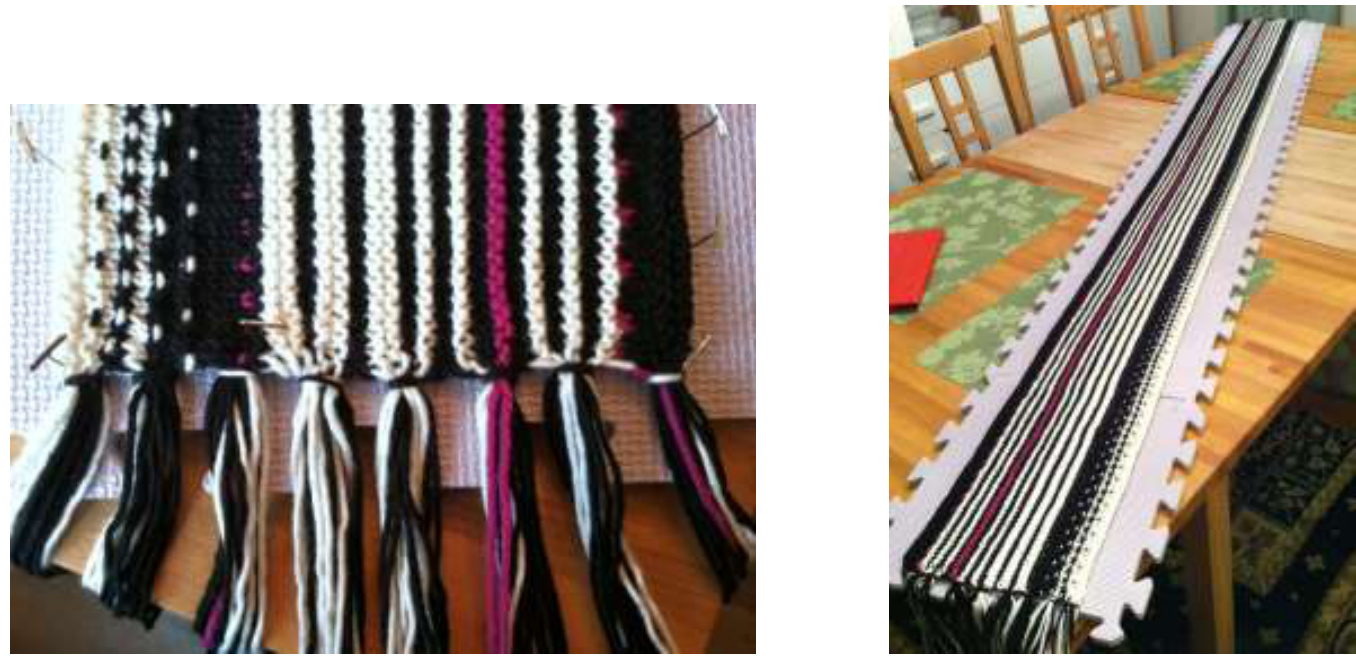
Let me start off by saying that Queen is my most favorite band of all time. This is my scarf-as-tribute to Queen, and one of my favorite albums of theirs: Jazz. Jazz has some great Queen classics, including Bicycle Race and Fat-Bottomed Girls, plus lesser-known gems like Leavin' Home 'Aint Easy (a favorite of mine) and Let Me Entertain You. I've always found the Jazz album's cover art mesmerizing and unique when compared to Queen's other album covers and/or the fantasy-type or photo cover images of many of their contemporaries (like Boston, Rush, or Van Halen for example). Seriously, check out the top 50 albums of 1978 and you'll see what I mean... (http://rateyourmusic.com/list/oldno1/top 50 albums of 1978) This is a project for an advanced beginner. You'll need to know how to knit, purl, and slip stitches. The combination of garter ridges and slipped stitches makes this scarf very textural and visually interesting as well. I hope you enjoy knitting it. Yarn: Light worsted/worsted weight. @ 250 yards white (l used Moda Dea Bamboo Wool in ivory, 1.6 balls) COLOR A @ 300 yards black (Il used Moda Dea Bamboo Wool in black, 2 balls) COLOR B @ 50 yards of hot pink or fuchsia (l used Nashua Handknits Creative Focus Superwash in Deep Fuchsia-21, about .2 ofaball)COLORC Needles: Size 6 circulars (long, 40" or longer; this is knit lengthwise) Gauge: Not terribly important, but you'll want a nice length to be able to wrap it around. About 4.5-5 stitches to the inch on size 6 needles. Using a light worsted yarn on size 6 needles will yield a finished scarf about 70+ inches long after blocking (not including fringe) and about 8 inches wide. My scarf ended up being really long after blocking -- 84 inches -- plus 7 more inches of fringe on each end. Note: When knitting this scarf, you will be using a new strand of yarn every row, which will become part of the fringe later. For each new yarn join, leave about an 8-inch tail.
Begin:
Using color A, cast on 340 stitches K2 rows, P 1 row Change to color B K1, SI2\* repeat to last stitch, K1 Change to color A K2 rows, P1 row Change to color B K1, Sl1\* repeat to end of row K1 row Change to color A K1 row, P1 row Change to color B K2, Sl1\* repeat to last stich, K1 K2 rows, P1 row Change to color A K 1, Sl2\* repeat to last stitch, K1 Change to color B K2 rows, P 1 row, K1 row, P1 row Change to color C K1, Sl1\* repeat to end of row Change to color B P1 row Change to color A ● Using A, K 4 rows Using B, K1 row, P 1 row Repeat ● 2 more times (3 total) Change to color A Using A, K 2 rows Using B, K1 row, P 1 row Repeat △ (2 total) Change to color C K 2 rows K1 row, P 1 row Change to color A Repeat 3 times K1 row Change to color B P2, Sl1 to last stitch, P1 K 1 row, P 1 row, K3 rows
Fringe
I don't usually do fringe on scarves. But given all the color changes, it seems like a no-brainer for this scarf. Plus, the alternative of weaving in 144 ends (72 per side) is thoroughly unappealing... SO let's begin! Depending on your color preferences, cut 32 lengths of yarn about 14-16-inches long (l used mostly black). Sixteen strands will be used on each end of scarf, in sets of 2 (8 sets per side). You will place these doubled strands about an inch apart, 8 times. Since the scarf is about 8 inches wide, this is the easiest way to measure out the fringe and get a nice, even look. I've included a bunch of pictures to help with this fringe part. If you started a new join at every row, you should have 72 yarn joins on each end of the scarf. Divided by 8, this equals 9 loose ends. For each double stranded addition, you will also include 9 loose ends from the edge. Insert a crochet hook through the end of the scarf from back to front. Make sure to go in one stitch beyond the very edge.

Fold a doubled strand in half. Using the crochet hook, grab the strands where they are folded (will be a loop) and pullit through to the back scarf.
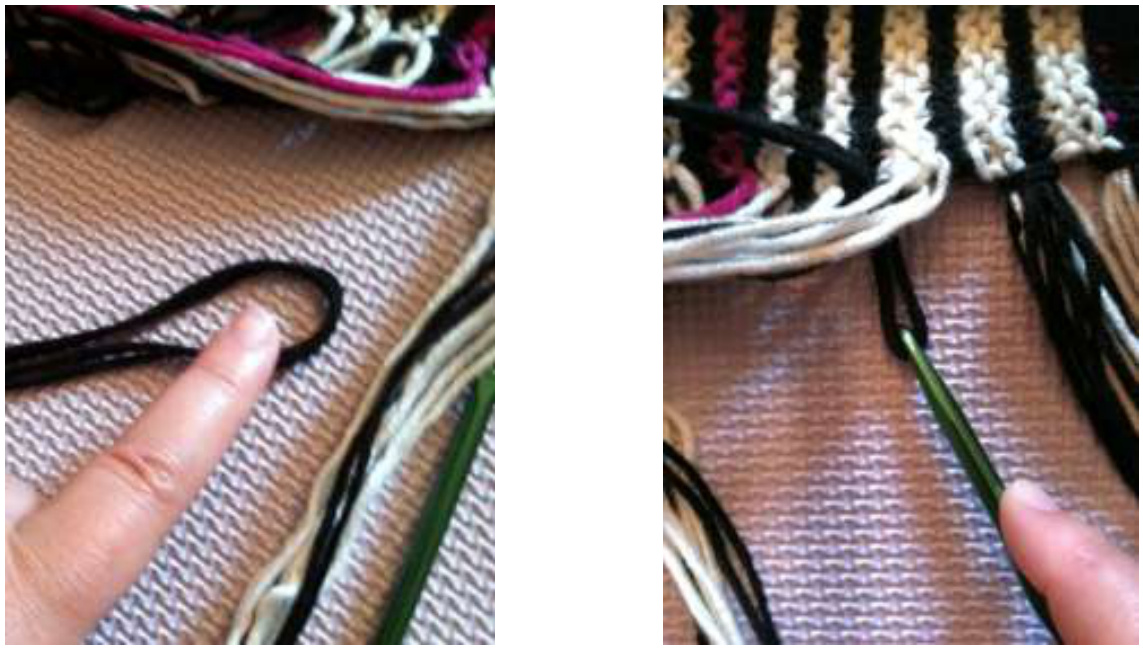
Feed the 9 end strands through the loop you just pulled through the scarf. Then fold the loop over the ends of the doubled strand. Pull tight and form a knot. This will secure the edging too.
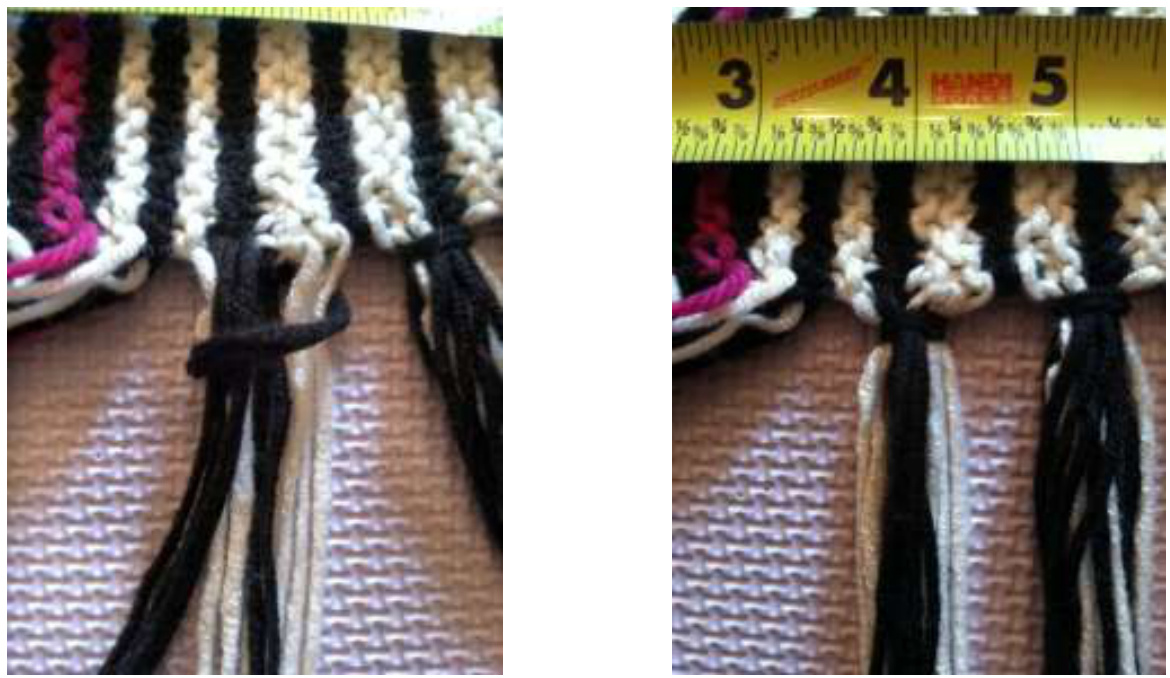
Repeat this process 7 more times. Trim the ends of the fringe evenly so that they are all the same length. Then work in the same manner for the other side.
Jazz Scarf 2012 Gina Waters.All Rights Reserved. http://mirthful-menagerie.blogspot.com For private, non-commercial use only. Pattern may not be copied or distributed.


