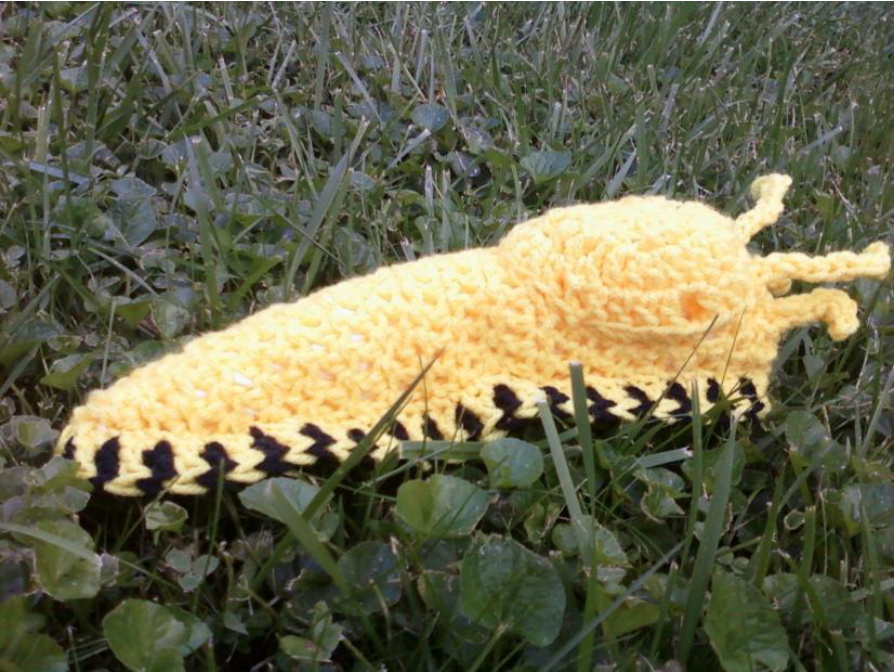
PATTERN: wOrk 1 body, 1 mantle, 1 skirt, 2 large antennae, 2 small antennae Yarn: Red Heart Super Saver 1 skein of yellow, small amount of black (l have used other yarns successfully, just use the hook called for by the yarn and have fun experimenting!) Hook: G Notions: Fluff for filling BODY: (join all rounds with slip stitch into first stitch unless otherwise noted) Rnd 1: with yellow, ch3, join into loop. Rnd 2: ch2 (counts as first dc now and throughout), 9 dc in ring. (10 dc) Rnd 3: ch 2, 1 dc in each dc around. (10 dc) Rnd 4: ch 2, (1 dc in next dc, 2 dc in next dc) around. (15 dc) Rnds 5-6: repeat Rnd 3 (15 dc) Rnd 7: ch 2, dc in next dc, 2 dc in next dc, (dc in next 2 dc, 2 dc in next dc) around. (20 dc) Rnds 8-12: repeat Rnd 3 (20 dc) Rnd 13: ch 2, dc in next 2 dc, dc next 2 dc tog, (dc in next 3 dc, dc next 2 dc tog) around. (16 dc) Rnds 14-15: repeat Rnd 3 (16 dc) Rnd 16: ch 2, dc in next dc, dc next 2 dc tog, (dc in next 2 dc, dc next 2 dc tog) around. (12 dc) Rnd 17: repeat Rnd 3 (12 dc) sTUFF (using fill of your choice, I used bamboo) Rnd 18: repeat Rnd 16 (9 dc) Rnd 19: ch 2, dc next 2 dc tog, (dc in next dc, dc next 2 dc tog) around. (6 dc) Rnd 20: ch 2, (dc next 2 dc tog, around). (4 dc) Note: If you know how, feel free to work the ch2 as the first /2 of the first 2dctog. (3 dc) Finish off. when sewing in ends, make sure to gather one end to look like slug's mouth. This will be your head-end. Sew the other one tightly for the "toil."
A slug's mouth really looks like this and is full of a rasp-like-tongue called a radula, it has more teeth than a shark! MANTLE: (join allrounds with slip stitch into first stitch unless otherwise noted) Rnd 1: with yellow, ch3, join into loop. Rnd 2: working in loop, ch 3, 2dc, htc, tc, htc, 2 dc, htc, tc (10 st) Rnd 3: ch3 & htc in first stitch, 2 dc in next 2 dc, 2 htc in next htc, 3 tc in next tc, 2 htc in next htc, 2 dc in next 2 dc, 2 htc in next htc, 3 tc in last tc. (22 st) Rnd 4: ch 2, dc in next 4 st, ch 2 & skip next st, dc in next 3 st, 3 dc in next st, dc in next 10 st, 3 dc in next st, dc in last st, (25 st) join &
Finish Off
The mantle should look like a saddle with a hole in the side. When sewing onto the slug, the pneumatophore (breathing hole) should be on the slug's right side, on the top. Sew onto the slug on the head end, between rows 3 & 9. It should not lay flat, but be a litle puffy. Remember, mantle slugs have their lungs and reproductive organs under this mantle. SKIRT: (DO NOT join row with slip stitch into first stitch unless otherwise noted) Row 1: with yellow ch73, join black yarn with dc into $3^{\mathrm{rd}}$ loop from hook, carrying yarn behind, alternate yellow and black dc around. (72 dc)
Finish Off leaving a LONG tail.
Starting with one end of skirt at tail, baste in place around Body with about 12 body stitches between skirt on top (the mantle should be on the top side). Baste the middle of the skirt by the mouth as well, then whipstitch around and join together at the tail.
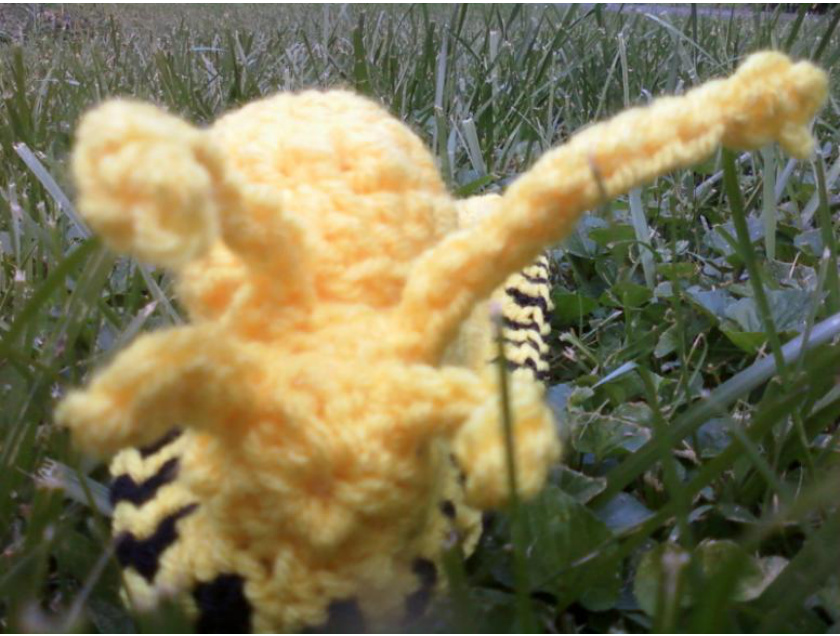
SMALL ANTENNAE: (make 2)
Row 1: ch 6, slip stitch back and Finish Off The small antennae are closer to the mouth, and are used for picking up chemicals like pheromones, left by other slugs. This is VERY important for reproduction. Use the photos to help you decide where to sew them on.
LARGE ANTENNAE: (make 2)
Row 1: ch 12, work a single chain picot at the end, slip stitch back & Finish Off. The large antennae are between the mantle and the small antennae, and are used for sensing light and movement. If the toy will not be used by a child or small animal, you may sew a small bead at the end for an "eye."


