Inukshuk
An inukshuk is a directional marker that signifies safety, hope and friendship, used by the Inuit.
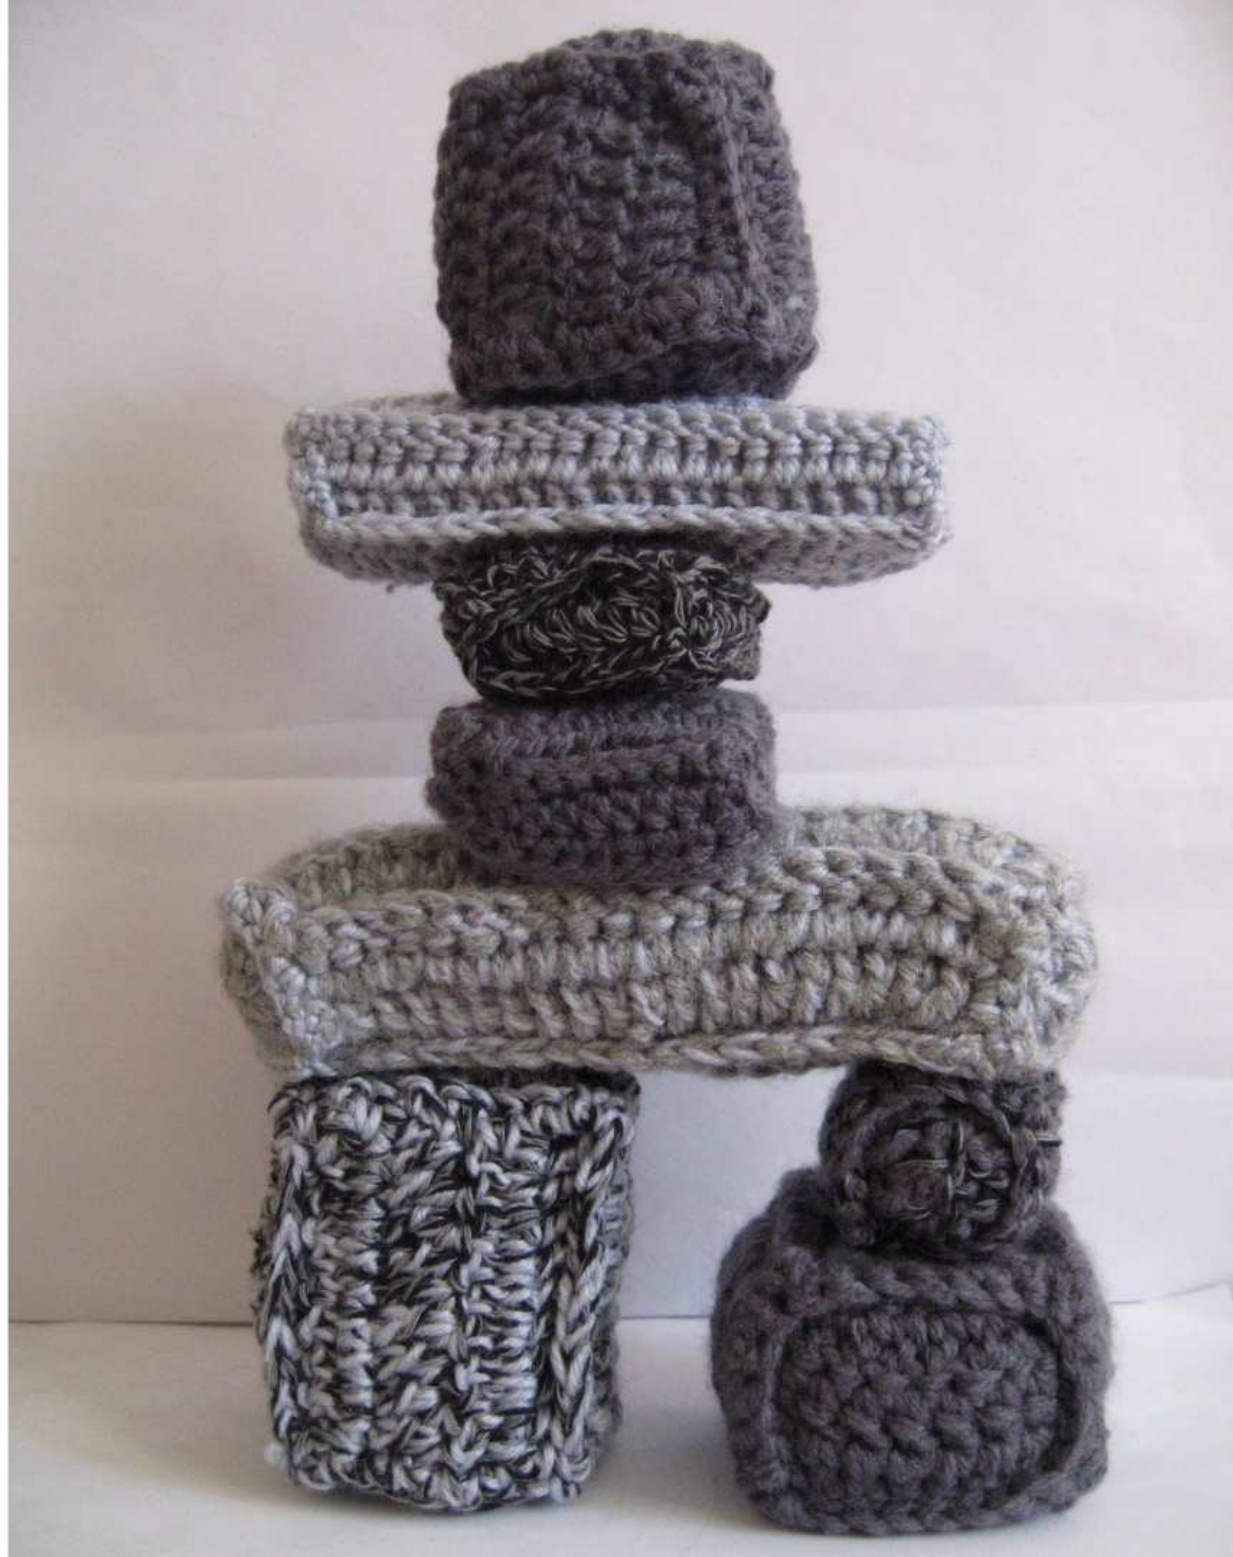
The mysterious stone figures known as inuksuit can be found throughout the circumpolar world. Inukshuk, the singular of inuksuit, means "in the likeness of a human" in the Inuit language. They are monuments made of unworked stones that are used by the Inuit for communication and survival. The traditional meaning of the inukshuk is "Someone was here" or "You are on the right path." (Wikipedia)
Materials
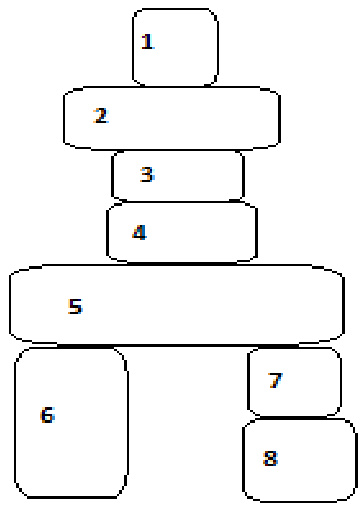
This pattern will use UK terms, US terms will be in brackets. 3.00mm (D/3) hook A selection of DK wool in shades of grey, natural or stone Wool needles for sewing in/weaving in ends Section 1 Ch 10 Row 1: Trb (dc) into 4th ch from hook, trb (dc) in each remaining ch across, ch 3 and turn - 8sts Row 2: Trb (dc) in each trb (dc) across, ch 3 and turn Rows 3-4: As Row 2 Row 5: Bptrb (bpdc) in each trb (dc) across, ch 3 and turn Rows 6-8: As Row 2 Row 9: As Row 5 Rows 10-12: As Row 2 Row13: As Row 5 Rows 14-16: As Row 2 except at the end of Row 16, ch 1 instead of ch 3 Row 17: join working edge to beginning edge with dc (sc) through both thickness' Ends - make 2 Ch 10 Row1: Trb (dc) into 4th ch from hook, trb (dc) in each rem ch across, ch 3 anc turn Row 2: Trb (dc) in each trb (dc) across, ch 3 and turn Row 3-4: As Row 2 but at the end of Row 4, ch 1 then dc (sc) through both thickness' to join edge to main piece around all 4 sides Before dc'ing (sc'ing) 4th side of 2nd piece, stuff firmly. Section 2 Ch 23 Row 1: Trb (dc) into 4th ch from hook, trb (dc) in each remaining ch across, ch 3 and turn Row 2: Trb (dc) in each trb (dc) across, ch 3 and turn Row 3: Bptrb (bpdc) in each trb (dc) across, ch 3 and turn Rows 4-6: As Row 2 Row 7: As Row 3 Row 8: As Row 2 Row 9: As Row 3 Rows 10-12: As Row 2 except at the end of Row 12, ch 1 instead of ch 3 Row 13: join working edge to beginning edge with dc (sc) through both thickness' Ends - make 2 Ch 10 Row 1: Trb (dc) into 4th ch from hook, trb (dc) across remaining ch, ch 3 and turn - 8sts Row 2: Trb (dc) in each trb (dc) across to end, ch 1 and then dc (sc) through both thickness on all 4 sides to join end to main piece Before dc'ing (sc'ing) 4th side of 2nd piece, stuff firmly Section 3 Ch10 Row 1: Htrb (hdc) into 3rd ch from hook, htrb (hdc) into remaining ch to end, ch 2 and turn Row 2: Htrb (hdc) into each htrb (hdc) across, ch 2 and turn Row 3: Bphtrb (bphdc) into each htrb(hdc) across, ch 2 and turn Rows 4-7: As Row 2 Row 8: As Row 3 Row 9: As Row 2 Row 10: As Row 3 Rows 11-14: As Row 2, except at the end of Row 14, ch 1 instead of ch 2 Row 15: join working edge to beginning edge with dc (sc) through both thickness' Ends - make 2 Ch 13 Row 1: Htrb (hdc) into 3rd ch from hook, htrb (hdc) into each remaining ch across, ch 1 then dc (sc) through both thickness' on all 4 sides to join end to main piece Before dc'ing (sc'ing) 4th side of 2nd piece, stuff firmly Section 4 Work the same as for Section 3 The following 4 pieces are worked with 2 strands of wool/yarn held together throughout to give strength and support for the completed piece Section5 Work the same as for Section 2 but with two strands of wool/yarn held together Section6 2 strands of wool Ch 13 Row 1: Trb ( dc) into 4th ch from hook, trb (dc) into each remaining ch across, ch 3 and turn - 9sts Row 2: Trb (dc) into each trb (dc) across, ch 3 and turn Rows 3-4: As Row 2 except at the end of Row 4, ch 1 instead of ch 3 and turn, then dc (sc) through both thickness on all 4 sides to join end to main piece Before dc'ing (sc'ing) 4th side of 2nd piece, stuff firmly Section 7 2 strands of wool Ch9 Row 1: Trb (dc) into 4th ch from hook, trb (dc) into each remaining ch across to end, ch 3 and turn Row 2: Trb (dc) into each trb (dc) across, ch 3 and turn Row 3: Bptrb (bpdc) across each trb (dc) to end, ch 3 and turn Row 4: As Row 2 Row 5: As Row 3 Row 6: As Row 2 Row7: As Row3 Row 8: As Row 2 except at the end ch 1 instead of ch 3 and turn Row 9: join working edge to beginning edge with dc (sc) through both thickness' Ends - make 2 Ch 7 Row 1: Trb (dc) into 4th ch from hook, trb (dc) into remaining ch to end, ch 3 andturn-5sts Row 2: Trb (dc) into each trb (dc) across to end, ch1 then dc (sc) through both thickness' on all 4 sides to join end to main piece Before dc'ing (sc'ing) 4th side of 2nd piece, stuff firmly Section 8 2 strands of wool Ch 10 Row 1: Trb (dc) into 4th ch from hook, trb (dc) in each remaining ch to end, ch 3 andturn-9sts Row 2: Trb (dc) in each trb (dc) across, ch 3 and turn Row 3: As Row 2 except at the end, ch1 then dc (sc) through both thickness' on all 4 sides to join end to main piece Before dc'ing (sc'ing) 4th side of 2 piece, stuffirmly You should now have 8 pieces of various colour, shape and size and the best part is it doesn't matter how rough some of them may look because they are supposed to represent unworked rock and stones. I found it easiest to start sewing the pieces together in this order as you could adjust as you went along to make sure that your Inukshuk would stand and balance correctly: 7 to 8, 7to5 6to 5 3 to 4 4to 5 3 to 2 then 1 to 2 You now have your own unique Inukshuk. This pattern was originally designed as a travelling gift for my parents and has not been tested other than by me, if there are any problems, please message me and I will endeavour to remedy them asap. You are free to do what you like with the finished article but all copyright on the pattern remains with me, Lovesagoodyarn2010.


