Braided Sealing Wax Mittens

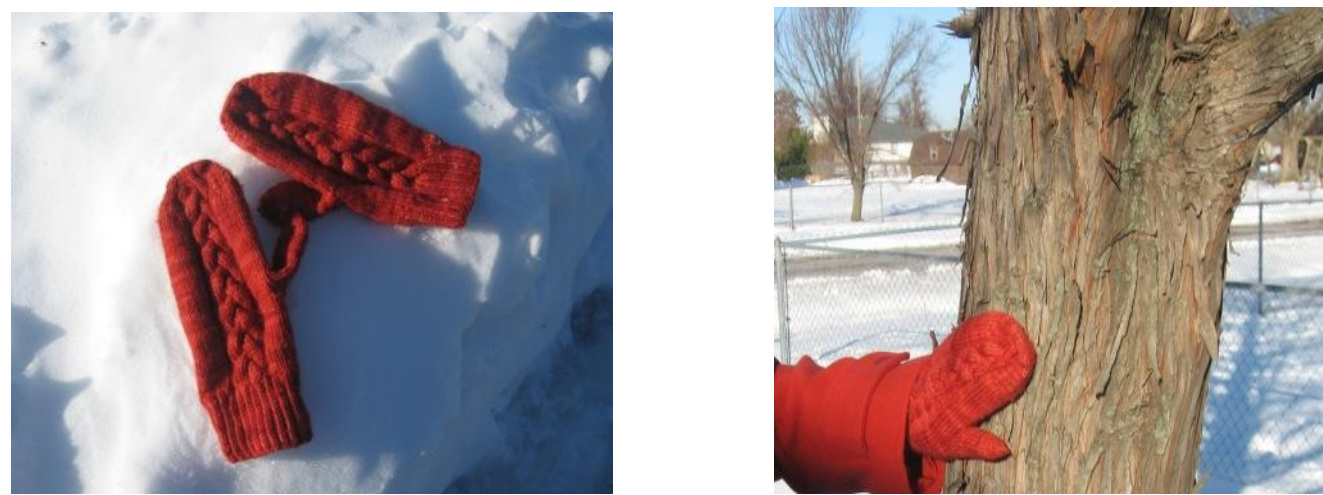
Needles: Size 4 ( $3.5\;\mathrm{mm}$ $32^{\bullet}$ circular needles formagic loop or double-pint ndles Yarn: Malabrigo Twist Aran Weight, Colorway: Sealing Wax, 1 skein Note: Great size just BARELY can be made with 1 skein; you may want to buy 2 just to be sure (you can always make a $2^{n d}$ smaller pair as a giftl) Gauge: 22 stitches/34 rows $=4^{\circ}$ in stockinettestitch (be sure and do this in the round as it will be different than flat stockinette - ask me how I know...) Notions: Cable Needle, Tapestry Needle,6" of contrasting scrap yan. Difficulty: Good Intermediate project, good projct to learn cables I wanted a pair of really warm Mittens to match a bright red coat I have. I had just gone on a trip in November to Ann Arbor, MI where I bought the perfect shade of tone-on-tone Malabrigo Twist in an awesome red with orange undertones to match my coat and I had a trip to Calgary, AB, Canada planned for mid-December. So even though I live in Katy, TX, near Houston, I needed some warm mittens. I looked and looked for just the right pattern that used worsted weight yarn and had some kind of cabling. I couldn't find anything that was just right. So I decided to design a pair of my own, and here it is. I have very long thin fingers and always need a women's large glove but I had several others who wear a women's large that have thicker hands and/or fingers try the Great size on and they fit very well. Wee fits a large child or youth or small woman's hands, Middling fits most women and a small man's hands, Great fits a large women's hands or a men's Middling hand. You could probably go up a needle size for a men's large or use one size larger needle with instructions for the next smallest size down to have a less dense mitten. I like a nice defined cable and a densely knit mitten to be extra warm. I used a braid that is 9 stitches wide for the cabling so you don't have to worry about mirror-imaging. Using size 4 needles and framing the braid with 3 stitches of purl on each side really makes the braid pop. I also used a twisted ribbing that is slightly reminiscent of small braids themselves.
Special Stitches:
1 x 1 Twisted Ribbing - (K1 through the back loop, P1) across Kbf - Knit into back and then front of the same stitch (increase made) C6F - Slip next 3 sts to cable needle and hold in front, K3, then K3 from cable needle. C6B - Slip next 3 sts to cable needle and hold in back, K3, then K3 from cable needle.
Cuff:
CO 30 [36, 42]. Join in the round, being careful not to twist. Work $1\mathrm{~x~}1$ twisted ribbing for 1.5 [1.75, 2.0] inches Next round: (K2 [3, 3], Kbf, K2 [3, 4], Kbf, K3 [3, 4], Kbf) twice, K2 [3, 3], Kbf, K2 [3, 4], Kbf, K4 [4, 5] - total stitches 38 [44, 50]
Hand:
Rnd 1 & 2: K2 [3, 5], P3, K9, P3, K2 [4, 5], knit $2^{\mathrm{nd}}$ half around Rnd 3: K2 [3, 5], P3, C6F, K3, P3, K2 [4, 5], knit $2^{\mathrm{nd}}$ half around Braided Sealing Wax Mittens Designed by Bethel King Rnd 4,5 & 6: K2 [3, 5], P3, K9, P3, K2 [4, 5], knit $2^{\mathrm{nd}}$ half around Rnd 7: K2 [3, 5], P3, K3, C6B, P3, K2 [4, 5], knit $2^{\mathrm{nd}}$ half around Rnd 8: K2 [3, 5], P3, K9, P3, K2 [4, 5], knit $2^{\mathrm{nd}}$ half around Repeat Rounds 1 - 8 until mitten is 2.25 [2.5, 2.75] inches from the cuff, ending on any round. Note: This was 2 repeats plus 6 rows for model mittens.
Right Mitten:
Next round: Continuing in pattern, work $1^{\mathrm{\,st}}\,19$ [22, 25] stitches, then knit next 4 [5, 6] stitches with contrasting scrap yarn, slip contrasting scrap yarn stitches back to left needle and knit thm again with regular working yarn, continue knitting around.
Left Mitten:
Next round: Continuing in pattern, work until 4 [5, 6] stitches are left in round, then knit next 4 [5, 6] stitches with contrasting scrap yarn, slip contrasting scrap yarn stitches back to left needle and knit them again with regular working yarn. Continue working Rounds 1 - 8 in established pattern until mitten is 1.5 [2.0, 2.25] inches short of desired length (about 4 [5, 5.5] inches) not including cuff, rying to end on round 3. Note: This was 6 repeats plus 3 rows for model mittens. Continue working in pattern with a few modifications as described below.
Top Decreases:
Rnd 1: K1, ssk, K0 [0, 2], P2 [3, 3], K9, P2 [3, 3], K0 [1, 2], K2tog, K1, K1, sk, K13 [16, 19], K2tog, K1 - 4 sts decreased; 34 [40, 46] stitches Rnd 2: K2 [2, 4], P2 [3, 3], K9, P2 [3, 3], K2 [3, 4], knit $2^{\mathrm{nd}}$ half around - no decrease Rnd 3: K1, ssk, K0 [0, 1],P1 [2, 3], K9, P1 [2, 3], K0 [1, 1], K2tog, K1, K1, ssk, K11 [14, 17], K2tog, K1 - 4 sts decreased; 30 [36, 42] stitches Rnd 4: K2 [2, 3], P1 [2, 3], K3, C6B, P1 [2, 3], K2 [3, 3], knit $2^{\mathrm{nd}}$ half around - no decrease Rnd 5: K1, ssk, K0 [0, 1], P0 [1, 2], K9, P0 [1, 2], K0 [1, 1], K2tog, K1, K1, ssk, K9 [12, 15], K2tog, K1 - 4 sts decreased; 26 [32, 38] stitches. Rnd 6: K2 [2, 3], P0 [1, 2], K9, P0 [1, 2], K2 [3, 3], knit $2^{\mathrm{nd}}$ half around - no decrease Rnd 7: K1, ssk, K0 [0, 1], P0 [0, 1], K7 [9, 9], P0 [0, 1], K0 [1, 1], K2tog, K1, K1, ssk, K7 [10, 13], K2tog, K1 - 4 sts decreased; 22 [28, 34] stitches Rnd 8: K0 [0, 1], ssk, K0 [0, 1], C6F, K1 [3, 3], K0 [1, 1], K2tog, K0 [0, 1], K1, ssk, K5 [8, 11], K2tog, K1 - 4 sts decreased; 18 [24, 30] stitches Rnd 9: K1, ssk, K3 [6, 9], K2tog, K1, K1, ssk, K3 [6, 9], K2tog, K1 - 4 sts decreased; 14 [20, 26] stitches
Size M & G:
Rnd 10: K1, ssk, K4 [7], K2tog, K1, K1, ssk, K4 [7], K2tog, K1 - 4 sts decreased; [16, 22] stitches Size G Only: Rnd 11: K1, ssk, K5, K2tog, K1, K1, ssk, K5, K2tog, K1 -4 sts decreased; [18] stitches Cut working yarn, leaving a tail and graft the remaining stitches together using Kitchener Stitch.
Thumb:
Carefully remove contrasting scrap yarn from thumb stitches, placing live stitches on 2 needles. There will be 4 [5, 6] stitches below the hole and 3 [4, 5] above. Join working yarn at the thumb on the back of hand. K4 [5, 6]; pick up 3 [3, 4] sts along the gap, K3 [4, 5]; pick up 3 [3, 4] sts along $2^{\mathrm{nd}}$ gap. - 13 [15, 19] stitches total. Join in the round and knit until thumb measures .5 inches shorter than desired length Size Wee and Great only: K2tog, knit rest of the way around - 1 st decreased; 12 [18] sts Rnd 1: (K3 [3, 4], K2tog) 3 times. 3 sts decreased; 9 [12, 15] sts Rnd 2: (K1 [2, 3], K2tog) 3 times. 3 sts decreased; 6 [9, 12] sts Size Wee Only: (K2tog) 3 times. 3 sts decreased; 3 sts. Size M & G Only: (K1 [2], K2tog) 3 times. 3 sts decreased; 6 [9] sts Size M Only: (K2tog) 3 times. 3 sts decreased; 3 sts. Size G Only: (K1, K2tog) 3 times. 3 sts decreased. 6 sts. Cut working yarn leaving tail. Thread tail through remaining sts and fasten off. Weave in ends. Note: Ihave tested this patternfor theGreat size only. Ihave done all the math (and Idoa lot of it in my regular work ;o)for theWee and Middling size but they have not been tested yet. If you make those sizes or even the Great size and would like to let me know if there are any typos or mistakes you can post a comment on my blog at www.bethelscrafitalk.blogspot.com. Remember this pattern is free but Itry and be as clear and mistake-free as possible. Thanks!


