LIGHT SABERBY ALLI HARTLEY

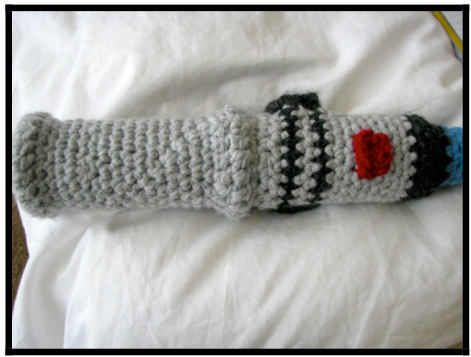
My son has an obsession with all things related to Star Wars! After I ventured into amigurumi, and made a large crochet pear for my daughter, the thing he most wanted me to make was this Jedi necessity. So here is what I came up with... A crochet lightsaber built around pipe insulation to make a soft version of the iconic weapon. This is my first crochet pattern so hopefully it is fairly clear! And remember,"They are really more like guidelines!" (Wrong movie perhaps, but seemed appropriate)
Type of craft: Crochet
Materials:
Color A-Bernat Softee Chunky Light grey (Held doubled) Color B-Lion brand Wool-ease thick and quick Charcoal Color C-Lion brand Wool-ease thick and quick Blue Small amount of red yarn for button. Self-sealing pipe insulation wrap for $\%$ to $\%$ inch pipes. (You will need one length approximately $34^{\prime\prime}$ long and another $\mathbf{1}2^{\prime\prime}$ long to form the handle). Button or Velcro- for the belt-loop strap.
Hook:
J hook or size needed to obtain gauge
Gauge:
Not essential to obtain a specific gauge. Make sure your stitches are tight enough to hide the inner material and try to keep as snug as possible to the form that you have created.
Abbreviations:
ch- chain sC- single crochet Decrease- Insert hook into the front loops of the next two stitches. Wrap yarn around hook and draw through first two loops then wrap and draw through final two loops dc- double crochet st - stitches or chains
Form:
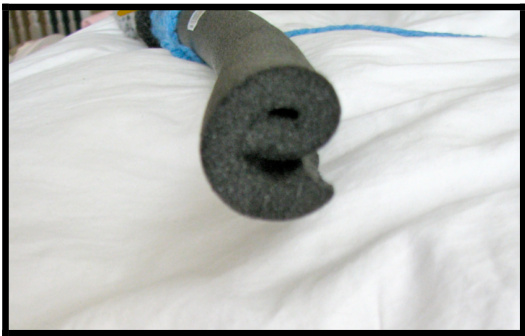
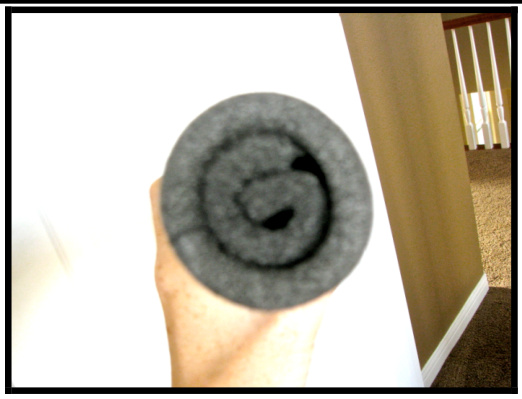
You need to wrap the longer length of pipe insulation into a spiral. If your insulation has sticky edge this will help you seal it into this shape. Otherwise I would recommend that you use duct tape in a few spots to keep it rolled. The crochet will eventually hold everything together. Take the shorter length and wrap around one end of the longer piece. Keep it flush to the end and seal the two edges together. You now have a long piece measuring approx $34^{\prime\prime}$ long with a $\mathbf{1}2^{\prime\prime}$ wider section that forms the handle on one end. This version does have a lot of wobble to it (I was aiming more for cuddling then dueling) If you are wanting a more rigid form then you could wrap a $30^{\prime\prime}$ plastic dowel of some sort, in the insulation. For safety, I would recommend that the dowel does not extend all the way to the end of the saber though.
Blade ( $\sim\!1\ \ V_{2}$ inch diameter)
Handle ( $\sim\!3^{\prime\prime}$ diameter)
Handle:
Bottom
Round 1- With color A held doubled. Ch 2 Round 2- 6 sc into $2^{\mathsf{n d}}$ chain from the hook. (Do not join) (6 st) mark first st Round 3- 2ch into all st (12 st) Move marker to first st of round as you continue Round 4- sc into $1^{\mathrm{st}}$ ch then 2 sc into next ch. Repeat across all st in round (18 st) Round 5 -1sc into each st
Bottom ridge
Round 6- ch3, dc into each st around Round 7- sl st into second chain at beginning to join round. (Sc, decrease, sc, sc) repeat around (I cut a circle to fit the base of the handle from my leftover insulation and fit it into the bottom after this ridge) Round 8 - (Sc, decrease, sc, sc) repeat around (you may need to decrease again to get a tight fit on the form. The amount of decreases will depend on how tightly you wrapped the insulation and your gauge. I aimed for the form to be slightly compressed as I worked around. You can insert the form and test the size out at this point. You may want to take the form back out until you are a few inches along the length of the handle to make the work easier going.
Handle
Round 9 - Sc into all st around in a spiral (do not join) Continue working around till work measures 3 1/2 inches from ridge. (Make sure you have inserted the form at this point, as it may get very hard to do so after this)
Second Ridge
Next round- sl st into first st, (ch 3, dc into each of next 3 st then 2dc into next st,) repeat around. (\*)If you have decreased more then indicated to fit your form then just increase around evenly your work- v4 stitches increased. Next round sl st into first st, Ch 3 then dc in all stitches around. Reverse the increase round as follows or to match your specific $(^{*})$ increase round. (Decrease, sc, sc, decrease) repeat around. Make sure that this round and the following rounds are tight to the form. Next round- Sc into all stitches Next round- Repeat round Change to color B (charcoal) sc into all stitches around Change to color A (light grey) sc into all stitches around
Strap
Change to color B sc into all stitches around, at the end of this round turn work and sc into the loops down the side to and including the first round of color B that you made. (\~4 stitches) These stitches form the vertical ridge the strap is built off of. Turn, ch1, sc into second loop from hook and all others Repeat row until the strap measures ${\mathfrak{z}}^{\prime\prime}$ . Then sc, ch 3, sc into last stitch. (Buttonhole formed) Next row- Sc into all st across Repeat above row till strap measures $\sim\!4^{\prime\prime}$ Bind off Join color A to main body of handle again. Sc around body until it measures $3^{\prime\prime}$ from last ridge.
Square Red button (May be easier to attach before the handle is done)
With scrap red yarn ch 5 (or amount needed to get width of $\sim1$ inch) Turn ch1 , sc into $2^{\mathsf{n d}}$ loop from hook and across all stitches Repeat above row till button is $1^{\prime\prime}$ long. Bind off and attach to handle where desired. Back on the main body of the handle; change to color B (this is the end cap of the handle and transition to the blade) Next round- Sc one round Next round- (Decrease, sc, decrease, sc) around Next round- repeat decrease round until tight to blade section of saber.

Belt loop on side
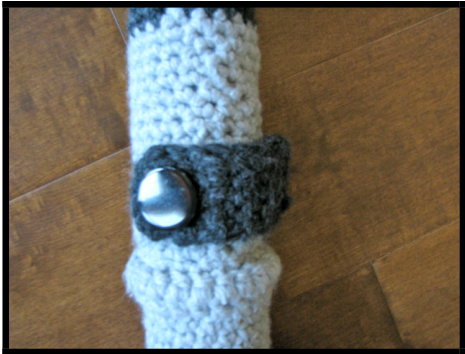
Buttoned belt loop Attach button to body of handle between the two charcoal stripes $4^{\prime\prime}$ from where the strap starts.
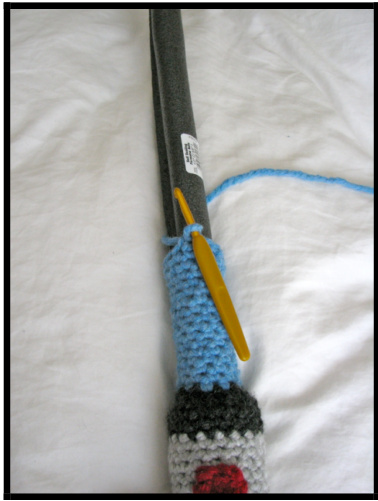
Blade:
Change to color C (light blue) and continue in spiral (do not join rounds), you may need to decrease to keep the desired snugness against the form. When you are $5^{\prime\prime}$ from the end decrease at the beginning and half way through the round. Continue in spiral. When you are $z^{\prime\prime}$ from end repeat decrease round. (The blade will be very compressed) Continue in sc spiral
When you have reached the end of the form, decrease every stitch around and then repeat. Cut yarn, with a needle bring end of yarn through loops and draw tight. Bind off. Knot yarn and weave in.
Enjoy!
I have the greatest respect for the creativity and work behind the Star Wars franchise and have no intent to encroach on licensed material. This pattern is to bring joy to the galactic fans in your life and is not for commercial or retail use of any kind. @


