oolly Thoughts
INPURSUIT OFCRAFTY MATHEMATICS
Calendar Cubes
Perpetual calendar in knitting or plastic canvas designedby Pat Ashforth & StevePlummer
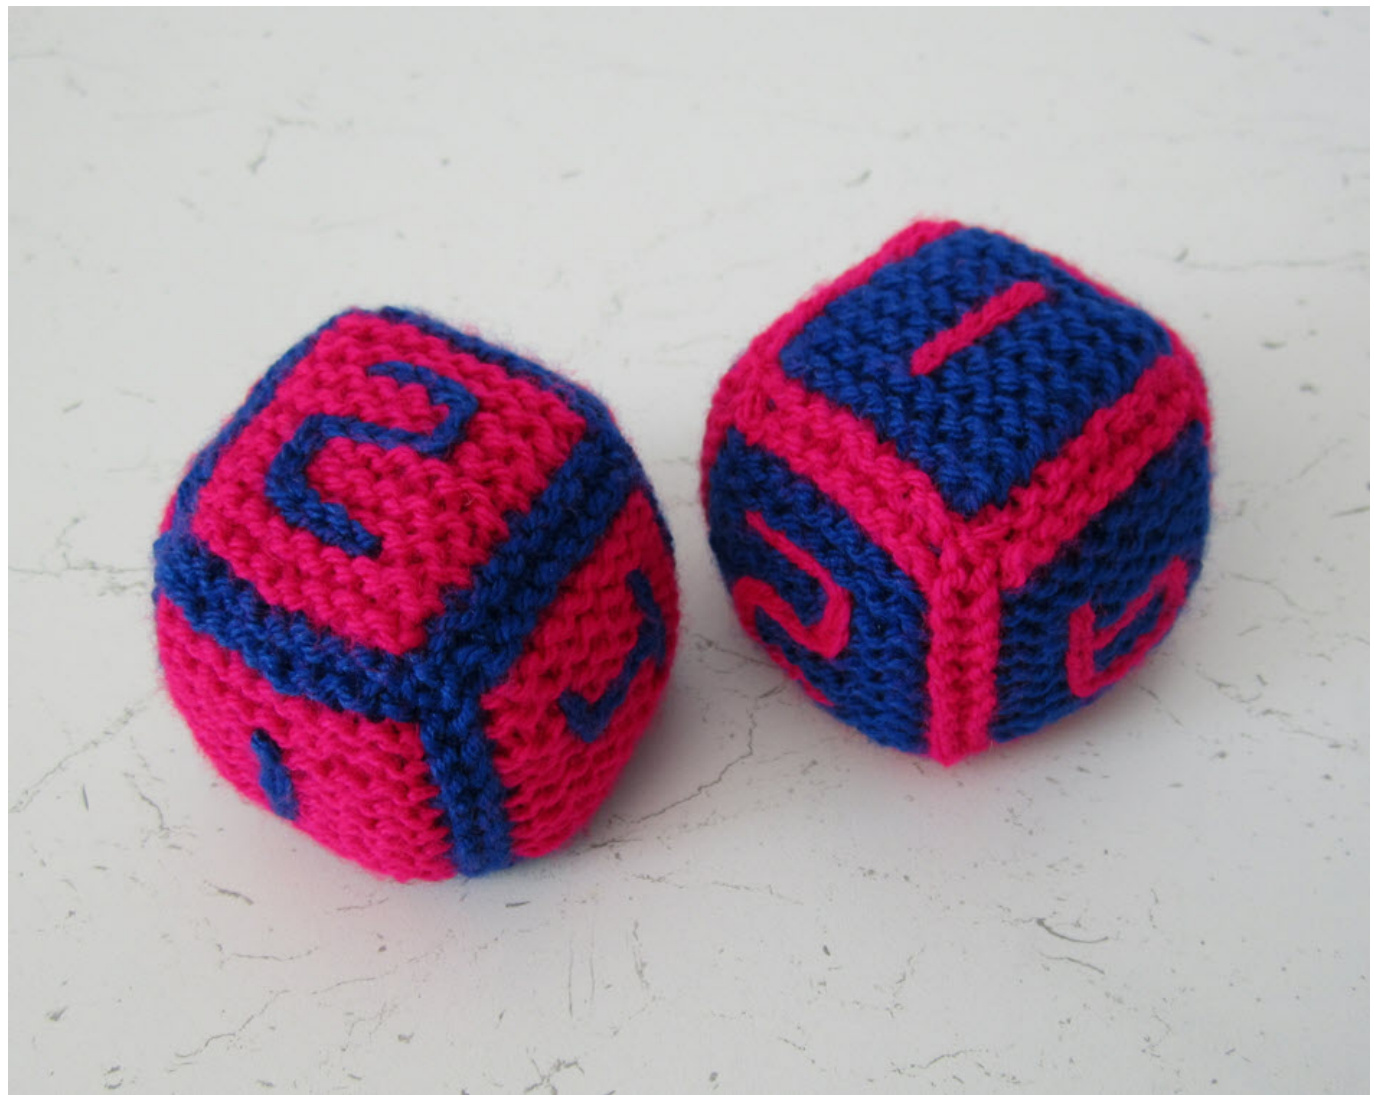
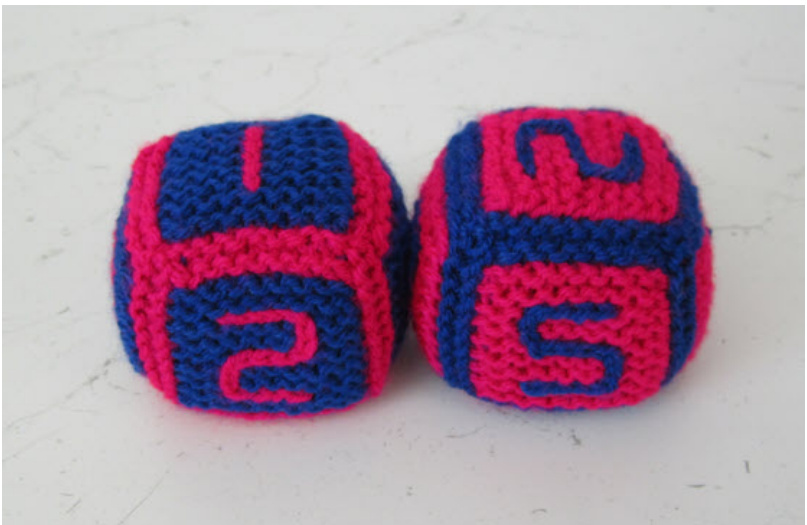
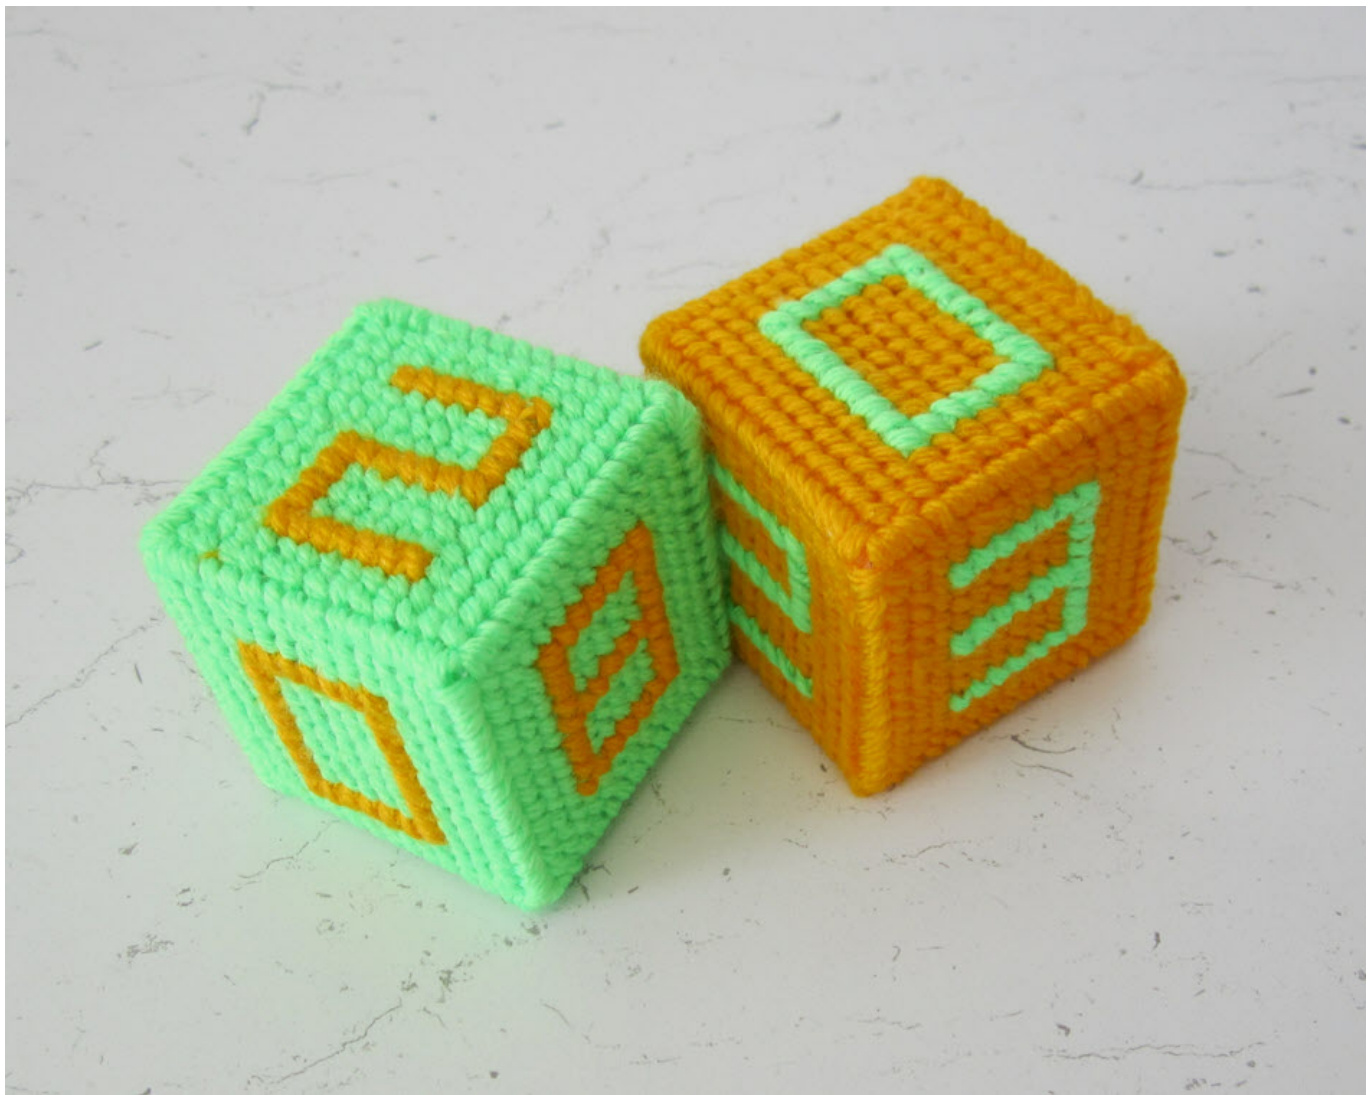
Calendar Cubes
You may be surprised to discover that you only need two cubes to be able to show all the dates in a month. The pattern contains instructions for a knitted version, which can also be used as juggling balls or stress-relieving balls, and a plastic canvas version.
Knitted Version
Yarn
Approximately 32 metres (35 yards) DK in each of two colours. Other thicknesses of yarn could be used but will give bigger, or smaller, cubes.
Needles
Use needles slightly smaller than you would normally use for your chosen yarn. The knitting should be as firm as you can comfortably make it. Two double-pointed needles are needed for finishing the cubes. You could use these throughout as you will only be working with a small number of stitches.
Filling
If you want your cubes to stay square you could put wooden blocks inside, or cut up car sponges to fit. If they are to double as juggling, or stress-relieving, balls the filling should be heavy and more fluid. This means that the cubes will always tend towards being spheres. There are many possible fillings such as rice, lentils, millet, etc. This type of filling should be in a secure bag inside the knitting. Bags can be made from any very fine and soft fabric. They should be bigger than the knitted cubes so that the filling has room to move about and fill all the corners. Pieces cut from the legs of tights work well. You can also use pop socks so that one end is already finished. Cut off the foot of the sock so that it is about 12 cm (5") long, insert the filling and stitch across the open end very securely so that the filling can't escape. I used 110 grams of rice in each bag.
Construction
The faces of the cubes could be joined in many different ways. The method given was chosen because it is quick, easy and very secure. It does not give matching joins on all edges. This would not be noticeable to most people but you might want to change the method to make them match more closely. (The only method that would ensure all joins are exactly alike would be to make six separate squares, edge them in the contrast colour, then stitch them together.)
Method
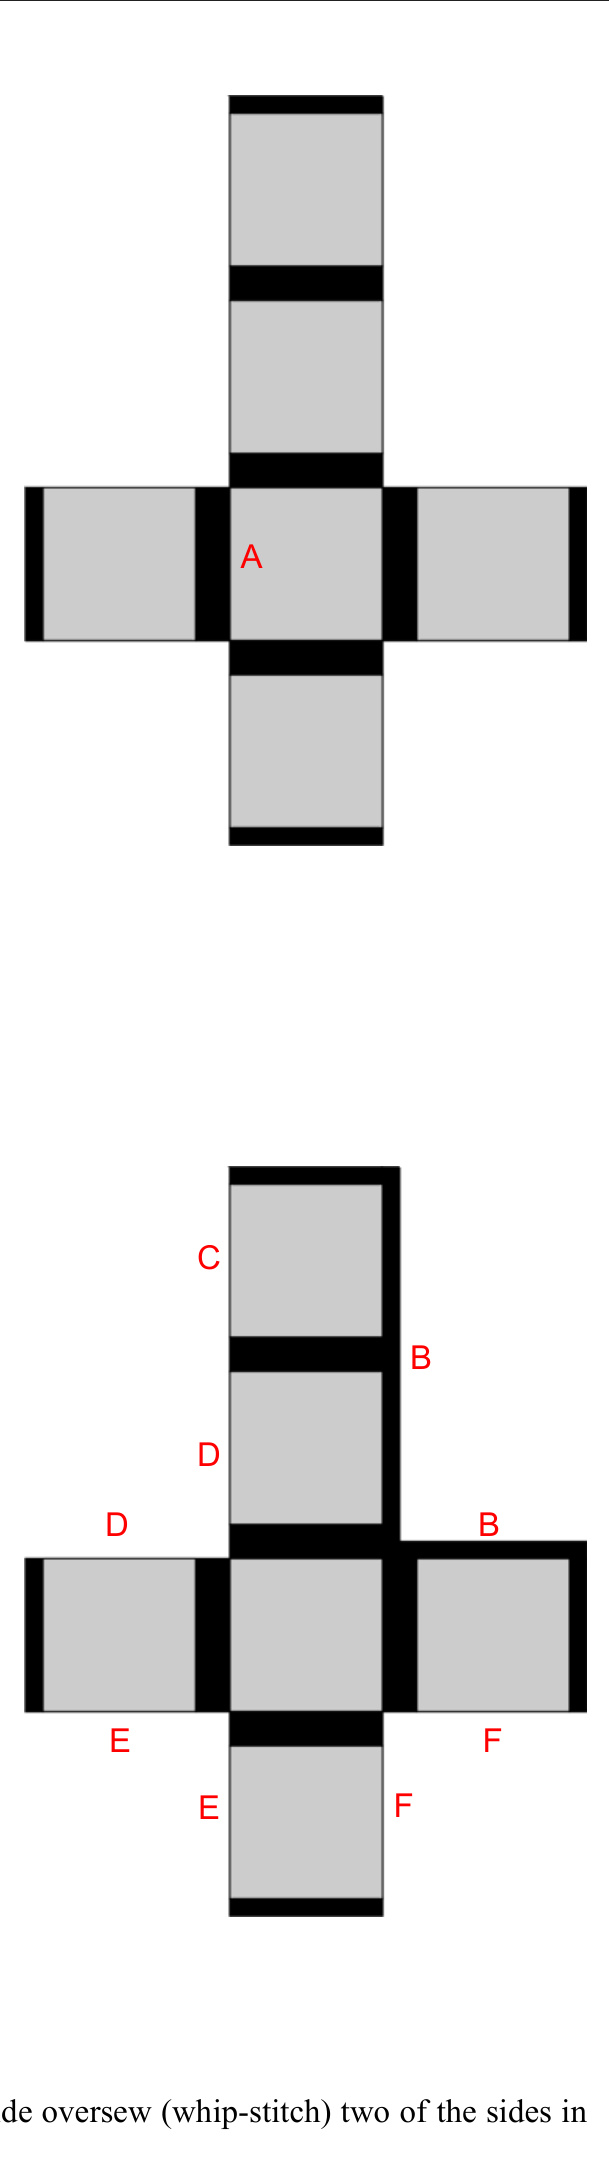
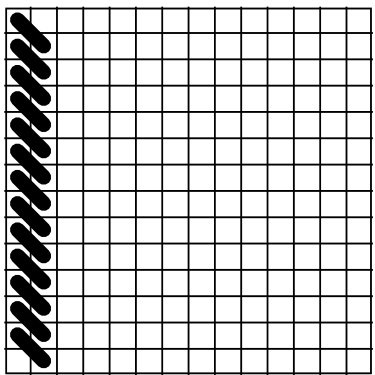
Work in garter stitch throughout. Using contrast and the long-tail method, cast on 9 stitches. Change to main colour and knit 9 garter ridges (18 rows). Knit 2 ridges contrast, 9 ridges main, 2 ridges contrast, 9 ridges main, 2 ridges contrast, 9 ridges main. Knit one row contrast. Cast off on the wrong side. Carry the contrast yarn up the side, to avoid having many ends to darn in. Do not twist the yarns at the end of each ridge as this will make it difficult to pick up stitches later. Catching it in two places is sufficient. On the 5th ridge, knit the first stitch, trap the contrast behind the main yarn and keep knitting. Repeat this on the 9th ridge. Using contrast pick up one stitch from the end of each garter ridge along the edge marked A (9 stitches). Knit 3 more rows (2 garter ridges in total) contrast then 9 ridges main, one row contrast. Cast off on the wrong side. Make a matching square on the other side, as shown.
Adding the numbers
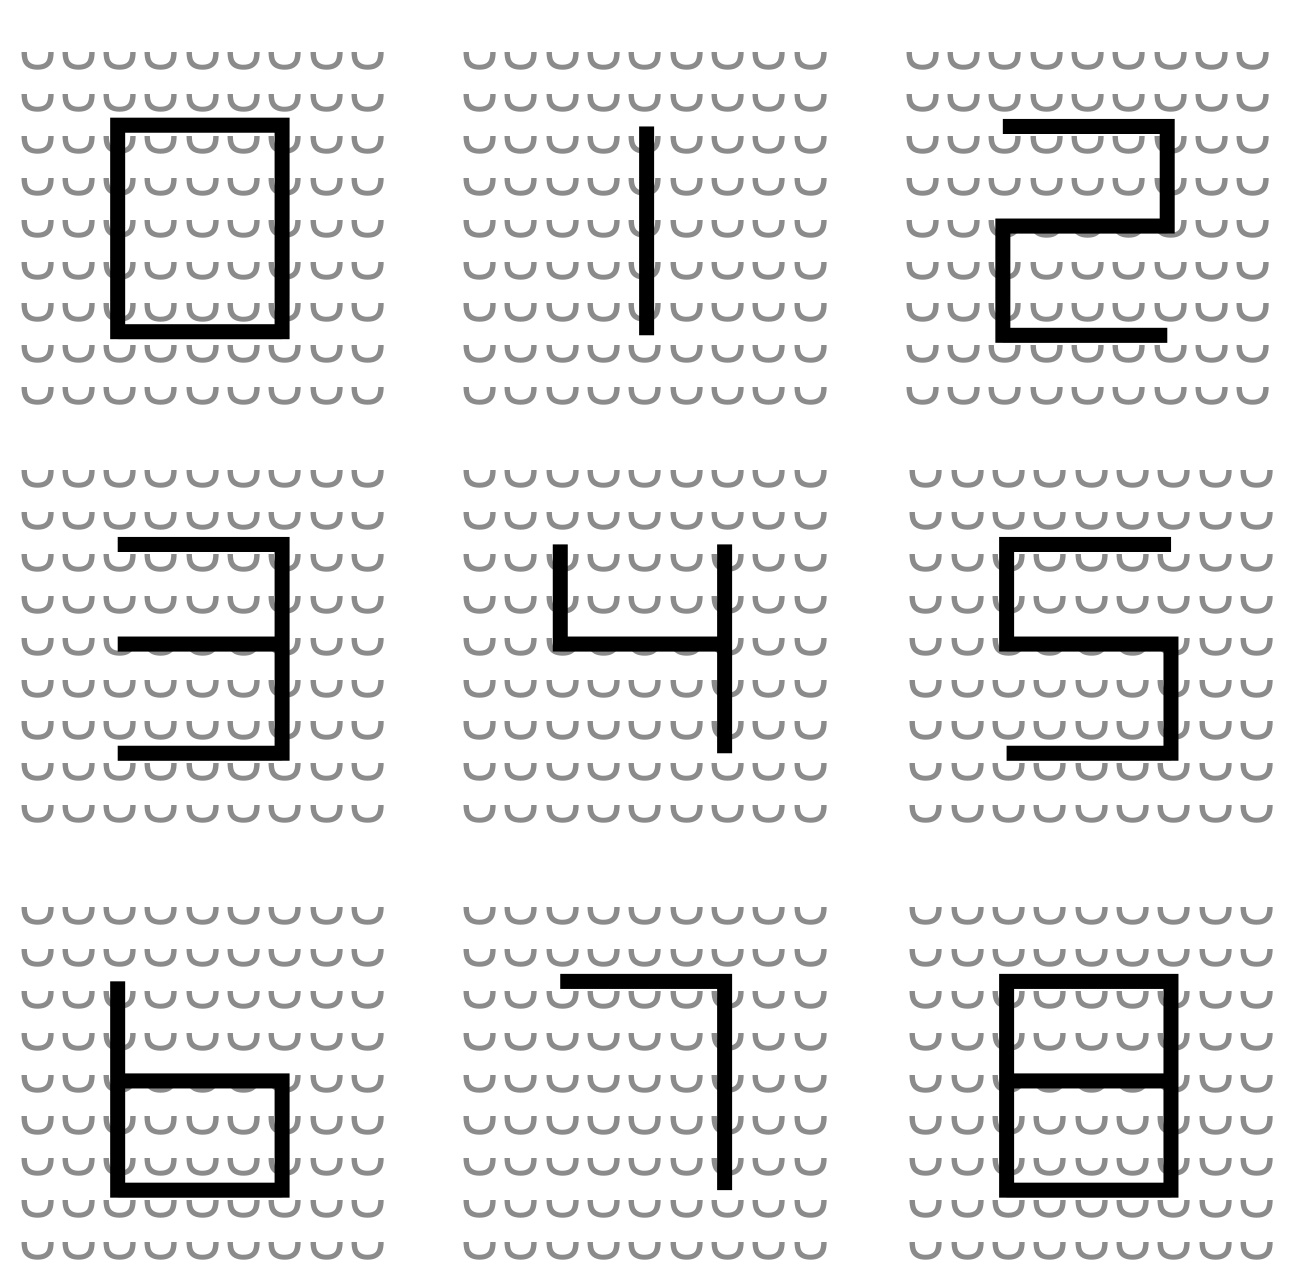
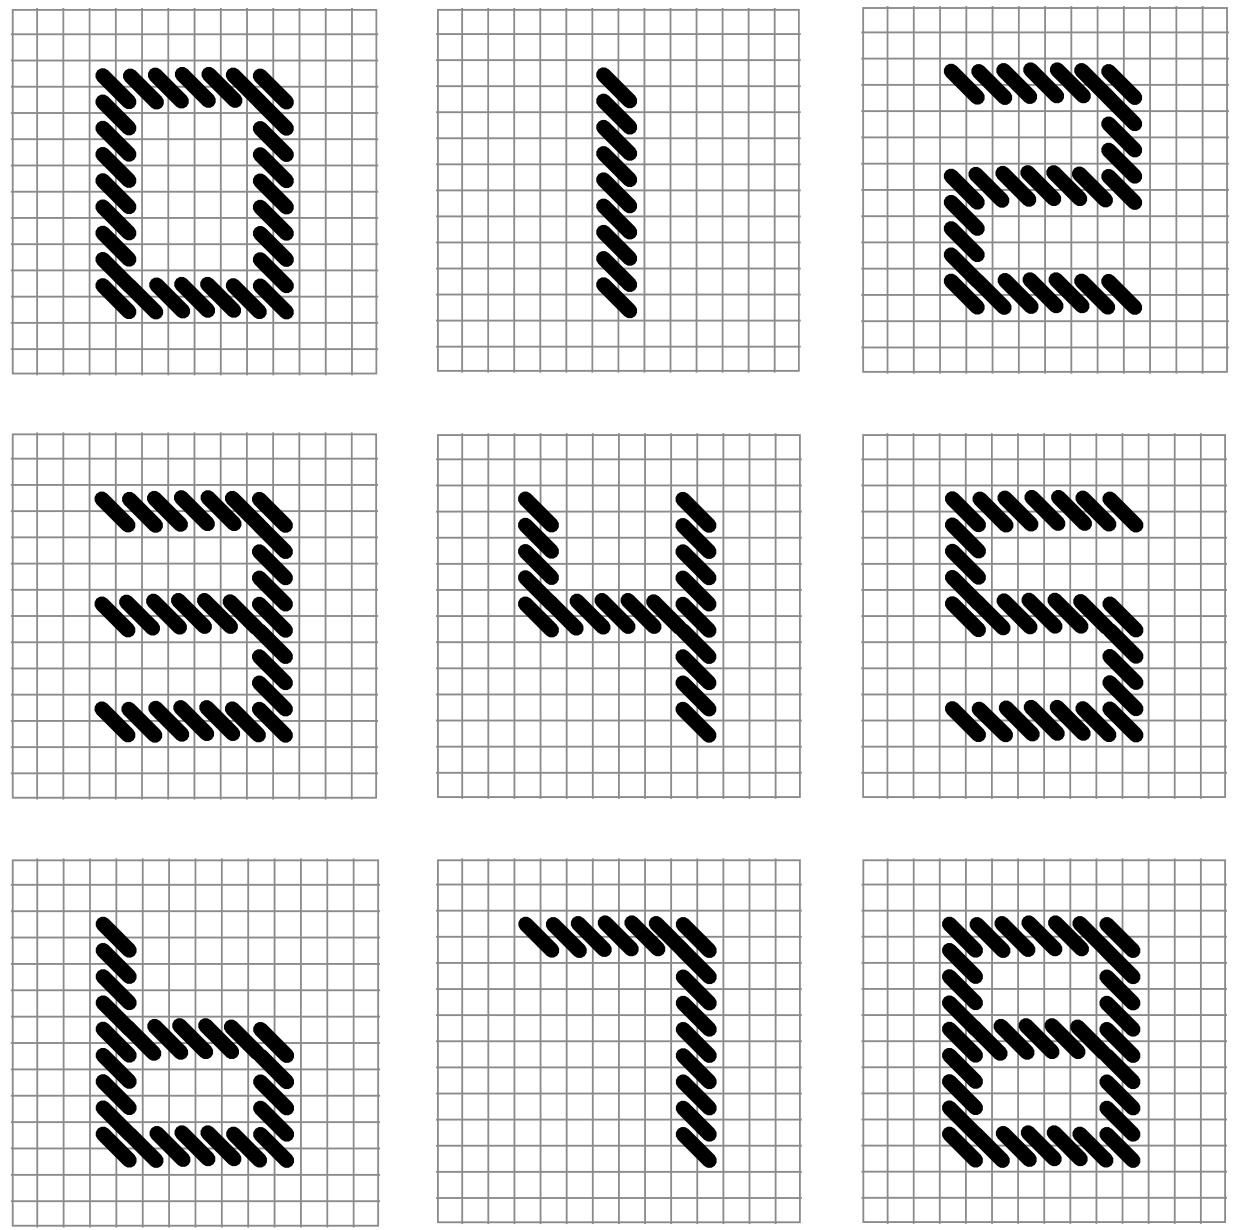
Embroider the numbers, as shown on page 3.
Edging and joining
Using contrast, pick up stitches along the edges marked B. as follows: 1 from the contrast ridge, 9 from main, 4 from contrast, 9 from main, 2 from contrast, 9 from main, 1 from contrast. Cast off 11, knit to end. Slip the first 12 stitches onto a double-pointed needle, and the other 2 stitches onto another double pointed needle. Fold the knitting with right sides together and cast off through both sets of stitches at the same time. Fasten off and use the end to darn any gap there might be in the corner of the join. Using contrast, pick up 11 stitches along the edge marked C, as follows: 1 from the contrast ridge, 9 from main, 1 from contrast. Cast Off. Using contrast, pick up stitches along the edges marked D asfollows: 1 from the contrast ridge, 9 from main, 4 from contrast, 9 from main, 1 from contrast. Slip onto double-pointed needles and complete as for side A. For edges E and F work as for edge C. place. Insert the filling and stitch the remaining side.
Use the garter stitch bumps as a grid to place the numbers. The numbers can be applied using any embroidery stitch. Chain stitch works well as it makes a solid line. also add them using surface crochet, with the yarn underneath the work and the hook aboy
If you want to know which numbers go on each cube go to http://www.woollythoughts.com/calendar.html
Plastic Canvas Version
Yarn
Small amounts of any smooth yarn that will fit through the holes in the plastic canvas.
Plastic canvas
Plastic canvas comes in different sizes, which have different numbers of holes to the inch. You can use any type you like. You will need 6 squares for each cube (12 in total) with 14 holes in each direction.
Method
Stitch over each bar with diagonal stitches until the whole surface is covered (except the outer edges). Make six in each colour. Stitch the contrast numbers in the same way, as shown in the grids below. To make the numbers stand out more stitch over them again with the lines going in the opposite direction so you form crosses. Stitch the pieces together using the contrast yarn,
OSteve Plummer & Pat Ashforth 2013 Woolly Thoughts 166 Keighley Road, Colne, Lancashire, BB8 0PJ, England All rights reserved


