
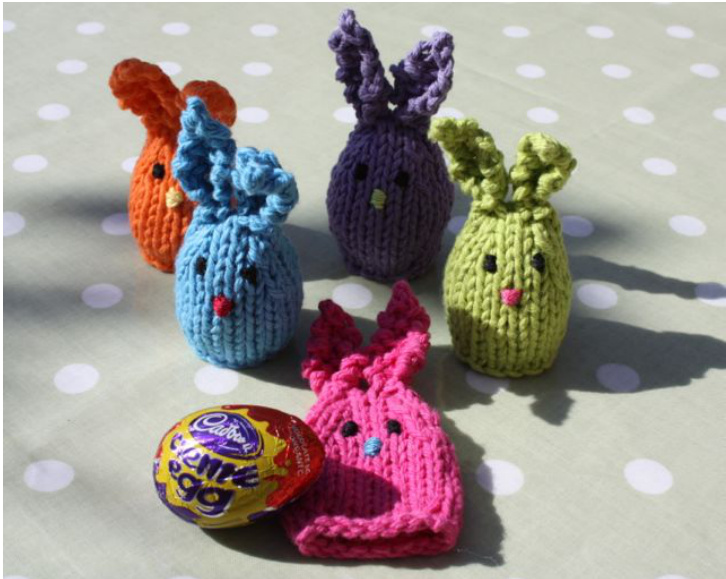
Huggie Bunnies
TheSe Cute bunnies will happily hug and hide a Sweet Easter treat for you, or maybe for Someone elSe to disCover.
Materials:
10 yards of worsted weight yarn per bunny. (l used Lily Sugar 'n Cream) You will also need some yarn for the eyes, nose and mouth. (l used 4 ply weight) 5mm (USA 8) DPNS, or size required to get gaurge (You can use a circular, but you'll need a 3rd needle) Yarn needle Yummy Easter treats! Gauge: 5 stitches to 1 inch Size: Just right to snuggly store a Cadbury's Creme Egg size Easter egg treat.
Body
CO16 and joint to knit in the round. Place a stitch marker at the beginning if you prefer to use one.
Round 1 and 2: knit
Round 3: k2, (mk1, k4) 3 times, mk1, k2 (20 stitches) Round 4 to 10: knit Round 11: k1, skpo, k4, k2tog, k2, skpo, k4, k2tog, k1 (16 stitches) Round 12 and 13: knit Round 14: k1, skpo, k2, k2tog, k2, skpo, k2, k2tog k1 (12 stitches)
Round 15 and 16: knit
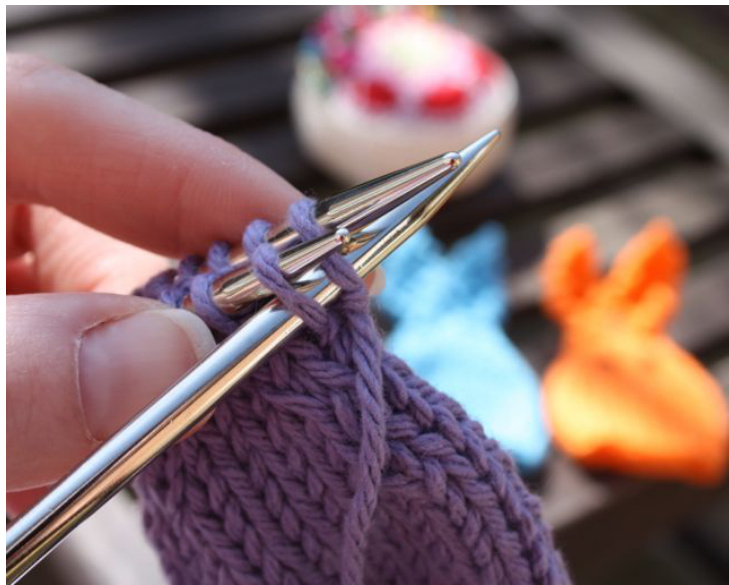
Now you'll need your extra needle. Arrange your stitches so that you have 6 on each needle (if you don't already). Row 1: Hold the two needles together and using the third needle, knit 2 stitches together, 1 from the front needle and 1 from the back needle. Repeat this twice more.
Abbreviations:
m1: Make an additional stitch. k2tog: knit two stitches together. p2tog: purl two stitches together. skpo: slip one (knitwise), knit the next, then pass the slipped stitch over. psso: Pass the slipped stitch over. kfb: Knit into the front and back of the stitch. You should now have three stitches on your left or 'extra' needle and 6 stitches left on your original needles. Slip these 6 stitches onto a stitch holder or some spare yarn. We'll come back to these Iater. Row 2: kfb, k1, kfb Row 3 to 6: k1, p1, k1, p1, k1 Row 7: p2tog, k1, p2tog Row 8 to 10: p1, k1, p1 Row 11: slip 1, k2tog, psso and bind off
SeCond Ear
Take the 6 stitches from your needle holder or spare yarn and rearrange on the two needles again, 3 on each needle. Take your third needle again, re-join the yarn and repeat the instructions for row 1 of the first ear. You should now have 3 stitches on your left or 'extra' needle and no spare stitches. Continue following the instructions for the first ear from Row 2 onwards. Just the start of the re-joined yarn from the second ear to sew up the little hole between the ears then weave in all ends. Using some extra pieces of yarn, pinch each ear together at the base a use a few stitches to secure them together. This makes the ears stand curve around and stand up on end nicely.
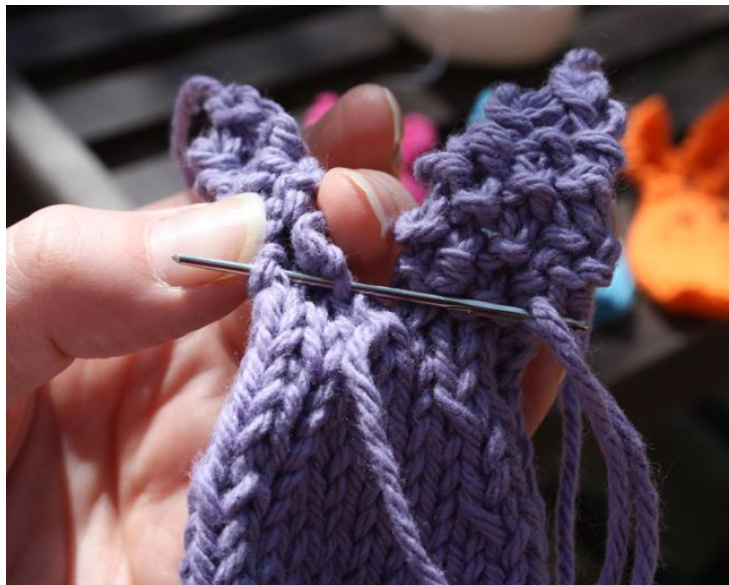
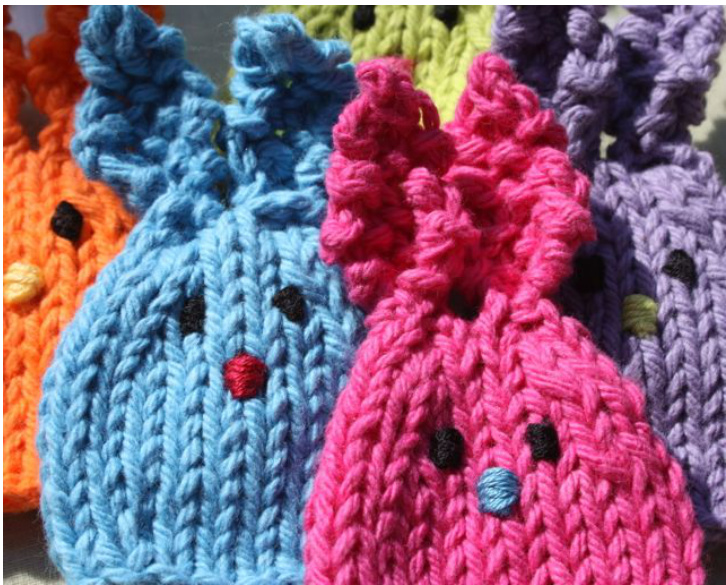
With some 4ply yarn and using the pictures as a guide, sew on a little face.
All done. Now you can squeeze a nice treat inside for bunny to hug for you!


