
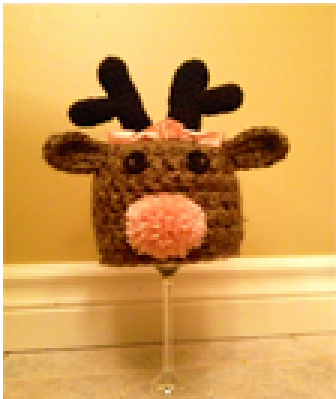
JINGLES
You will need: Hook: 9.00 mm, 5.00 mm Gauge: 1 row = 1 inch and 2 dc = 1 inch 1 Ball of your favourite super bulky yarn (Size 6 weight) Small amount of regular worsted weight yarn - one colour for the antlers and one colour for the nose (Size 4 weight) Two buttons for the eyes 4 bells (optional) Ribbon for bows (optional) Needle for weaving in ends Notes: dc - double crochet sc - single crochet ss - slip stitch st/sts - stitch/stitches ch - chain The body of the hat and the antlers are done in the round, so be sure to mark where you finished your last stitch in each row. I like to leave a long tail from my magic circle and use it as my stitch marker! When you see \* and \* it means to complete everything within the stars I've separated each size to lessen any confusion!
\* A HUGE thank you goes out to my testers \* \* Angi, Kim, Terry, Nicole and Brandi \*
Copyright 2O1 2 TuTu Chic Boutique All rights reserved. Please do not copy, reproduce, or rewrite. Under No circumstances may this pattern be sold. Finished products may differ according to variations of yarn, hooks, and individual work. PLEASE sell your finished items: I would appreciate acknowledgment for the pattern, so please include the shop name, TuTu Chic Boutique, and link to my page www.facebook.com/TuTu.Chic.Boutique.2012 - Never hesitate to contact me t tutuchicboutique@gmail.com if you require assistance!! Beanie - use super bulky: Start with a magic circle Row 1 - dc 10 times in circle (10) Row 2 - 2 dc in each st (20) Row 3 - \*dc in the next 3 sts, then 2 dc in the next st\* around (25) Row 4 -7 dc in each st and join at the end of the last row (25) Row 8 - ch 1 and sc around (25)

Newborn - 15" ; (still use 9.oO mm hook and super bulky yarn, and make 2) Ch 7. Hdc in the second from the ch. Hdc in the next two sts, dc in the next 2 sts and 4 dc in the last st. Working around the back side of the ch, dc in the next 2 sts, hdc in the last two stitches. Leave a tail to sew on the beanie. Antlers, done in two parts (use 5.oomm hook and reg worsted yarn): Part 1 - make 2 Start with a magic circle Row 1 - hdc 6 times in circle (6) Row 2 - \*hdc in the first st, 2 hdc in the next\* 3 times (9) Row 3 - 10 hdc in each st and join at the end of the last row (9) Leave a tail approx 6 inches long. Attach bells to the top of the magic circle (optional) - I find it's easier to do this at about row 3 before the antler gets too large. Part 2 - make 2 Start with a magic circle Row 1 - hdc 6 times in circle (6) Row 2 - \*hdc in the first st, 2 hdc in the next\* 3 times (9) Row 3 - 5 hdc in each st and join at the end of the last row (9) Leave a tail approx 6 inches long. Attach bells to the top of the magic circle (optional) - I find it's easier to do this at about row 3 before the antler gets too large.


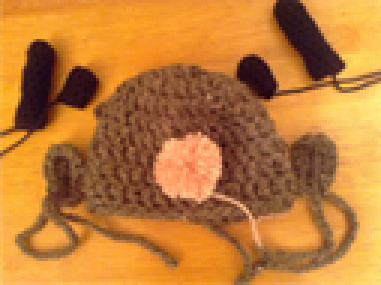
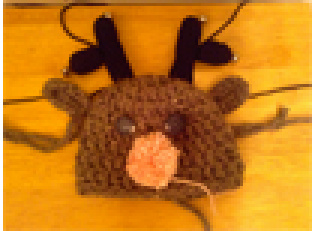
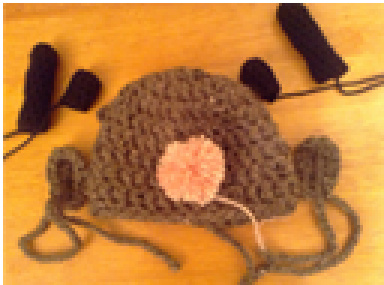
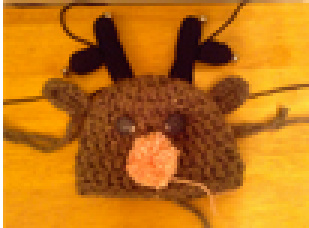
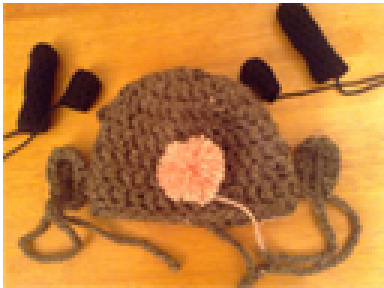
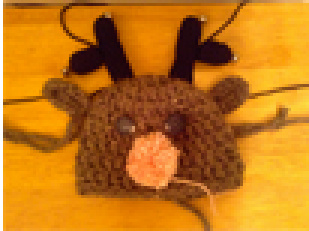
Nose (use reg worsted yarn): Make a small Pom Pom by using either a pom pom maker, or by wrapping yarn around 3 fingers approximately 50 times (more or less, depending on how smal/large you want it to be). Leave a tail to sew on the beanie. Assembly: Take Part 1 of the antlers and slip over your index finger (l found this to be the easiest way). Using the tail on Part 2, attach the small antler to the large one. Weave in ends. Attach the antler to the crown of the beanie (l put them on the row outside of the magic circle. Stuffing is optional in the antlers. Attach ears on the side a few rows down from the antlers. I added bows to the antlers to make it more “girly". Add buttons and pom pom nose to the front of the beanie, and there you have it!!


Infant - 1 7"
Beanie - use super bulky: Start with a magic circle Row 1 - dc 10 times in circle (10) Row 2 - 2 dc in each st (20) Row 3 - \*dc, then 2 dc in the next st\* around (30) Row 4 - 8 dc in each st and join at the end of the last row (30) Row 9 - ch 1 and sc around (30) Ears (still use 9.Oo mm hook and super bulky yarn, and make 2): Ch 7. Hdc in the second from the ch. Hdc in the next two sts, dc in the next 2 sts and 4 dc in the last st. Working around the back side of the ch, dc in the next 2 sts, hdc in the Antlers, done in two parts (use 5.oOmm hook and reg worsted yarn): Part 1 - make 2 Start with a magic circle Row 1 - hdc 6 times in circle (6) Row 2 - \*hdc in the first st, 2 hdc in the next\* 3 times (9) Row 3 - 12 hdc in each st and join at the end of the last row (9) Leave a tail approx 6 inches long. Attach bells to the top of the magic circle (optional) - I find it's easier to do this at about row 3 before the antler gets too large.

Part 2 - make 2 Start with a magic circle Row 1 - hdc 6 times in circle (6) Row 2 - \*hdc in the first st, 2 hdc in the next\* 3 times (9) Row 3 - 7 hdc in each st and join at the end of the last row (9)

Leave a tail approx 6 inches long. Attach bells to the top of the magic circle (optional) - I find it's easier to do this at about row 3 before the antler gets too large. Nose (use reg worsted yarn): Make a small Pom Pom by using either a pom pom maker, or by wrapping yarn around 3 fingers approximately 50 times (more or less, depending on how small/large you want it to be). Leave a tail to sew on the beanie. Assembly: Take Part 1 of the antlers and slip over your index finger (l found this to be the easiest way). Using the tail on Part 2, attach the small antler to the large one. Weave in ends. Attach the antler to the crown of the beanie (l put them on the row outside of the magic circle. Attach ears on the side a few rows down from the antlers. I added bows to the antlers to make it more "girly". Add buttons and pom pom nose to the front of the beanie, and there you have it!!!


Child/Pre-Teen - 18-2O"
Beanie - use super bulky: Start with a magic circle Row 1 - dc 10 times in circle (10) Row 2 - 2 dc in each st (2o) Row 3 - \*dc, then 2 dc in the next st\* around (30) Row 4 - \*dc in the next 5 sts, then 2 dc in the next st\* (35) Row5 - 9 dc in each st and join at the end of the last row (35) Row 10 - ch 1 and sc around (35) Ears (still use 9.oO mm hook and super bulky yarn, and make 2): Ch 7. Hdc in the second from the ch. Hdc in the next two sts, dc in the next 2 sts and 4 dc in the last st. Working around the back side of the ch, dc in the next 2
Start with a magic circle Row 1 - hdc 6 times in circle (6) Row 2 - \*hdc in the first st, 2 hdc in the next\* 3 times (9) Row 3 - 14 hdc in each st and join at the end of the last row (9) Leave a tail approx 6 inches long. Attach bells to the top of the magic circle (option Start with a magic circle Row 1 - hdc 6 times in circle (6) Row 2 - \*hdc in the first st, 2 hdc in the next\* 3 times (9) Row 3 - 8 hdc in each st and join at the end of the last row (9)
Leave a tail approx 6 inches long. Attach bells to the top of the magic circle (optional) - I find it's easier to do this at about row 3 before the antler gets too large. Nose (use reg worsted yarn): Make a small Pom Pom by using either a pom pom maker, or by wrapping yarn around 3 fingers approximately 50 times (more or less, depending on how small/large you want it to be). Leave a tail to sew on the beanie. Assembly: Take Part 1 of the antlers and slip over your index finger (l found this to be the easiest way). Using the tail on Part 2, attach the small antler to the large one. Weave in ends. Attach the antler to the crown of the beanie (l put them on the row outside of the magic circle. Stuffing is optional in the antlers. Attach ears on the side a few rows down from the antlers. I added bows to the antlers to make it more "girly". Add buttons and pom pom nose to the front of the beanie, and there you have it!!!


Teen/Adult Small 2 1 "
Beanie - use super bulky: Start with a magic circle Row 1 - dc 10 times in circle (10) Row 2 - 2 dc in each st (20) Row 3 - \*dc, then 2 dc in the next st\* around (30) Row 4 - \*dc in the next 2 sts, then 2 dc in the next\* around (40) Row5 - 9 dc in each st and join at the end of the last row (40) Row 10 - ch 1 and sc around (4o) Ears (still use 9.oO mm hook and super bulky yarn, and make 2): Ch 7. Hdc in the second from the ch. Hdc in the next two sts, dc in the next 2 sts and 4 dc in the last st. Working around the back side of the ch, dc in the next 2 sts, hdc in the Antlers, done in two parts (use 5.oOmm hook and reg worsted yarn): Part 1 - make 2 Start with a magic circle Row 1 - hdc 6 times in circle (6) Row 2 - \*hdc in the first st, 2 hdc in the next\* 3 times (9) Row 3 - 14 hdc in each st and join at the end of the last row (9) Leave a tail approx 6 inches long. Attach bells to the top of the magic circle (optional) - I find it's easier to do this at about row 3 before the antler gets too large. Part 2 - make 2 Start with a magic circle Row 1 - hdc 6 times in circle (6) Row 2 - \*hdc in the first st, 2 hdc in the next\* 3 times (9) Row 3 - 8 hdc in each st and join at the end of the last row (9) Leave a tail approx 6 inches long. Attach bells to the top of the magic circle (optional) - I find it's easier to do this at about row 3 before the antler gets too large. Nose (use reg worsted yarn):
Make a small Pom Pom by using either a pom pom maker, or by wrapping yarn around 3 fingers approximately 50 times (more or less, depending on how small/large you want it to be). Leave a tail to sew on the beanie. Assembly: Take Part 1 of the antlers and slip over your index finger (l found this to be the easiest way). Using the tail on Part 2, attach the small antler to the large one. Weave in ends. Attach the antler to the crown of the beanie (l put them on the row outside of the magic circle. Stuffing is optional in the antlers. Attach ears on the side a few rows down from the antlers. Add buttons and pom pom nose to the front of the beanie, and there you have it!!!

Adult Medium - 22"
Beanie - use super bulky: Start with a magic circle Row 1 - dc 10 times in circle (10) Row 2 - 2 dc in each st (20) Row 3 - \*dc,then 2 dc in the next st\* around (30) Row 4 - \*dc in the next 2 sts, then 2 dc int he next\* around (40) Row 5 - \*dc in the next 7 sts, then 2 dc in the next\* around (45) Row 6 - 10 dc in each st and join at the end of the last row (45) Row 11 - ch 1 and sc around (45) Ears (still use 9.oO mm hook and super bulky yarn, and make 2): Ch 7. Hdc in the second from the ch. Hdc in the next two sts, dc in the next 2 sts and 4 dc in the last st. Working around the back side of the ch, dc in the next 2 sts, hdc in the last two stitches. Leave a tail to sew on the beanie. Antlers, done in two parts (use 5.oOmm hook and reg worsted yarn): Part 1 - make 2 Row 1 - hdc 6 times in circle (6) Row 2 - \*hdc in the first st, 2 hdc in the next\* 3 times (9) Row 3 - 14 hdc in each st and join at the end of the last row (9) Leave a tail approx 6 inches long. Attach bells to the top of the magic circle (optional) - I find it's easier to do this at about row 3 before the antler gets too large.

Part 2 - make 2 Start with a magic circle Row 1 - hdc 6 times in circle (6) Row 2 - \*hdc in the first st, 2 hdc in the next\* 3 times (9) Row 3 - 8 hdc in each st and join at the end of the last row (9) Leave a tail approx 6 inches long. Attach bells to the top of the magic circle (optional) -1 find it's easier to do this at about row 3 before the antler gets too large.

Nose (use reg worsted yarn): Make a small Pom Pom by using either a pom pom maker, or by wrapping yarn around 3 fingers approximately 50 times (more or less, depending on how smal/large you want it to be). Leave a tail to sew on the beanie. Assembly: Take Part 1 of the antlers and slip over your index finger (l found this to be the easiest way). Using the tail on Part 2, attach the small antler to the large one. Weave in ends. Attach the antler to the crown of the beanie (l put them on the row outside of the magic circle. Stuffing is optional in the antlers. Attach ears on the side a few rows down from the antlers. Add buttons and pom pom nose to the front of the beanie, and there you have it!!! -PAGE 6 -


Adult Large - 23"
Beanie - use super bulky: Start with a magic circle Row 1 - dc 10 times in circle (10) Row 2 - 2 dc in each st (20) Row 3 - \*dc, then 2 dc in the next st\* around (30) Row 4 - \*dc in the next 2 sts, then 2 dc int he next\* around (40) Row 5 - \*dc in the next 3 sts, then 2 dc int he next\* around (50) Row 6 - 10 dc in each st and join at the end of the last row (50) Row 11 - ch 1 and sc around (5o) Ears (still use 9.oO mm hook and super bulky yarn, and make 2): Ch 7. Hdc in the second from the ch. Hdc in the next two sts, dc in the next 2 sts and 4 dc in the last st. Working around the back side of the ch, dc in the next 2 sts, hdc in the last two stitches. Leave a tail to sew on the beanie. Antlers, done in two parts (use 5.oOmm hook and reg worsted yarn): Part 1 - make 2 Row 1 - hdc 6 times in circle (6) Row 2 - \*hdc in the first st, 2 hdc in the next\* 3 times (9) Row 3 - 14 hdc in each st and join at the end of the last row (9)
Leave a tail approx 6 inches long. Attach bells to the top of the magic circle (optional) - I find it's easier to do this at about row 3 before the antler gets too large. Part 2 - make 2 Start with a magic circle Row 1 - hdc 6 times in circle (6) Row 2 - \*hdc in the first st, 2 hdc in the next\* 3 times (9) Row 3 - 8 hdc in each st and join at the end of the last row (9)
Leave a tail approx 6 inches long. Attach bells to the top of the magic circle (optional) -1 find it's easier to do this at about row 3 before the antler gets too large. Nose (use reg worsted yarn): Make a small Pom Pom by using either a pom pom maker, or by wrapping yarn around 3 fingers approximately 50 times (more or less, depending on how small/large you want it to be). Leave a tail to sew on the beanie. Assembly: Take Part 1 of the antlers and slip over your index finger (l found this to be the easiest way). Using the tail on Part 2, attach the small antler to the large one. Weave in ends. Attach the antler to the crown of the beanie (l put them on the row outside of the magic circle. Stuffing is optional in the antlers. Attach ears on the side a few rows down from the antlers. Add buttons and pom pom nose to the front of the beanie, and there you have it!!! - PAGE 7 -


