Flower Power Scrubbie Wren Couture Designs
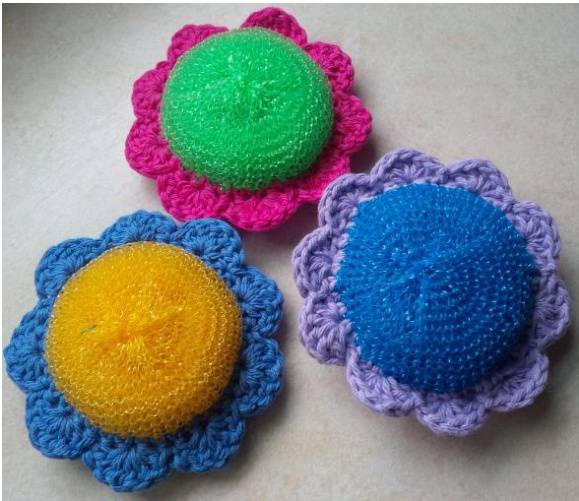
A cute crochet flower dish scrubbie to power away grim and add some sunshine to your kitchen sink. This pattern is written for the size of scrubbie that comes in the 3 pack for \$1 at Wal-Mart that have a diameter of 3in (7.5cm). I've found that the scrubbies found at The Dollar Tree are slightly bigger, measuring at 3.25in (8cm). This pattern can easily be modified to fit the larger sized scrubbie by using a larger sized hook or double crochet instead of half double crochet for the base. Gauge is not essential, just be sure to check that your base disc is the same diameter as your scrubbie before starting attachment row.
Techniques:
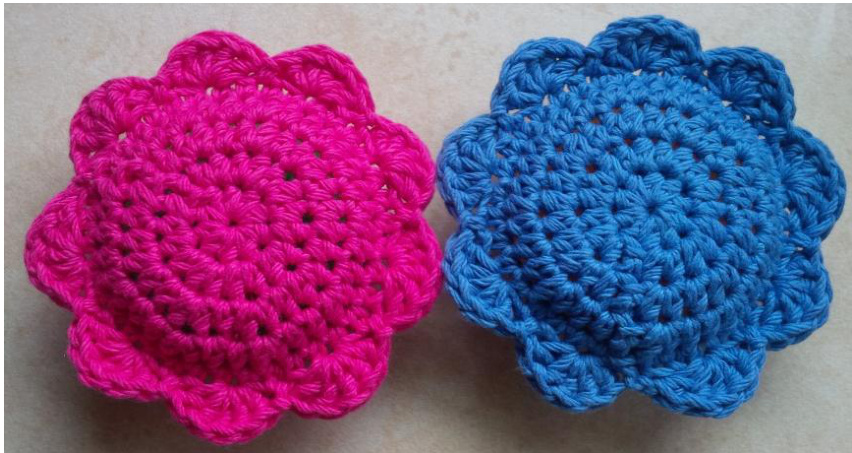
These scrubbies are worked in the round using the Magic Ring technique popular in amigarumi patterns. A great tutorial by Emi Harrington is available at www.alfreecrochet.com. Each round of the base starts with 2 chain stitches. The first half double crochet stitch of the round is worked in the same stitch the joining slip stitch was worked in. The chain stitches at the beginning of each row are not counted in the stitch count. The base is worked first and then attached to the scrubbie by inserting your hook into the outer edge of mesh and working a single crochet stitch (see picture on last page). Scallops are then worked onto the row of single crochet stitches for a nice flowery finish.
Materials:
Approx. 15 yards (13m) of worsted weight, cotton yarn for dishcloths. Shown in Peaches and Creme. US size F (3.75mm) crochet hook Round plastic mesh scrubbie Stitch marker to mark beginning of each row (optional) Abbreviations: rnd - Round st - stitch ch - chain stitch sc — single crochet hdc - half double crochet dc - double crochet sl st - slip stitch
Circular Base
Rnd 1: Ch 2, 9hdc using magic ring technique; sl st into 1st hdc to join. Synch tightly to close loop. (9 sts) Rnd 2: Ch 2, 2hdc in same st as the joining sl st; 2hdc in each st round; sl st to join. (18 sts) Rnd 3: Ch 2, \*hdc, 2hdc in next st\* repeat sts between \* round; sl st to join. (27 sts) Rnd 3: Ch 2, \*2 hdc, 2hdc in next st\* round; sl st through base and outside scrubbie edge mesh to join. (36 sts)SeephotoAbelow Attachment rnd: Ch 1, sc in each st (picking up the outside scrubbie edge mesh) round; sl st to join. (36 sts) See photoB-Dbelow Rnd 5: sk the sc joining sl st was worked in, sk 1 sc, \*5dc in next st, sk 1 sc, sl st in next sc, sk 1 sc\* round; ending final scallop with a sl st into the same stitch as the joining sl st from the previous round was worked. (9 scallops in total) Fasten off and pull end under to hide.
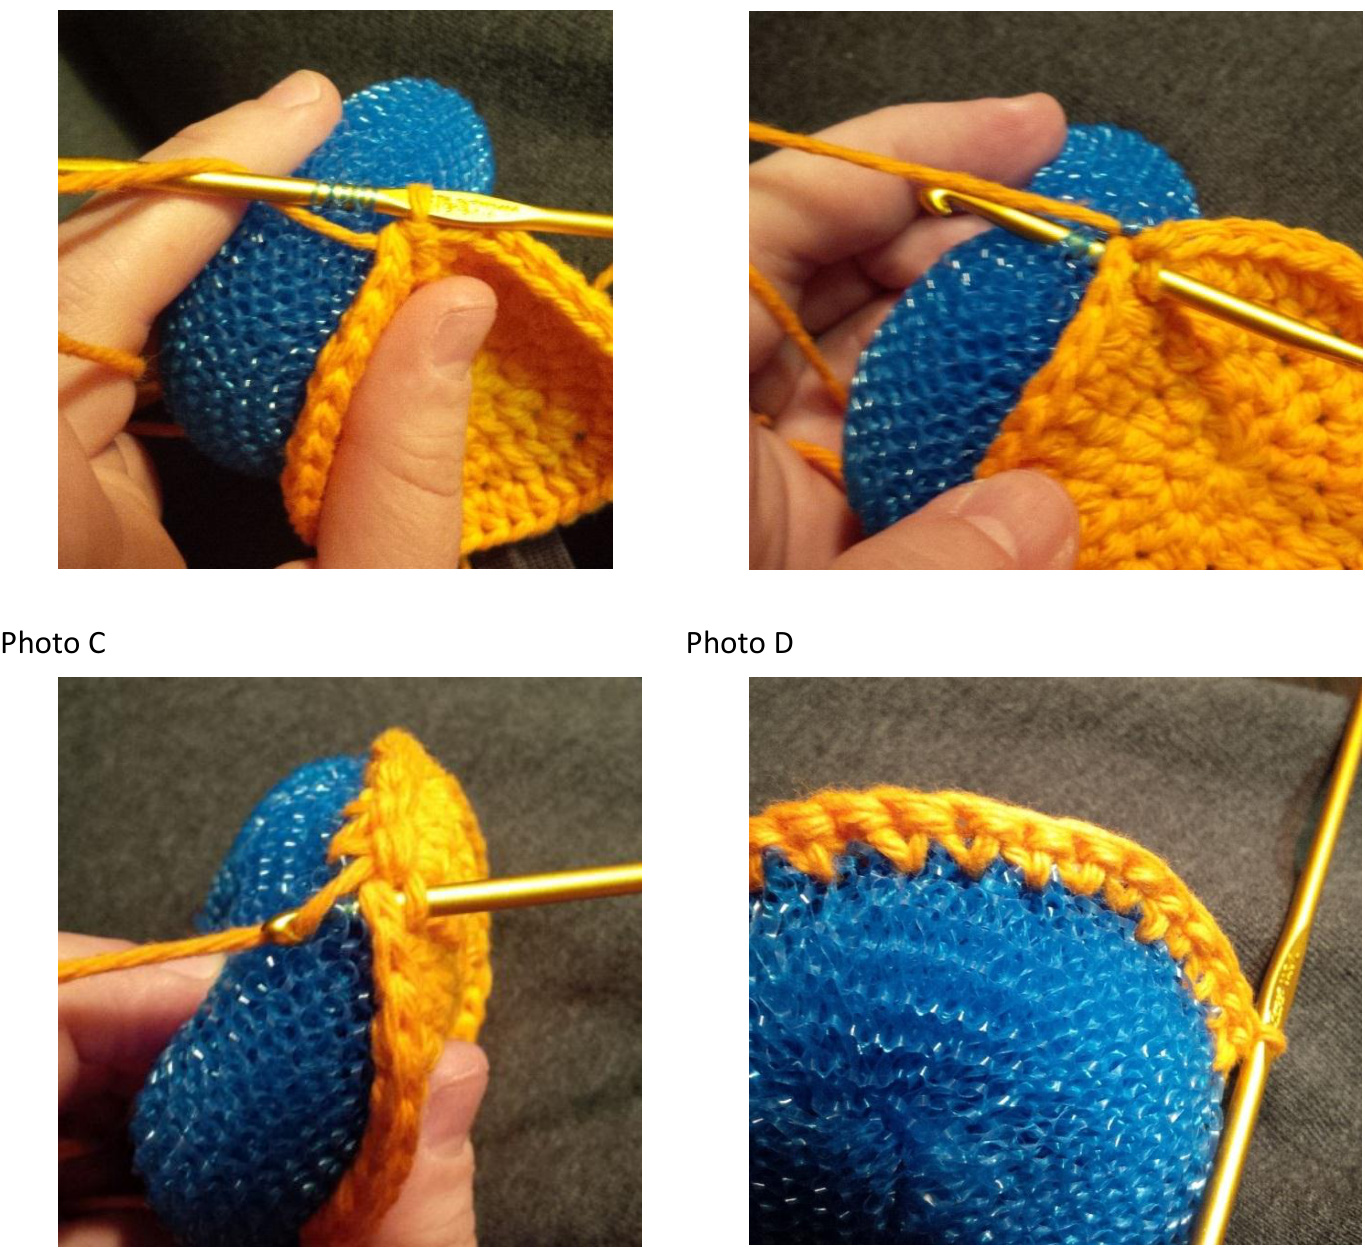
Photo A Photo B


