Double-Sided Crochet
I don't know what this stitch is called but it uses two contrasting yarns which alternate on each row. You end up with a fairly bulky fabric with a different color on each side. Depending on the size of the hook and yarn weight, you can end up with a heavy, dense fabric to keep even the coldest day at bay, or a lighter (relatively anyway) fabric. This can be used for any project that needs to be thick, such as potholders, trivets, afghans, baby blankets, and even bedspreads.
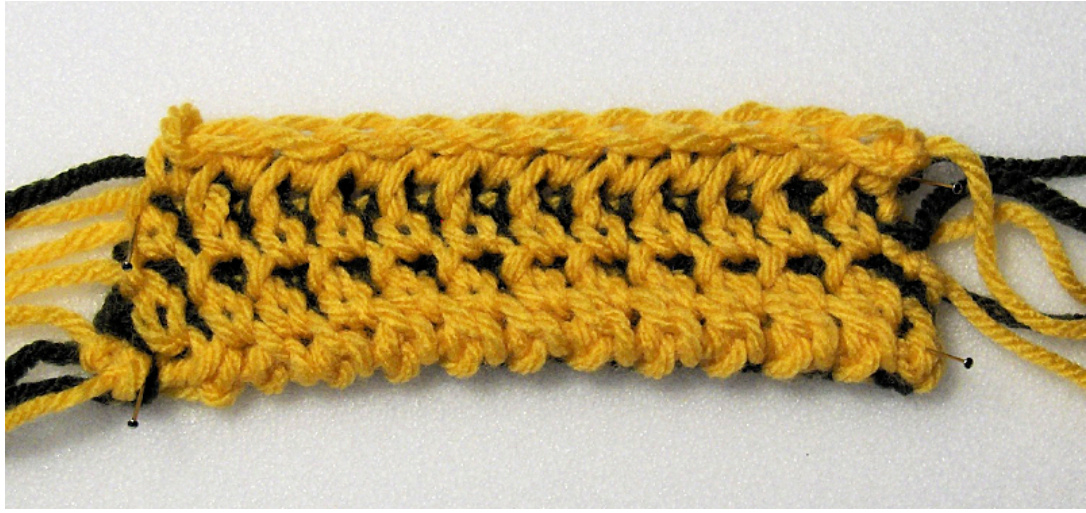
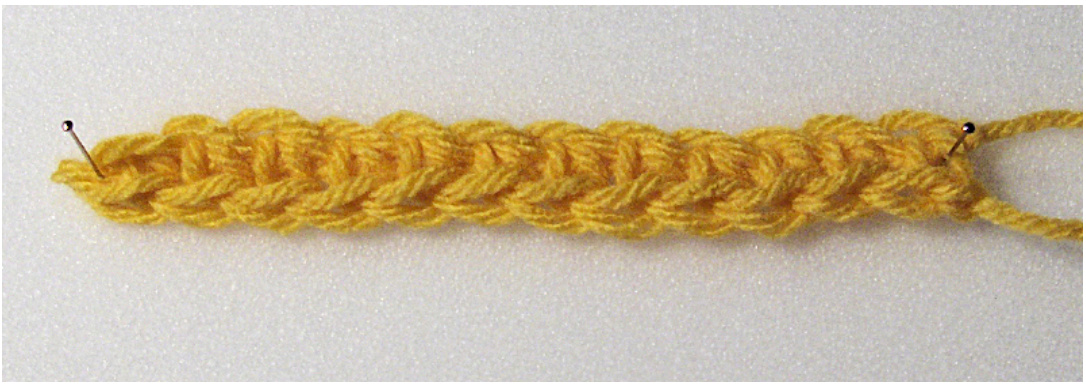
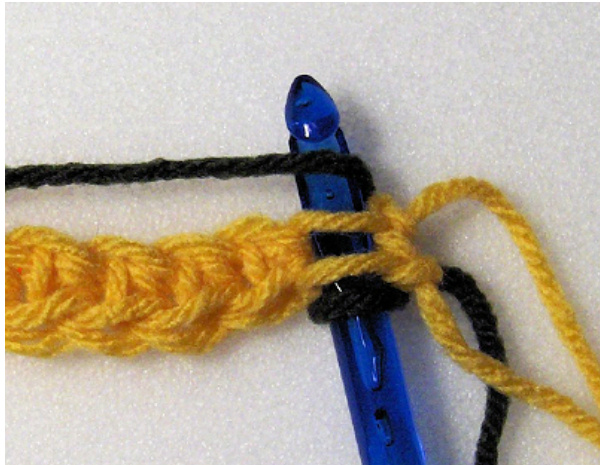
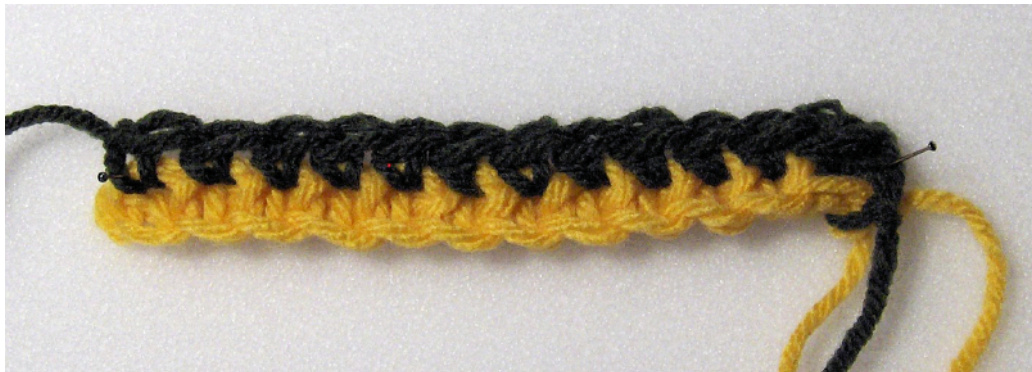
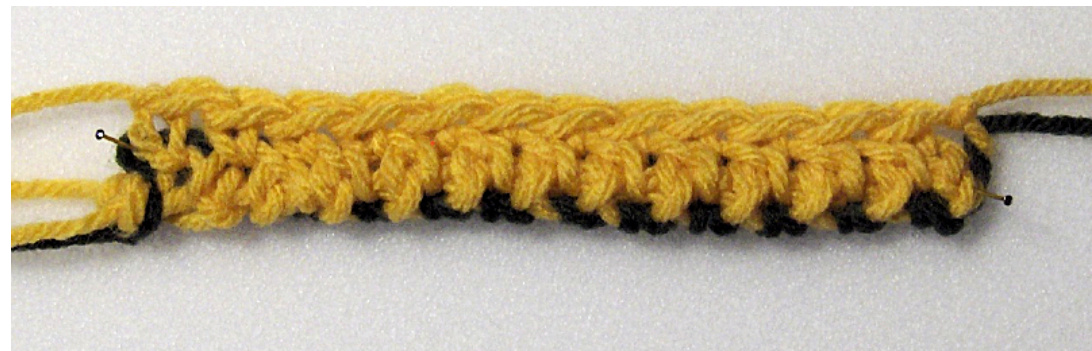
Supplies: Crochet Hook: Use hook recommended for yarn for a tighter, more dense fabric. Use a larger hook for a looser, less dense fabric. Yarn: Two contrasting yarns, any weight depending on project. Stitches used: ch - chain sl st - slip stitch sc - single crochet YO - yarn over reverse sc - reverse single crochet Decide which yarn will be A (main color) and B (secondary color). Depending on your project, decide on the dimensions needed, especially the side of the fabric as this willbe needed to make your base ch. You'll also need to decide how long your fringe willbe. An afghan or bedspread would look well with a $4^{\circ}$ fringe, while a potholder or trivet would probably work better with a $1.2^{\bullet}$ fringe. Double-Sided Crochet Row 1: With A, make a base ch long enough for the side of your project, plus one ch. Sc in second ch from hook and in each ch across. Cut the yarn long enough for your fringe, pull through last loop on hook and tighten to fasten off. Turn piece so end of row (with tails) is on the right side of piece.
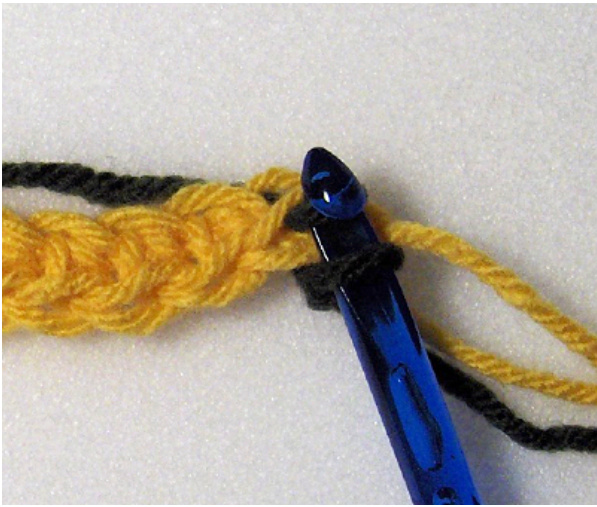
Row 2: With B, make a loop leaving enough yarn for your fringe as the tail, pick up a single loop from the original base chain then a single loop from the top of the first sc row. YO and pull through two loops on hook, YO and pull through remaining loops on hook. Repeat to end of row. Cut the yarn long enough for your fringe, pullthrough last loop on hook and tighten to fasten off. Turn piece so end of color B row is on the right side of piece.
Details:
1. Pick up loop from original base chain.
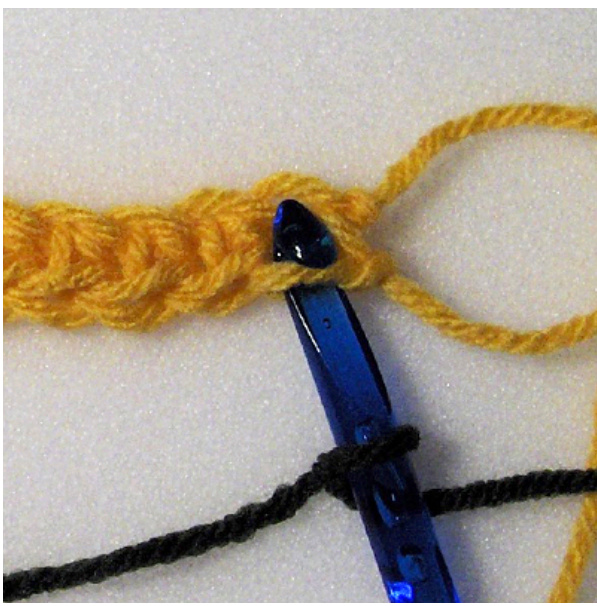
Double-Sided Crochet 2. Pick up loop from top of first sc row.
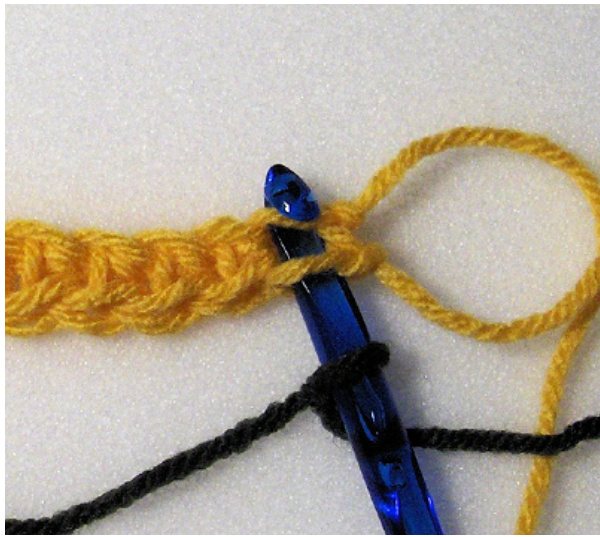
3. Yarn over
4. Pull loop through two loops on hook (color A).
Double-Sided Crochet 5. Yarn over and pull through remaining two loops on hook.
6. Repeat to end of row.
7. Fasten off.
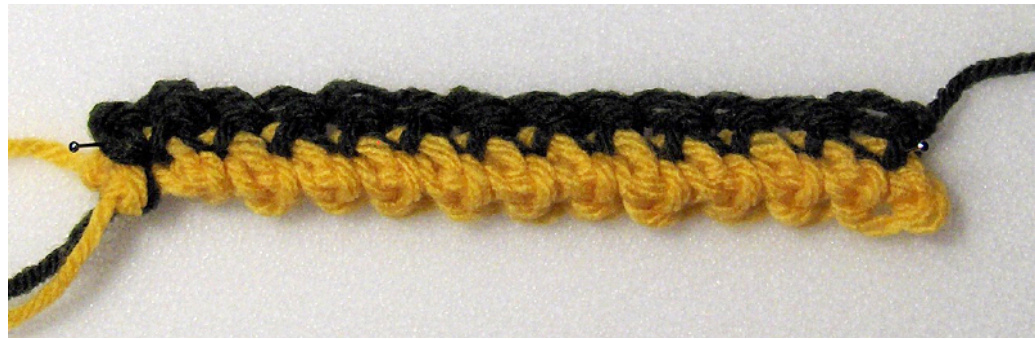
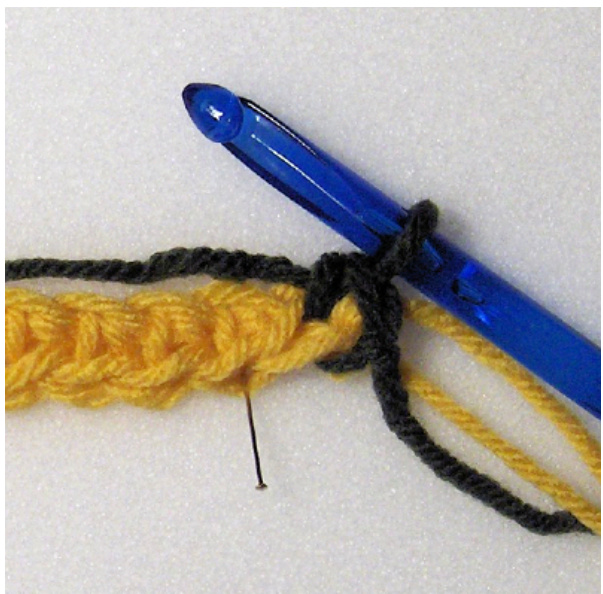
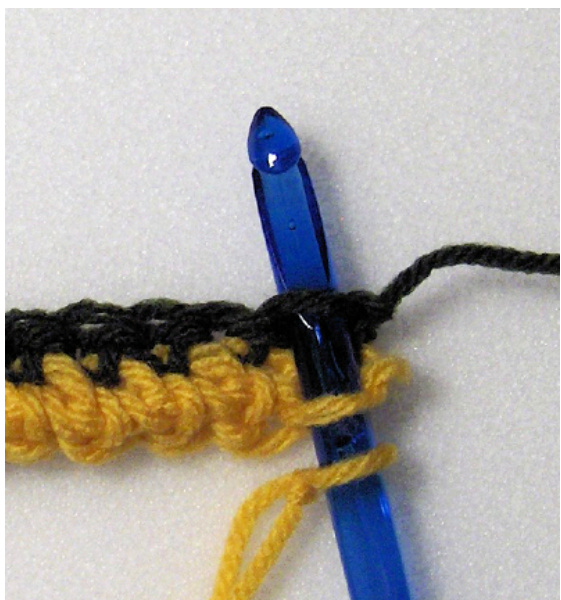
Row 3: This row is done exactlylike row 2 except, instead of picking up both loops of the previous color, we'll pick up on loop of A and one of B. With A, make a loop leaving enough yarn for your fringe as the tail, pick up a single loop from the first sc row and a single loop from the Color B row. YO and pullthrough two loops on hook (color A & color B loops), YO and pull through both loops on hook. Repeat to end of row. Cut the yarn long enough for your fringe, pullthrough last loop on hook and tighten to fasten off. Turn piece so end of color A row is on the right side of piece.
Details:
1. Pick up loop from first sc row and from first color B row.
Photos and instructions copyright $\copyright$ 2008 CatBird Studios. Double-Sided Crochet 2. Yarn over and draw through two loops on hook. Yarn over and draw through remaining loops on hook.
3. Repeat to end of row and fasten off.
4. Turn piece so end of color A row is on the right side.
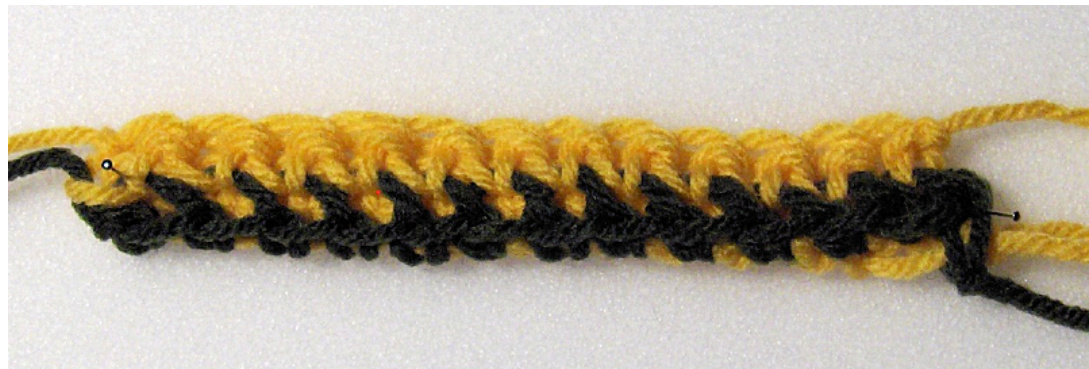
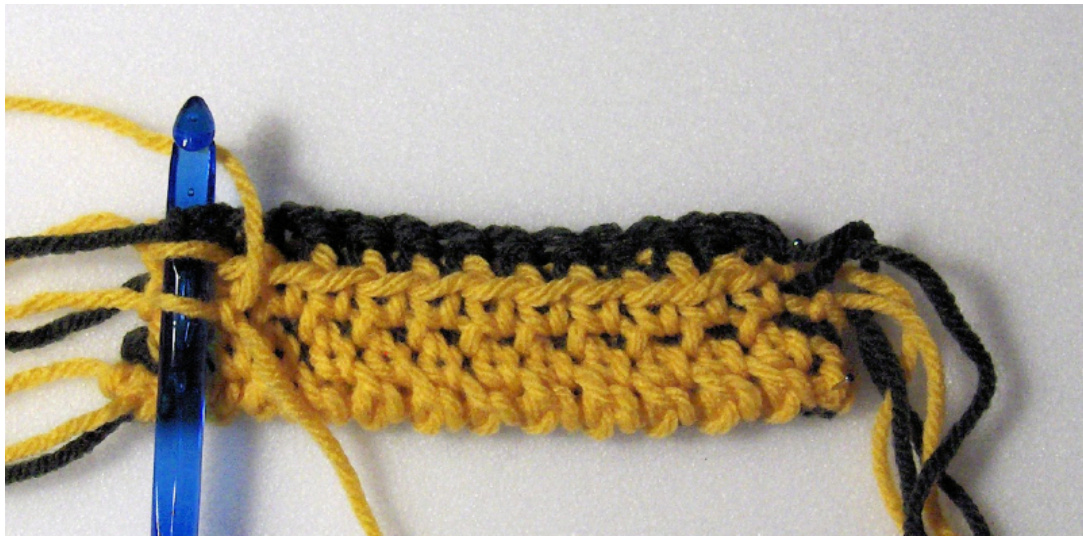
Double-Sided Crochet Row 5 to end: Repeat row 3 with A then B, repeating until piece is as long as needed, ending with B and turning piece at end of each row so end of row just completed is at the right side of piece.
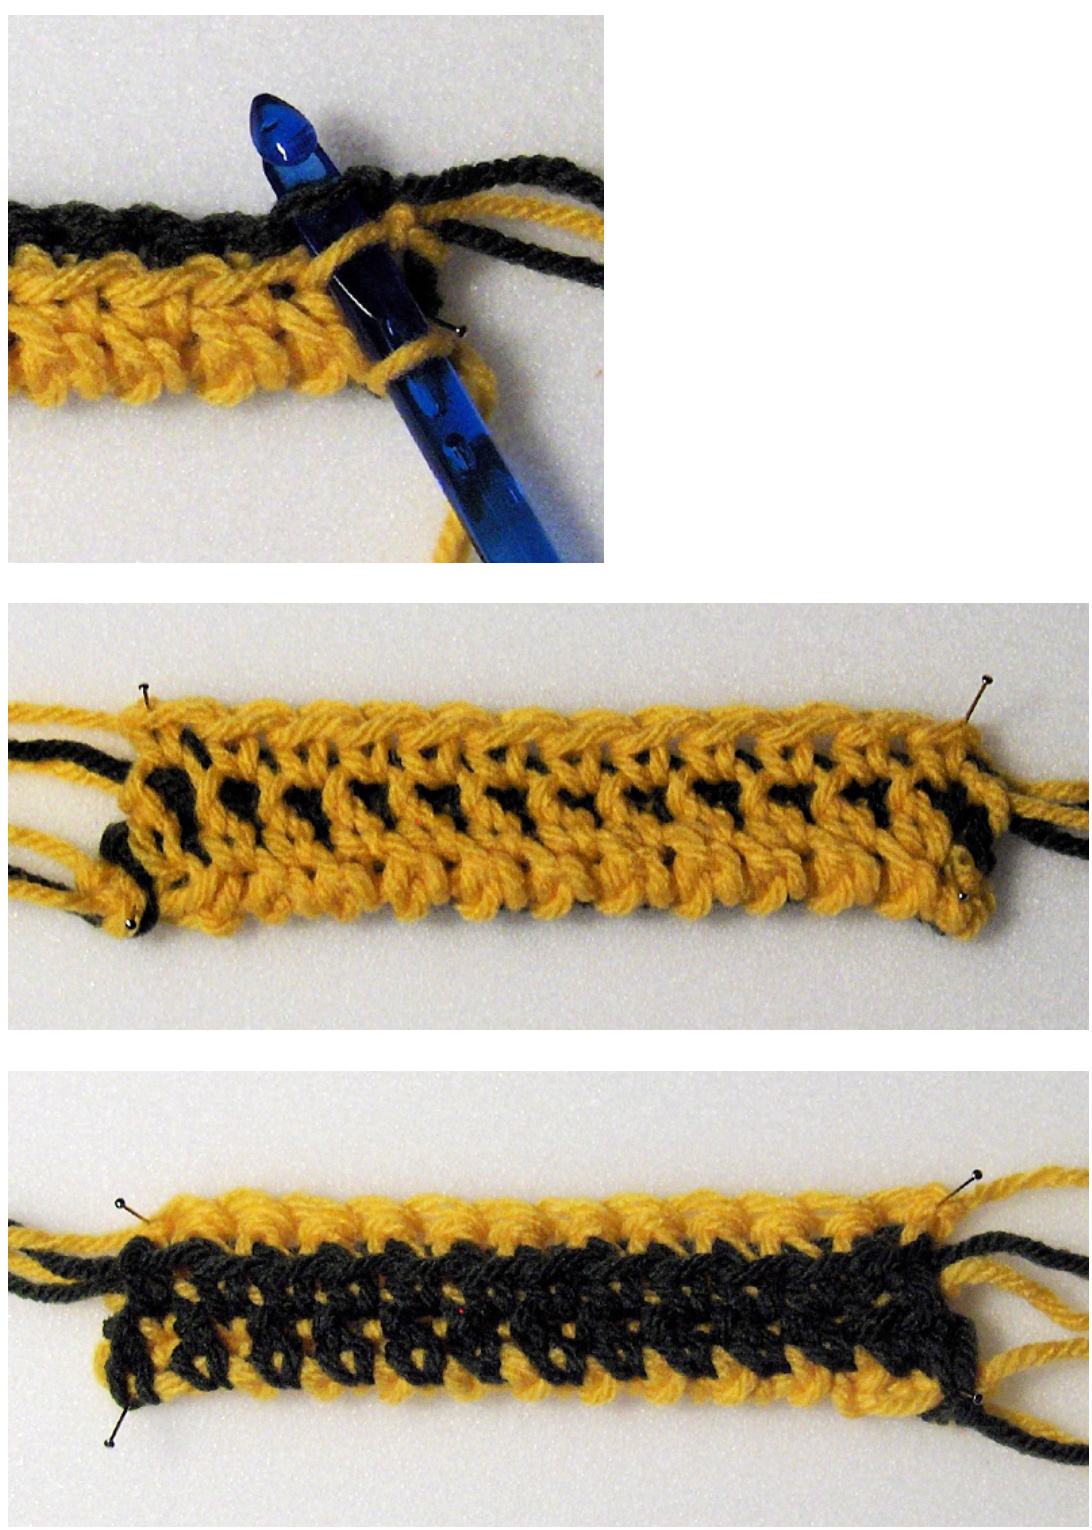
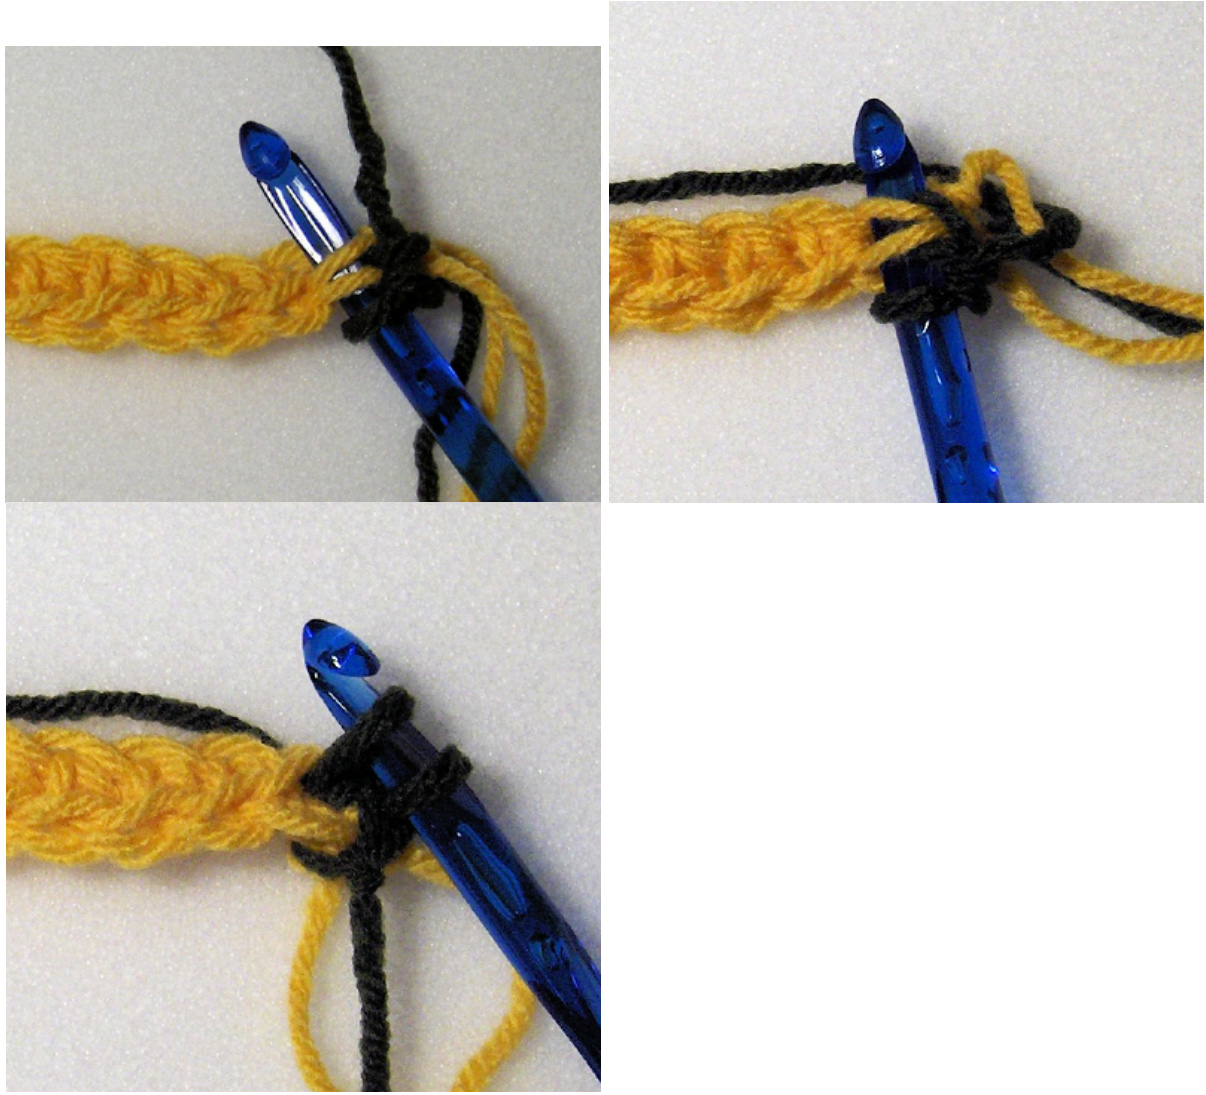
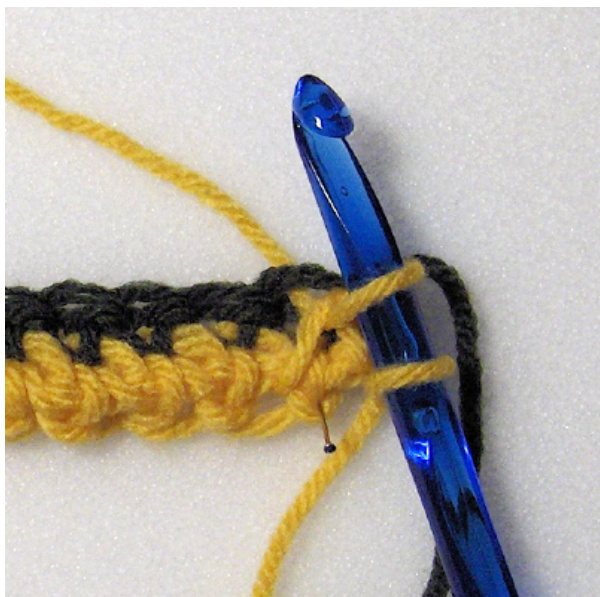
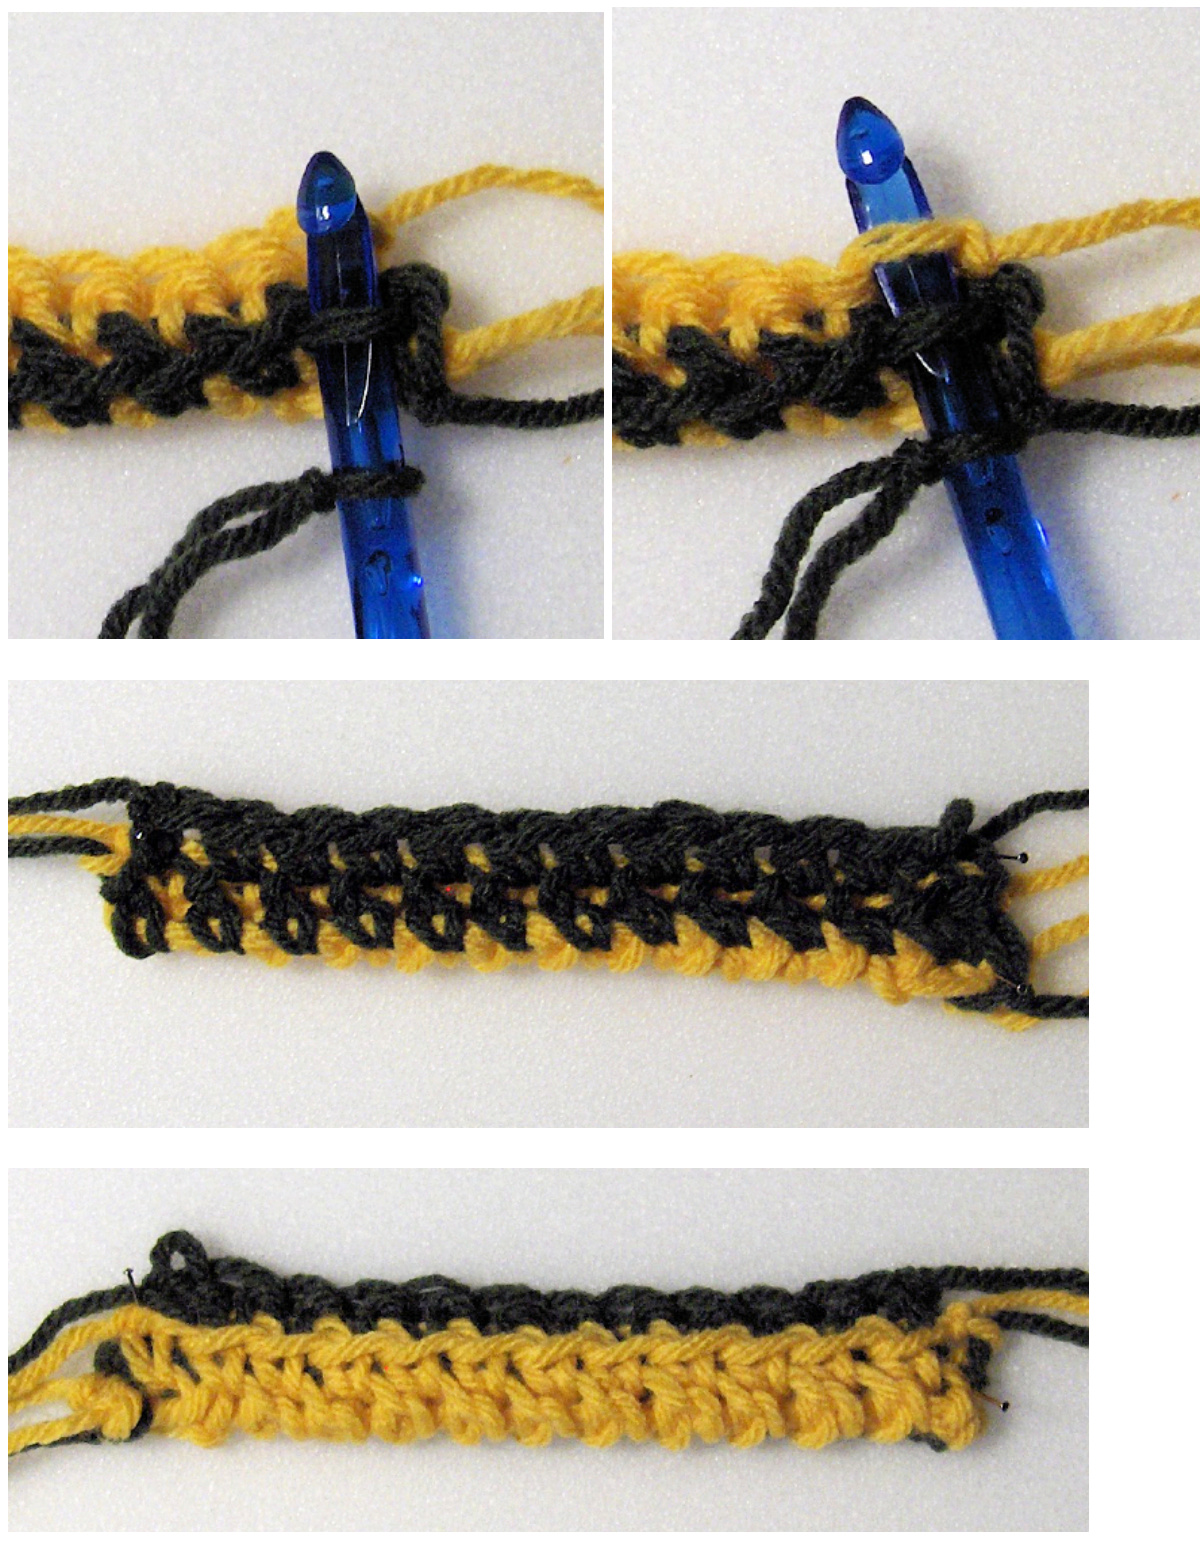
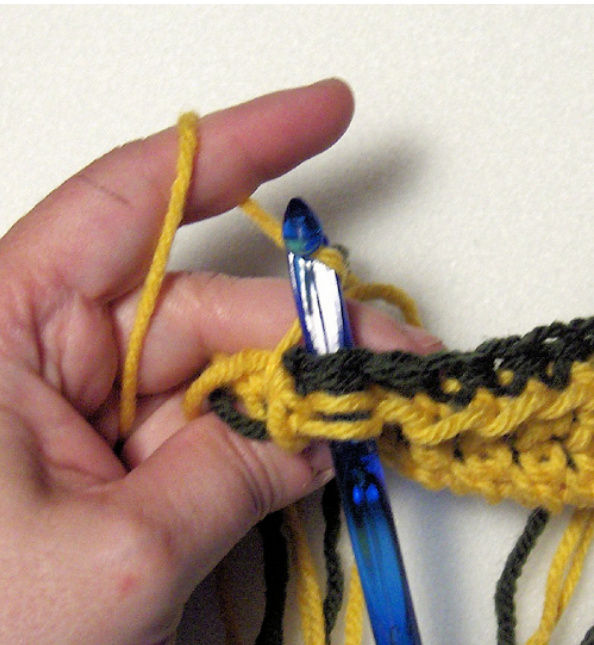
Finishing row - reverse sc: Start at left side of piece. With A, make a loop leaving enough yarn for your fringe as the tail. pick up a single loop from the last color A row and a both loops from the top color B row. YO from back of hook over to front of hook and pull through three loops on hook (color A & color B loops), YO and pullthrough both loops on hook. Repeat to end of row. Cut the yarn long enough for your fringe, pull through last loop on hook and tighten to fasten off. Turn piece so beginning tail of A is on the right side of piece. Photos and instructions copyright $\copyright$ 2008 CatBird Studios. Double-Sided Crochet Flip piece so beginning base chain is at top, start at left side and make a row of reverse sc to end so it matches the other end.
Details:
1.Starting at lft side, with A, make loop on hk, pick up single lop frm previus clr A row and both loops from top of last color B row.
Four loops on hook.

Double-Sided Crochet
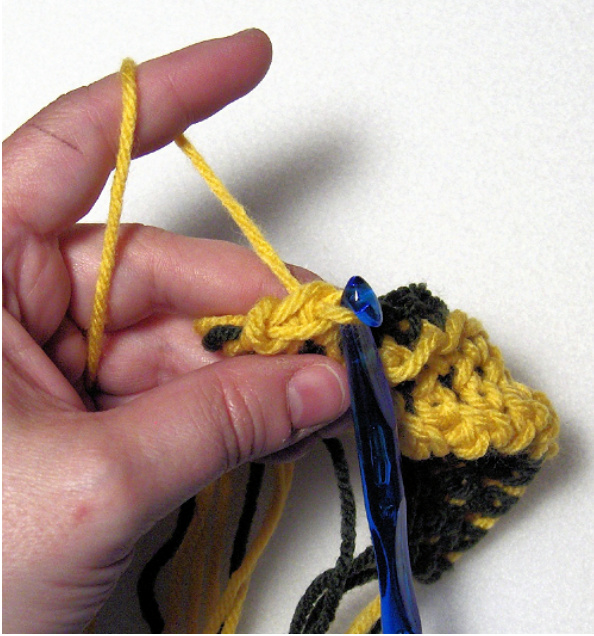
2.Yarn over from back of hook over to front of hook, pullthrough three loops on hook.
3. Yarn over and pull through both loops on hook.
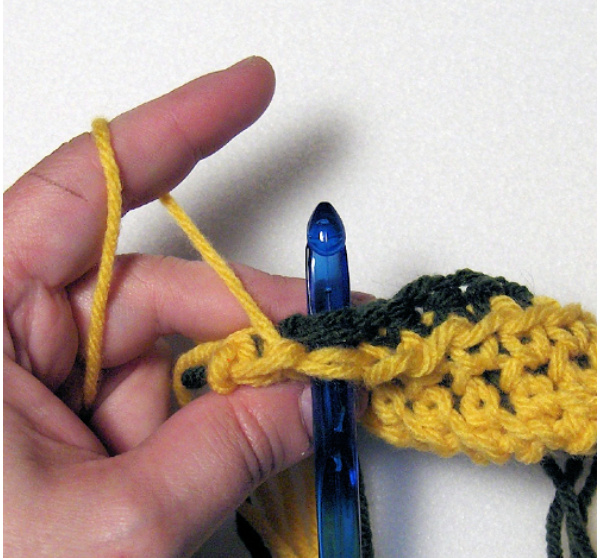
4. Pick up single loop from next color A sc to right of stitch just made, then two loops from top of the color B row above. YO from back to front of hook, pull through three loops on hook. Yarn over, pull through both loops on hook.

Fringe: Cut lengths of A and B that are double your fringe length plus one inch. Select several of the fringe pieces depending on how thick you'd like the fringe. Fold each set in half, pull loop through ends of each row along edge of piece, add original fringe ends to the new ends and pull ends of yarn through the loop and pull to tighten. Repeat until both edges are fringed. Trim all fringe ends to your selected fringe length. Useage rights: I learned this technique when I was asked to help decipher a “family pattern’ that wasn't understood by the current generation of crocheters. These instructions are my re-creation of this technique and over the last day or so, I've found a couple of references to it on the Internet, but no instructions for it. Because of this, anything you make using this technique, is yours to do with as you please. You can sell or give away your projects no matter how many you make. Just don't sell these instructions but you can print them out to teach others how to do it. Also, please don't include these instructions in a pattern without my permission.


