Jessi's Socks
by pinneguri
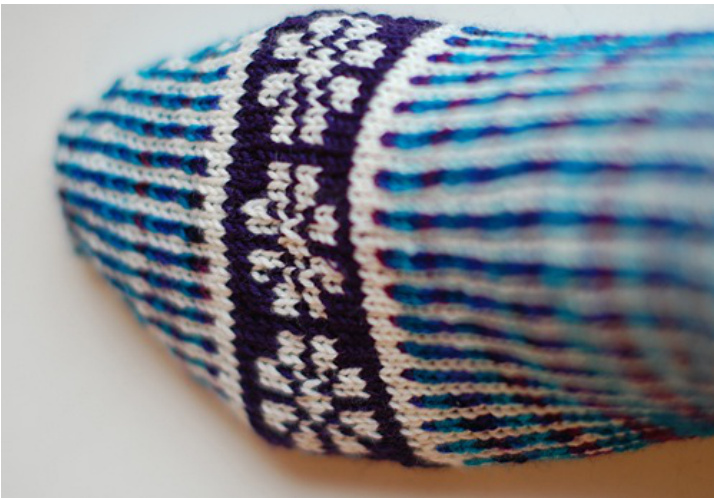
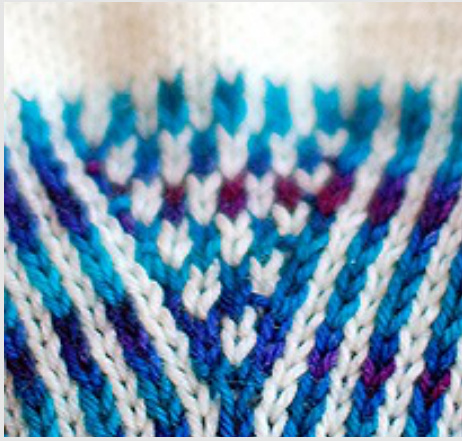
When I first discovered Wollmeise yarn, it was a challenge for me, as for many others, to get my hands on it. Jessi from Germany sold me some of my first skeins, at a friendly price. As a warm thank-you to her, I named one of the first pairs of socks that I designed myself "Jessi". The socks are knit toe-up with Judy's Magical Cast On. The heel is a mixture of a gusset heel and short rows, a good heel for those with a high instep, like me. With this technique, there are some extra stitches in the ankle when the heel is finished, which are decreased later. But with these stripes it works very well and looks beautiful. The cuff is double thickness and is cast off on the inside by knitting it in (see the explanation below) When knitting the stripes, one color will stand out, depending on how you hold the yarn. If you want the white stripes to stand out, hold the white yarn closest to you on your index finger. If you want the contrast color to stand out, hold the contrast color yarn closest to you on your index finger. If you want the two colors to be relatively equal, rather than holding each in a consistent position, you will need to mix them up a little.
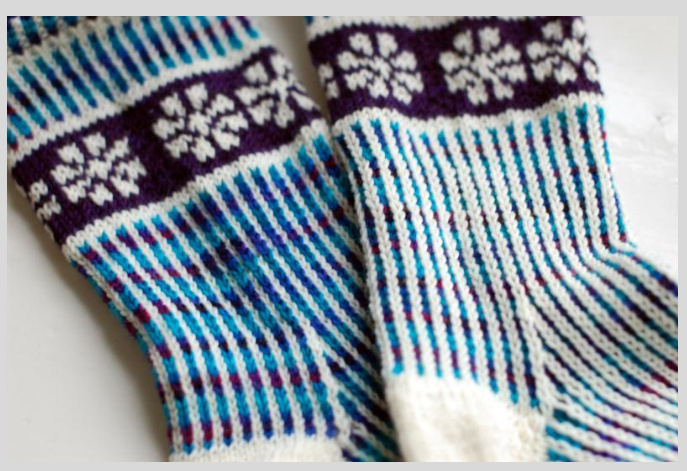
Yarn: Wollmeise Twin in white (MC) and two contrast colors (CC1 and CC2). In the blue socks, the blue is Am Kalten Polar in Fluffy Wild Thing, and the purple is Eine Klein Wenig Verrucht in Twin Needles: US 1 1/2 / 2.5 mm Sizes: It is the easiest thing in the world to make these socks shorter or longer and narrower or wider, to fit. Add in 2, 4, 6, etc stitches in each side, and knit the foot shorter or longer. The directions given here are for ladies size 38/23 cm (Us 7 1/2 ) Important stitch counts: Toe: 24 - Around the foot: 64 - Around the heel: 76 - Around the ankle: 64 - Ribbed cuff:66
Abbreviations
M - make (increase) one stitch by picking up and knitting into yarn between stitches in the row below W&T - wrap & turn - short rows, where you wrap the last stitch, turn the work and knit in the opposite direction, wrapping and turning again, following pattern directions
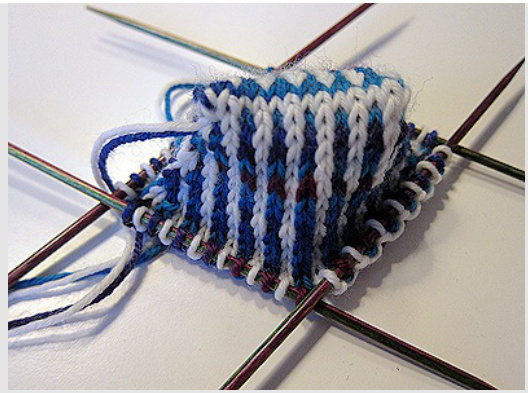
Cast on
Cast on 24 st in MC and CC1 with Judy's Magic Cast On. You have 12 stitches on each needle, 12 MC and 12 CC1; in Diagram 1 you see the side that starts with CC1, on the other side the first row will be MC. Feet are different If you follow these instructions, you will have a pointed toe - which fits people with a long big toe. If your foot is wider, you can cast on more stitches, and either increase every 3rd row or aim for a shorter toe area.
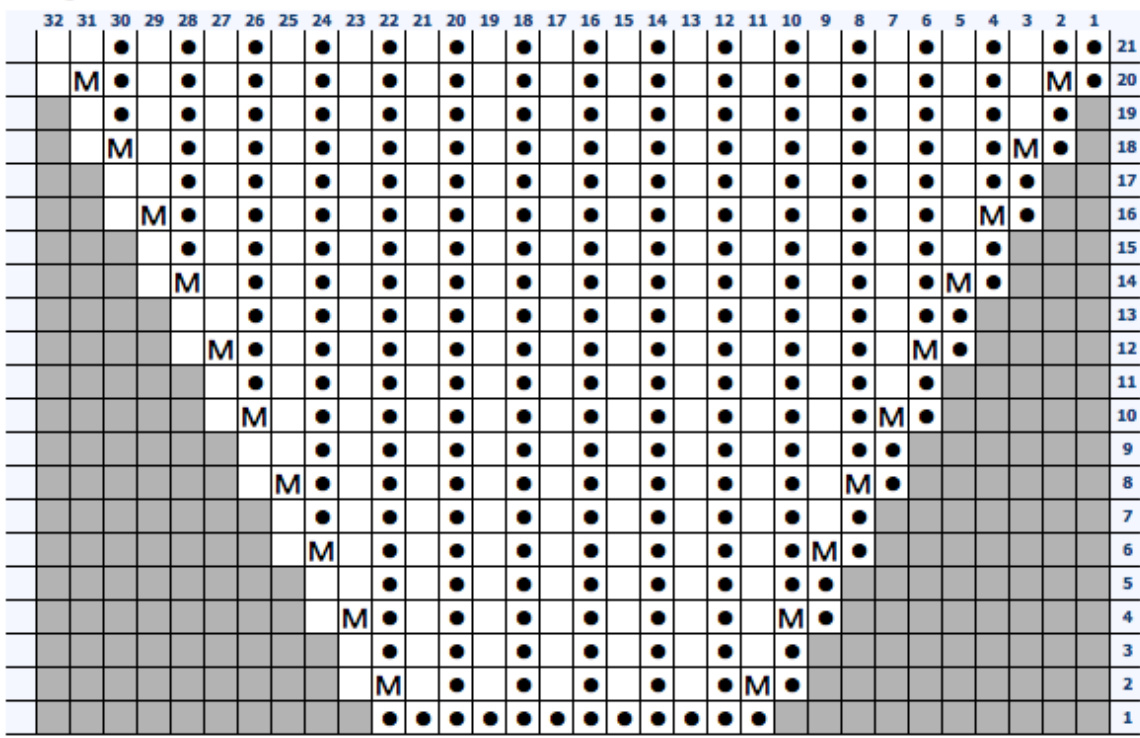
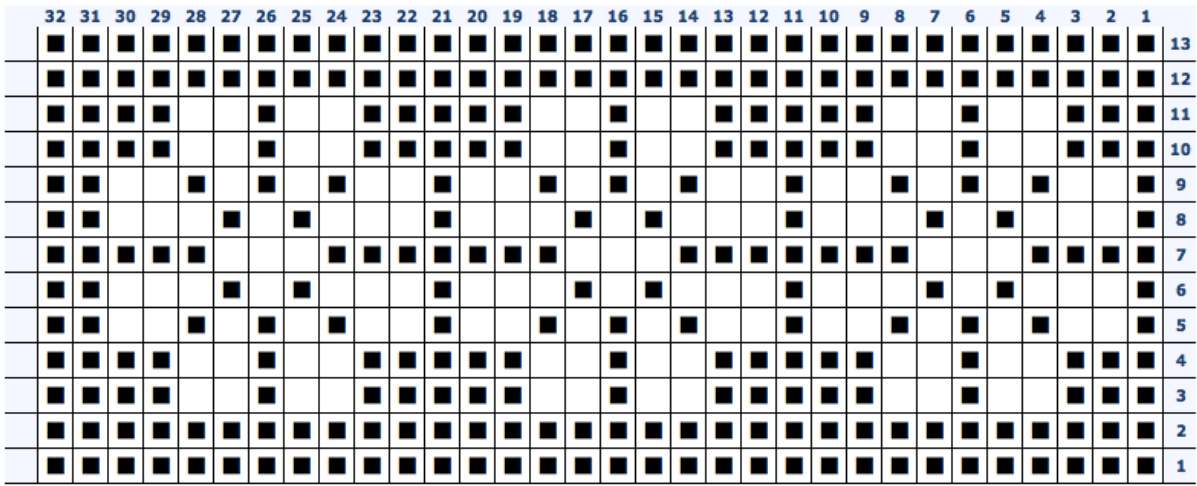
Follow Diagram 1 to increase to 64 st, cut CC1
Diagram 1
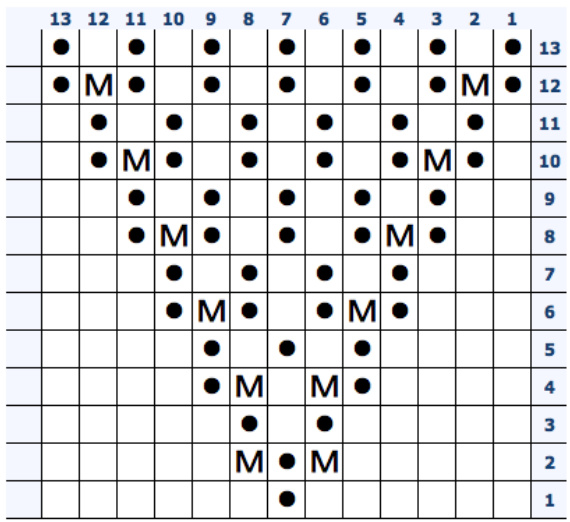
You can switch to double-pointed needles whenever you choose. Knit 2 r in MC, knitting in the end of your CC2 yarn, and start Diagram 2.
Diagram 2
Foot and gusset
When you have finished Diagram 2, cut CC2 yarn, knit in the end of the CC1 yarn, and knit 2 r in MC before continuing with the stripes as before Diagram 2. Knit 10 r of stripes (15 cm/6" from the tip of the foot, or as long/short as you wish). You will now knit a little gusset under the foot, which allows room for a high arch/instep. On either side of the center stitch on the sole side, increase 1 st (total increase 2). Continue increasing every other row until you have increased 12 sts - see diagram 3. Knit until you are on the last round of the gusset, the round without increases. You will now start the heel.
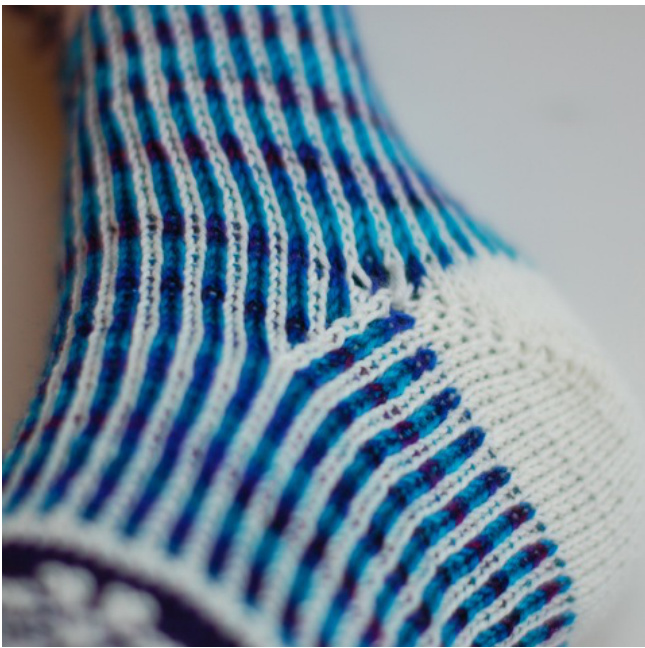
Heel
The heel is knitted with the 13 center sts, plus 12 on each side - a total of 37 st. The remaining 39 sts are idle. Knit 12 sts, knit the 13 gusset sts (the 12 you increased plus the center stitch that you started the gusset with), and knit to the 12th st on the left side of the gusset. You leave the contrast color yarn here and continue using just the main color. Wrap and turn the 37th stitch, purl back to the last (first) st, w&t, and knit to the stitch before the w&t stitch from the previous row (36th st). W&t, purl back, and continue this way, wrapping the next-to-last stitch each time, until you have 8 wrapped st on each side (16 sts total). Now you are going to knit the wrapped stitches. Knit to the first wrapped st on the left side, pick up both the wrap and the stitch, and knit them together. Wrap the next stitch, turn, and purl back to the first wrapped stitch on the right side. Purl the wrap and the stitch together, wrap the next stitch, and turn. Knit back across to the next wrapped stitch, pick up the wrap and knit it with the stitch, wrap the nest, turn, and purl back. Continue in this way until you have knit the last (8th) stitch on the left side, with one wrapped stitch left on the right side.
Pick up the contrast color strand that you left hanging at the beginning of the heel and start knitting stripes again, and when you reach the st that is still wrapped on the right side, knit it in the usual way, picking up the wrap and knitting it together with the stitch.
Leg
Now you'll decrease the 12 sts you increased in the sole, decreasing 1 st every other row, a total of 6 times. The back of the sock is facing you, and the new row/round starts on the left side. Knit 2 st together. Knit across the front, to the other side, and decrease 1 st by slipping 1 stitch, knitting the next stitch, and slipping the slipped stitch over the knit stitch (or ssk). Knit 1 round, decrease the same way. The decreases should be done consistently with ONE color. Continue with the stripe pattern until there are 64 sts left. Continue knitting, either 30 r (ca 9-10 cm, 3 %-4"), or as short or long as you wish. Knit Diagram 2 one more time, and place it the same way you did on the foot, with 2 r in MC before and after the pattern. If you decide to do a relatively long leg, it's a good idea to increase 1 st on each side every 5th row after you have finished the second Diagram 2 pattern. Otherwise, continue with the stripe pattern another 10 r (3-4 cm, 1 %").
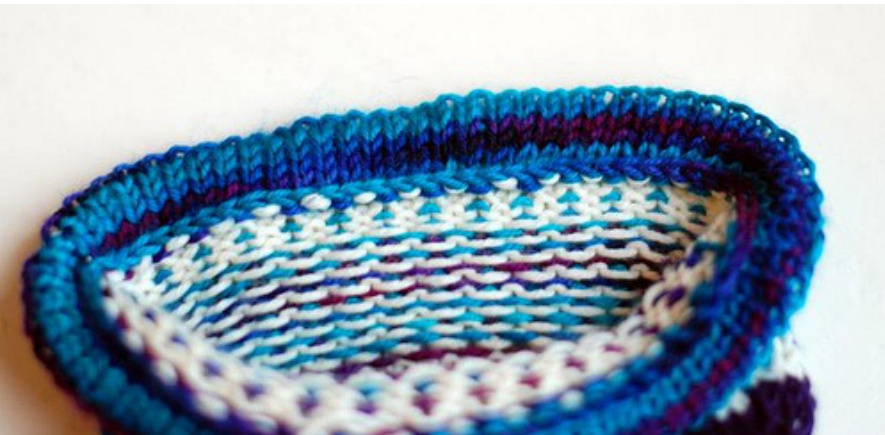
Cuff
Knit 2 r in MC. The stripes will be switched, MC over CC and vice versa. Start the cuff, K1 in CC, P1 in MC, 5 rounds. Cut the MC strand and knit 1 r CC, then purl 1 r CC, then knit 5 r CC. You can either cast off the a long strand, stitching them in on the inside of the sock, or knit the cuff stitches in. If you want to knit the stitches in, you can do it like this: pick up 1 stitch from the row rows below where you purled a row, and knit that stitch together with 1 stitch from your live stitches. Repeat this in the next stitch, then cast the first stitch off, over the second stitch. Repeat these two steps until all stitches have been cast off. Knit sock #2, weave in the ends - done!
Tip for sock #2:
To make the gusset on the sole of the foot identical to the other sock (with the gusset framed either by the main color or the contrast color) it is important to start the stripes on both socks with the same color. In other words, either start with the CC on both, or the MC on both. This pattern was written by Ann Myhre / pinneguri, and was first published in January 2011. Thank you to Liv Dahlseng Dstebg who was kind enough to test knit the Norwegian edition, and it was translated by Anne Kamsvaag. Please send feedback on mistakes in the pattern and other comments to theneedlelady@gmail.com


