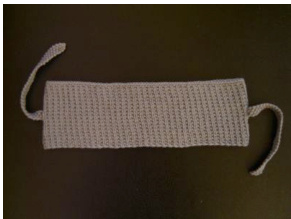
Bainbridge Scarf
A friend came to visit from Philly a few weeks ago. She was wearing a scarf she'd bought at a small boutique on Bainbridge Street in the city of brotherly love. Its construction was simple—nothing more than a loop with two ties—but when worn it looked like a complicated little scarf. I played around with the proportions and came up with my own version. Take this basic pattern and make it your own—the possibilities are endless! All you have to do is pick a stitch pattern (preferably one that will lie flat, so you don't need to fuss with edgings or massive blocking), figure out your gauge, and match the scarf dimensions. There's not much more to it. Pick whatever yarn suits your fancy. I had wool cotton on hand.
Yarn
2 balls Debbie Bliss wool cotton (barely used much of the 2nd ball) Gauge 6 sts = 1 inch
Materials
US 5 (3.75mm) circular needles (24" or smaller), or size to get appropriate gauge Finished Dimensions fits an average person's neck 4 inches wide 26 inches around stitch marker
Directions
Scarf
Cast on 144 stitches. Join to work in the round, being careful not to twist. Place marker to mark beginning of round. Work broken rib as follows: Row 1 \*Kl, pl; repeat from \* to end of round. Row2Knit. Repeat rows 1-2 until work measures 4 inches. Bind off all stitches.
Ties
At opposite sides of the scarf, in the middle of the tube, pick up and work k1,p1 for 4 stitches. (This is like pick up and knit, but if you pick up and kl, pl, you don't have a "back" of the tie.) Work seed stitch as follows: Row 1 \*K1, pl; repeat from \* to end of row. Row 2 \*p1, kl; repeat from \* to end of row. Repeat rows 1-2 until tie measures 7 inches. Next Row K2tog, p2tog, pass the first stitch over the second to bind off. Repeat at the other side of the scarf for the second tie as shown. Copyright @ 2007 by Pepperknit. http://pepperknit.com Finishing Sew in all ends.
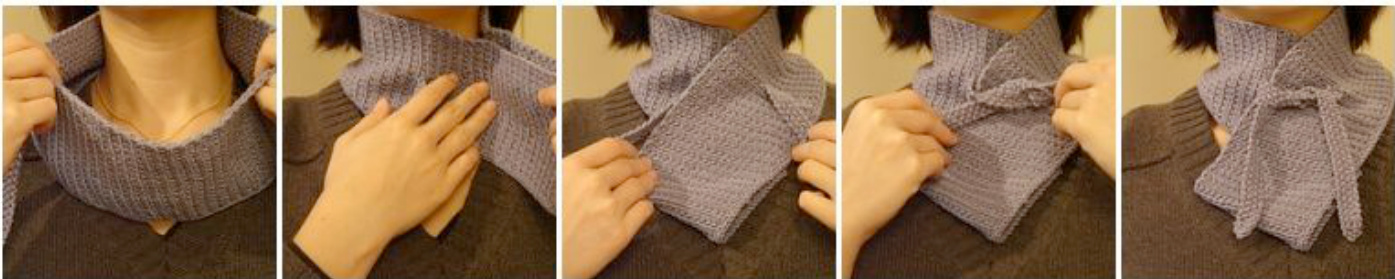
To Wear the Scarf
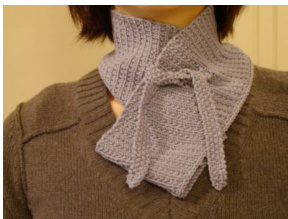
1. Do not panic.\*
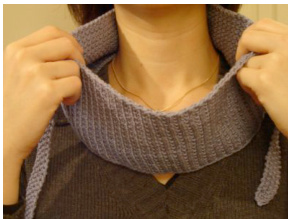
2. Place the tube around your neck, with the ties on either side.
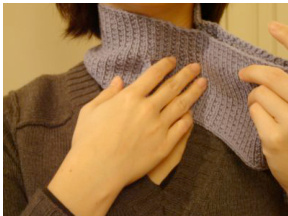
3. Bring the scarf flush to your neck, drawing the excess out flat.
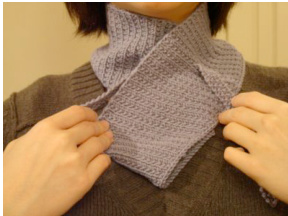
4. Fold the excess over your chest, at an angle.
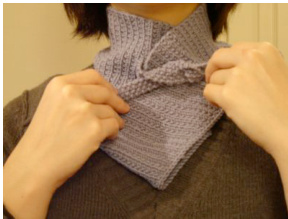
5. Tie the ties.
6. Wear in the cold! \* A classic "step 1" for survival how-to books. It's always applicable as a first step.


