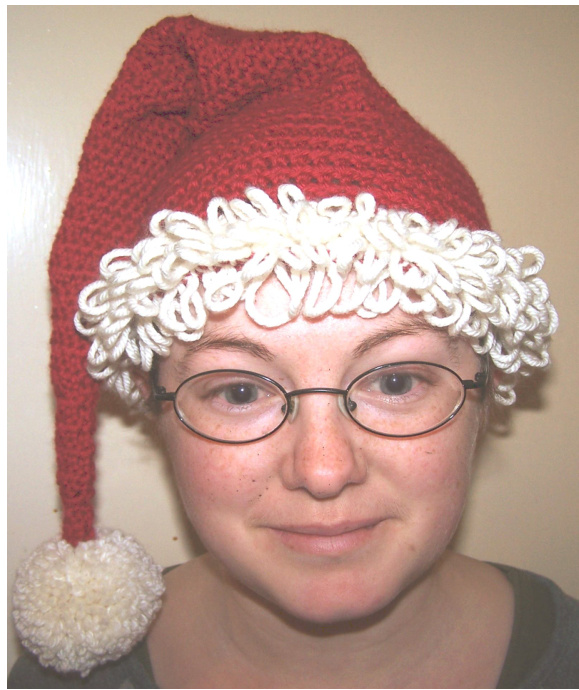
CROCHETED SANTA HAT (US TERMINOLOGY)
This hat can be made in rounds, as shown here, or it can be completed in continuous spirals - I have included this alternative method at the very end of the patern. If you decide to work in spirals you will need a stitch marker. This pattern will make a medium sized hat. It wilfit up to a 56cm (22in) diameter head, and is 51cm (20 in)in length - excluding the pompom. I have used this pattern to make hats that fit both a 7 year old and adults.
Materials
Using aran weight wool $2\times509/180\mathrm{m}$ ballsRED $1\times509/90\mathfrak{m}$ ball of WHITE Iused Debbie Bliss cashmerino aran: 300610 - RED, 300101 - WHITE, 90m/100yrds HooK 5mm/ US H Techniques Required/Abbreviations Chain stitch (ch) Slip stitch (ss) Double crochet (dc) Decrease(dc2tog) Loop stitch Colour change Rnd(s) $=$ Round(s) YO $=$ yarn over st(s) $=$ stitch(s) FO $=$ Finish off
LOOP STITCH
Once you get your fingers trained, this stitch is very simple to complete. it's a variation of single crochet, and the loop is formed on the back (wrong side) of the fabric. Here's how its done: Insert hook into next stitch, wrap the yarn around your finger (l use index finger, but go with what you're comfortable with). With the hook behind the loop on your finger (diagram 1), draw both threads back through the stitch (diagram 2). Y0 (diagram 3) and draw through all3 loops on the hook and the stitch is finished (diagram 4).

Once the stitch is complete, it is still possible to lengthen or shorten the loop a little with a gentle tug on the loop or the working yarn. For this hat, I've made the loop approximately 1inch long. Pictures below show what the finished stitches look like from the right and wrong sides.
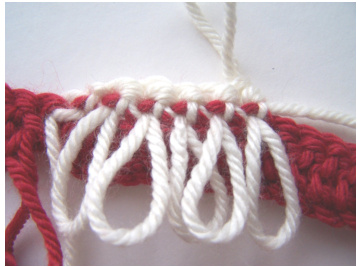
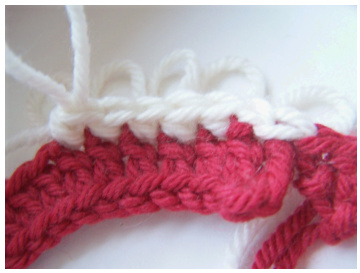
Wrong side' (outside of the hat) “Right' side (inside of the hai
Pattern
With RED, 69ch.
Rnd 1: 1 dc in $4^{\mathrm{th}}$ ch from hook (first 3 ch $=$ first dc). 1 dc in each ch to end, changing to WHITE before finishing the last dc. Either drop the RED and pick up again on round 6, or cut and re-join (l prefer to leave the RED attached - see picture below). (66 sts) The red yarn carried to row 6.
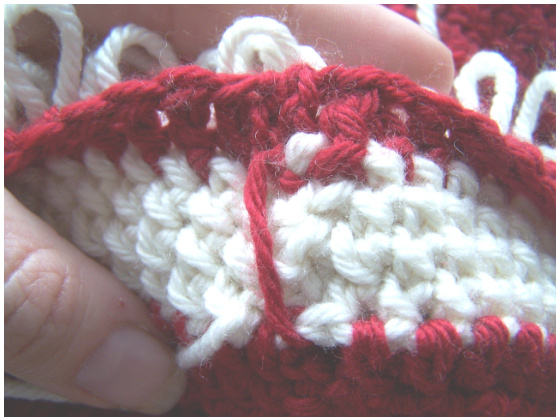
Round 1 is shown at the top of this picture. Without twisting the work, and with the WS facing out (see picture below), ss into top of 3 ch at start of round.
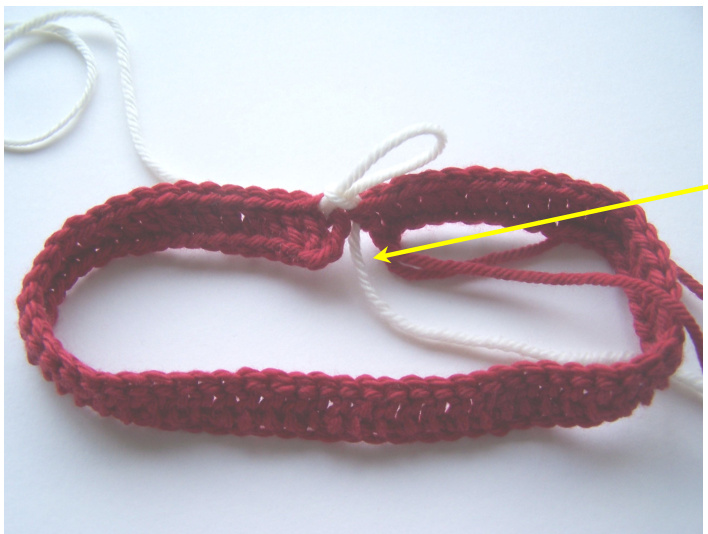
The lower edge of round 1 is stitched together after the hat is completed.
Rnd 2:
with WHITE; 1 ch (counts as first stitch),lop stitch in each st to end. ss into ch at start. (66)
Rnds 3-5:
Repeat rnd 2 three more times, changing back to RED before completing the last loop stitch on round 5. ss into ch. (66) CutWHITE. Rnd 6: with RED; 3 ch (counts as first dc), 1 dc in each stto end. ss into top of 3 ch. (66) Rnds 7-11: Repeat round 6 five more times. (66) Rnd 12: 3 ch, 8dc in next 8 sts,tr2tog. \* 9 dc, dc2tog, repeat from \* to end. ss into top of 3 ch. (60) Rnds 13-14: Repeat round 6 twice. (60) Rnd 15: 3 ch, 7dc in next 7sts, dc2tog.\* 8 dc, dc2tog, repeat from \* to end. ss into top of 3 ch. (54) Rnds 16-17: Repeat round 6 twice. (54) Rnd 18: 3 ch, 6dc in next 6 sts, dc2tog. \*7 dc, dc2tog, repeat from \* to end. ss into top of 3 ch. (48) Rnd 19: Repeat round 6 once. (48) Rnd 20: 3 ch, 5 dc in next 5 sts, dc2tog. \* 6 dc, dc2tog, repeat from \* to end. ss into top of 3 ch. (42) Rnd 21: Repeat round 6 once. (42) Rnd 22: 3 ch, 4 dc in next 4 sts, dc2tog. \* 5 dc, dc2tog, repeat from \* to end. ss into top of 3 ch. (36) Rnd 23: Repeat round 6 once. (36) Rnd 24: 3 ch, 3dc in next 3 sts, dc2tog.\* 4 dc, dc2tog, repeat from \* to end ss into top of 3 ch (30) Rnd 25: Repeat round 6 once. (30) Rnd 26: 3 ch, 2dc in next 2sts, dc2tog.\* 3 dc, dc2tog, repeat from \* to end. ss into top of 3 ch. (24) Rnds 27-29: Repeat round 6 three times. (24) Rnd 30: 3ch;1dc in next st, dc2tog.\* 2dc, dc2tog, repeat from \* to end. ss into top of3 ch. (18) Rnd 31-34: Repeat round 6 four times. (18) Rnd 35: 3 ch, dc2tog.\* 1 dc, dc2tog, repeat from \* to end. ss into top of 3 ch.(12) Rnd 36-38: Repeat round 6 three times. (12) Rnd 39: 3 ch, dc2tog. \* 1 dc, dc2tog, repeat from \* to end. ssinto top of 3 ch. (8) Rnds 40-42: Repeat round 6 three times. (8) Rnd 43: 3 ch, 1 dc in next st, dc2tog, 2 dc in next 2 sts, dc2tog. ss into top of 3 ch. (6) Rnds 44-45: Repeat round 6 twice. (6) Version $2.0\ {\textcircled{<}}$ Gilly Bettney 2007 Rnd46: Decrease next 2 sts together as follows; 2 ch in first st, YO, insert hook into next st, YO and draw loop through, YO and draw through first two loops on hook, YO and draw through all 3 loops on hook. \* dc2tog, repeat from \* in last two sts. ss into top of first dec at start of round. FO, leaving a long length to sew on the pompom with (3)
To FINISH
Make a pompom using WHITE - my pompom is $2\,\%$ inches (approx. 7cm) in diameter and sew onto the top of the hat. Use free end of yarn from the start to sew together the lower edge of round 1. · Sew in any other loose ends.
Alternatives
Sew on a large bell instead of the pompom Sew on a large crocheted tassel, of a cluster of small tassels Enjoy! If you have any problems with the pattern, orif you notice any errors - please don't hesitate to contact me. Thank -you Gilly $\circledcirc$ herebegb@blueyonder.co.uk www.herebegb.etsy.com Etsy ID: Herebegb
To WORK THE HAT IN SPIRALS
Rather than joining round 1 with a slip stitch into the top of the 3ch, join by working the first loop stitch into the top of 3ch - remember to mark the beginning of each round with a stitch marker. Continue as pattern above, until round 46. Round 46: tr2tog three times, ss in top of next stitch. FO. Working in spirals leaves no seam at the back of the hat and gives a cleaner finish. If you're not yet comfortable with the loop stitch, you may find this method a little bit more awkward.


