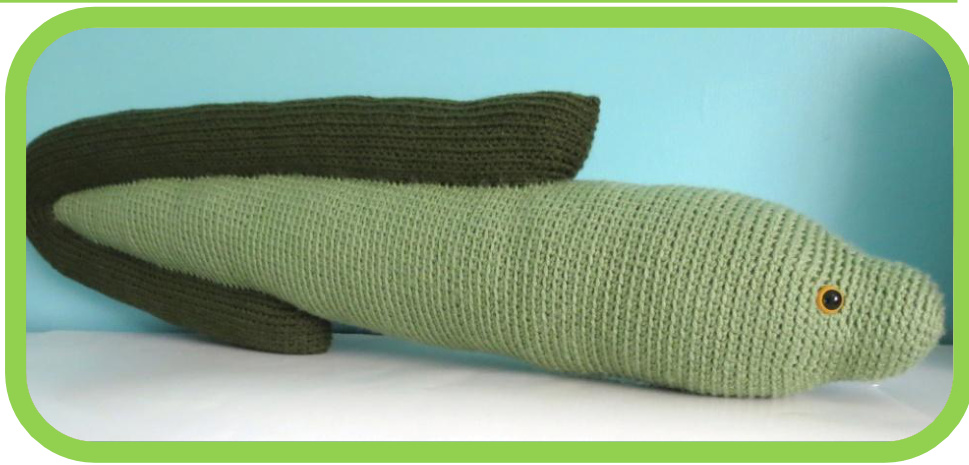
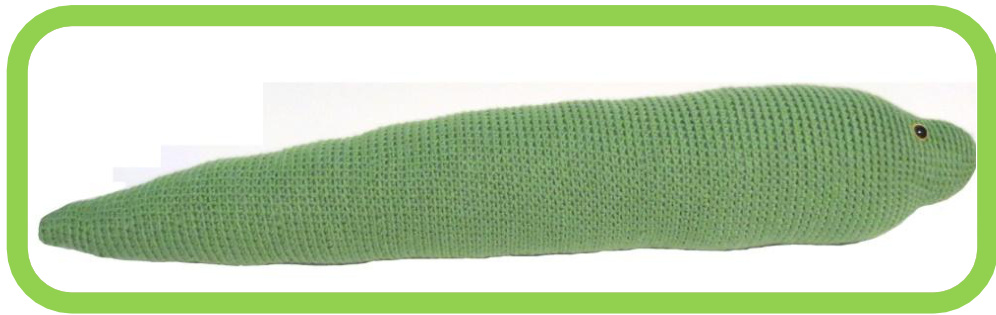
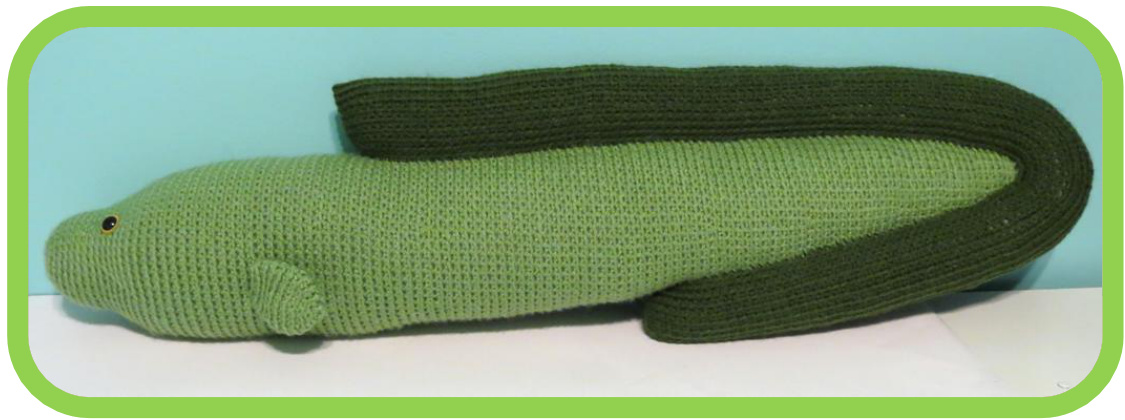
Erick Ehe Eel
Design by: Adriana Aguirre Length: 32 inches
Materials:
Yarn: 2 colors Crochet Hook Stitch Marker Polyester Stuffing Safety Eyes Tapestry Needle
Yarn:
Worsted Weight Hobby Lobby I love this yarn (100% Acrylic; 355yards [325m]/ 7oz [198g]) A: #140 Mid Green: 300 yards B: #130 Dark Olive: 130 yards I am a tight crocheter so you may need more or less than the yardage I used. Difficulty Level: Intermediate
Abbreviations:
O Ch: Chain st(sts): stitch sc: single crochet O sc2tog: single crochet 2 together Rep: repeat x]: number of repeats Rep [2x] = repeat instructions in [] 2 times
Hook:
US G-6 (4mm)
Gauge:
Gauge is not important. Just use the right hook for the thickness of your yarn. You do not want to use a larger hook than needed because that would leave holes in your fabric and stuffing could come out. Help: Visit my blog Adrialyshc.blogspot.com Tutorials Tab has videos and tips on how to make my animals. If you do not find the answer to your question under the tutorials tab, send me an e-mail by going under my contact tab and I will get back to you as soon as possible. @2013 Adrialys Designs. Alrights reserved. This pattern is for personal use only. It may not be distributed or sold in digital or print form. You may sellitems made from this pattern as long as you add 'Adrialys Design" to the tag and link to www.adrialyshc.blogspot.com if selling online.
Nofes
Start using sloppy slip knot. Crocheting through the back loop O Gives a different feel and look. O Ridges help when attaching and counting. Color Changes: 0 Clean color changes tutorial on my blog. (Use same method for adding new yarn) Color changes will be instructed using letters. · Ex: A: sc in next st. B: sc in next st. C: sc in next st. 0Assign each letter a color so you know what color to use. Ex: A:Grey B:White Use safety eyes if for children 3 years and older. 0 Use crocheted eyes for babies. (Tutorial on my blog) Fasten off. Leave a long tail. 0 You will use the long tail for attaching to another piece. Ex: leg to body. Length depends on what you are attaching. Leave 6-12 inches. Head will need a longer tail than a leg. O It is always better to have extra then not enough. 0If only instructed to fasten off, then leave about 3-inch tail. Attaching: O If you need help with attaching pieces, make sure view my video on attaching. O I give basic guidelines of where I attached the pieces on my animal. O You can attach wherever you think it looks best on your animal. 0 Some pieces will need to be whip-stitched before attaching.
Symbols:
O I use three different symbols in my patterns. 0 Parenthesis (to let you know how many stitches you should have at the end of each round. Ex: (30) Square Brackets [] are used to separate the parts you will be repeating. Ex: [Sc twice in the next st, sc in the next st]. Repeat [] 5 times. Meaning you will work what is inside the brackets a TOTAL of 6 times. Curly Brackets { are used when you will be crocheting the same instructions for several rounds. To make it easier for you to know exactly how many rounds that is without you having to count I included the total number of rounds in the {. Ex: Round 11- 14: Sc in each st. (60sts) {4} @2013 Adrialys Designs. Alrights reserved. This pattern is for personal use only. It may not be distributed or sold in digital or print form. You may sellitems made from this pattern as long as you add 'Adrialys Design" to the tag and link to www.adrialyshc.blogspot.com if selling online.
Parttern
Make sure to read notes before beginning
Body
A: Ch 2.
Round 1: Sc 6 times in second chain from the hook. (6) Round 2: Sc twice in each st. (12) Round 3: [Sc twice in next st, sc in next st]. Rep [5x]. (18) Round 4: [Sc twice in next st, sc in next 2sts]. Rep [5x]. (24) Round 5: [Sc twice in next st, sc in next 3sts]. Rep [5x]. (30) Round 6-12: Sc in each st. (30) {7} Round 13: [Sc twice in next st, sc in next 4sts]. Rep [5x]. (36) Round 14: [Sc twice in next st, sc in next 5sts]. Rep [5x]. (42) Round 15: [Sc twice in next st, sc in next 6sts]. Rep [5x]. (48) Round 16: [Sc twice in next st, sc in next 7sts]. Rep [5x]. (54) Round 17: [Sc twice in next st, sc in next 8sts]. Rep [5x]. (60) Fasten eyes to round 14. You will need to stuff as you go. Round 18-37: Sc in each st. (60) {20} Round 38: [Sc2tog, sc in next 8sts]. Rep [5x]. (54) Round 39-48: Sc in each st. (54) {10} Round 49: [Sc2tog, sc in next 7sts]. Rep [5x]. (48) Round 50-79: Sc in each st. (48) {30} Round 80: [Sc2tog, sc in next 6sts]. Rep [5x]. (42) Round 81-90: Sc in each st. (42) {10} Round 91: [Sc2tog, sc in next 5sts]. Rep [5x]. (36) Round 92-101: Sc in each st. (36) {10} Round 102: [Sc2tog, sc in next 4sts]. Rep [5x]. (30) Round 103-107: Sc in each st. (30) {5} Round 108: [Sc2tog, sc in next 3sts]. Rep [5x]. (24) Round 109-112: Sc in each st.(24) {4} Round 113: [Sc2tog, sc in next 2sts]. Rep [5x]. (18) Round 114-116: Sc in each st. (18) {3} Round 117: [Sc2tog, sc in next st]. Rep [5x]. (12) Round 118-119: Sc in each st. (12){2} Round 120: [Sc2tog]. Rep [5x]. (6) Round 121: Sc the next stitch and the 4th stitch together. Fasten off. Weave in tail. For a longer eel, increase the number of plain rounds. [18-37, 39-48, or 50-79]
Dorsal/ Anal/Caudal Fin
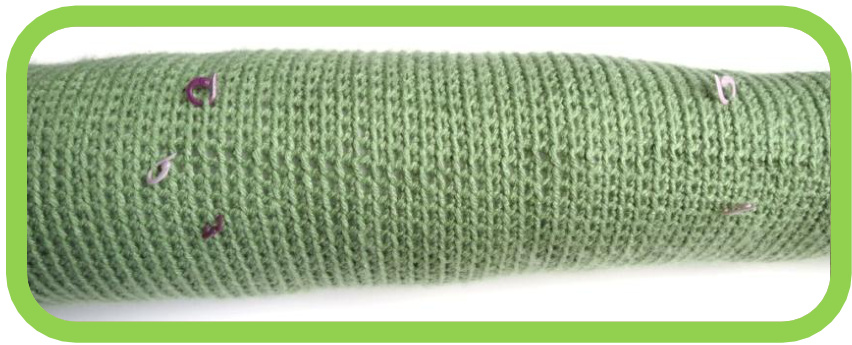
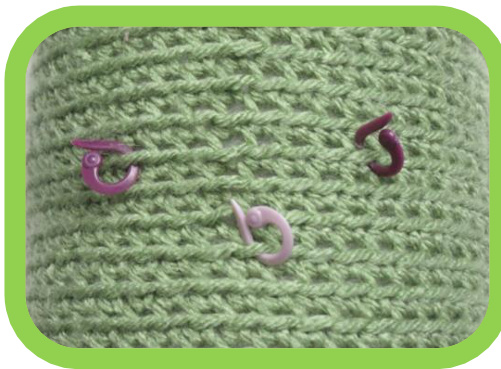
For these fins, you will be picking up stitches on the top and bottom of the eel. They are all connected into 1 fin. If you want yours to be centered, I recommend using stitch markers in several areas so it's easier when you start crocheting. For help watch: Video Tutorial: Ruffles for help on picking up stitches. With B: First: Place stitch markers so that the fin is centered. I used the placement of the eyes as a guide. Pick 2 center stitches to start with. To the right you will see how I placed the stitch markers. The lighter stitch marker was the tip where I was going to start. I have also provided a diagram below, the X marks the stitches I picked up so that the beginning would be a point and not a straight line. The X marks the spot where I started.
| 43 | ||||||||
| 42 | X | |||||||
| 41 | X | X | ||||||
| 40 | x | X |
Picking up Stitches:
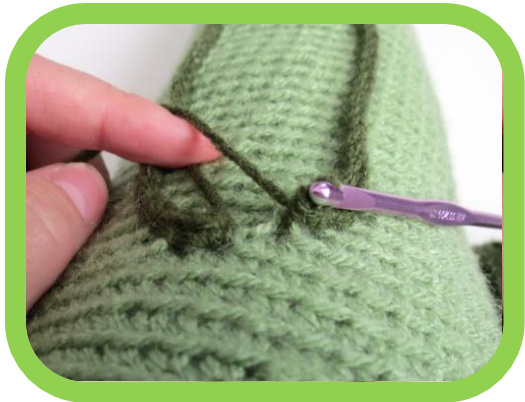
Starting on Round 40, pick up the first stitch, insert your hook into the loop and ch 1, then sc in the same loop. Now begin to pick up the stitches as shown in the diagram. Sc in each st, after Round 43 pickup stitches in somewhat of a straight line as shown below.

At first, you will have around 6sts in between where you are picking up the stitches but you should start to reduce the number as you get to the tail.
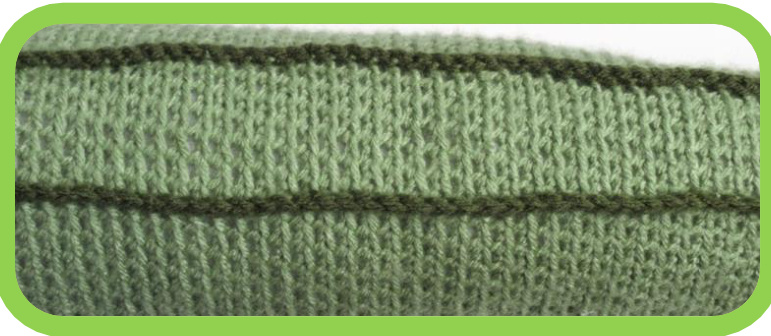
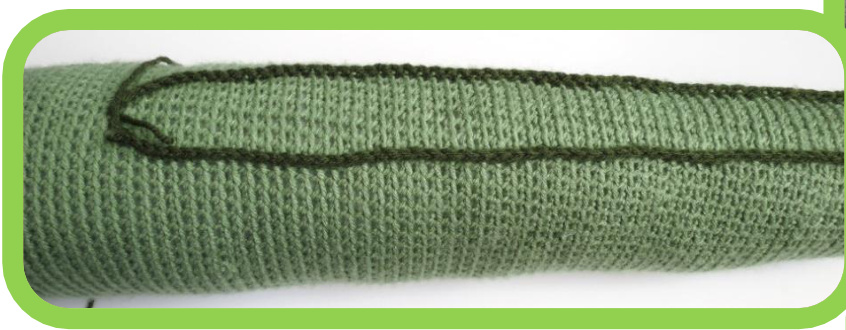
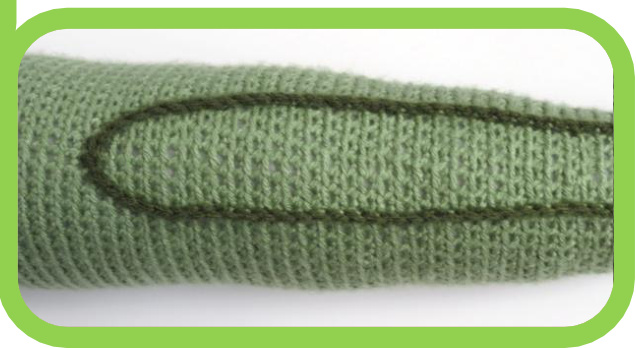
<You can use stitch markers in certain areas to try to keep you on track. Sc all the way down to the bottom side of round 74 of the eel and back around to the top. @2013 Adrialys Designs. All rights reserved. This pattern is for personal use only. It may not be distributed or sold in digital or print form. You may sell items made from this pattern as long as you add 'Adrialys Design" to the tag and link to www.adrialyshc.blogspot.com if selling online. Once you have gone all the way around, it should look like this from the side. >
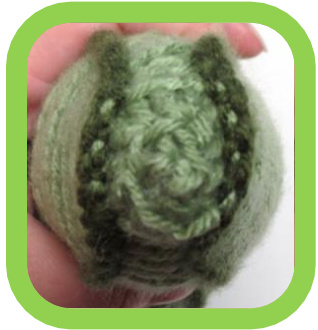
The bottom should look like the picture to the right. > Now that you have worked all the way around you will have something that looks like the picture to th Place a stitch marker on the last stitch you picked up. Sc twice the first 3sts. Increase where the arrows point. Make sure to increase on both sides of the tail fin. Increase by sc twice in the 6 center stitches. Sc in all other stitches. It's not super important to be exactly centered as long as you increase the same number of times on both sides of the fins. Sc twice in last 3sts.
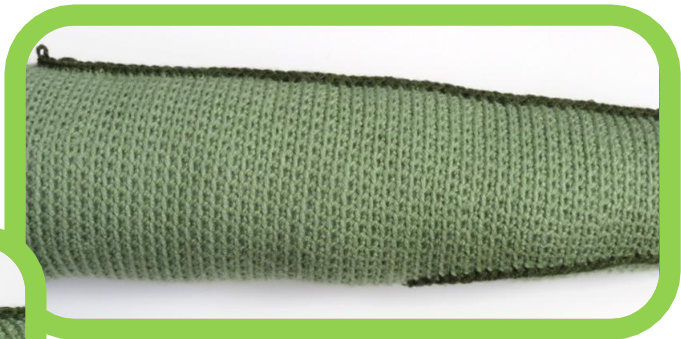
<The top should look like the picture to the left.

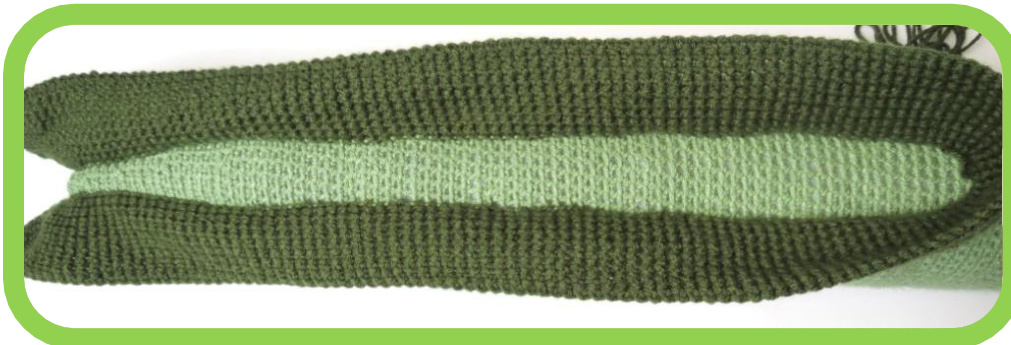
@2013 Adrialys Designs. All rights reserved. This pattern is for personal use only. It may not be distributed or sold in digital or print form. You may sell items made from this pattern as long as you add 'Adrialys Design" to the tag and link to www.adrialyshc.blogspot.com if selling online. I crocheted 10 rounds total. You can choose to make your fins shorter or taller. Sc in each stitch and increase every 3 rounds. Increase whenever you feel the ends are getting too tight. Once I finished it looked like the picture to the right.>
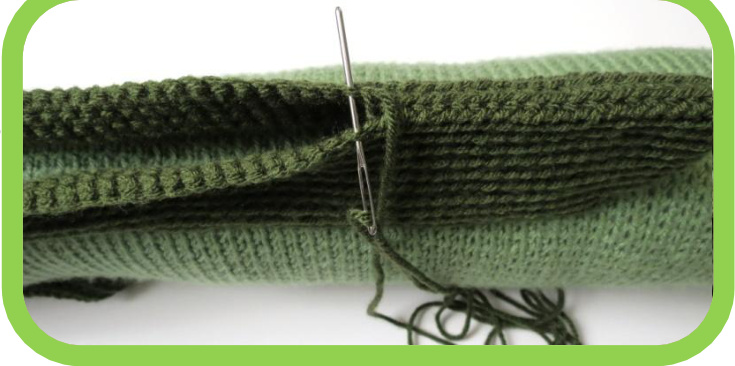
Fasten off and leave an extra long tail. You will be whip stitching all the way across so make sure you have enough yarn. As you whip stitch it should look like the picture to the right. > I lightly stuffed it as I closed it up. You can choose to leave it flat if you'd like.
Pectoral Fins Make 2.
This piece is optional. Not all eel's have pectoral fins.
A: Ch 2.
Round 1: Sc 6 times in second chain from the hook. (6) Round 2: Sc twice in each st. (12) Round 3: [Sc twice in next st, sc in next st]. Rep [5x]. (18) Round 4: [Sc twice in next st, sc in next 2sts]. Rep [5x]. (24) Round 5-6: Sc in each st. (24) {2} Round 7: [Sc2tog, Sc in next 2sts]. Rep [5x]. (18) Round 8-9: Sc in each st. (18) {2} Round 10: [Sc2tog, sc in next st]. Rep [5x]. (12) Fasten off. Leave long tail.
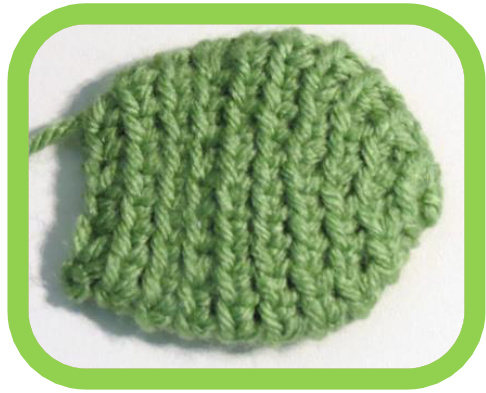
Whipstitch fin and attach to round 30.
@2013 Adrialys Designs. All rights reserved. This pattern is for personal use only. It may not be distributed or sold in digital or print form. You may sell items made from this pattern as long as you add 'Adrialys Design" to the tag and link to www.adrialyshc.blogspot.com if selling online.
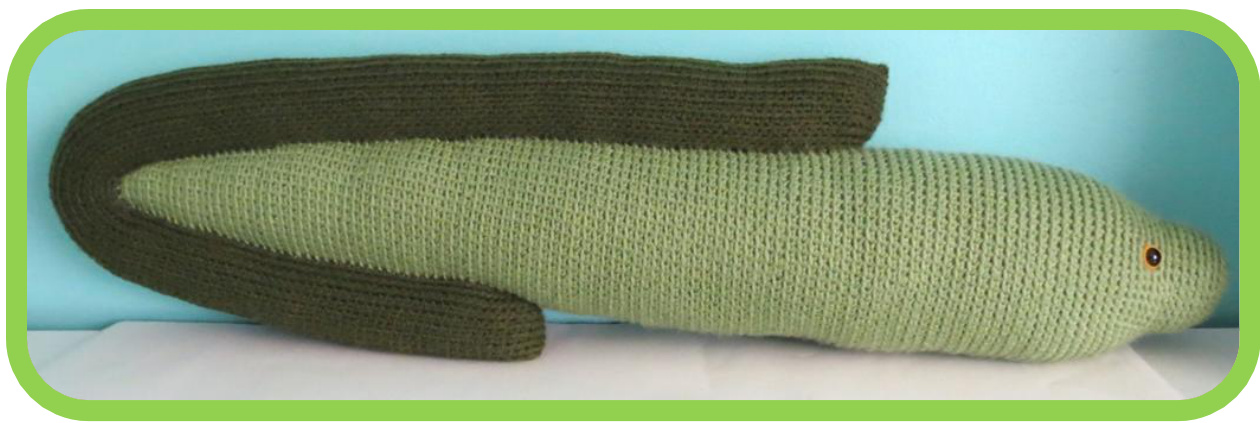
Congrats you finished your Eel!
Share pictures of your finished animal on my Facebook page! facebook.com/adrialyshc low me on Twitter for news on upcoming patterns and sales @AdrialysH( Remember to link your project to my pattern on Ravelry. Send pictures of your animals to Adrialyshc@aol.com Join my Group Adrialys Designs on Ravelry!
Become a pattern tester!
By purchasing any one of my patterns, you become eligible to become a tester for my future patterns! If you are interested, join my group on Ravelry and check out the Pattern Testing thread for more details!


