Mrs Eviltedi
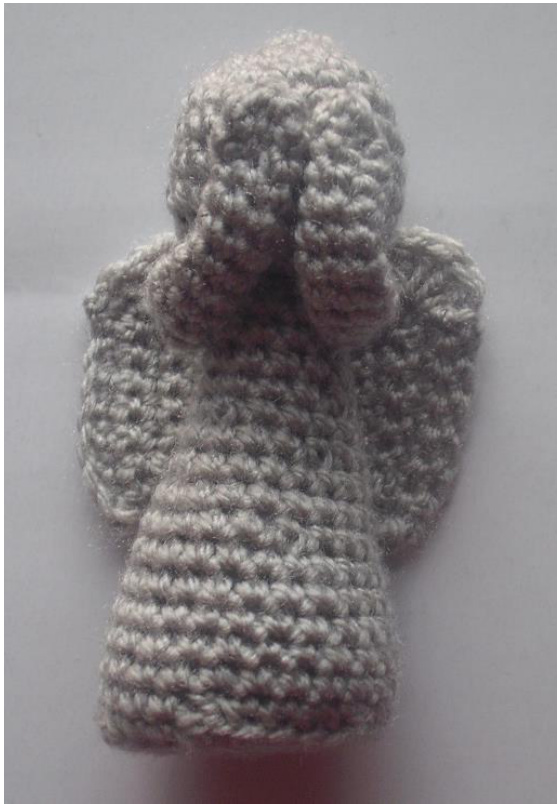
Weeping Angel
Materials
Grey DK yarn, 3mm crochet hook, a small piece of card or plastic (see note below), toy stuffing, tapestry needle, and for attacking angel a small amount of dark grey or black yarn or thread to embroider face and a pipecleaner for poseable arms. Work in the amigurumi style of spirals (ie do not join at end of round, do not turn, continue working in next stitch, use a marker to denote end of rounds) sc - single crochet (UK double),dc - double crochet (UK treble),inc -increase, dec - decrease, BLO - Back Loops Only, NR - next row (...) repeat the instructions in brackets as indicated For firm standing base of card or plastic draw around base body at 24sc as noted in pattern
Head
Starting at crown Work 2 chain, work 6sc into 2nd chain from hook - 6sc NR - Inc round - 12sc NR -(1sc, inc) - 18sc NR -(2sc, inc) - 24sc Work 4 rounds of single crochet NR - (2sc,dec) - 18sc NR -(1sc,dec)- 12sc Stuff the head and shape into ball NR -(dec) - 6sc, fasten off
Body
Starting at base Work 2 chain, work 6sc into 2nd chain from hook - 6sc NR - Inc round- 12sc NR -(1sc, inc) - 18sc NR - (2sc, inc) - 24sc. Draw around for firm base if desired, (see pictures below, place flat on card/plastic and draw around outside of work to make circle) and set aside for now NR -(3sc, inc) - 30sc NR - working in BLO (3sc, dec) around - 24sc Working through both loops as normal work 5 rounds of sc NR -(4sc, dec) - 20sc Work 2 rounds of single crochet ..if you want to put in a plastic or card or grain base to help standing do so now as it will be nearly impossible to do later, push it flat to the base then pop some stuffing on top NR - (3sc,dec) - 16sc Work 1 round sc NR -(2sc,dec - 12sc Work 4 rounds, finish stuffing NR - Dec around - 6sc, fasten off Sew head to top of body, and remember to point head forward slightly for dormant angel, and raised for attacking, a couple of small stitches can secure the head in whatever position you wish if needed.
Arms make 2
Start at hands Work 2 chain, work 6sc into 2nd chain from hook - 6sc Work 12 rounds on these 6sts, fasten off For dormant angel sew open edge to shoulder height angled forward and down a touch, bring hands to centre front face as in picture and secure. For attacking angel cut 2 pieces of pipecleaner twice the length of the arm, fold each bit in half and gently push folded edge into the open edge of the arm. Sew open edge to shoulders pointing forwards. Bend slightly at elbows.
Hair bun
Make 2 chain, work 6sc in 2nd chain from hook, NR - (inc) round -12sc Work 1 round single crochet, NR - (dec) around - 6, fasten off Push a little stuffing into the bun and sew to back of head as in pictures. For hair on the crown stitch several long stitches around hairline towards bun. See "top view" picture below.
Wings make 1 of each as described
Lower half make 2 Slip into 2nd chain from hook, 7sc NR - Chain 1 turn, 7sc NR - Turn no chain slip into 1"t, 6sc NR - Ch1, 6sc NR - Turn no chain slip into 1st, 5sc NR - Ch1, 5sc NR - Turn no chain slip into 1st, 4sc follow from this point and make a right and left wing as describedbelow. Right wing, do not turn, find centre of row edge and work 8dc into that point (see pictures, make sure longer edge is on the left) slip into long edge at 1"t chain at start and fasten off. Left wing, fasten off at end of lower part and rejoin on longer side in the 1st original chain, making sure longer lower edge is held to the right hand side this time find center as as before work 8dc into the midpoint then slip and fasten off on the short edge row opposite. This makes 2 wings with mirror matching top edges. Attach short edge to centre back along the short edge up to the curved edge positioning them either flat or straight back as desired (see pictures)
FACE
For Attacking Angel only. Embroider face using darker grey yarn. I made 2 small lazy daisy stitches for the eyes, with lid lines angled down and eyebrows above pointing down to look angry. For the mouth I used a couple of straight stitches with a small one either side. Please feel free to make as detailed or basic as you like. White yarn or threads would also work instead. On the next few pages are several pictures to help the descriptions. I have put these all at the end so it is easy to leave them out if you wish to print the pattern for personal use
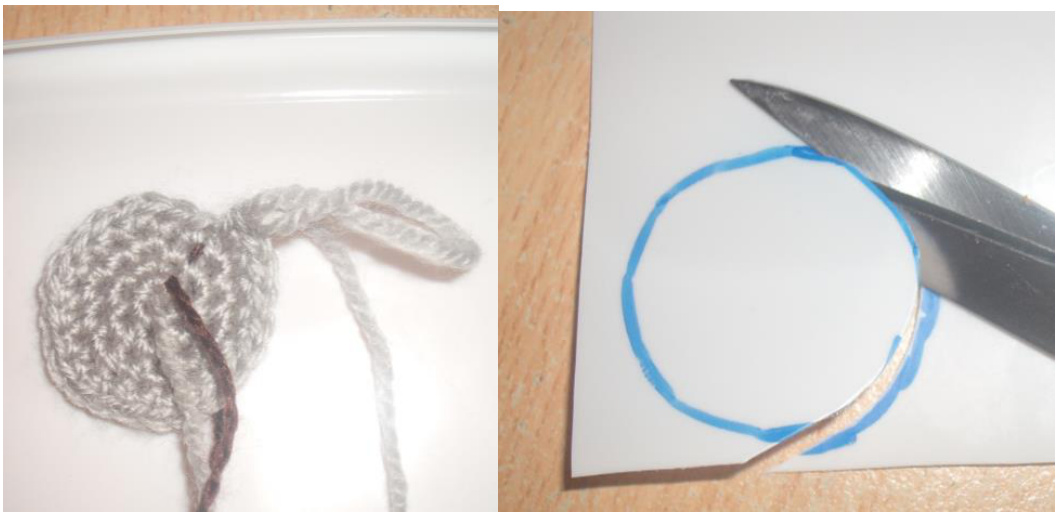
To make card or plastic base, draw round work at 24sc increase round. I used the side of an icecreamtub
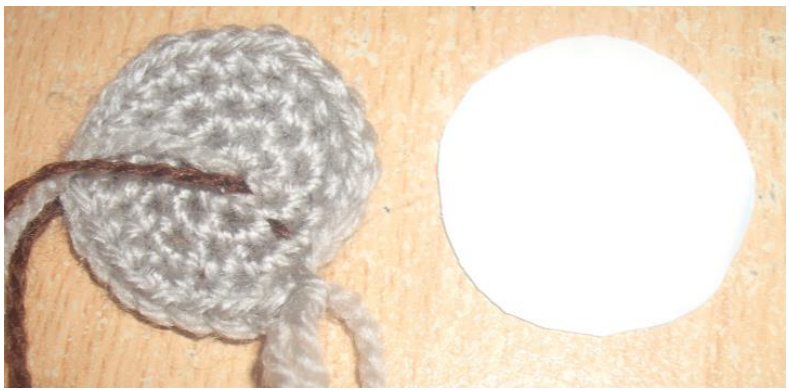
Base at 24sc and plastic insert (sorry about the camera flash whiteout)
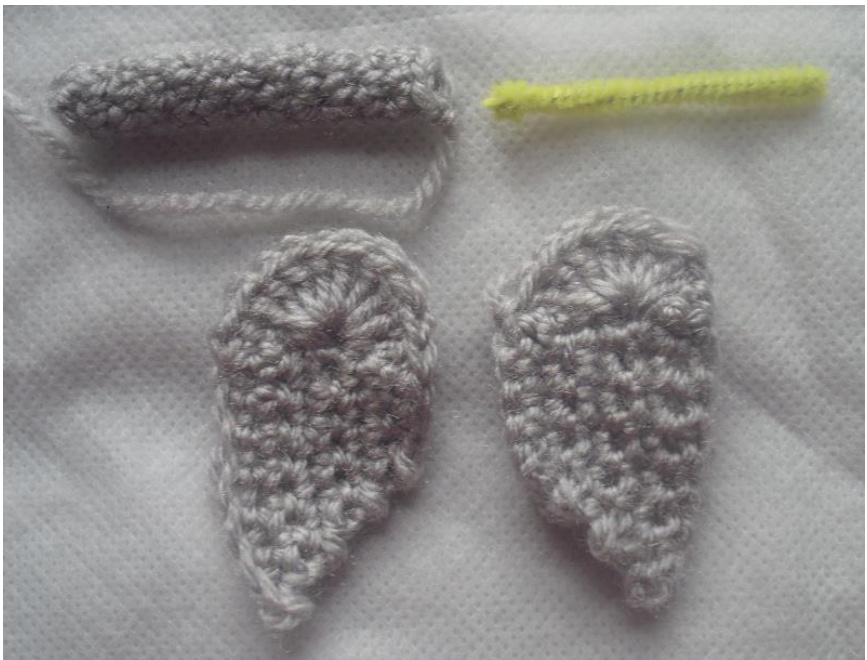
Arms and wings
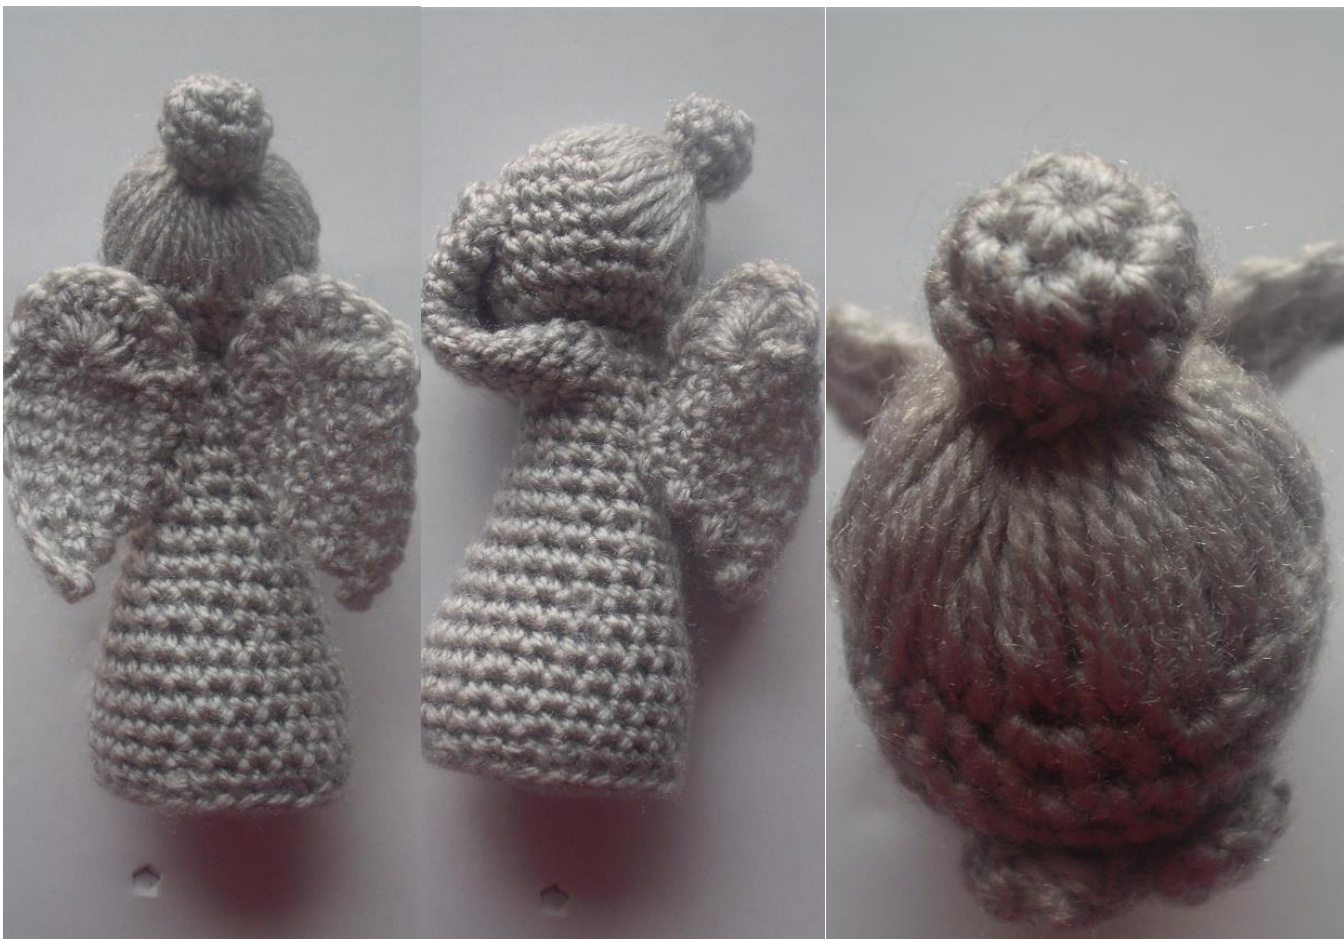
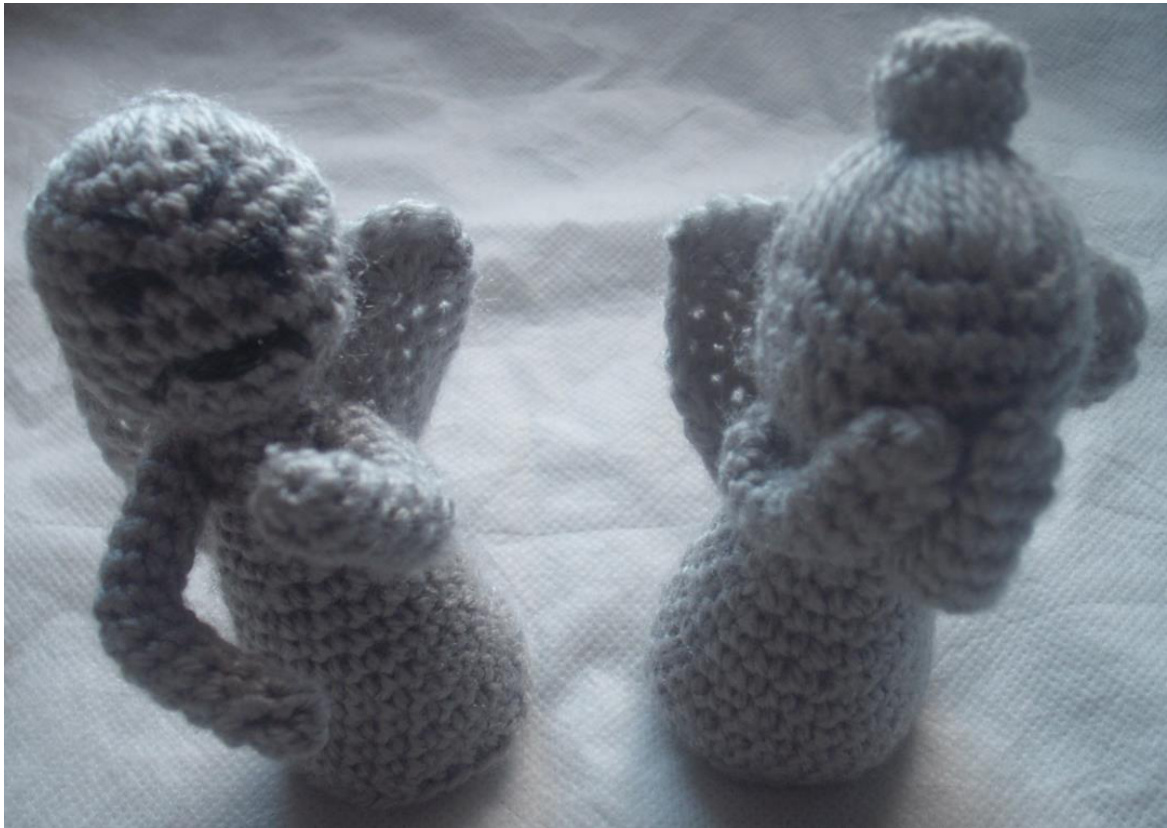
Back, Side and Top view
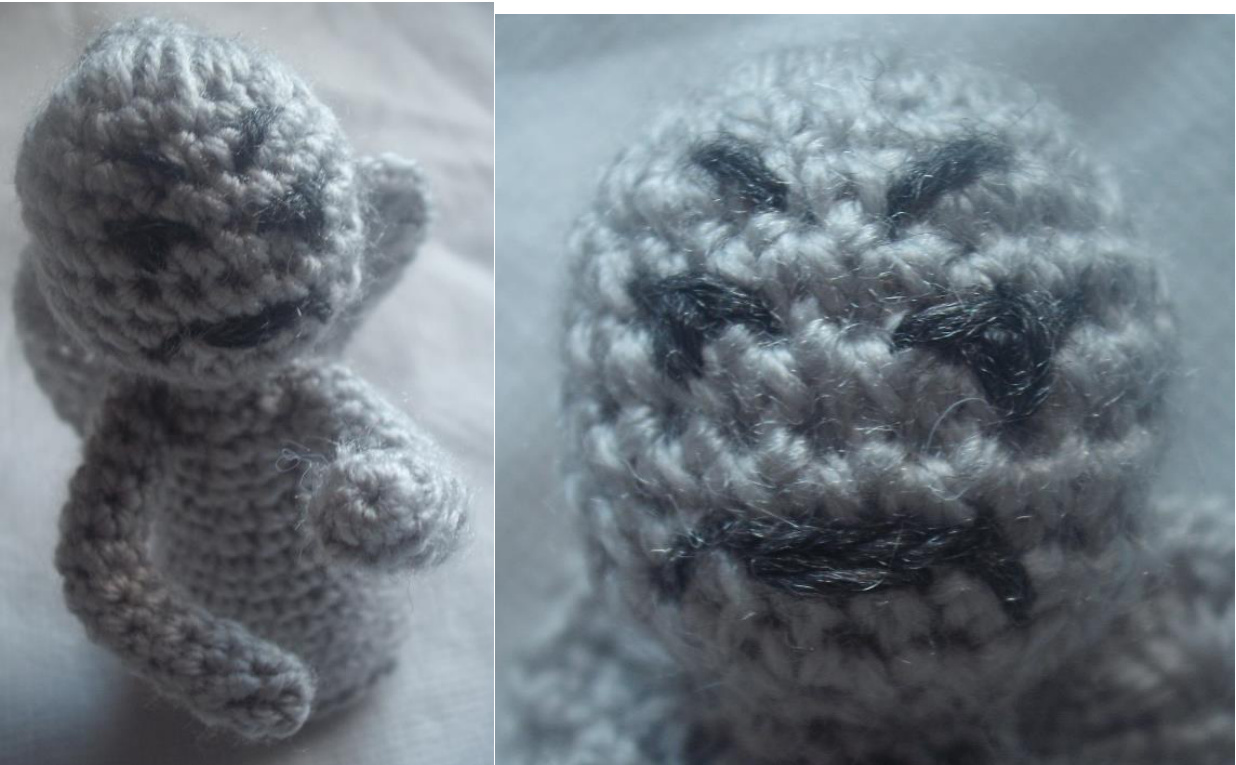
Attacking Angel front and basic angry face detail
Alternative colouring
This pattern could easily make any basic angel. Make head and arm is pale peach, body in a light colour, wings in white or metallic yarn, bun in hair colour, and hair straight stitches the same. Hands could be sewn in a praying position with a couple of stitches to hold the elbow bend. A gold pipecleaner loop would work to make a halo. If you make an Angel I would love to see them on Ravelry project pages Enjoy COPYRIGHT 2014 Please do not reproduce or sell pattern. Selling the finished toy is OK but please give credit where it is due.


