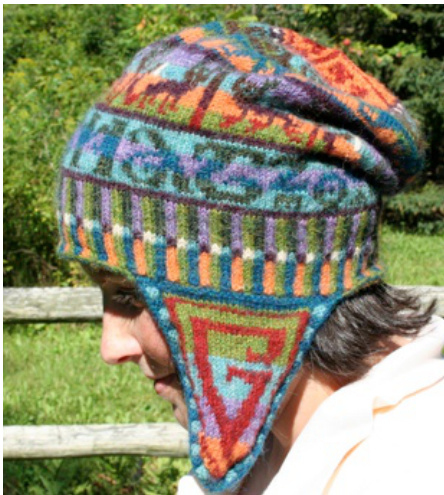
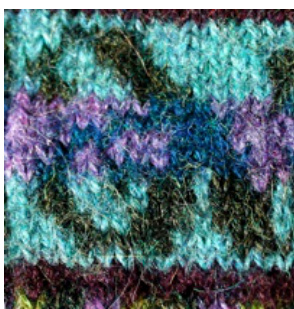
is for Peruvian Chullo
This hat is designed to fit most adults. YARN 1 skein each Ultra Alpaca Light (50% Super Fine Alpaca, 50% Peruvian Highland Wool, 1.75 oz/50 g 144 yds/133 m), or similar-weight yarn in colors as follows Color A (Oceanic mix, #4285) Color F (Grape, #4212) Color B (Pea Soup mix, #4275) Color G (Peat mix, #4277) Color C (Pumpkin, #4226) Color H (Lavender mix, #4283) Color D (Turquoise mix, #4294) Color I (Redwood mix, #4281) Color E (Couscous, #4208) Color J (Dark chocoloate, #4205) This is quite a lot ofyarn, but you can make the hat with as few as two colors. One skein ofthe recommended yarn in each color, even if you use only two colors, will be plenty to make a complete hat. Gauge: Ribbing: 18 stitches to 2 inches (5 cm.), Main hat: 16 stitches to 2 inches (5 cm.) Needles: 2o-inch circular in size 3 mm. or to reach gauge; set of double-pointed needles in same size.
DIRECTIONS
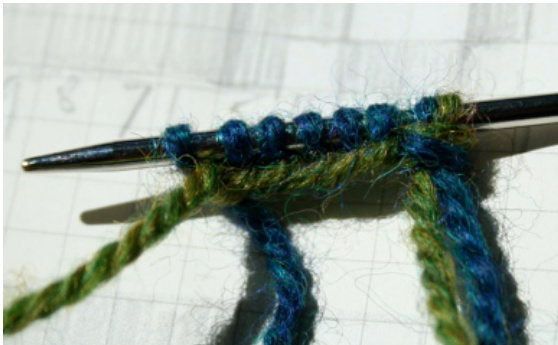
Brought to you by the letter P at unionpurl.blogspot.com Cast on 168 stitches using your preferred method, or the two-color cast-on, as follows: Using one strand each of A and B, make a slip knot and attach to round needle. Hold both strands attached to balls of yarn in left hand, looping B over the thumb and A over the index finger, as shown.

With the needle in your right hand, use it to catch the left-most strand of yarn (color B) from underneath and bring it over and across the first strand of color A, catching color A in a loop on the needle and letting color B slip from the thumb. Gently tighten color B to secure it onto the needle, being careful not to pull too tightly. The stitches should look like this (see illustration, below right): Repeat until you have 168 stitches, not including the slip knot, which should be dropped from the needle. Join stitches, taking care not to twist. Ribbing: Row 1: \*K2A, K2B, K2C\* repeat to end of row. You will be knitting with one color and carrying two colors rows 1 through 17. Row 2: \*P2A, P2B, P2C\* repeat to end of row, holding yarn on wrong side. This row of purl stitches helps to keep the knit-knit ribbing from curling up, although doesn't eliminate the curl. When you put the hat on, however, that pesky curl will go away.
Rows 3 to 8: \*K2A, K2B, K2C\* repeat to end of row.
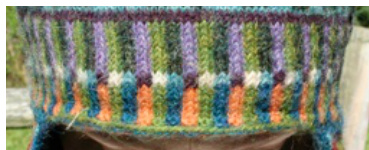
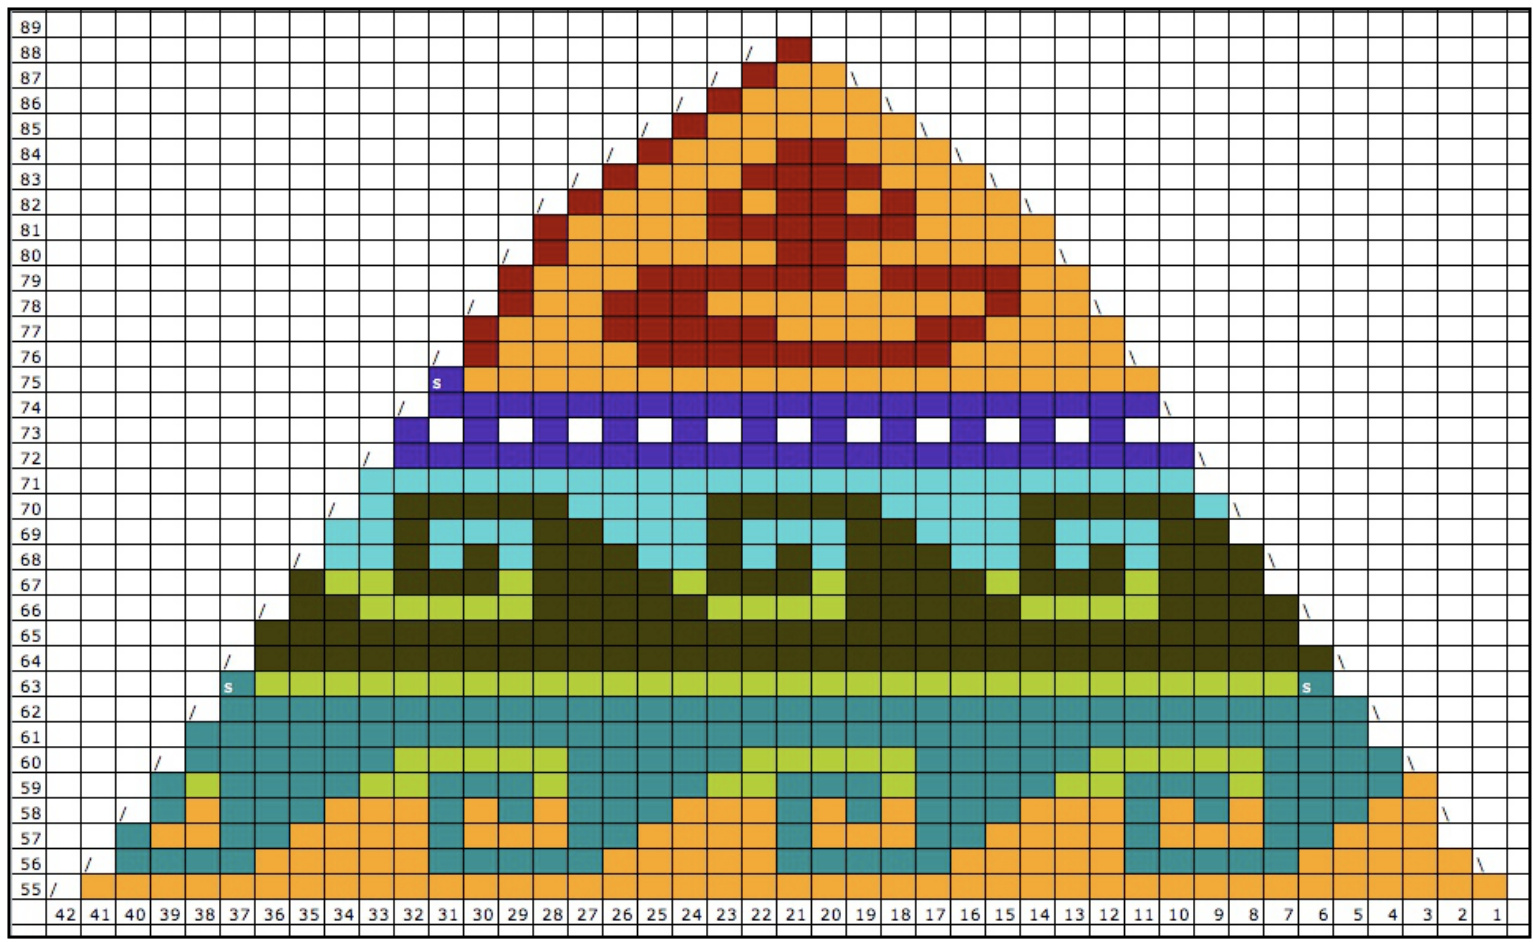
Rows 9 & 1o: \*K2D, K2E, K2F\* repeat to end of row. Rows 11 to 17: \*K2G, K2B, K2H\* repeat to end of row. Rows 18 & 19: K all stitches in F. Row 2o: K all stitches in D. Rows 21 to 33: Lettering rows. You can eliminate the message and skip right to row 34. If you tend to knit "high" rows (i.e., you get fewer rows per inch), and you prefer a lower hat, this might appeal to you. You'd get a more fitted hat and wouldn't have to chart a message. If however, you like to knit words, chart yourself a message using the 13-row letters as charted below. Before you start, keep in mind that you'll need to leave at least 10 stitches between words and fit the letters into 168 stitches. If you have some stitches left over, just add a small ornamental design in your chart. My message was two words and eleven letters, in colors as follows: Rows 21 to 24 : Background in D, Letters in G Rows 25 to 29: Background in G, Letters in A Rows 30 to 33: Background in D, Letters in G End of lettering rows. Row 34: K all stitches in D. Rows 35 & 36: K all stitches in F. Rows 37 t0 53: Follow Chart No. 1, repeating three times (168 stitches). Rows 37 to 4o: Background in B, design in I. Rows 41 to 45: Background in C, design in F. Rows 46 to 5o: Background in D, design in J, fox's tail in E. Rows 51 to 53: Background in H, design in G. Rows 54 & 55: K all stitches in F. Rows 56 to 89: Follow Chart No. 2, repeating three times (beginning 0 with 168 stitches). Work decreases as indicated, 8 stitches every other row. Switching to double pointed needles as needed. Forward slash /=k2 tog: backward slash ^=ssk. On row 63, slip A-color stitches purlwise (symbol: s) to avoid carrying the color through the row. On row 75, slip F-color stitches purlwise (symbol: s) to avoid carrying the color through the row. After row 88: arrange stitches so that there are three stitches on each needle (12 stitches all together). Row 89: K2 together in C, K1 in I. Move both new stitches back to left-hand needle, then pass second stitch (in color I) over first and transfer it back to the right-hand needle. Continue in this way for the round, cut yarns, and pull tail through remaining 4 stitches.
EARFLAPS
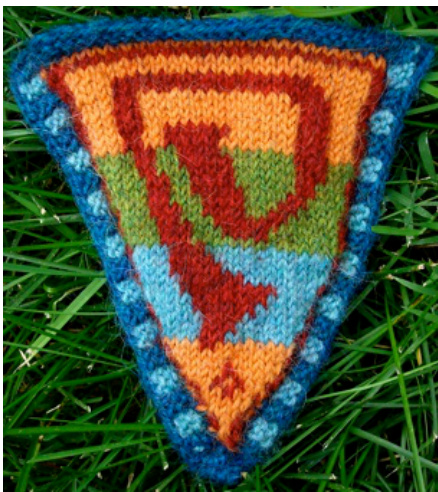
Attached are charts for monograms shaped to fit into the triangular earflaps. Charts include 26 alphabet letters, a question mark and an ampersand (as at right), for those of you who have typographic addictions or have single names, like Cher, Bono or Christo, and want to balance one monogrammed earflap with a typographic symbol. Forward slash /=k2 tog; backward slash ^=ssk. Double slash / / or \\=p2 tog
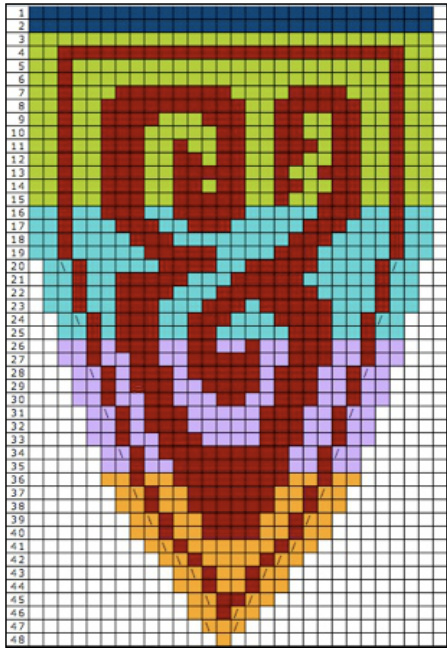
Left side: With right side of work facing (that is, not inside out), place a safety pin or other marker at approximate location of stitch No. 25 (about 3 inches or 8 cm.) to the left ofthe beginning of the round. Count leftward 32 stitches (16 ribs) and place another pin or marker. With right side facing, begin picking up at second marker, and continue to the first marker: 28 stitches in A. You will be knitting flat with 2 straight needles or one round needle. Rows 1 & 2: K (garter stitch) in A Rows 3 to 47: Chart No. 3 (monogram; pick an initial or typographic symbol) Knit from chart, decreasing as indicated by slashes (ie., ssk on second & third stitches, k2 tog. the second and third-to-last stitches in the row). Colors as follows: Rows 3 to 13: Background in B, monogram in I Rows 14 to 23: Background in D, monogram in I Rows 24 to 33: Background in H, monogram in I. Rows 34 to 47: Background in C, monogram in I. w edge of sleeve ruffle to the bound off edge, both side Earflap edging: With right side facing, pick up 38 stitches from along right edge in A. Turn work. Row 1 (wrong side): Attach color D. Carrying yarns on wrong side, \*K2A, KzD\* to last two stitches. K2A.Turn work Row 2 (right side): Carrying yarns on wrong side, \*P2A, P2D\* to last two stitches. P2A. Turn work. Row 3 (wrong side): Cast off purlwise in A. Right side: As left side, at about 3 inches or 8 cm. to the right of the beginning of the round, place a safety pin or other marker. Count across to the right 32 stitches (16 ribs) and place another pin or marker. With right side facing. begin picking up at first marker, and continue to the other marker: 28 stitches in A. For earflaps, with A, crochet or sew together 2 sides of earflap at point using mattress stitch. Attach edging to hat at two sides of top of each earflap. Darn in all ends (good luck!) rts for lettering rows and earflap monograms are provided in separate file
Chart One: Griffin & Fox
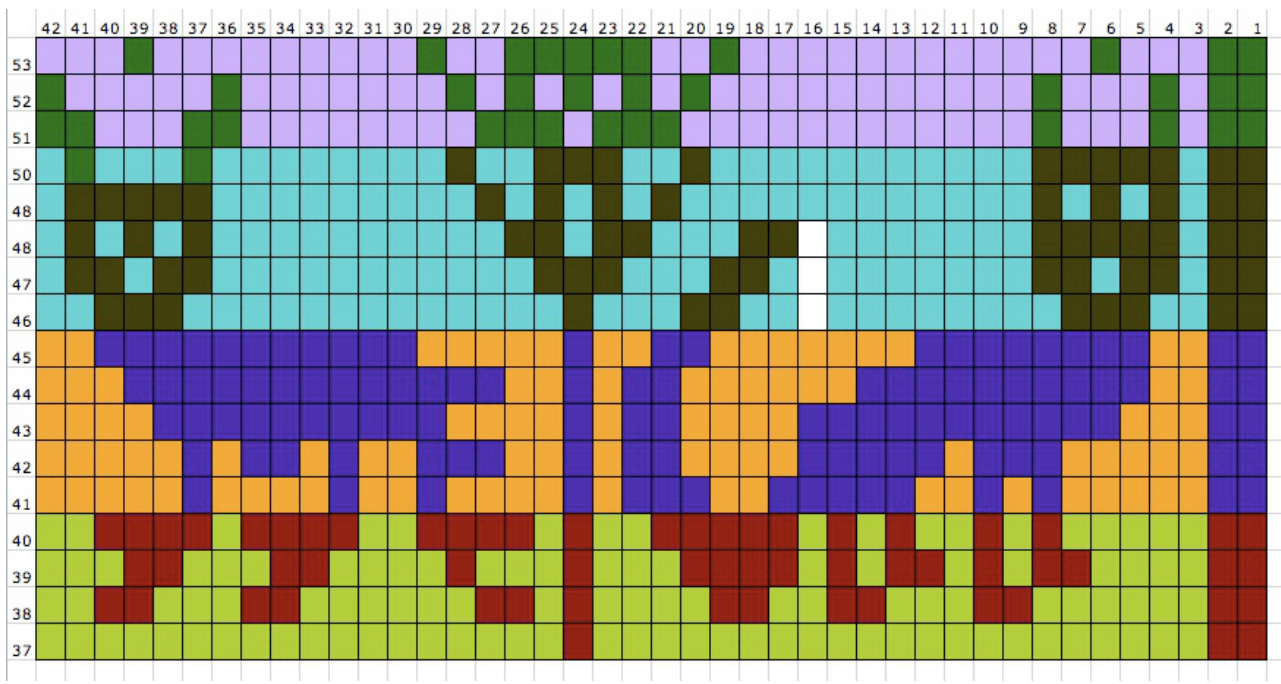
Chart Two: Waves & Snakes
This pattern, including charts and photography are @ Unionpurl Designs. All rights reserved. This pattern is for personal and non-profit use only, and may be freely shared, so long as this copyright statement is preserved in any copies, printed or electronic. This pattern may not be sold or used to sell products, including handmade knit products, except if sold to raise money for charity.


