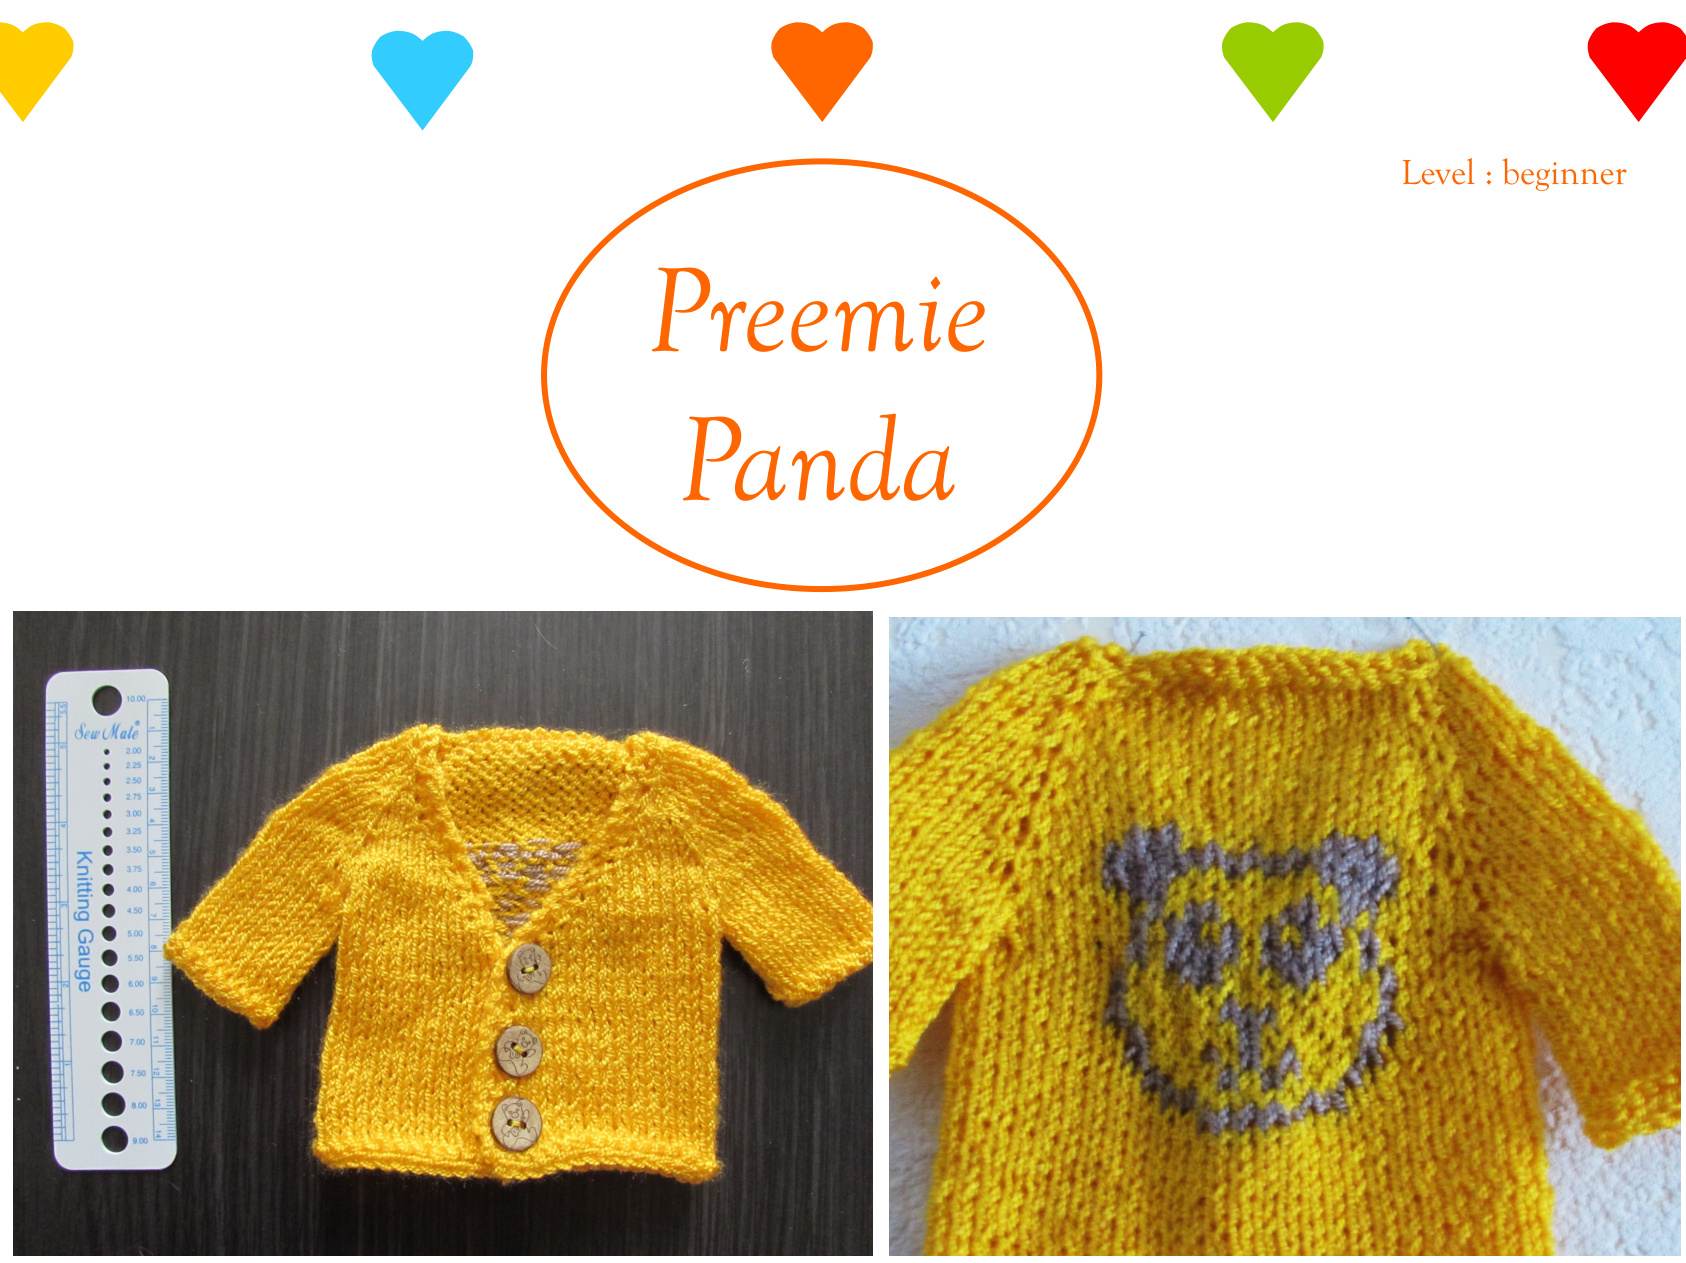
All the mothers of preemies know how difficult it is to find the right size clothes for their tiny babies... so when a solidarity chain on Instagram (IGSOSPREMA) called on all knitters to start knitting fit garments for all preemies sizes, I grabbed my needles and created this little panda cardigan, perfect to keep these adorable bundles warm and cosy! There are 3 sizes, depending on the number of weeks achieved during pregnancy (24, 30 or 36 weeks). It is a simple raglan with a little intarsia motif on the back! This is a fast knit with very little yardage requested.
Material :
Abbreviations :
Thread : fingering 4 ply, between 50 and 130 of Main Color and 4 and 8 m of Contrasting Color. or lace 2 ply, doubling the yardage. Needles 4 mm (or size needed to obtain gauge). 4 markers. 2 or 3 buttons. Gauge : 20 st x 27 r, washed, blocked and dry. You have to respect this gauge if you want to obtain indicated final size, it is really important. Ist : stitch(es). Ir : row. IRS/ws : right side / wrong side. IMC/CC : Main/Contrasting Color. I(P)Mk (1,2,3,4) : (place) marker I(1,2,3,4). IsM : Slip Marker. : until you reach yo : yarn over. K2tog : Knit 2 stitches together. M1 : Make One (see annexes p. 3).
Advices and information :
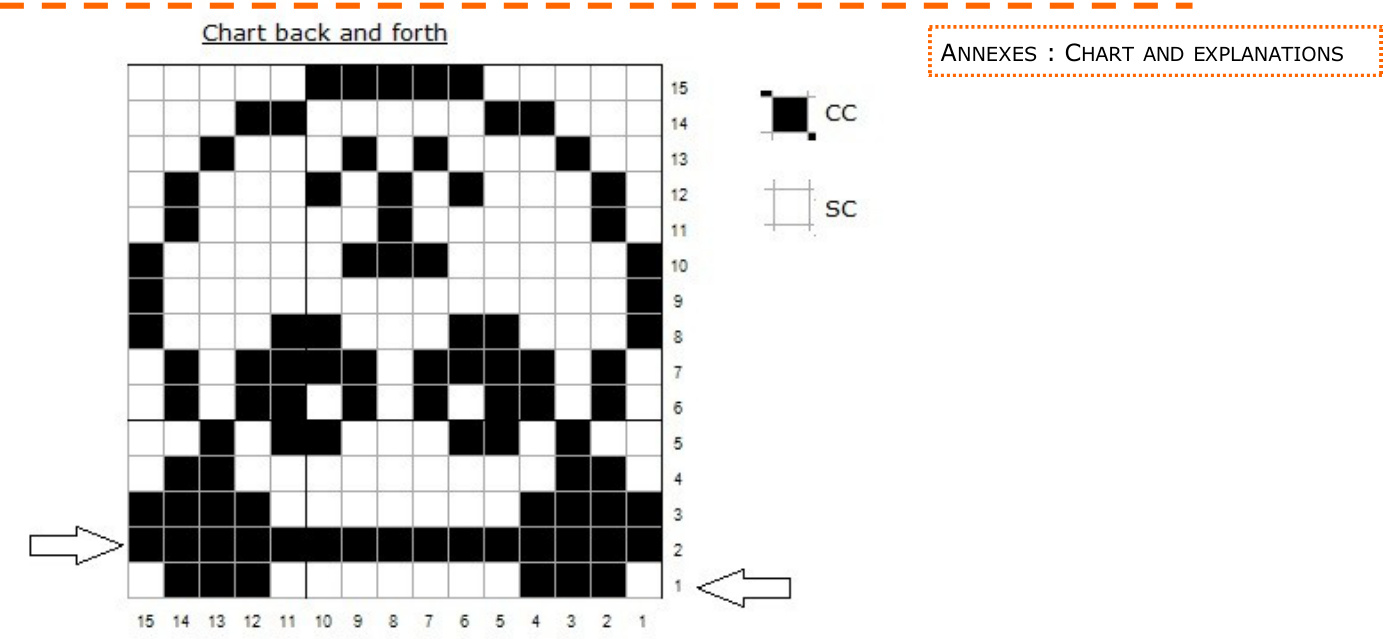
You will find, at the end of the pattern, in annexes p. 3, several step-by-steps to show you how to do M1, as well as the chart for intarsia part. As said previously, there is 3 sizes, defined by the bust measurement of the baby. A birth at 24 weeks corresponds at 20 cm of bust measurement, 30 weeks at 28 cm and 36 weeks at 32 cm. Choose the size according to the bust measurement. When you knit increase rows, the increases are always on the first row. For example, if I have to increase every 3 rows, the increase will take place on the first row of the 3. Always read carefully the whole pattern before beginning. For each step, always read the whole paragraph before continuing. To save ink and paper, I advise you to print p. 2 and 3 only ;) . Sizes are indicated in this order : 24 w [30 w, 36 w].
Pattern :
1- Cast on and raglan
This part is worked back and forth. With MC, cast on 24 [ 32, 42] stitches. Knit two rows (= a rib of garter stitch), and place markers this way : PM1 after first stitch. Count 5 [7, 10] stitches and PM2. Count 12 [16, 20] stitches and PM3 Count 5 [7, 10] stitches and PM4. Continue with stockinette, knit on RS, purl on WS. On the next RS row, increase this way : Increase row : K > Mk1, M1, SMk1, K1, M1, K > 1 st before Mk2, M1, K1, SMk2, M1, K > Mk3, M1, SMk3, K1, M1, K > 1 st before Mk4, M1, K1, SMk4, M1, K > end. Then, on every wS row, begin and end the row with K2. Repeat this increase row 6 [7, 7] times in total every 3 [3, 4] rows. When you have to increase on the WS, replace K by P, excepting the fisrt and last 2 stitches. At the same time, when you have 3 stitches on each front, on the next RS row, increase to shape the V-neck, this way : V-neck increases : K2, Mi, .. (normal row or increase row) .., Mi, K2. Repeat these increases every 2 rows, 7 [11, 13] times in total. At the same time, at 4 [5, 7] cm of height from the cast on, include the intarsia by centering it on the stitches between Mk2 and Mk3 (see next page for the chart). When you have done all the increase rows and reach 7 [9, 11] cm of total height, divide the work and put the sleeves aside (between Mk1 and Mk2, between Mk3 and Mk4). Take off the markers and continue by joining the fronts and the back and finishing the V-neck increases. You have 52 [68, 76] stitches for the body and 17 [21, 24] stitches on each sleeve.
2 - The body :
On the next row (RS) : K2, yo, K2tog, K > end. On the next row (ws), purl the yo from the front loop ("open", the threads are not crossed). This is your first buttonhole. Continue in stockinette until you reach 13 [15, 19] cm of total height, adding one or two more buttonholes if you want. Knit two rows (= 1 rib of garter stitch) and bind off loosely.
3 - Sleeves :
Take back the stitches of one sleeve on your needles (you can pick up one or two stitches to avoid gap on the armpit), and with a new thread, knit in the round until you reach 6 [9, 12] cm from the armpit. Purl 1 row (= 1 rib of garter stitch) and bind off loosely. Do exactlv the same with the second sleeve. Weave in ends, wet-blocked if needed, sew buttons and voila ! ;-)
M1 :
On the right side, when you have to Make One on the left of a marker of the work, from the front, pick up the thread between two stitches with left needle then knit through back loop. In this pattern, you have to make this M1 on the right of the marker.
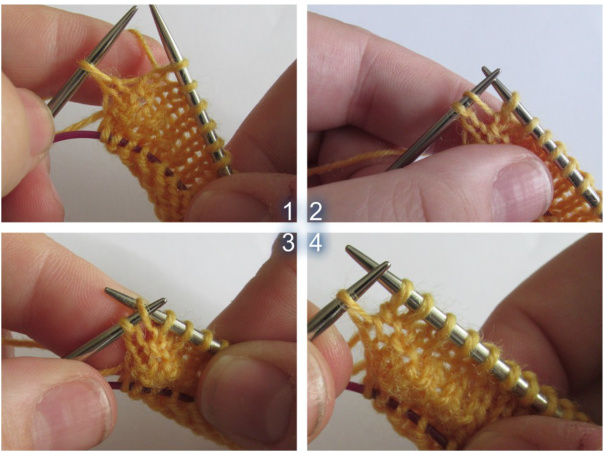
On the right side, when you have to Make One on the right of a marker, from the back, pick up the thread between two stitches with left needle and knit I through front loop. In this pattern, you have to make this M1 on the left of the marker.
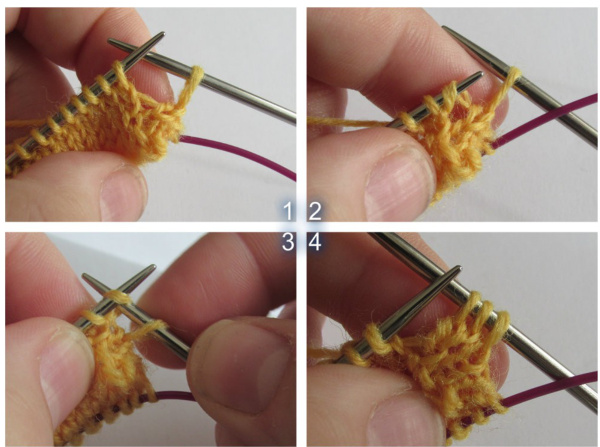
It works the same on the wrong side of the work. But do not forget to purl through the back loop.


