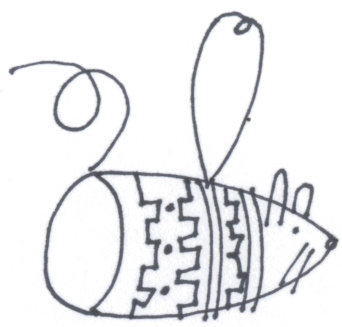
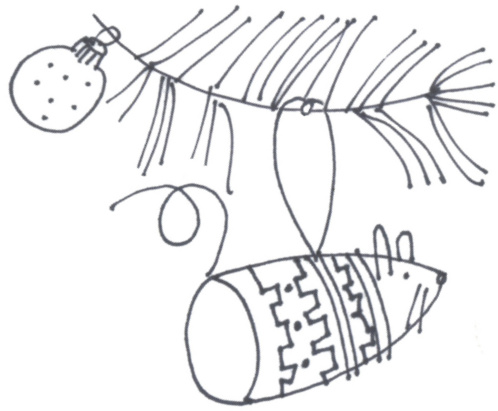
A Little Fair Isle Friend
his little mouse in a simple fair isle sweater is recommended for a tree that needs a sweet ornament, big friends that need L cheering up,lite friends that need a pocket-sized confidante, and as a quick solution for that overwhelming pile of yarn scraps you've been saving. Requires some knowledge of knitting—not too much, just enough. Can be knit up in an afternoon.
What you'll need...
· Fingering weight yarn: 3 yards or less in four colors plus 3 yards in a body color for the mouse's head and tail is plenty · 4 / 2 to 2.25mm double pointed needles · Gauge? Tight enough to keep the stuffing in · 6mm beads for eyes and a nose or scrap yarn · A handful of stuffing: polyester or wool batting · A 3-inch piece of light cardboard (from a cereal box or the like) · A 3-inch piece of felt of light weight fabric in a color to match the bottom of the mouse · A dab of glue to attach the cardboard to the fabric · A sewing needle and thread to match the fabric
The body, head, and snout
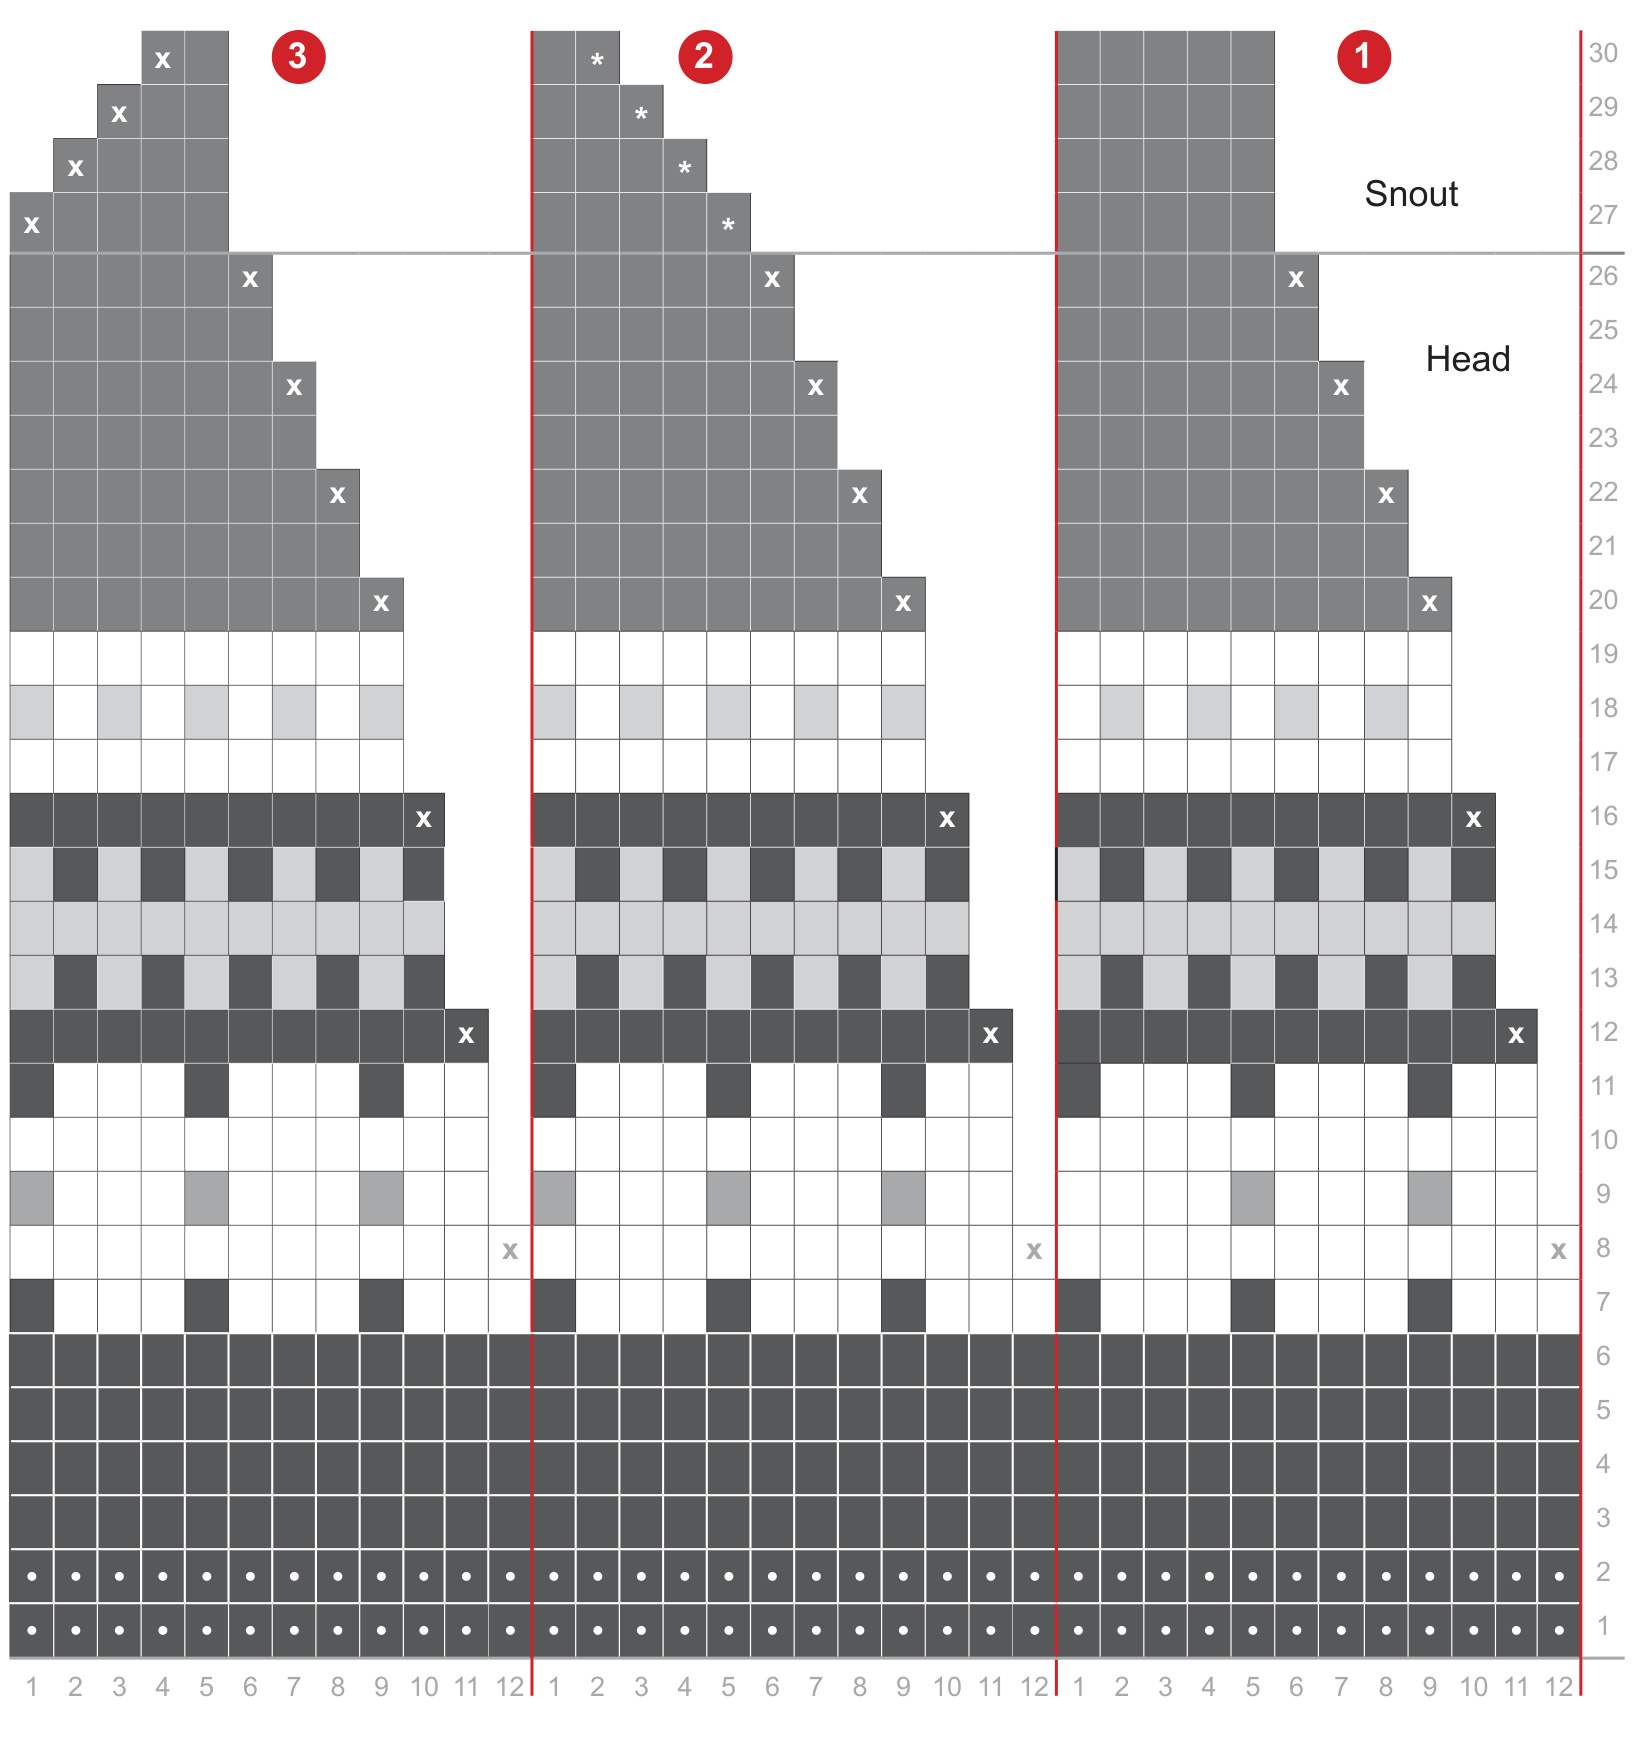
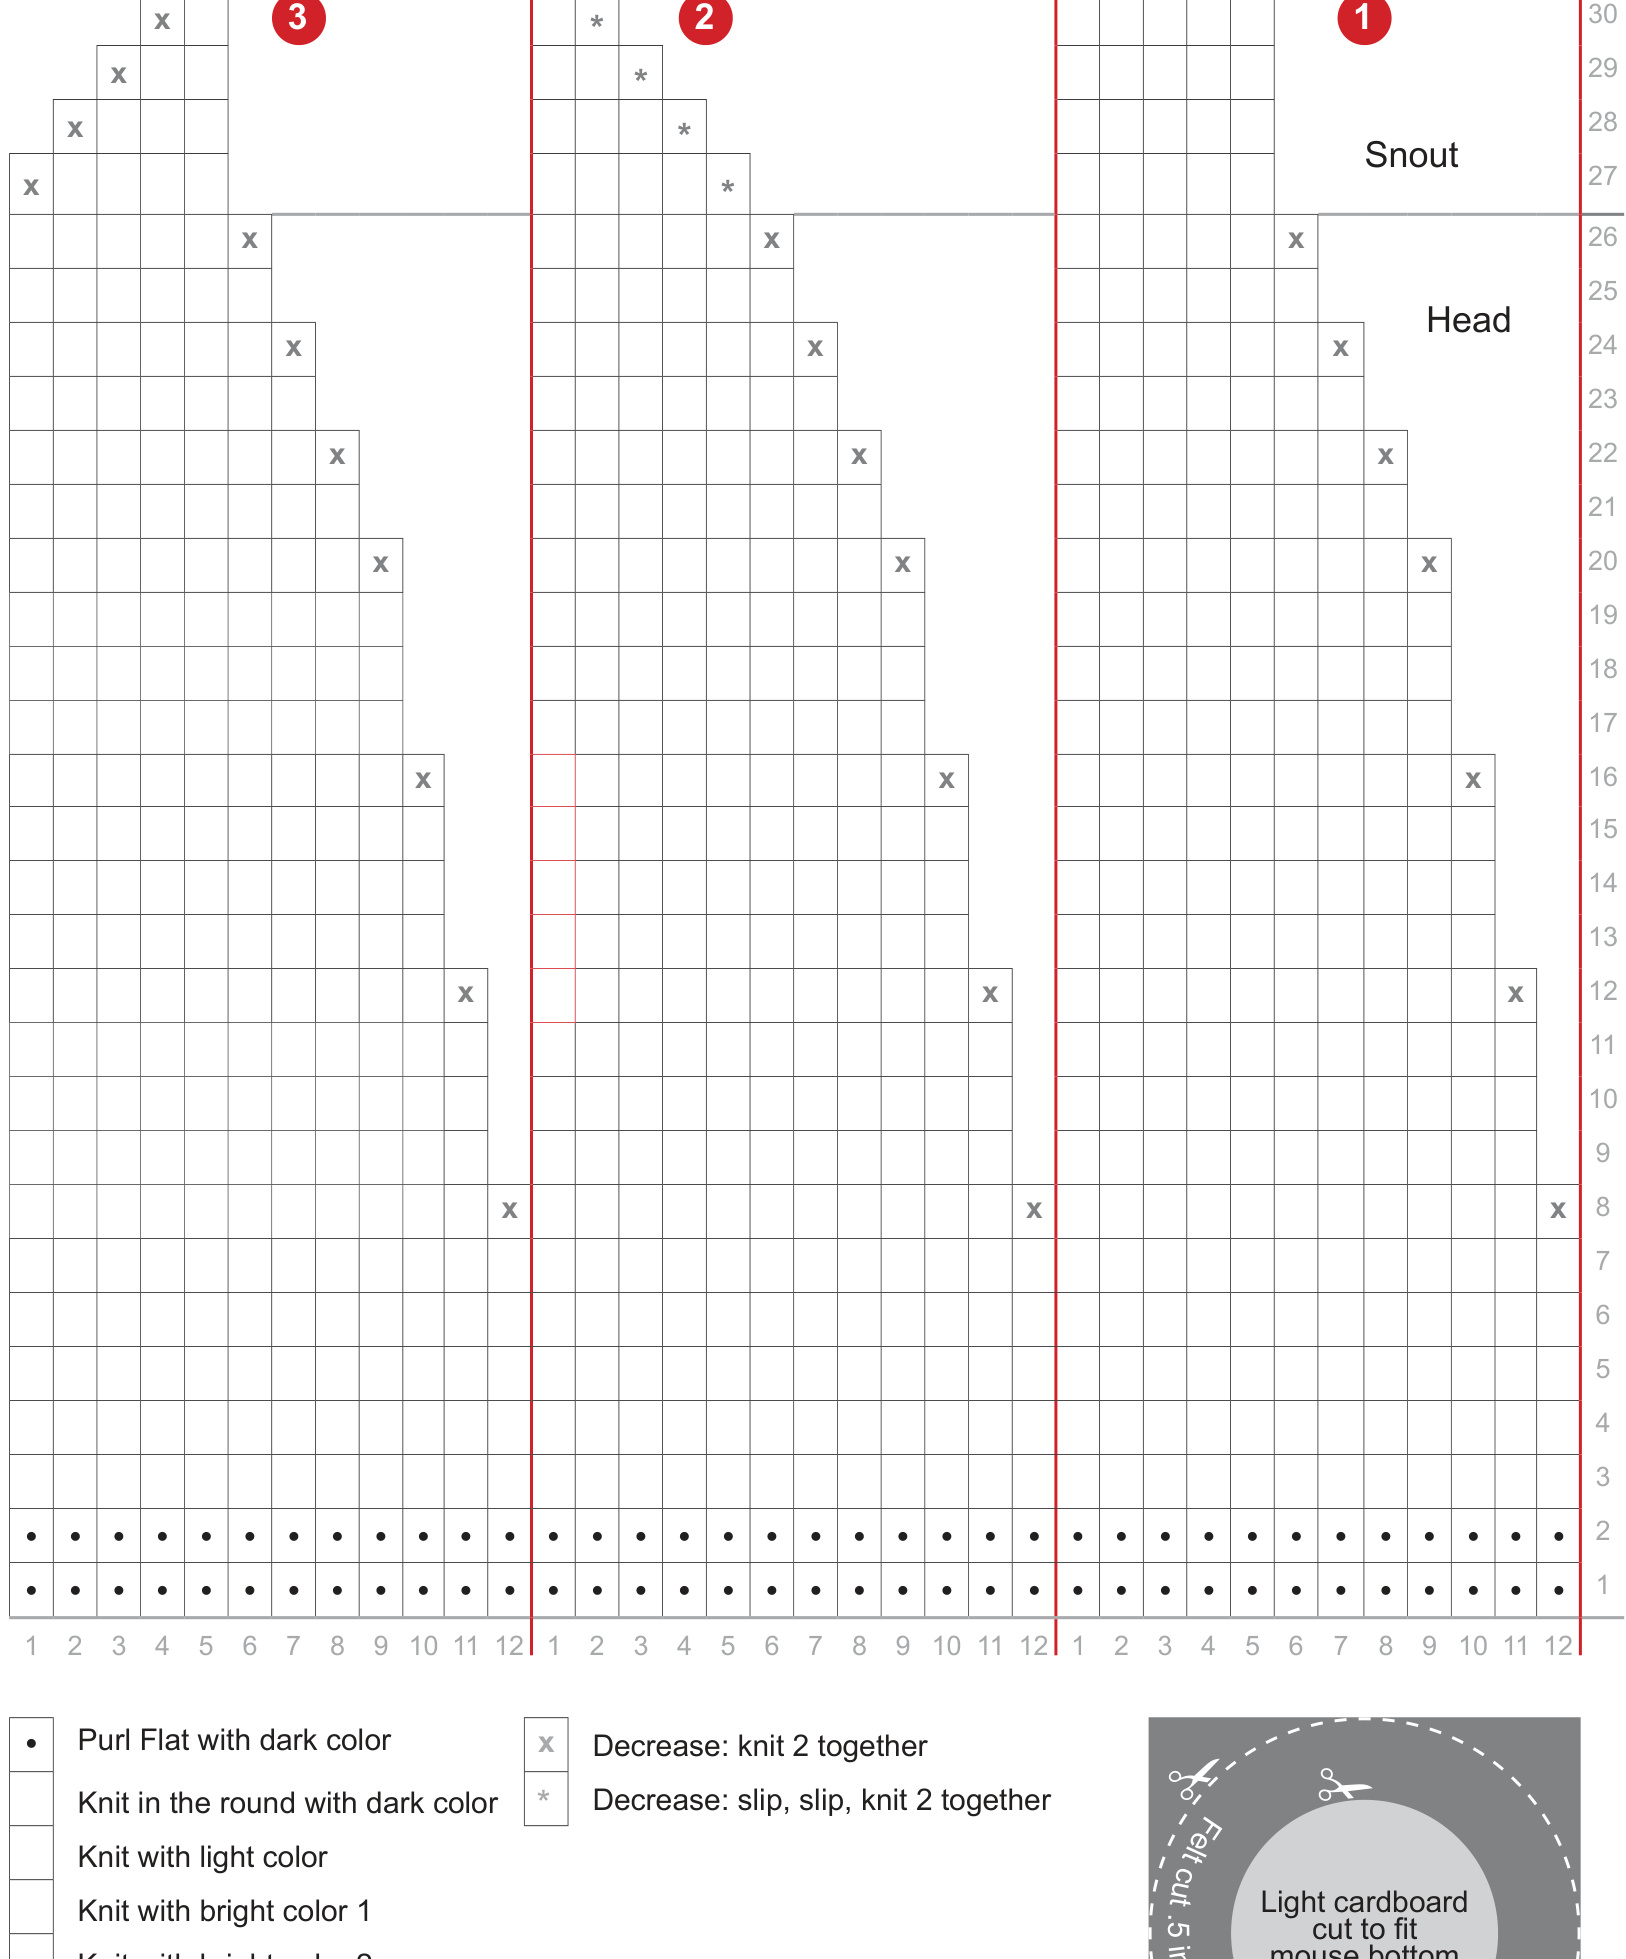
The main part of the mouse is knit from the bottom up. You"ll start by knitting two rows flat to create a little ridge for sewing on the bottom. Then you'll join in the round and knit the little sweater following a simple chart showing color changes and decreases. If you've never knit from a chart before this is fun way to start. ast 36 stitches on one needle. (Magic Loop? Two circulars? It can be done, but I leave that to you.)
Follow the chart provided. for the color changes.
ROWs 1-2: Knit 2 rows flat, then divide stitches evenly over 3 needles. Join in the round. ROWS 3-7:Knit. ROWs 8: Knit two together (K2tg) at the start of each needle (33 stitches remain) ROWS 9-11: Knit. ROWS 12-26: Repeat rows 8-11. ROWS 27-30: The snout. (Note: for a sharper snout, add a knit row between decrease rows.) Needle 1: Knit all. Needle 2: SSK (slip two knit-wise, then knit these two stitches together through the back loop), Knit to end of needle. Needle 3: Knit to last 2 stitches. K2tg. When 5 stitches remain overall, break yarn leaving a 6" tail. Thread tail through remaining stitches. Pull snout closed. Stuff two-thirds of the body. Firm or fat mouse? Squishy or skinny mouse? You decide! Cats? Wrap a pinch of catnip in the center of the stufing.
The tail
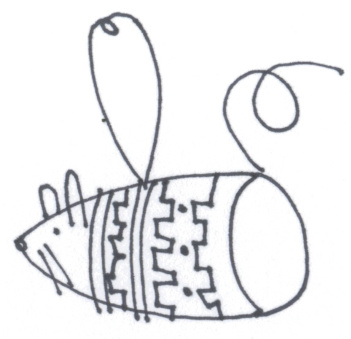
Use the tail from the cast-on to sew the up the gap made by knitting the first two rows flat. Cut and weave the end in. Then using your mouse color pick up 4 stitches at the bottom back where you've closed up the gap. Knit icord until the tail is right for your mouse. Some mice need a long curly tail, others feel happier with a short tail Thread the yarn ends through the tail for a firmer tail.
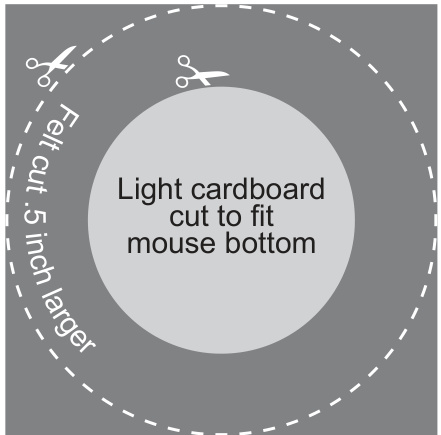
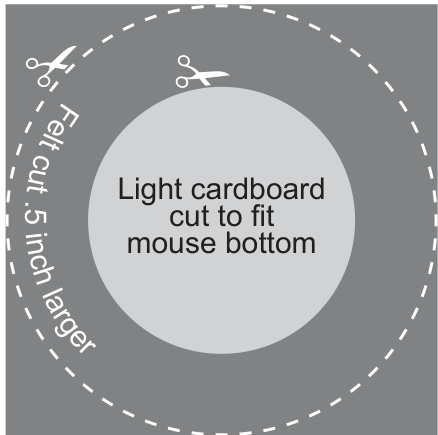
The mouse's bottom
Cut a small circle of light cardboard (A) (use the template provided with the chart as a guide. The final size will depend on the size of your mouse). Glue the cardboard to the center of a felt square (B). Trim the felt into a circle about 3/8ths of an inch larger then the cardboard. Cut flaps all around the felt, but don't cut into the cardboard circle (C). These flaps will be folded and tucked in as you sew on the bottom. Thread a needle (D). Place the circle along the mouse bottom. It should sit slightly inside the mouse. Tuck in a flap. Catch the edge of the fold with the needle and sew between the two ridges of purl stitch. Come back, tuck another flap and sew again. Work half way around. Check to see if more stuffing is called for. Finish sewing up (E). (Afraid of hand sewing? Be fierce. You can do this!)

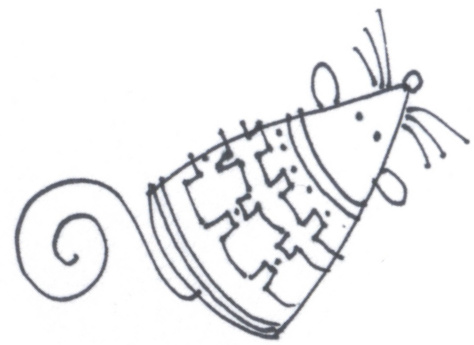
The ears
Cast on 10 stitches. Purl 1 row. Knit 1 row. DoN'T CAST OFF! Instead break the yarn, leaving enough tail to sew the ear on with. Use a tapestry needle to sew this tail through the stitches on the needle. Pull up tight to gather the ear at the bottom and knot at the base withe cast-on tail. The ear will look like a little shell. Make a second ear, then sew both ears on your mouse.
The face
Small buttons and 6mm beads make wonderful noses and ears if your mouse is going to live with someone over the age of seven. For cats and children six and under (or anyone who will swallow anything and everything) use yarns to create the face. In both cases sewing tightly through the head from eye to eye will create a little cheeky indent on your mouse. Whiskers? Up to you. If your yarn is more than one ply: sew two scraps of the mouse color through the face. Knot the strands together on both sides of the face, then tease the plies out into single strands. A little face tip: Hold the mouse with its snout facing you and the tail at twelve o'clock. Use a toothpick or dpn to help you decide where your ears and eyes should be placed, by poking the pick through from one side to other. Squint. Does it look right to you? If not poke again. Then sew at those point.
Modifications?
Please do consider... ...heavier yarn, larger needles = larger mouse. If you go up in weight you might need to add a plain row between the first couple of decrease rows on the snout. ...adding a strand of mohair and brushing out the "fur" (an old, soft toothbrush works for me). ...school colors for a mascot mouse? Stretching your fair isle wings? Yay! Blank chart provided.
The fine print
You may use this pattern in lots of wonderful ways: print it, share it, teach it, and even sell what you make. However don't claim my words or drawings or pictures as your own, for that is called violation of copyright. @ 2013 Kate Godfrey kate@okaykate.com