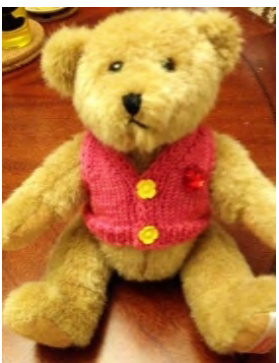
Heart to Heart Bear V-NECK WAISTCOAT
(with V-neck vertical front bands knit as you go) This was designed for the Heart to Heart Bears, sold for the Heart to Heart group in Shanghai China which raises funds for surgeries for Chinese children with congenital heart disease. These directions are free for your personal, individual use. Please do not distribute or reformat them for commercial use, or sell them. Items made from these directions should only be sold if all profits go to charity. Materials:. 21g yarn DK weight 3 15mm buttons (optional) Stitch holder

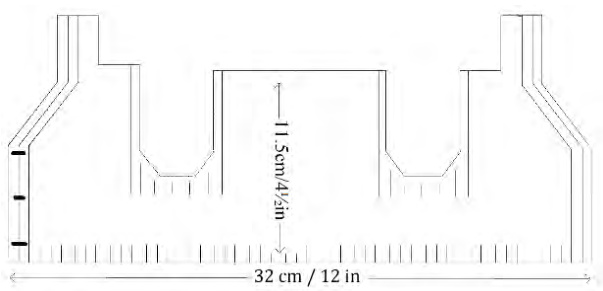
Needles: ..3 4mm needles (2 double pointed, or 1 set circular/straight plus 1 extra) Gauge: .. 25 stitches, 36 rows = 10cm X 10cm Note:.... Waistcoat will fit a teddy bear about 25-30cm/10--12in tall with a waist of about 29cm/11/2in. Final waistcoat should measure about 32cm/12in along the bottom edge and 11.5cm/41/zin. from top to bottom at the back.
ABBREVIATIONS
K. ...knit .....purl St(s) ....stitch(s) RS...right side (od # rows) WS ....wrong side (even # rows) St.St. ...stockinette stitch (K RS row, P wS row) Slk...slip stitch knitwise Slp...slip stitch purlwise Ri.... work in Ki1P1 ribing, beginning with P or Slp on RS, K or Slk on WS YO .... yarn over (to make a hole) K2tog.. knit 2 Sts together K2togTBL..knit 2 Sts together through back loops P2togTBL..purl 2 Sts together through back loops SPP .... Slp1, P1, pass slipped St over P St SSK: ... Slk1, Slk1, then K these 2 Sts together BO.... bind off
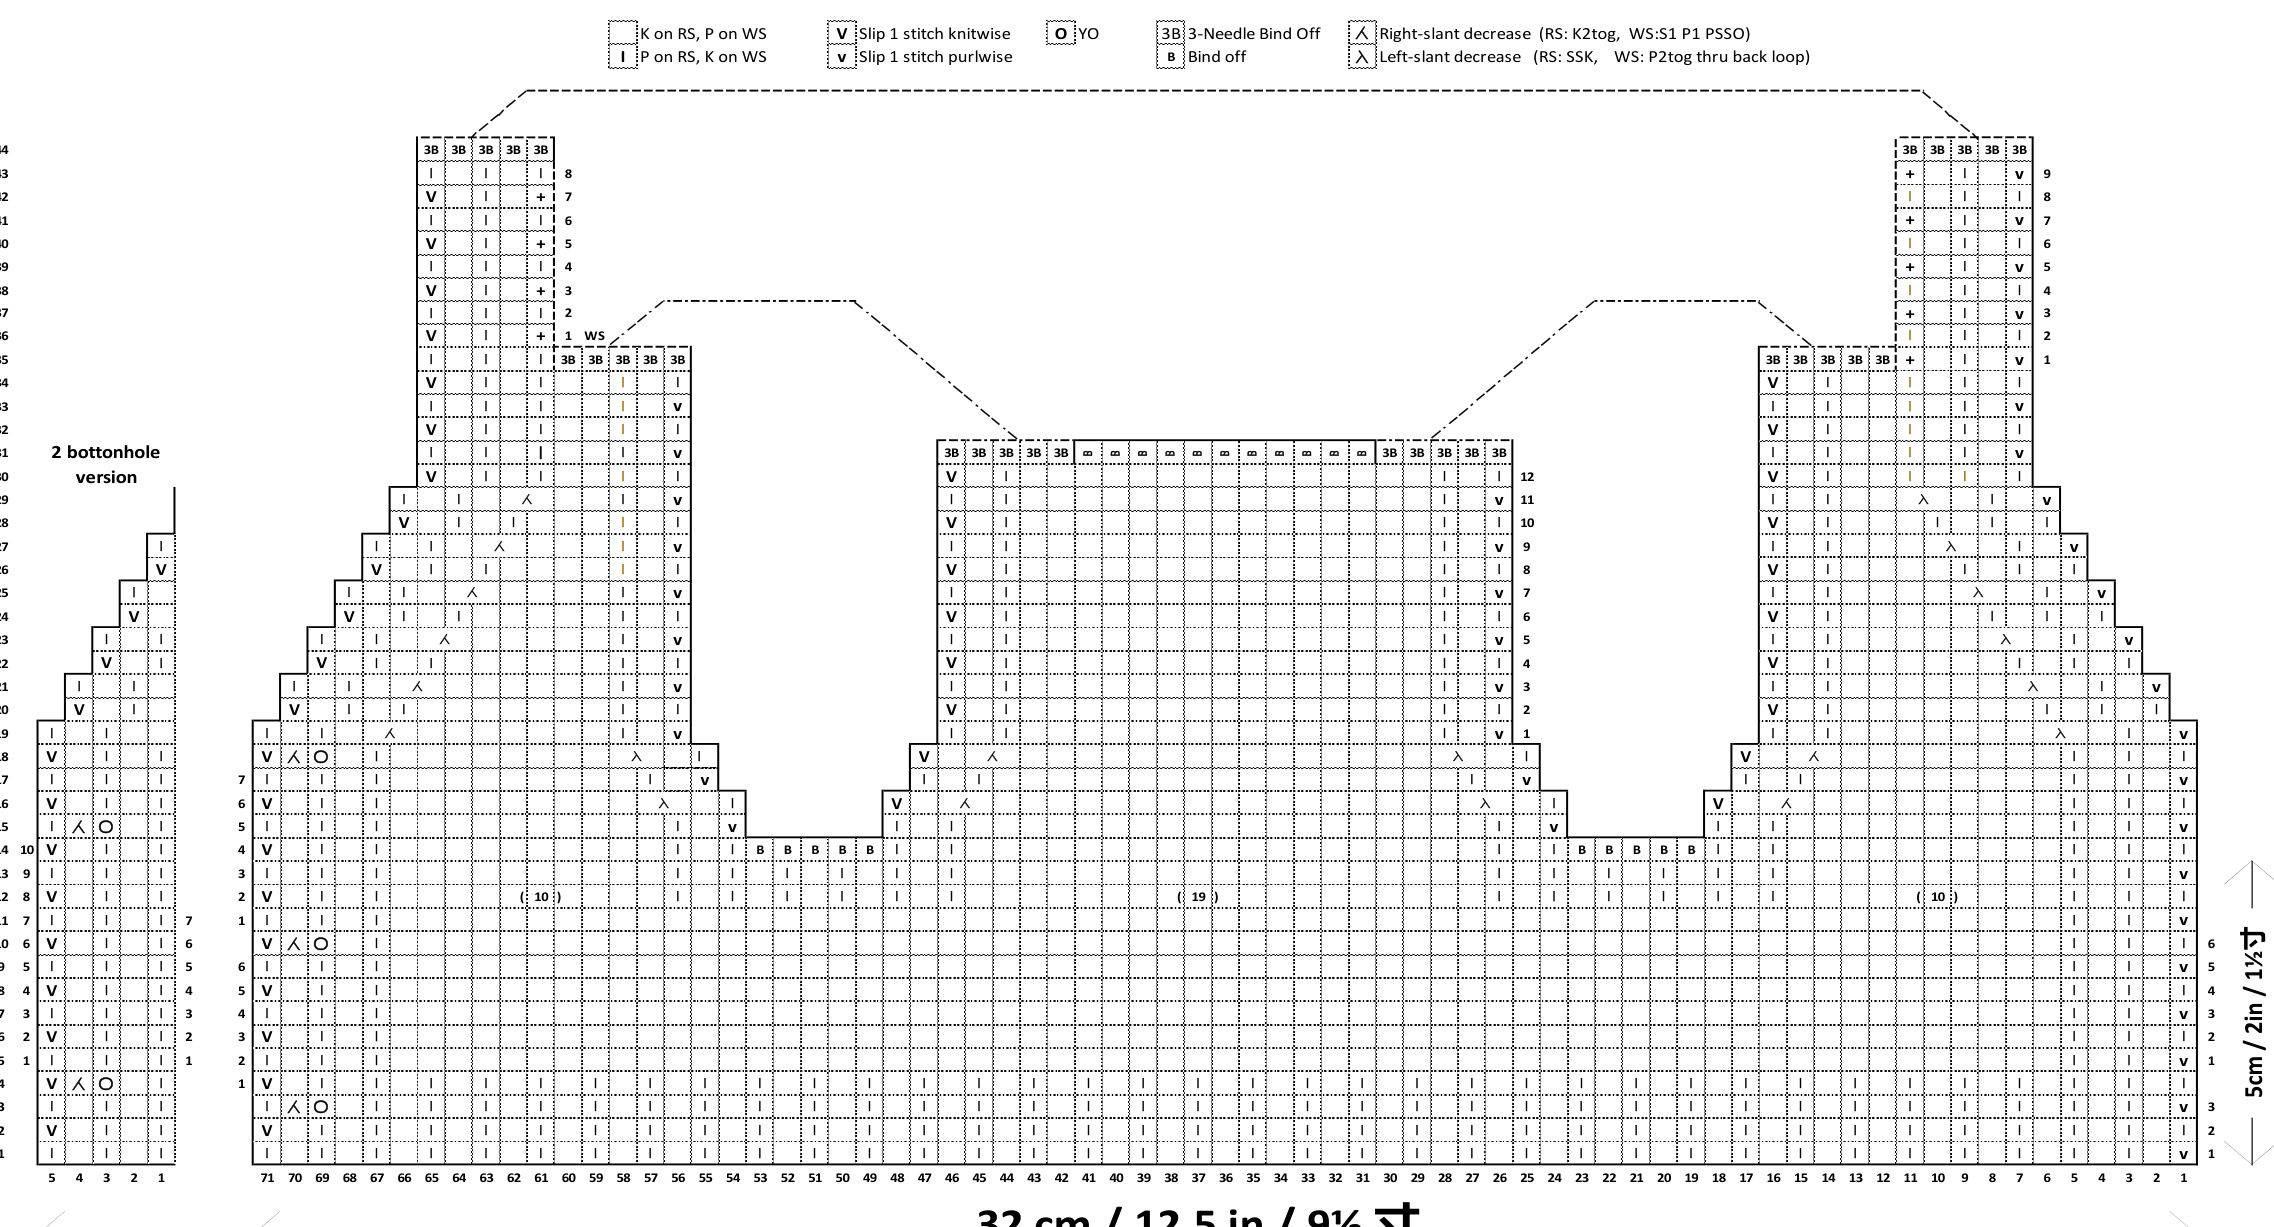
BACK & FRONTS (knit in one piece until
armholes) Cast on 71 Sts, put optional markers after 1st 5 and before last 5 Sts to mark ribbing. Bottom ribbing: Row 1 Slp1 \*K1P1 repeat from \* until end Row 2: Slk1 \*P1K1 repeat from \* until end Row 3: Slp1 \*K1P1 repeat from \* until 5 Sts remain, work 1st buttonhole in last 5 Sts (P1; K1; YO; K2tog; P1). Row 4: Repeat Row 2 Underarms: Row 5-9 (next 5 rows): Slip 1st St and Rib 4; work in St.St. until 5 Sts left, Rib 5. Row 10: Slk1; SPP; YO; P1; K1; work in St.St. until 5 Sts left; Rib 5 (2nd buttonhole) Row 11: Same as Row 5-9. Row 12: Slk1; Rib5; P10; Rib 11; P19; Rib 11; P10; Rib5 Row 13: Slp1; Rib4; K10; Rib 11; K19; Rib 11; K10; Rib5 Divide for Left-Front, Back, and Right Front: Row 14: Slk1; Rib 4; P10; Rib 3; BO 5; Rib 3; P19; Rib 3; BO5; Rib 3; P10; Rib 5 (18 Sts + 25 Sts + 18 Sts)
RIGHT FRONT (18 Sts):
Decrease underarm: (Right Front Rows 15-18, decreasing on P rows) Row 15: Slp1; Rib4; K until 3 Sts left; Rib 3 Row 16: Slk1, P1, K2togTBL; P until 5 Sts left; Rib 5 Row 17-18: repeat rows 15-16 (16 Sts) Decrease collar: (Right Front Rows 19-29, decreasing on K rows) Row 19: Slp1; Rib 3; P2togTBL; K until 3 Sts left; Rib 3 Row 20: Slkl; P1; K1; P until 5 Sts left; Rib 5 Row 21-30: Repeat rows 19-20 until there are 10 Sts left, (2 Sts between ribbings), ending with a P (WS) row Row 31: Slp1; Rib4; K2; Rib 3. Row 32: Slk1; P1; K1; P2; Rib 5 Row 33-34: Repeat rows 31-32 Cut yarn, leaving a long tail, and place all 10 Sts onto a spare needle.
BACK (25 Sts):
With RS facing, join yarn at bottom right of the back. Decrease underarm: (Back Rows 15-18, decreasing on Prows) Row 15: Slpl; K1; P1; K until 3 Sts left; Rib 3 Row 16: Slk1; P1; K2tog; P until 4 Sts left; K2togTBL; P1, K1 (23 Sts) Rows 17-18: repeat rows 15-16 (21 Sts) Row 19-30 (Next 12 rows): Slip 1st St; Rib 2; Work in St.St. until 3 Sts left; Rib 3
RIGHT Shoulder Seam & Collar
Join Right Front to Back
Transfer RIGHT FRONT Sts to third needle. Placing right sides together, use 3-needle bind-off (described at end of pattern) to bind off 5 Sts from the armhole edges of the Right Front and Back. You now have 15 Sts on back needle, 4 Sts on front needle, and 1 St on working needle. Transfer single St onto needle with back Sts, than, continuing with 4 remaining Sts from right front, Rib 4. Shift rib Sts onto back needle. 20 Sts Row 16: Slk1; Rib 4; P until 4 Sts left; K2togTBL, P1, K1 Row 17: Repeat Row 15 Row 18: Slk1; P2togTBL; YO; P1; K1; P until 4 Sts left; SPP, P1, K1 (3rd buttonhole, 16 Sts) Decrease collar:(Left Front rows 19-30, decreasing on K rows) Row 19: Slp1; K1; P1; K until 6 Sts left, P2tog, K1, P1, K1, P1. Row 20: Slk1; Rib 4; P until 3 Sts left; Rib 3 Row 21-30: Repeat rows 19-20 until there are 10 Sts left, (2 Sts between ribbings), ending with a P (WS) row Row 31: Slp1; K1; P1; K2; Rib 5 Row 32: Slk1; Rib 4; P2; Rib3 Row 33-34: Repeat Row 31-32
LEFT Shoulder Seam & Collar
Join Left Front to Back
Placing right sides together, use a 3rd needle for a 3- needle bind-off to bind off 5 Sts from the armhole edge of the Left Front and Back.You now have 9 Sts on back needle, 4 Sts on front needle, and 1 St on working needle. Transfer single St onto needle with back Sts, then, continuing with 4 remaining Sts from left front, Rib 4. 14 Sts. Left Collar: Row 1: Slk1; P1; K1; P1; K2tog. (8 right collar and back Sts left on remaining needle. Turn Row 2 (Working with 5 collar Sts): Slp1; Rib 4 Rows 3-8: Repeat rows 1-2 (ending with a RS row 2) - 10 Sts total. Cut yarn, and transfer all Sts onto the needls with the 5 collar Sts. 15 Sts.
LEFT-FRONT (18 Sts)
With RS facing, join yarn to the bottom right of the LEFT-FRONT section. Decrease underarm: (Left Front rows 15-18, decreasing on P rows) Row 15: Slp1; K1; P1; K until 5 Sts left; Rib 5 Transfer 5 Sts onto 2nd needle. With right sides together, bind off right and left collar Sts using 3- needle bind off. Cut yarn, and use tail to fill in if there is a hole left at the collar edge.
Finishing
Sew in yarn ends. Sew on buttons.
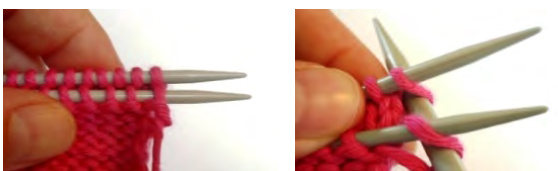
Three Needle Bind-Off
Hold two needles with stitches together, with right sides facing inwards, towards each other (first picture). Insert the third needle into the first stitch on each of the needles knitwise, starting with the front needle (picture 2), and knit one stitch. Continue in this way, binding off stitches as you knit.