The Rosa Mitts
By Erin Amelia (Designed to match The Amanda Hat, by Gina House)
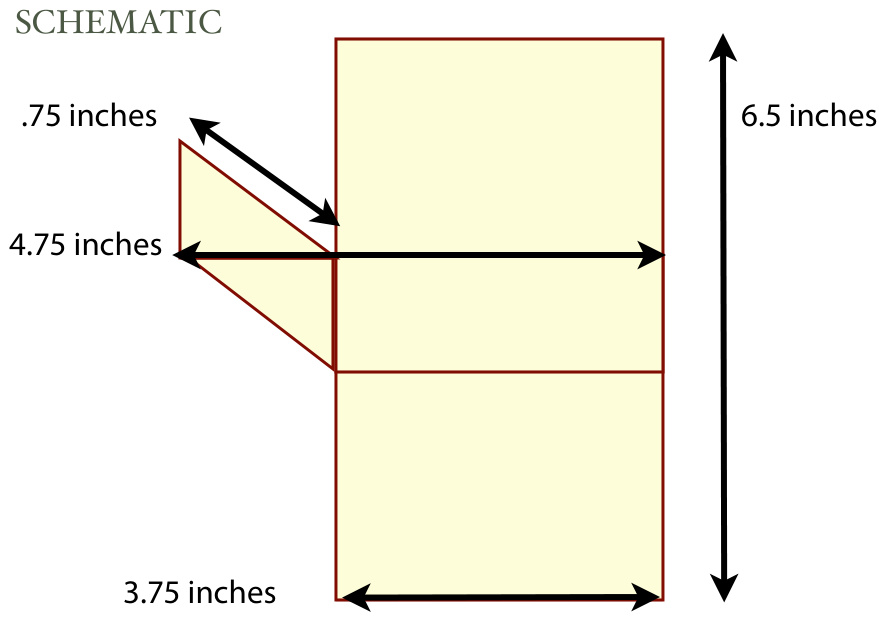
Materials and Measurements
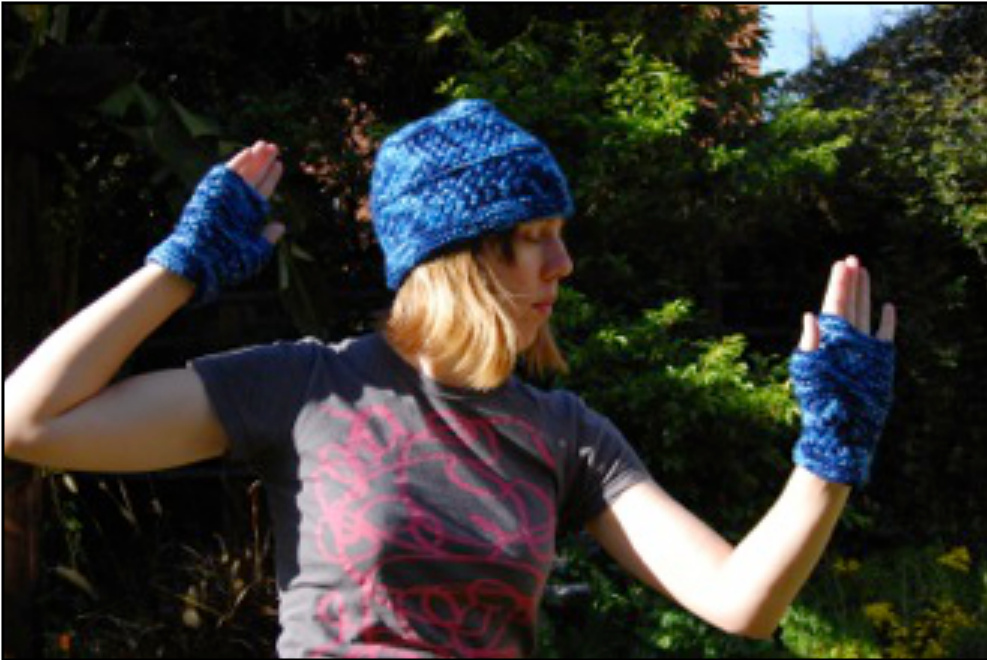
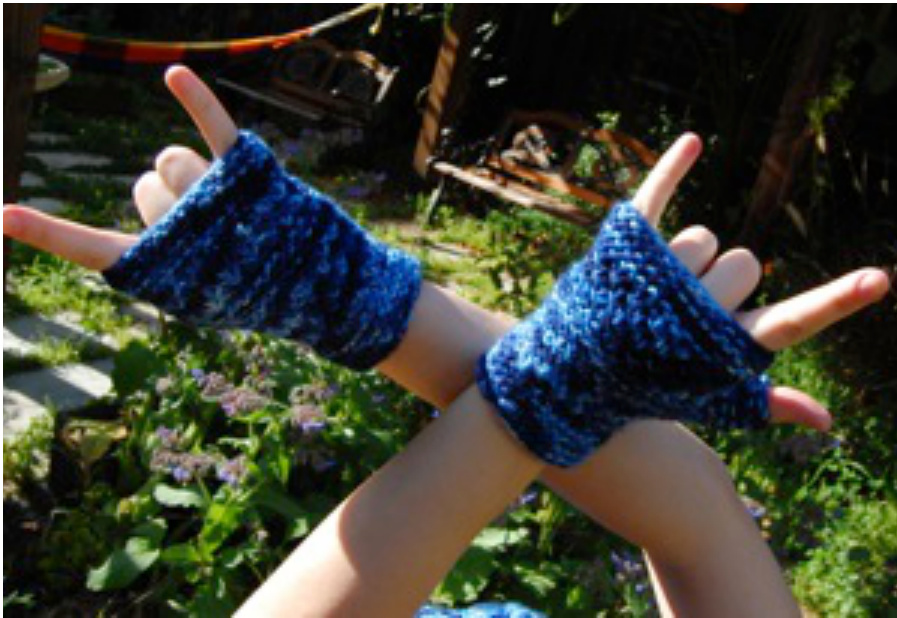
When my friend Rosa had to have spinal surgery, I wanted to make her something really nice as a “hooray, you're feeling better!' present. Fortunately, she lives in Canada so wooly presents are always welcome. I had several skeins of Malabrigo lying around so an Amanda Hat seemed like a good idea, and when i was done I still had half a skein.. thus, fingerless mitts! (Soon Rosa will be well enough to get on her bike, these should serve her well.) Yarn: Approximately 1/2 skein of Malabrigo Merino Worsted (106 yds). These mitts are designed in such a way that you can get one Amanda Hat and one pair of Rosa Mitts out of a single skein of Malabrigo Worsted with enough left over for a swatch. Needles: 1 set of five size 9 (5.5 mm) dpns, or size to match gauge. Gauge: 16 sts and 24 rows to 4" by 4" (4 sts and 6 rows per inch) Note: The merino is squishy and stretchy so gauge is less important for this project than for, say, a sweater. Don't worry if you are a little off. If you are making an Amanda Hat with the Mitts, try to match gauge. Model: Margit Z
INSTRUCTIONS
Sizes: S, M, and L (size shown: medium). The two mitts are identical.
With a long-tail cast on held over two needles, CO 27 (31, 35) sts.
Join to work in the round, being careful not to twist. Work 8 rounds of garter stitch, starting with a purl row and ending with a knit row. This produces a loose cuff. If you want a tighter cuff, go down a needle size or two for the cuff. Work the following lace pattern 3 times: Round 1: k1, \*yo, sl 1, k1, yo, psso\*.\*repeat across round. (40, 46, 52 sts) Round 2: k1, \*drop yo, k2\*.\*repeat across round.(27, 31,35 sts) Round 3: k2, \*yo, sl 1, k1, yo, psso\*..\*repeat across round, end with k1. (39, 45, 51 sts) Round 4: k2, \*drop yo, k2\*.\*repeat across round, end with k1. (27, 31, 35 sts)
INSTRUCTIONS, CONTINUED
THUMB INCREASES:
Row 1: Purl until the last 4 stitches, place marker I, purl front and back, purl 2, purl front and back, place marker 2 Row 2: Knit to the stitch before marker 1, knit into the front and back, slip marker, knit 6 Row 3: Purl front and back, purl to marker 1, slip marker, purl front and back, purl 4, purl front and back. Row 4: Knit to the stitch before marker 1, knit into the front and back, slip marker, knit 8 Row 5: Purl front and back, purl to marker 1, slip marker, purl front and back, purl 6, purl front and back. Row 6: Knit Row 7: Purl to marker 1, then place the 10 stitches in between the markers onto waste yarn or a stitch holder. (Waste yarn is easier.) Row 8: Knit

REST OF MITT:
Work the lace pattern 2 times, followed by 8 rounds of garter stitch. Bind off top of mitts. Put thumb stitches back on needles, evenly distributed, and pick up 2 extra stitches from the gusset. Knit one round, decreasing two stitches randomly. Work 2 more rounds in garter stitch, bind off. Sew in ends.
THANK YOU FOR KNITTING!
Big thanks to Jeri and Nicole for feedback and tech editing. If you have problems please RavMail or email me (erin.acb@gmail.com)!


