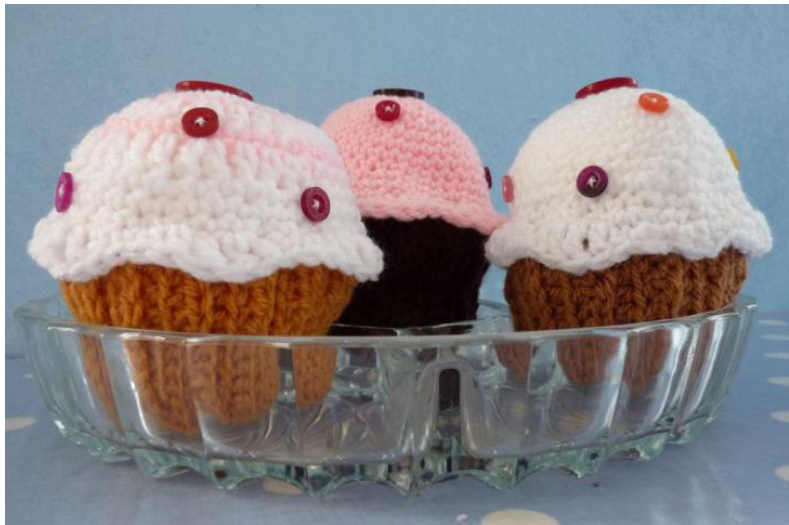
Crocheted Cupcakes @ Olivia Rainsford 2011
Abbreviations
used in this pattern / American CH chain SC single crochet HDC half double crochet sp(s) space(s) Abbreviations used in this pattern / [British] CH chain [DC] double crochet HTC half treble crochet sp(s) space(s)
You need:
scraps of yarn (cotton, WW or DK acrylic) in brown (for the cupcake base) and some pastel colour for the icing / frosting. hook - use a hook that's one or two sizes smaller than the one recommended for your yarn weight. You want a firm, tight stitch stuffing - Ibuy cheap cushions at the 99c store and re-use their innards. You could also use chopped up tights / nylons, or yarn scraps buttons or sequins to decorate a sewing needle to attach your cupcake decorations

This is more of a guideline than a pattern. You will have to experiment a litle bit to adapt it to your gauge. But don't fret - we'll get to that later! Every effort has been made in design and testing to make this pattern as user-friendly as possible. Should you, however, find any quirks or oddities, please let me know. You may sell items made from this pattern privately or at craft fairs. If you sell items made from this pattern on sites such as Etsy, it would be courteous to let me know .. and giving me credit for the design would be the honorable thing to do! What is expressly forbidden, of course, is reproducing this pattern in print or electronic form, passing it off as your own work or re-selling it as your own design. That's a big crafting no-no - but I don't need to tell you that. You seem like an all Olivia - The Gingerbread Lady

Cupcake Base
Use a brown or biscuit-coloured yarn. Start with a magic loop or by chaining 3 and joining with a slip stitch to form a little circle. Round 1: Chain one, then do a SC [DC] in the same stitch below (this counts as your first SC [DC] here and throughout), then do 7 SC (DC) into the circle. (8 stitches in total)
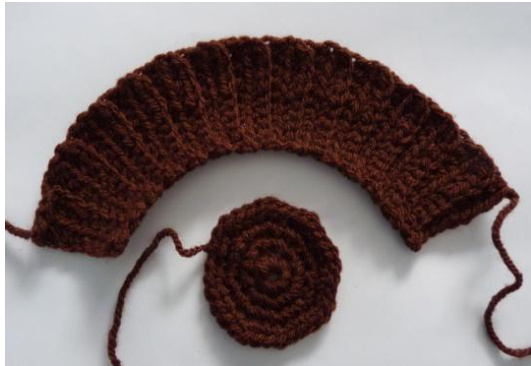
Round 2: Chain one, then do 2 SC [DC] in the same stitch. 2 SC [DC] in next seven stitches (16 stitches in total) Round 3: Chain one, then do 1 SC [DC] in the same stitch, 2 SC [DC] in next stitch, \*1 SC [DC] in next stitch, 2 SC [DC] in next stitch.\*\* Repeat from \* to \*\* around, ending with 2 SC [DC] (24 stitches in total) Round 4: Chain one, then do 1 SC [DC] in the same stitch, 2 SC [DC] in next stitch, \*1 SC [DC] in next two stitches, 2 SC [DC] in next stitch.\*\* Repeat from \* to \*\* around, ending with 2 SC [DC] (32 stitches in total). Chain 2, yank tight and cut yarn.
Cupcake Side
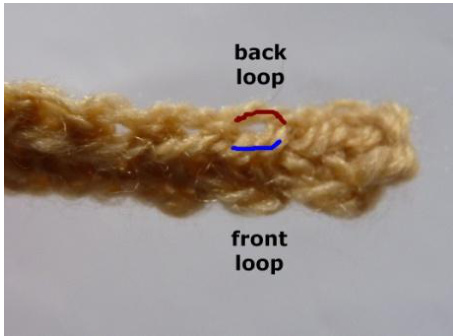
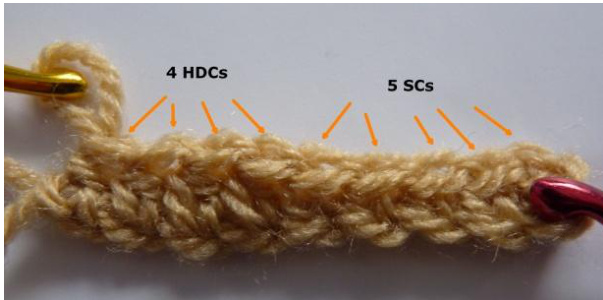
Row 1: Chain 10. In second chain from the hook, do 1 SC [DC]. Crochet 1 SC [DC] in the next four stitches. Crochet 1 HDC [HTR] in the remaining four stitches. Now turn this wriggly little chain in preparation for the next row. Take a look at it - from now on, we're going to have a front and a back to our work, and to make this clearer, we are going to work in the front or back loop of the previous row.
Row 2:
Chain 1. Crochet 1 HDC [HTR] in the front loop (the one closest to you) of the next four stitches, then 1 SC [DC] in the front loop of the next five stitches. Turn your work.
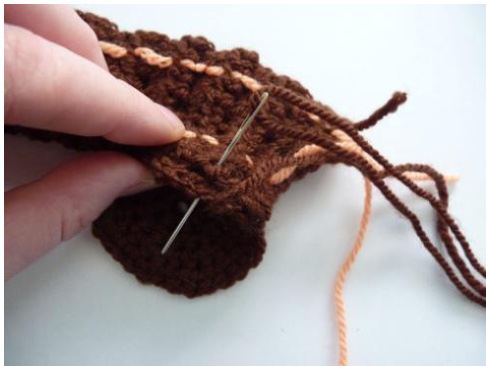
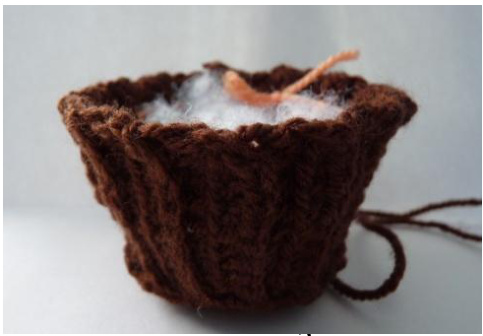
Row 3: Chain 1. Crochet 1 SC [DC] in the back loop of the next five stitches. Crochet 1 HDC [HTR] in the back loop of the next four stitches. Look at your work. You should have a clear ridge on one side of your work. This is the front. It might help to thread a bit of coloured yarn or a stitch marker through one of the stitches to remind you which side is the front. From now on, you will crochet into the back loop when the front of your work faces you and into the front loop when the back of your work faces you (Aha! So now you understand why it's not a bad idea to have a visual signal for the front and theback!) Continue like this till the skinny side of your, um, curvy trapezoid fits around your cupcake base when you stand it upright in its cupcake shape. I recommend that you make it smaller rather than larger than the base. Now, here's where you cheat. Take two strips of the yarn you used for your cupcake base and thread them through the top and bottom of your curvy shape on the back side of the cupcake side. (I've used a contrasting colour, so you can see it. You should use the same colour so it can't be seen.) These two pieces of yarn will give your base a better shape and some stability. Sew the base to the side with the ridge on the inside, sew up the opening. Tug the pieces of yarn to pull in the cupcake's sides and tie it when you think your cupcake base looks suitably cupcakey. Turn it inside out, so the ridge (front side) is facing out. Stuff it with as much stuffing as you can fit inside it.


Cupcake top
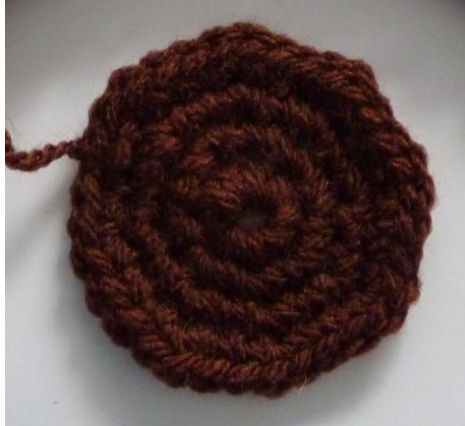
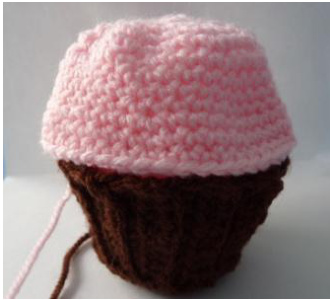
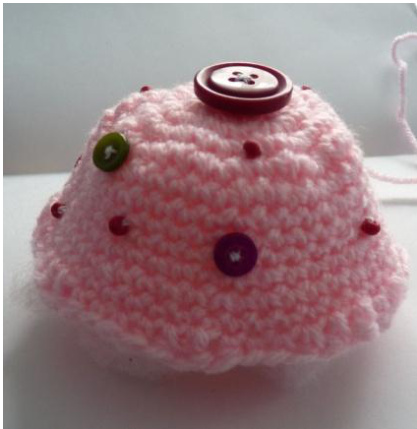
Use a pastel-coloured yarn. Start with a magic loop or by chaining 3 and joining with a slip stitch to form a little circle. Crochet as per the instructions for the base (rounds 1-4). Round 5: Chain 1. Crochet 1 SC [DC] in same stitch, then 1 SC [DC] in each stitch around. Your circle should be approximately big enough to sit on top of your cupcake base. Round 6, 7, 8: Chain 1. Crochet 1 SC [DC] in same stitch, then 1 SC [DC] in each stitch around. You should have a little dome that sits atop your cupcake base like this ->

We now have to widen it a bit to fit on top of the base better. We do so by increasing with double SC [DC]s Round 9: Chain one, then do 1 SC [DC] in the same stitch, 2 SC [DC] in next stitch, \*1 SC [DC] in next four stitches, 2 SC [DC] in next stitch.\*\* Repeat from \* to \*\* till you come back to your starting SC [DC].
Round 10 and 11 (optional): you can continue by doing 1 SC [DC] in each stitch around. The cupcake top should be approximately as tall as the base.
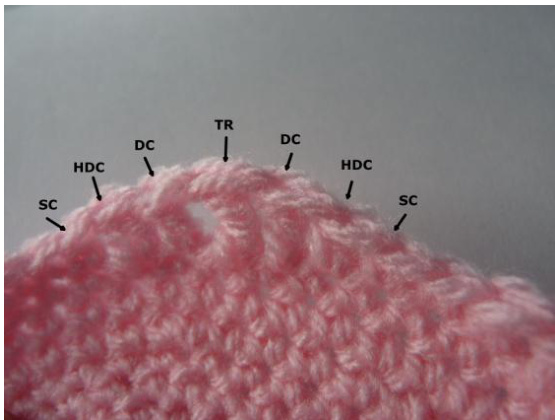
The dribbles
When your cupcake top is tall enough, create 'dribbles' of icing/frosting, by crocheting stitches of different heights around the edge: Sew your buttons and sequins on top and stuff the cupcake with as much stuffing as you can get into it.
Now the tricky bit: sew the two pieces together. You will probably find that these two pieces don't actually want to be stuck together, and you may have to pin them in place.
You will probably find that these two pieces don't actually want to be stuck together, and you may have to pin them in place beforehand. I usually use the pastel yarn and sew the top to the base along the last row of SC [DC], leaving the dribbles free to ... well, dribble. You will probably find that you'll need to stuff even more filling into the cupcake before you sew it up completely. They need to be really, really full. And there you go - your first cupcake is complete!


