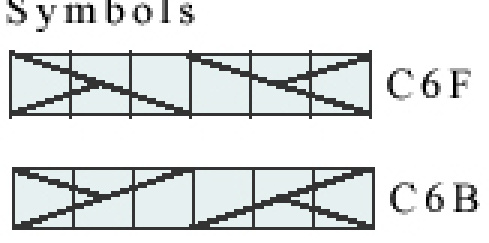
Jessie's HaT
by Jennifer Kaczetow My friend Jessie is the type of person that is carefree and easygoing.. and loves hats. While creating this pattern, I couldn't help but think of her, and how she would enjoy the shape of it, and the different ways it can be worn. It's something light and simple that can easily be thrown on to cover up a bad hair day, or as a cute accessory to an outfit.
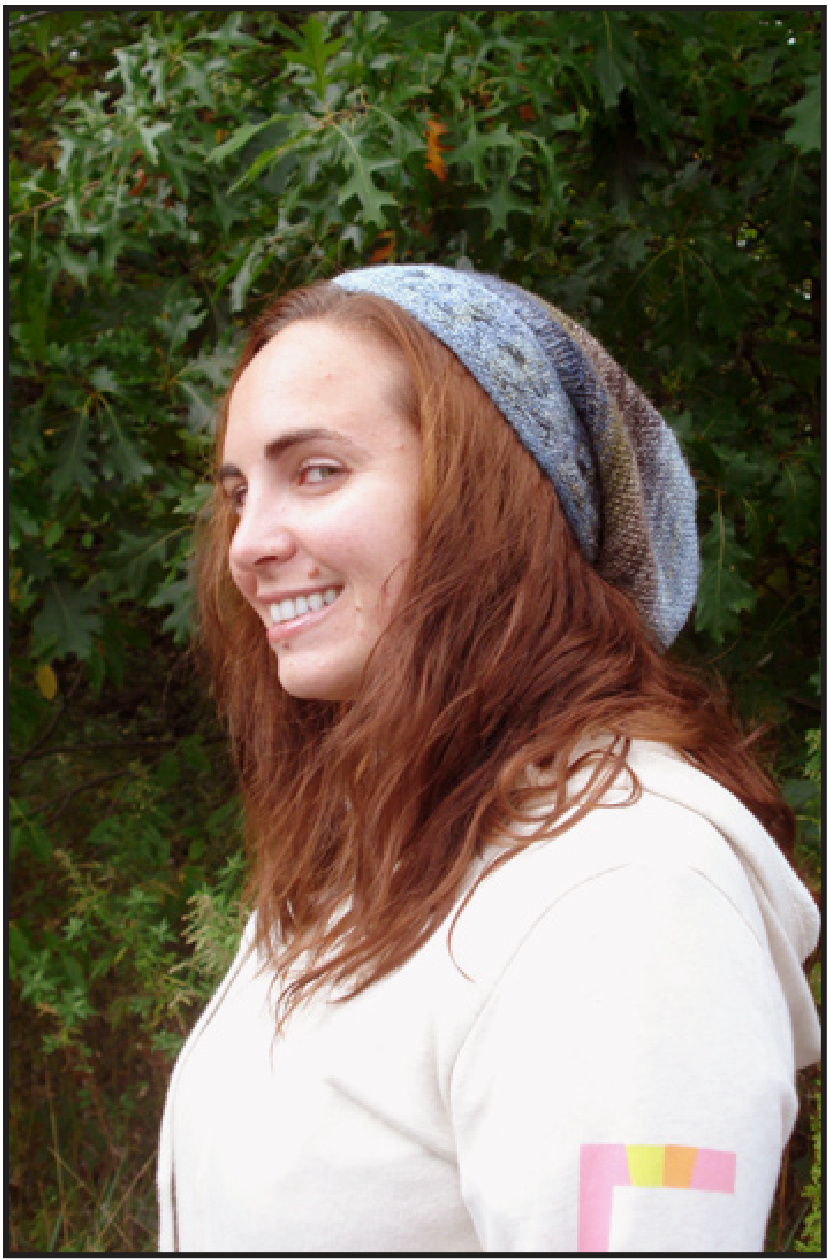
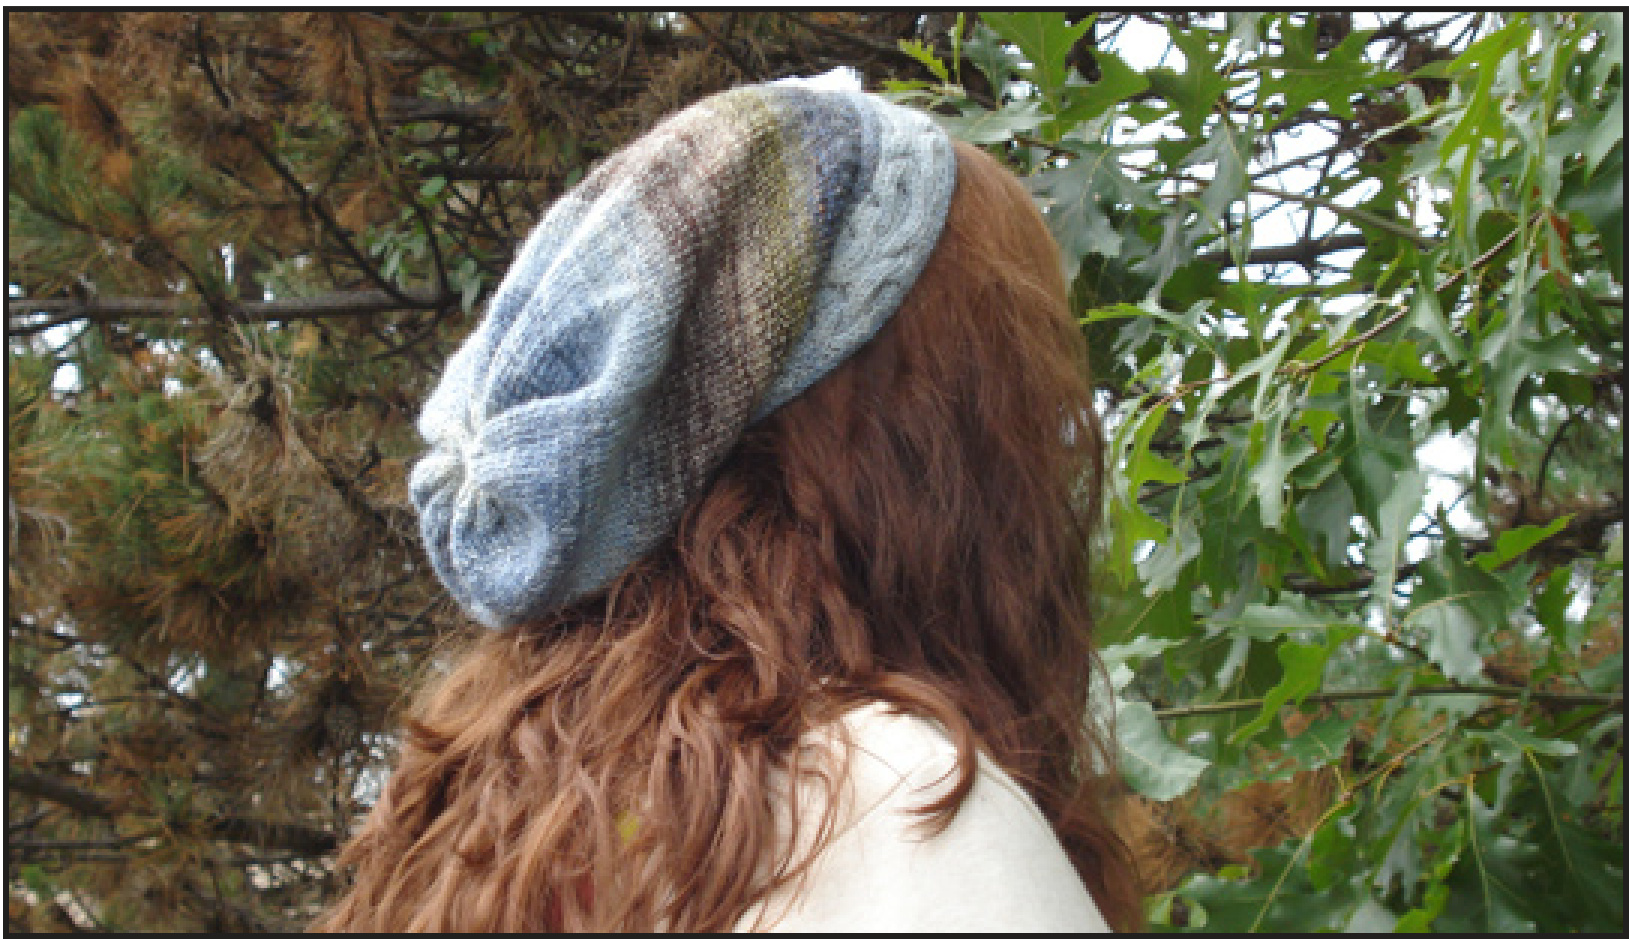
This slouchy hat is designed to be knit with a variety of yarns, especially handspun. The main body is perfect for showing the gentle striping or heavy variations in a handspun yarn, and the cabled band is simple, but adds visual interest. This hat was knit in a heavy fingering weight yarn, but the pattern is easily adaptable to many other weights, and can be customized to your size preference. Skill Level: Intermediate Finished Measurements: Circumference (unstretched) 21"" Handspun Specifications: Fiber: Spunky Eclectic Corriedale Top (4oz), colorway “Soul Windows" Finished yarn: 2ply, Heavy fingering weight WPI:16 Yardage: 330 Commercial yarn alternative: Malabrigo Sock, 1 skein Drafting method: Short forward draw Needles Set of 5 Size $3(3.25\mathrm{mm})$ dpns or $16^{\circ}$ size 3 circular needles Notions/tools: Waste yarn, tapestry needle, stitch marker, cable needle Gauge 26 sts x $\mathrm{:}\,36\ \mathrm{rows}=4^{\circ}$ in stockinette stitch
Notes
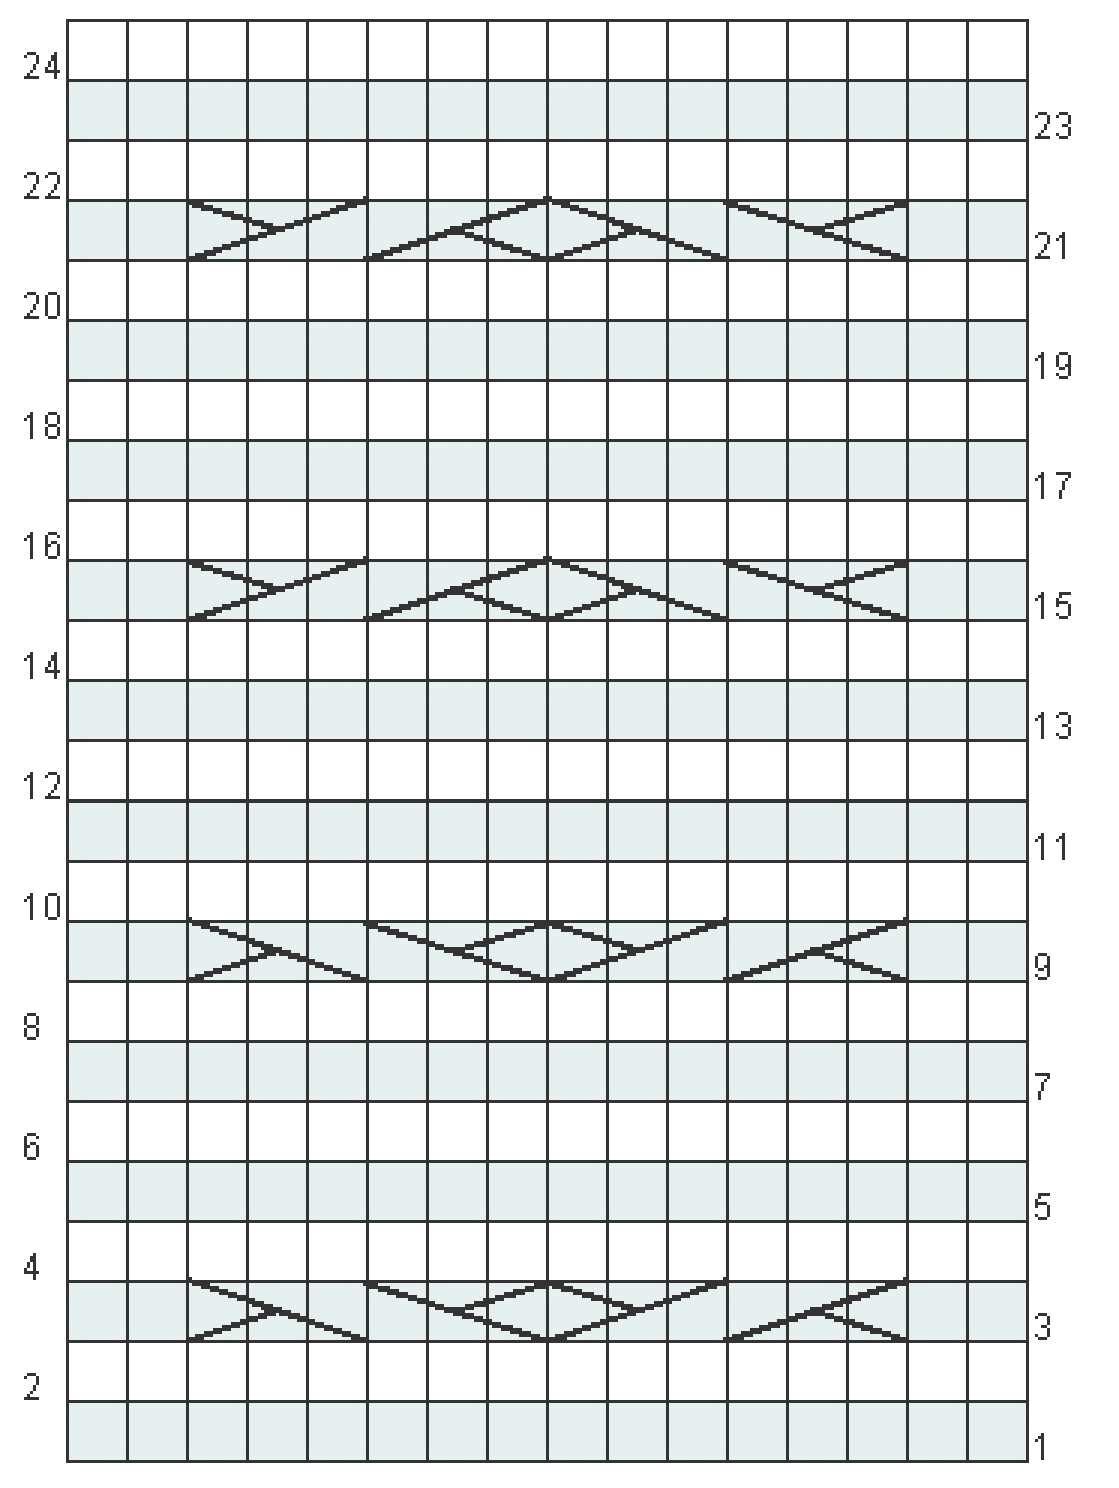
Cable Pattern (16 sts over 24 rows): Row 1(RS): (RS) Knit. Row 2 (and all even rows): Purl Row 3: K2, C6B, C6F, K2. Row 5 and 7: Knit. Repeat rows 3 - 8 one more time. Row 9: K2, C6B, C6F, K2. Row 11 and 13: Knit. Repeat rows 9-14 one more time.
Applied I-Cord Edging: Cast on 3 sts, using the cable cast on Row $1\!:{}^{*}\mathrm{K}2$ sts, then K2tog through the back loop. Slip the three worked stitches back onto the left hand needle. Then pull the working yarn tightly across the back of those 3 stitches. Repeat row 1, and repeat from \* to \*. Stitch & Abbreviation Guide K: Knit P: Purl CO: Cast on C6B: Cable 6 back: slip 3 sts to cable needle and hold to the back of work, knit next 3 stitches then knit the 3 stitches from the cable needle C6F: Cable 6 front: slip 3 sts to cable needle and hold to the front of work, knit next 3 stitches then knit the 3 stitches from the cable needle KFB: Knit into the front and back of stitch K2tog: Knit two stitches together RS: Right side Sts: Stitches
Hat Pattern
Band Using a provisional cast on and waste yarn, cast on 16 sts. \*Slip the first stitch as if to purl on each row. This will make it easier when picking up stitches for the edging. Work Cable Pattern 8 times; ending last repeat on row 23. End off, leaving a 6" tail. Carefully unravel the provisional cast on and place those 16 sts on a separate needle. Make sure not to twist the band, and graft both ends of the band together with the tail using kitchener stitch. Band Edging With right side facing, pick up and knit 96 sts along the edge of the band. Work applied I-Cord edging to end. End off, leaving a long tail. Using the tail, sew the two ends of the I-Cord together. Repeat band edging for opposite side of the band.
Body Choosing one side of the band, pick up and knit 96 sts through the same slipped sts that were used for the I-Cord edging. Place marker to indicate beginning of round and knit 2 rounds even. Increase on the next round as follows: ( $^{*}\mathrm{K}1$ , KFB); Repeat from \* to end of round. (144 sts) Knit every round until hat measures $10^{\circ}$ from the edge of the band. Shape Crown Begin decreases as follows: Rnd 1: $\ast\mathrm{K}2$ , K2tog; repeat from \* to end of round. (108 sts) Rnds 2-3: Knit.. Rnd 4:\*K1, K2tog; repeat from \* to end of round. (72 sts) Rnd 5: Knit. Rnd 6: \*K2tog; repeat from \* to end of round. (36 sts) Rnd 7: Knit. Repeat round 6 until 9 sts remain. End off leaving a long tail, thread yarn through last 9 sts and pull tight to close the gap. Finishing Weave in all ends, and block if desired
Substituting a different yarn
If you want to use a different weight of yarn, feel free! It is fairly easy to adjust the pattern to suit a range of yarns. Work the band as written, but repeat the cable pattern until the band is long enough to wrap around your head comfortably. (Appx 21") Work the I-cord edging and body as written; your stitch count will be the only thing that differs. Work the crown decreases until there are 10-7 sts remaining, then finish as written.