One Seam Christmas Tree Ornament
By Stitching Bevy, LLC
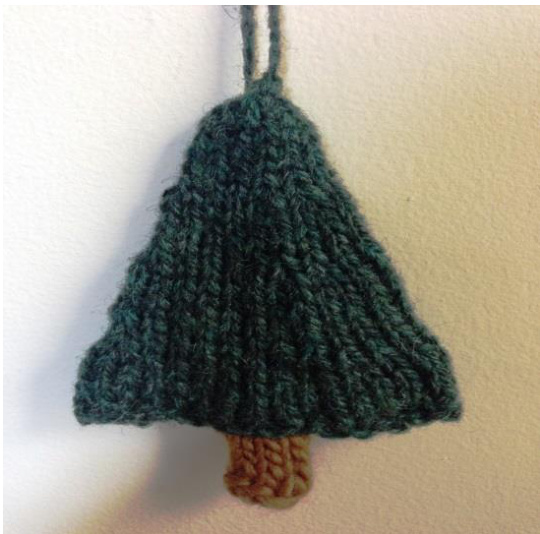
http://www.stitchingbevy.com https: //www.facebook.com/stitchingbevy Follow us on Pinterest: http: / /www.pinterest.com/stitchingbevy2/pints-purls-greentown-tavern/ We all love those fun and festive knitted Christmas tree ornaments, but who wants to spend time seaming all of those tiny pieces and tracking down stuffing to boot? This tree is knit in the round, including the trunk which is made of I cord, on short double pointed needles. You only need to sew it shut across the bottom. No stuffing is needed since the fabric is sturdy and provides enough body to hang well. Leave an extra length of yarn for sewing closed when you cast on, and for the hanger after you bind off. If you have some experience knitting with double pointed needles and making decreases, this will work up in a flash. Make in the traditional colors as shown or go full-on stash buster with wild colors from your scrap bin. The tree pictured is 5 inches tall, from trunk to tip. Gauge: 3.5 stitches per inch, 5 rows per inch, not really critical ls (to look authentic in camp, aim for wood, bone, or steel tools) Worsted weight wool yarn in scrap lengths 1 set of 4 wooden double pointed needles, US size 7 (4.5mm), 6 incl 1 tapestry needle 1. Cast on 30 stitches and arrange 10 stitches on each needle. 2. Knit 5 rows 3. Row 6: Knit 2 stitches together, knit 7 stitches, knit 2 stitches together; repeat for each needle, end with 24 stitches total 4. Knit 5 rows 5. Row 12: Knit 2 stitches together, knit 4 stitches, knit 2 stitches together; repeat for each needle, end with18 stitches total 6. Knit 5 rows 7. Row 18: Knit 2 stitches together, knit 2 stitches, knit 2 stitches together; repeat for each needle, end with 12 stitches total 8. Knit 5 rows 9. Row 24: Knit 2 stitches together, all the way around, end with 6 stitches total 10.Row 25: Knit 2 stitches together, all the way around 11.Row 26: Run needle through all remaining stitches and pull closed. 12.For I cord: cast on 6 stitches, using your double pointed needles. Make @ 1.5 inches of I cord for the trunk. 13.Flatten out tree into a triangular shape. Center I cord piece with strings facing inside the tree. 14.For hanger: Use needle to bring end of yarn inside the tree. Flip tree inside out and make a knot with this yarn, leaving enough of a loop outside for the hanger. Pull snug. 15.Use the tail of yarn from where you cast on the tree, and stitch closed across bottom, enclosing trunk as you stitch across. Make knot and run end yarn into body of tree to conceal. This pattern is copyrighted under the creative commons license. Feel free to use this pattern for personal or small-scale commercial use. However, following the ethics of open source, the pattern itself cannot be copied and marketed as your own pattern because it now belongs to the commons. We would love to hear feedback from you!


