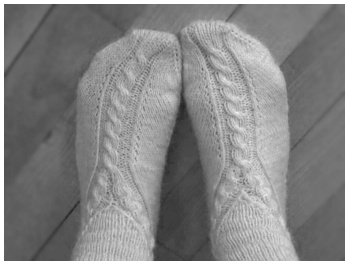
Kiellinie by Susanne Reese
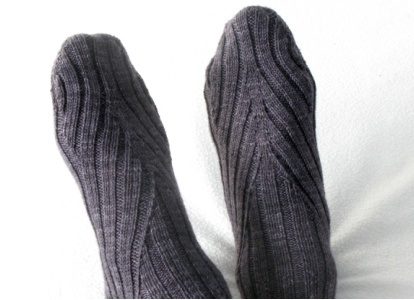
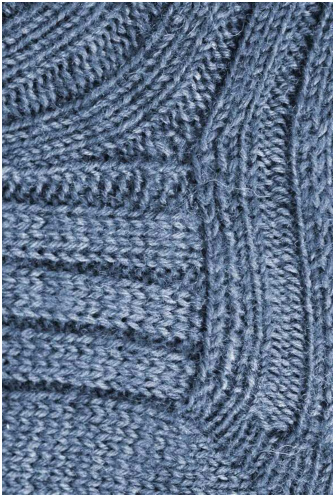
Kiellinie is the German word for sailing straight ahead and is the name of a gorgeous promenade along the Kieler Forde, along which I have the pleasure to bike to work. Inspired by patterns like Kai-Mei from Cookie A., Arch-Shaped-Socks from Jen Showalter and KawKawEsque from Yarnissima, I combined simple 3x2 ribbed toe-up socks, with the gusset increasing on the top of the foot. The increases start just after the toe and continue to the heel flap. To maintain the width of the foot, there are the same number of decreases as there are increases in the first half of the foot. The 2nd half is then knitted without decreases but continuing the increases as before. This creates a really well-fitting kind of wedge as the characteristic elementof thesesocks. This type of construction is open for many variations - the sides could be knitted in stockinette and the wedge with cables, or inverted as shown in the picture.
As help for toe-up-knitting I highly recommend the Basic-Toe-Upspattern by Ingrid Hiddessen. (http://www.ravelry.com/patterns/library/basic-toe-ups).
Pattern for 3x2 Rib-Socks with Wedge in XL (European 44)
Yarn: Wollmeise 80/20 Twin or any fingering sock yarn Needle: 2.75 mm circular needle or other to obtain the gauge
Gauge: 36 st / 44 rows stockinette = 10x10 cm. Ribbing 1: k3p2 Ribbing 2: 1st rd k1-sl1kw-k1-p2 2nd rd k3-p2
Glossary
knit purl Knit stitch through the backloop slip, slip, knit slipped stitches together (ssk) Knit 2 together Make 1 knitwise Make 1 purlwise Slip knitwise Purl 2 together Toe is worked with increases on both sides in every 2nd round. CO 15 stitches with Judy's Magic Cast-On. That creates 30 stitches in the 1st round over both needles. http://www.persistentillusion.com/blogblog/techniques/magic-cast-on/magic-cast-on-2 1stg round knit. 2d round Inc. 1 st after and before the first/last stitch on every needle in your favourite way (lifted increase, m1 or m1bl) Continue by increasing in every 2nd round up to 70 st. in total. In 5t round (19 st on every needle) start the ribbing (k6/p2/kbl1/k1/kbl1/p2/k6) only on top of the foot. Be careful to centre the k3-ribbing exactly. Continue increases and ribbing up to 35 st on every needle as described. If there are 5 st. between the last increase and the p2-ribbing in the middle it's to start a new rib as in round 7: K2/p2/k3/p2/kbl1/k1/kbl1/p2/k3/p2/k2 The bottom of the foot is knitted in plain stockinette up to the heel.
1st part of the foot:
In the 1st rd take 1 st from the bottom to the top needle on each side: 37 top/33 bottom and purl it. The ribbing should look like this: --000--000--000--80.--000--000--000--
Continue ribbing for about 2 cm = 10 rd. Rd 11: start increases in every 3rd rd. To maintain the width you have to decrease as shown in chart 1
| 15 | α | α | ||||||||||||||||||||||||||||||||||
| 14 | α | α | ||||||||||||||||||||||||||||||||||
| 13 | K | α | α | K | 7 | |||||||||||||||||||||||||||||||
| 12 | α | α | ||||||||||||||||||||||||||||||||||
| 11 | α | 1 | ||||||||||||||||||||||||||||||||||
| 10 | K | α | K | |||||||||||||||||||||||||||||||||
| 6 | α | |||||||||||||||||||||||||||||||||||
| 8 | α | |||||||||||||||||||||||||||||||||||
| 7 6 | < | α α | < | |||||||||||||||||||||||||||||||||
| 5 | ||||||||||||||||||||||||||||||||||||
| 4 | α | α | 7 | |||||||||||||||||||||||||||||||||
| 3 | α | α | v | 7 | ||||||||||||||||||||||||||||||||
| 2 1 | V | α α α | α α α | v |
Repeat rd. 1-15 once (30 rd in total)
Wedge:
Now you have to increase without decreases on the sides for the width of the heel. Increases are made inside the kbl-ribbing in the centre, in every 3. rd, as shown in chart 2. Knit the ribbing 2-pattern. Continue increases up to 37 st. inside the wedge. Finish with a rd. 10
| 2 1 | I | |v | < | α | |||||||||||||||||||||||||||||||||
| 1 8 | 8 | v | v | 8 | |||||||||||||||||||||||||||||||||
| 1 5 | 8 | 8 | - | ||||||||||||||||||||||||||||||||||
| 1 2 | / | 8 | I | ||||||||||||||||||||||||||||||||||
| 9 | 8 | K | K | 8 | |||||||||||||||||||||||||||||||||
| 6 | α | K | K | 8 | |||||||||||||||||||||||||||||||||
| 3 | α | < | α | ||||||||||||||||||||||||||||||||||
| 1 | / | α | α |
If your gauge is not exactly the same as needed and your foot becomes too short or too long, you can take care of it by increasing in every 2. rd (foot too long) or 4. rd (foot too short). At the end of the increases the foot should have the length in total minus 4.5 cm heel. At the end of the wedge you have 73 st on your top needle: 18/37/18. In next rd take 18 st on both sides to the bottom needle: 37 st remaining on top.
Heel:
Heel turn is to knit in 8 short rows by using double stitches over 33 st. of the bottom. If you need help follow the instructions as given in the basic toe up pattern mentionned above.
Knit 1 round over all st on both needles by continuing ribbing on the top needle and the sides. Now it's to start the heel flap knitting back and forth over 33 st. 2. row: slip 1 st with yarn in front - p31 - p2topg - turn 3. row: continue in ribbing 2 without slipping 1 st before and after the heel edge: Sl1 yib-k2-p2-k1sl1kwk1-p2- k1sl1kwk1-p2 k1sl1kwk1-p2-k1sl1kwk1-p2-k1sl1kwk1-p2-k2-ssk-turn 4. row = row 2, knit/purl st as shown Repeat rows 3 and 4 until all 17 side-stitches are used. 33 stitches remaining. Knit the leg in rounds by continuing ribbing 2 as long as you want. You can do extra stitches between heel and wedge to avoid holes and decrease them in the next round. There is a tutorial inravelryhttp://www.ravelry.com/twir/69/ask-a-knitter-12 Bind off loosely by using your preferred elastic bind-off-method.
Size adaption
For smaller sizes you can knit less ribs or a k2/p2 ribbing. Don't repeat chart 1 and knit more rounds between top and chart 1. Watch the centre rib, it's important for the wedge. Math for other sizes: Top 3.5 -4 cm depending of size Heel 4 - 4.5 cm Add these and discount sum from your desired foot length: you get the length for wedge and forefoot. Calculate the length of your wedge by using your gauge and the sum of increases for the heel in yoursize.
Example
Foot length 24 cm (women's M/38-39 in German) needs 15 increase rounds, that makes 3x15 rd = 45: Your gauge is about 40 rounds/10cm = 11 cm for the wedge. Plus 8 cm for top and heel remaining 5 cm for forefoot = 20 rd. That is exactly 1 x chart plus 5 rounds after the top. If your math or gauge is not correct, you can help yourself by adding/subtracting non-increasingrounds in the wedge-part. For a longer foot you make the increases in every 4. rd, for a shorter foot increase in every 2. rd. That's not perfect but convenient to get the exact foot length before starting the heel. Ingrid made a perfect adaption to women's size 40/L on her blog Ingrids Strickpraxis Kielliniemeine Modifikationen fur Gr.40 < Strickpraxis It's in German, but illustrated with many photos and hopefully comprehensive to foreign speakers. Thanks to you, Ingrid, for your help and motivation. Many thanks to PurpleDan for helping me with the english pattern. Feel free to ask me if ever needed by sending a PM to my Ravelry account jancacha )u may need this pattern only for private purpose. Thank you for respecting my copyrights Susanne Reese/2012


